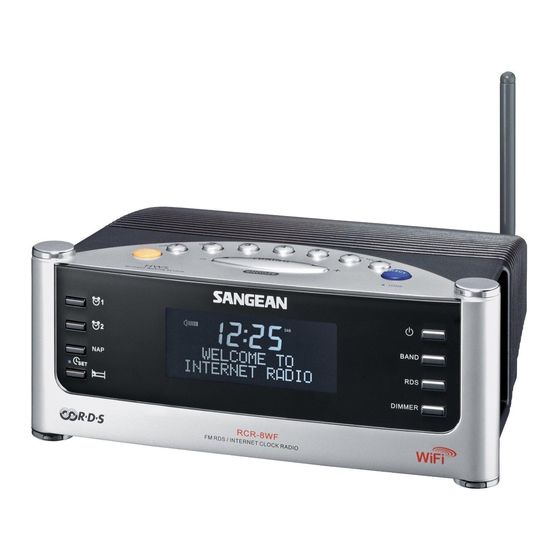
Sangean RCR-8WF User Manual

Sangean RCR-8WF User Manual

Fm rds/internet clock radio
Hide thumbs Also See for RCR-8WF:

Advertisement

RCR-7WF/RCR-8WF
GB
Revision 3

Advertisement

Table of Contents
loading
Need help?

Need help?

Do you have a question about the RCR-8WF and is the answer not in the manual?

Questions and answers

Subscribe to Our Youtube Channel

Summary of Contents for Sangean RCR-8WF

  • Page 1 RCR-7WF/RCR-8WF Revision 3...
  • Page 2: Table Of Contents

    Contents Important safety instructions ........... 2-4 Troubleshooting ............... 36 Controls ................5-8 Factory reset ..............37 Before you can use this product ........9 Upgrade firmware ............. 37 Connecting your radio to your network ......10 Headphone socket ............38 Operating controls ............
  • Page 3: Important Safety Instructions

    Important safety instructions 1. Read and understand all safety and operating instructions before the 9. Do not expose this product to splashing or dripping. radio is operated. Objects containing liquid, such as vases or drinking glasses, should not be placed on top of this product. 2.
  • Page 4 16. Power cords: The power cord should be positioned so it is not 21. Unplug this product from the wall outlet and refer servicing to walked on, pinched, or items placed on top of it. Pay particular qualified service personnel under the following conditions: attention to cords at plugs, convenience receptacles, and the point When the power supply cord or plug is damaged.
  • Page 5 - Consult the dealer or an experienced radio/TV technician for help. The user should not modify or change this equipment without written approval form SANGEAN ELECTRONICS INC. Modification could void authority to use this equipment. 26. Excessive sound pressure on ear- and headphones could impair the hearing ability.
  • Page 6: Controls

    Controls (Front) Alarm 1 button Band button Alarm 2 button RDS button Nap button Dimmer button Time Set/Sleep button LCD display Power button...
  • Page 7 Controls (TOP) Tuning +/- and Snooze button Preset 4 / Fast-Forward button Back button Preset 5 / Play / Pause button Preset 1 / Shuffle/Repeat button Volume Up/Down buttons Preset 2 / Queue button Select/Tone button Preset 3 / Backward button...
  • Page 8 Controls (Rear) WiFi antenna Line Out socket FM antenna Auxiliary Input socket Main Power input socket RJ-45 socket (Ethernet)(RCR-7WF only) Headphone socket...
  • Page 9: Controls

    Controls (Right hand side) 26. USB slot (RCR-7WF only) SD card slot (RCR-7WF only)
  • Page 10: Before You Can Use This Product

    Before you can use this product Before you can use your Internet radio, you must have the following: A broadband Internet connection. A wireless access point (Wi-Fi) or a wired Ethernet connection (10 or 100 Mbits/sec with RJ45 connection; For RCR-7 only) connected to your broadband Internet, preferably via a router.
  • Page 11: Connecting Your Radio To Your Network

    Connecting your radio to your network 1. Place your radio on a surface and plug the mains lead into the Mains input socket located on the rear of your radio (marked ) ensuring that the plug is pushed fully into the socket. 2.
  • Page 12 When using a wireless network (Ignore this section if wired LAN Internet connection is used with RCR-7WF) 1. Turn on the radio by pressing the Power button. 2. The display will show “Starting” and then “Initializing Network”, followed by showing “Scanning” * If the radio cannot find a network then the display will say ‘No Wireless Networks Found’.
  • Page 13 3. There may be more than 1 wireless networks that your radio finds. The display now shows “Select networks”. Press the Tuning+/- buttons to search your wireless network. This is a name that is allocated to the access point by the person who set up the network -for example: ‘My Home Network’.
  • Page 14: Operating Controls

    Operating controls 6. If you make an error, press the Back button to delete the 1. The majority of functions on your radio may be performed by using character entered. Use the left and right arrows to move the block the Tuning +/- and Select buttons on the top panel.
  • Page 15: Selecting An Internet Radio Station

    Selecting an Internet radio station There are several thousand Internet radio stations to select, and there are 3 ways of selecting ways which are by Location, Genre and Search. Location: enables you to choose a radio station from the list first by geographic region and then by country.
  • Page 16 Selecting an Internet radio station by location 1. Press the Tuning+/- buttons until the display shows <Location>, and then press the Select button to enter the Location search. 2. Press the Tuning+/- buttons until the country is shown on the display. Press the Select button to confirm your choice. The station list for that country will appear on display.
  • Page 17 Selecting an Internet radio station by genre 1. Press the Tuning+/- buttons until the display shows <Genre>, and then press the Select button to enter the Genre search. 2. Press the Tuning+/- buttons until the genre you would like to choose is shown on the display.
  • Page 18 Selecting an Internet radio station by Search 1. Press the Tuning+/- buttons until the display shows <Search>, and then press the Select button to enter the Search. 2. Use the Tuning+/- button and the Select button to enter the key word of the radio station name you would like to search.
  • Page 19: Volume Control

    Volume control Internet radio station preset While the radio station is playing, you can change the volume by Storing an Internet radio station in a preset pressing Volume+/- buttons on the top panel. There are 5 memory presets available. Audio setting (tone control) 1.
  • Page 20: Listening To Previously Broadcast Material

    Listening to previously broadcast material Some radio stations allow you listen to programs that have already 7. To listen from the beginning of the program, press the Select been broadcast. When you select a radio station that has this facility, button again.
  • Page 21: Customizing Your Radio On Website

    Customizing your radio on website In addition to storing your favorite radio stations in the radio presets, Configure My Stations your radio allows you to create a customized list of stations which can 1. Using Reciva’s website at http://www.reciva.com, it is possible appear in a special menu on the radio called ‘My Stuff’.
  • Page 22: Media Player

    Media Player Configure My Streams The Media Player allows you to play audio files which are stored on a 1. Once logged into your Reciva website account, you can add your own computer on your network, or USB and SD card. Supported file formats Internet radio streams to the My Streams section, which is listed are MP3 and WMA (Even the Internet radio supports MP3, WMA, under the My Account section.
  • Page 23: Window Shares

    Window Shares Set up the PC to allow your radio to access your audio files via Locate the shared audio files using the radio Window Shares (make the music file shared) 1. Use the Tuning+/- and the Select buttons to enter the menu direction 1.
  • Page 24: Upnp Server

    UPnP server Connecting the radio using UPnP Set up a Windows PC to allow the radio to access your audio files via a UPnP server 1. Use the Tuning+/- and the Select buttons to enter the menu direction 1. If your PC is running Microsoft Windows XP or Windows Vista then “Media Player>...
  • Page 25 5. Select the named server again using the Tuning+/- and the Note: Select buttons. If WMP 11 is now able to communicate with your In UPnP mode the search criteria offered and the file types made radio you will be presented with some media selection options by available to the radio are a function of the UPnP server software the server software.
  • Page 26: Usb And Sd - Local Media Operation

    USB and SD — Local Media operation (For RCR-7 only) 1. Turn on the radio by pressing the Power button. 2. Slot in an audio USB or SD card on the side of the radio. And refer to “Operation after you set up for Window Shares, UPnP or USB/SD card”...
  • Page 27: Operation After You Set Up For Window Shares

    Operation after you set up for Window Shares, Listening to a complete album UPnP or USB/SD card 1. Now the radio is under either <Windows Shares> or <UPnP> or Whether you access your files using Windows Shares, UPnP or USB <Local Media>...
  • Page 28 Queuing up tracks for playback later Browsing the list of tracks currently queued up for playback 1. If you wish to add only particular tracks from an album to the queue, 1. Press the Queue button, the currently playing track name will first choose the album as described.
  • Page 29 Playing tracks in the queue repeatedly Playing tracks in random (Shuffle) order 1. When the radio is playing, press the Back button to go back to the 1. When the radio is playing, press the Back button to go back to the main Mode menu.
  • Page 30: Fm Radio

    FM Radio To listen to the FM radio Storing a FM radio station in a preset 1. Turn on the radio by press the Power button. There are 5 memory presets available. 2. Press the Band button until the display shows <FM>. 1.
  • Page 31: Auxiliary Input Socket

    Auxiliary input socket Clock Setting Your radio has a 3.5mm stereo jack socket for connection to external Setting the clock time audio sources. This can be configured to two sensitivity levels to suit 1. Long press Tine Set button until “Set Time/Date” is shown on the output level of the connected device.
  • Page 32 DST(Auto time set by Internet) Setting the alarm clock This is the function that real time set by Internet Your radio has 2 separate alarms which can be set to wake you to either These are options available: FM radio, buzzer, Aux In, or Internet Radio. Each alarm can be set to Auto(US) –...
  • Page 33 5. Press the Tuning+/- buttons to set whether the alarm is for once, When the alarm sounds everyday, weekly, weekdays or at weekends. Then press the 1. The radio alarm will sound at the selected times for up to 60 minutes Set button.
  • Page 34 Sleep timer Nap timer It is a countdown alarm which will sound after the time period that Your radio can be set to turn off after a preset time has elapsed. you set. And the time period can be set from 10 to 1 hour 30 minutes in The sleep setting can be adjusted between 15 and 3 hours 15 10 minutes steps.
  • Page 35: Backlight

    Backlight Network configuration (For RCR-7 only) Press the Dimmer button to adjust the display backlight settings to suit This menu enables you to configure your radio’s network settings, your needs. scan for a connection to an alternative wireless network, or to Separate settings are available for Active mode (while operating manually configure the network parameters.
  • Page 36 Configuring the radio to use either an Ethernet or a 4. Press the Tuning+/- buttons until it shows <Wireless Only>. Wi-Fi connection Then press the Select button. And it will allow cause the radio to 1. Turn on the radio, and press the Tuning+/- button until the display restart and then to use only its WiFi connection to communicate shows <Setting>.
  • Page 37: Troubleshooting

    Troubleshooting 5. If you have an encrypted network, check that you have entered If you have difficulty connecting the radio to your wireless network, the correct key or pass-phrase into the radio. Remember that some of these steps may help to resolve the problem: text-format WPA keys are case sensitive.
  • Page 38: Factory Reset

    Factory reset Upgrade firmware From time to time, new software features for your radio may be If you wish to completely reset your radio to its initial state this may developed. For example, a new audio decoder may be added to allow be performed by following this procedure.
  • Page 39: Headphone Socket

    Headphone socket Specifications 1. A 3.5mm Headphone Socket located on the rear of your radio is Power AC 100 ~ 240 volts, 50 ~ 60 Hz. provided for use with headphones. Inserting a plug automatically Connectivity Wired Ethernet Wi-Fi 10/100M bits/sec via RJ-45 802.11b mutes the internal loudspeaker.
  • Page 40 If at any time in the future you should need to dispose of this product please note that: Waste electrical products should not be disposed of with household waste. Please recycle where facilities exist. Check with your Local Authority or retailer for recycling advice.

This manual is also suitable for:

Rcr-7wf

Table of Contents