TRENDnet TEW-623PI User Manual
Hide thumbs
Also See for TEW-623PI:
- User manual (28 pages) ,
- Quick installation manual (11 pages) ,
- Specifications (2 pages)
Table of Contents
Advertisement
Quick Links
Download this manual
See also:
Installation Manual
Advertisement
Table of Contents

Related Manuals for TRENDnet TEW-623PI


Summary of Contents for TRENDnet TEW-623PI
- Page 2 Copyright This publication, including all photographs, illustrations and software, is protected under interna- tional copyright laws, with all rights reserved. Neither this manual, nor any of the material con- tained herein, may be reproduced without written consent of the author. Copyright 2006 Version 1.0 (June, 2006) Disclaimer...
-
Page 3: Federal Communications Commission Interference Statement
Federal Communication Commission Interference Statement This equipment has been tested and found to comply with the limits for a Class B digital device, pursuant to Part 15 of the FCC Rules. These limits are designed to provide reasonable protection against harmful interference in a residential installation. This equipment generates, uses and can radiate radio frequency energy and, if not installed and used in accordance with the instructions, may cause harmful interference to radio communications. -
Page 4: Ce Mark Warning
CE Mark Warning This is a Class B product. In a domestic environment, this product may cause radio interference, in which case the user may be required to take adequate measures. This transmitter must not be co-located or operation in conjunction with any other antenna or transmitter. -
Page 5: Table Of Contents
Table of Contents Federal Communications Commission Interference statement CE Mark Warning Chapter 1 - Getting Started with the TEW-623PI Chapter 2 - Wireless LAN Networking Transmission Rate (Transfer Rate) Type of Wireless Networks Wireless LAN Security Chapter 3 - Hardware and Wireless Utility... -
Page 6: Chapter 1 - Getting Started With The Tew-623Pi
Congratulations on purchasing the TEW-623PI! This manual provides information for setting up and configuring the TEW-623PI. This manual is intended for both home users and professionals. It is not required to read some of the more technical information in this manual (such as in “Wireless LAN Networking”... -
Page 7: Chapter 2 - Wireless Lan Networking
This is an Independent BSS (IBSS). To connect to a wired network within a coverage area using access points, set the TEW-623PI operation mode to Infrastructure (BSS). To set up an independent wireless workgroup without an... - Page 8 (IBSS) N ETWORK Ad-hoc mode does not require an access point or a wired network. Two or more wireless stations communicate directly to each other. An ad-hoc network may sometimes be referred to as an Independent Basic Service Set (IBSS). To set up an ad-hoc network, configure all the stations in ad-hoc mode.
- Page 9 When a number of wireless stations are connected using a single access point, you have a Basic Service Set (BSS).
- Page 10 In the ESS diagram below, communication is done through the access points, which relay data packets to other wireless stations or devices connected to the wired network. Wireless stations can then access resources, such as a printer, on the wired network.
-
Page 11: Wireless Lan Security
ITH POOR SECURITY SETTINGS, SENSITIVE DATA YOU SEND CAN BE SEEN BY OTHERS. The list below shows the possible wireless security levels on your TEW-623PI starting with the most secure. EAP (Extensible Authentication Protocol) is used for authentication and utilizes dynamic WEP key exchange. - Page 12 Settings screen of the wireless utility and entering them manually as the WEP keys in the other WLAN adapter(s). The TEW-623PI allows you to configure up to four WEP keys and only one key is used as the default transmit key at any one time.
-
Page 13: Chapter 3 - Hardware And Wireless Utility
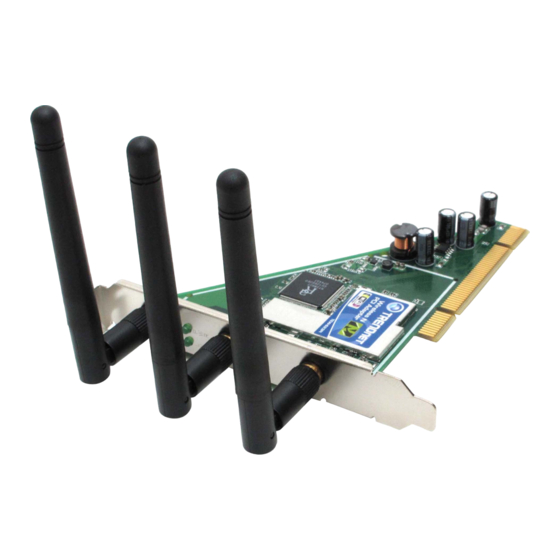
Chapter 3 - Hardware and Wireless Utility This chapter introduces the Adapter and prepares you to use the Wireless Utility. About Your Wireless N PCI Adapter With the Adapter, you can enjoy wireless mobility within almost any wireless networking environment. The following lists the main features of your Card. -
Page 14: Hardware And Wireless Utility Installation
Hardware and Wireless Utility Installation Follow the instructions below to install the PCI Card and Wireless Utility. Windows Vista Insert the Utility and Driver CD-ROM into your computer’s CD-ROM Drive. Turn off your computer‚ unplug the power cord and remove the computer's cover. Pick a free PCI expansion slot and remover the protective bracket. - Page 15 Click I don’t have disc. Show me other options. Click Browse my computer for driver software (advanced). 10. Type in F:\. Then click next or click browse to locate the drivers. Note: F:\ represents the drive letter that is assigned to your CD-ROM drive. 11.
- Page 16 12. Click Close. Windows XP Insert the Driver and Utility CD into CD drive. If your CD Autorun is enabled, the Main Installation Menu will show. Click Install Driver & Utility. (Otherwise open your CD folder and double-click on the “setup.exe” file)
- Page 17 The InstallShield Wizard prepares for installation. The InstallShield Wizard prompts you for confirmation. Click Next on the following menu. In the destination Folder screen you are asked to confirm the Destination Folder for the application software. If you would like, you may change the destination folder to another location. Click Next.
- Page 18 The wizard is ready to begin installation. Click Install on it. At the Software Installation menu click Continue Anyway. Click Finish to complete the client utility installation. Turn off your computer‚ unplug the power cord and remove the computer's cover. 10.
- Page 19 11. Secure the Card bracket with the screw from step 2. Replace the computer’s cover. 12. Connect the external antenna to the Card from the SMA connector. And then, reconnect the power cord and power on the computer. 13. After power on, you will get the “Found News Hardware Wizard” menu. Select No, not this time and then click Next.
- Page 20 16. The Windows has finished installing driver for the device. Click Finish to finish the installation. Windows 2000 Insert the Driver and Utility CD into CD drive. If your CD Autorun is enabled, the Main Installation Menu will show. Then click Install Driver & Utility.
- Page 21 The InstallShield Wizard prepares for installation. The InstallShield Wizard prompts you for confirmation. Click Next on the following menu. In the destination Folder screen you are asked to confirm the Destination Folder for the application software. If you would like, you may change the destination folder to another location. Click Next.
- Page 22 The wizard is ready to begin installation. Click Install on it. Click Yes. Click Finish to complete the client utility installation. Turn off your computer‚ unplug the power cord and remove the computer's cover. 10. Pick a free PCI expansion slot and remover the protective bracket. Insert the Card into the slot until it is fully seated.
- Page 23 11. Secure the Card bracket with the screw from step 2. Replace the computer’s cover. 12. Connect the external antenna to the Card from the SMA connector. And then, reconnect the power cord and power on the computer. 13. Drivers will install automatically. 14.
-
Page 24: Using The Utility To Configure Your Network
Using the Utility to Configure Your Network The following are explanations on how to configure and use the Utility program. After completing the installation procedure, a new icon as shown below will automatically appear in the lower right tray bar. Hold your mouse pointer over the icon, and double click the left mouse button to open the Wireless Client Utility. - Page 25 The following table describes the items found on the Link Information screen. Wireless Network Status Profile Name The name of the current selected configuration profile. Set up the configuration name on the Profile tab. SSID Displays the wireless network name. Link Status Shows whether the station is associated to the wireless network.
-
Page 26: Site Survey
Channel Width 20MHz only or 40/20MHz channel support Security Status Security Shows the security type – Disable, WEP, WPA/WPA2, WAP-PSK/WAP2-PSK or 802.1X Authentication Displays the authentication mode. TCP/IP Status IP Address Displays the computer's IP address. Subnet Mask Displays subnet mask Gateway Displays gateway address Site Survey Click the Site Survey tab to see available infrastructure and ad hoc networks. - Page 27 Click the Connect button to connect the available network. If no configuration profile exists for that network, the Profile Settings window opens to ask to create a profile for the network. Follow the procedures to create profile for that network. Profile To add a new configuration profile, click Add on the Profile tab.
-
Page 28: Scan Available Networks
Scan Available Networks Click the Browse button on the Profile Settings screen to scan for available infrastructure and ad hoc networks. On this list, click Refresh to refresh the list at any time. To configure a profile for Ad-Hoc or Infrastructure mode, select the Network Type field on the Profile Settings. - Page 29 Click Next to continue the profile setting. To define the security mode, select the security button of the desired security mode. And then click Next to continue. Please see following table for details of security modes. WEP This card support three modes of WEP, include: 64 Bits 128 Bits WPA/WPA2 Enables the use of Wi-Fi Protected Access (WPA).
- Page 30 PEAP (EAP-GTC) Protected Extensible Authentication Protocol) authenticates wireless LAN clients using only server-side digital certificates by creating an encrypted SSL/TLS tunnel between the client and the authentication server. The tunnel then protects the subsequent user authentication exchange. PEAP (EAP-MSCHAP V2) Protected Extensible To use PEAP (EAP-MSCHAP V2) Authentication Protocol)
- Page 31 The following table describes the items found on the Advanced Settings screen. Power Save Mode Shows the power save mode. Power management is disabled in ad hoc mode. The options include: Continuous Access Mode Maximum Power Saving Fast Power Saving 802.11b Preamble Displays the 802.11b preamble format.
- Page 32 Select the desired network and then click Connect. Click Connect Anyway. Click Close.
- Page 33 Connecting to a Secured Wireless Connection (WEP-PSK and WPA-PSK) Note: Make sure you know the wireless encryption key before proceeding. If you are not sure, contact the network administrator or log on to your wireless router. On the bottom right-hand corner of the screen, right click the wireless network connection icon and select Connect to a network.
- Page 34 Click Close.
-
Page 35: Chapter 4 - Maintenance
Under Hardware tab, click Device Manager. Step 4. Double-click Network Card Step 5. Right-click mouse button on “TRENDnet TEW-623PI Wireless N PCI Adapter”, and choose Uninstall Step 6. Click OK to confirm that you are going to uninstall the driver Uninstall the Client Utility Follow the steps below to remove the Client Utility from your computer. -
Page 37: Glossary
Glossary For unfamiliar terms used below, look for entries elsewhere in the glossary. (IBSS) Ad-hoc mode does not require an AP or a wired network. A network that transmits wireless from computer to computer without the use of a base station (access point). Two or more wireless stations communicate directly to each other. - Page 38 SSID The SSID (Service Set Identity) is a unique name shared among all wireless devices in a wire- less network. Wireless devices must have the same SSID to communicate with each other. (TKIP) EM POR AL NTEGRI TY R O TOC O L Temporal Key Integrity Protocol (TKIP) uses 128-bit keys that are dynamically generated and distributed by the authentication server.
-
Page 39: Limited Warranty
TEW-623PI 3 Years If a product does not operate as warranted above during the applicable warranty period, TRENDnet shall, at its option and expense, repair the defective product or deliver to customer an equivalent product to replace the defective item. All products that are replaced will become the property of TRENDnet. Replacement products may be new or reconditioned. - Page 40 THE POSSIBILITY OF SUCH DAMAGES, AND LIMITS ITS LIABILITY TO REPAIR, REPLACEMENT, OR REFUND OF THE PURCHASE PRICE PAID, AT TRENDNET’S OPTION. THIS DISCLAIMER OF LIABILITY FOR DAMAGES WILL NOT BE AFFECTED IF ANY REMEDY PROVIDED HEREIN SHALL FAIL OF ITS ESSENTIAL PURPOSE.
Need help?
Do you have a question about the TEW-623PI and is the answer not in the manual?
Questions and answers