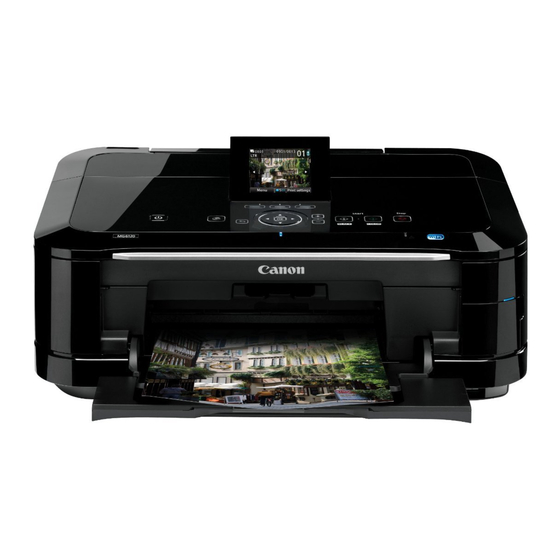
Canon PIXMA MG6120 Network Setup Manual
Installing your multifunction to your network for the first time
Hide thumbs
Also See for PIXMA MG6120:
- Getting started (83 pages) ,
- Service manual (70 pages) ,
- Network setup manual (34 pages)

Related Manuals for Canon PIXMA MG6120


Summary of Contents for Canon PIXMA MG6120
- Page 1 Next >> << Previous Installing Your Multifunction to Your Network for the First Time PIXMA MG6120 Mac OS...
- Page 2 << Previous Next >> Installing Your Multifunction to Your Network for the First Time PIXMA MG6120 Mac OS Preparing to Connect My Multifunction To My Network Connecting Your MG6120 To Your Network Installing The MG6120 Software...
-
Page 3: Network Requirements
Preparing to Connect My Multifunction << Previous Next >> To My Network Network Requirements Before connecting the machine to the network, make sure that configuration of the computer and access point or router is complete, and that the computer is connected to the network. - Page 4 Preparing to Connect My Multifunction << Previous Next >> To My Network An "Ad-hoc connection," which establishes a direct connection to the computer over a wireless connection without using an access point, is not supported. Be sure to prepare an access point. Notes on Network Connection •...
- Page 5 Connecting Your MG6120 To Your Network << Previous Next >> Step 1 Step 2 Use the ↑ or ↓ button (A) to display Use the ← or → button (C) to select Setup, then touch the right Wireless LAN setup, then touch the FUNCTION button (B).
- Page 6 Connecting Your MG6120 To Your Network << Previous Next >> Step 3 Step 4 Select Yes, then touch the OK button. Select Easy setup, then touch the OK button. When wireless connection is enabled, the Wi-Fi lamp lights blue.
- Page 7 Connecting Your MG6120 To Your Network << Previous Next >> Step 5 Step 6 Select the access point name you Make sure that one of the below wrote down, then touch the OK screens is displayed, then touch the button. right FUNCTION button.
- Page 8 Connecting Your MG6120 To Your Network << Previous Next >> Step 7 Enter the network key you wrote down on, then touch the left FUNCTION button (E). 1. Touch the center FUNCTION button (F) to switch character entry modes. 2. Enter upper and lower case letters of the alphabet correctly.
- Page 9 Connecting Your MG6120 To Your Network << Previous Next >> Step 7 (continued) Character Entry This machine allows you to enter characters when an on-screen keyboard is displayed. Follow the procedure below. 1. When the on-screen keyboard shown above is displayed, touch the center FUNCTION button (A) to switch to a keyboard having the...
- Page 10 Connecting Your MG6120 To Your Network << Previous Next >> Step 7 (continued) Character Entry 2. Select a character on the on- screen keyboard using the ↑↓←→ buttons (B) then touch the OK button to enter it. Entered characters are displayed on the upper section (C) of the on-screen keyboard.
- Page 11 Connecting Your MG6120 To Your Network << Previous Next >> Step 8 Step 9 Make sure that the network key is When the screen below appears, correct, then touch the OK button. touch the OK button. Your MG6120 is now connected to your network Note: •...
-
Page 12: Installing Software
• If the firewall function of your security software is turned on, a warning message may appear that Canon software is attempting to access the network. If such a warning message appears, set the security software to always allow access. - Page 13 Installing The MG6120 Software << Previous Next >> Step 1 Step 2 Turn on the computer, then insert the Double-click the Setup icon of the Setup CD-ROM into the CD-ROM CD-ROM folder to proceed to the drive. If you are using Windows, the following screen.
- Page 14 Installing The MG6120 Software << Previous Next >> Step 3 Step 4 Click Easy Install Click Install The drivers, application software, and on-screen manuals are installed. Note: If you want to select particular items to install, click Custom Install.
- Page 15 Installing The MG6120 Software << Previous Next >> Step 5 Step 6 Select Use the printer on network, When the Printer Detection screen then click Next. appears, click Next. IMPORTANT IF THE PRINTER CONNECTION SCREEN APPEARS INSTEAD OF THE SCREEN ABOVE, THE CONNECTION METHOD IS NOT CORRECTLY SELECTED IN 5.
-
Page 16: Register Printer
Installing The MG6120 Software << Previous Next >> Step 7 Step 8 On the Canon IJ Network Tool screen, When the Register Printer and select MG6100 series in Printers, then Scanner screen appears, click click Next. Register Printer. Note: The alphanumeric characters after Canon MG6100 series is the machine's Bonjour service name or MAC address. - Page 17 Next >> Step 9 Step 10 For OS X v. 10.6.x and 10.5.x only For OS X v. 10.4.11 only Select Canon MG6100 series 1. When the Printer List window canonijnetwork and click Add. appears, click Add. Go to Step 11.
- Page 18 Next >> Step 10 (continued) Step 10 (continued) 2. Click More Printers in the Printer 3. Click More Printers in the Printer Browser window. Browser window. 4. Make sure that Canon MG6100 series is added to the list of printers.
- Page 19 Installing The MG6120 Software << Previous Next >> Step 11 Step 12 When the Register Printer and Select MG6100 series on the Scan- Scanner screen appears, click from-Operation-Panel Settings Register Scanner. screen, then click OK.
- Page 20 Installing The MG6120 Software << Previous Next >> Step 13 Step 14 Click Next on the Register Printer and Follow any on-screen instructions to Scanner screen. proceed with the remaining software installation. Wireless setup is now complete...
Need help?
Do you have a question about the PIXMA MG6120 and is the answer not in the manual?
Questions and answers