Table of Contents
Advertisement
Advertisement
Table of Contents

Subscribe to Our Youtube Channel
Related Manuals for Brookstone TIMESMART Self-Setting Clock Radio


Summary of Contents for Brookstone TIMESMART Self-Setting Clock Radio
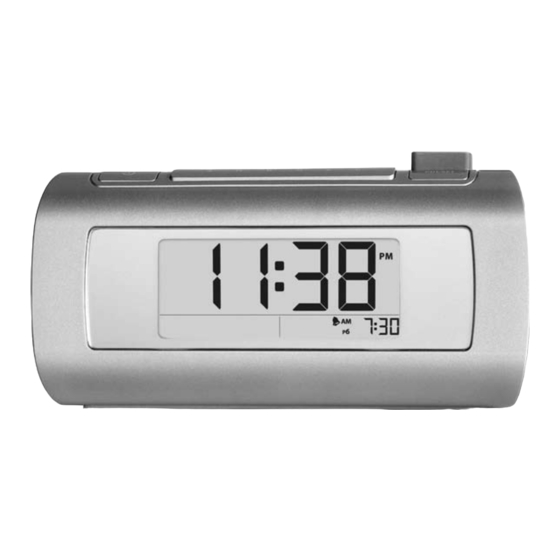
- Page 1 TimeSmarT ™ Self-Setting Clock Radio Just plug it in—it sets itself...
-
Page 2: Table Of Contents
Table of conTenTS Cautions and Warnings . . . . . . . . . . . . . . . . . . . . . . . . . . . . . . . . . . . . . . . . . . . . . . . . . . 2-6 Location of Controls . -
Page 3: Cautions And Warnings
caUTion • TO REDUCE THE RISK OF ELECTRIC SHOCK, DO NOT REMOVE COVER . THERE ARE NO SERVICEABLE PARTS INSIDE . • TO REDUCE THE RISK OF FIRE OR ELECTRIC SHOCK, DO NOT EXPOSE THIS UNIT TO RAIN OR MOISTURE . The lightning flash with arrow-head symbol within an equilateral triangle is intended to alert the user to the presence of uninsulated “dangerous voltage”... - Page 4 DanGer To reduce the risk of electric shock, burns, fire or injury: Do not use while bathing or in a shower . Do not place or store unit where it can fall or be pulled into a tub or sink . Do not place in or drop into water or other liquid .
- Page 5 The unit should be situated away from direct sunlight or heat sources such as radiators, electric heaters, heat registers, stoves, or other units (including amplifiers) that produce heat . Avoid placing on top of stereo equipment that radiates heat . Never block the air openings of the unit with materials such as clothing, plastic bags or papers, or place it on a soft surface such as a bed or couch, where the air openings may be blocked .
-
Page 6: Fcc Information
fcc informaTion This equipment has been tested and found to comply with the limits for a Class B Digital Device, pursuant to Part 15 of the FCC Rules . These limits are designed to provide reasonable protection against harmful interference in a residential installation . - Page 7 baTTerY PrecaUTionS • Dispose of the old battery properly . Do not dispose of the old battery in a fire . • Do not leave the battery where a child or pet could play with or swallow it . If the battery is swallowed, contact a physician immediately . •...
-
Page 8: Panel And Controls
locaTion of conTrolS Power Alarm 2 Alarm 1 Volume Wheel Speaker PRESET Back 10 . SLEEP MODE 11 . FM/AM/AUX Forward 12 . SNOOZE... - Page 9 locaTion of conTrolS Volume DC 8V In Headphone Jack FM Pigtail Antenna AUX In Jack Speaker...
- Page 10 locaTion of conTrolS 1 . Control Compartment Cover 5 . Daylight Savings Time Switch 2 . Back-up Battery Compartment Cover 6 . Lock, Time/Date Set Switch 3 . Reset Button 7 . Time Zone Switch 4 . 12/24 Time Format Switch...
-
Page 11: Plugging In Your Clock For The First Time
oPeraTion plugging in your clock for the first time Plug the DC 8V ADAPTER (included) into a power outlet . The first time you connect your new clock to the AC outlet, the internal computer will automatically set the correct time and date for the Eastern Time Zone, which is the initial default setting . -
Page 12: Setting The 12/24 Time Format
setting the 12/24 time formAt The 12 hour format is set as the default . To change the 12/24 hour time format, open the CONTROL COMPARTMENT COVER on the bottom of the clock and adjust the 12/24 TIME FORMAT switch to the desired format . -
Page 13: Adjusting The Backlight
ADJusting the bAcklight There are 5 backlight settings: HIGH, MEDIUM, LOW, DIM and OFF . Press the SNOOZE button for 3 seconds and continue to hold to toggle through each of the backlight settings . The backlight setting will change every 3 seconds while the SNOOZE button is being pressed and held . -
Page 14: Setting And Activating The Alarm
setting AnD ActivAting the AlArm Press and hold the MODE button for 2 seconds . The clock will go into Alarm Set mode . Alarm 1 time will flash . Press the FORWARD/BACK buttons to scroll to the desired alarm time— hold down the FORWARD/BACK buttons to accelerate scrolling . -
Page 15: Deactivating The Alarm
DeActivAting the AlArm The ALARM 1 and/or ALARM 2 button must be in the “up” position to activate the alarm . When the alarm sounds, press the ALARM 1 or ALARM 2 button into its “down” position to shut off the alarm . If the alarm is set to buzzer, the buzzer will sound for 20 minutes if the alarm is not turned off or the SNOOZE button isn’t pressed . -
Page 16: Using The Sleep Function
using the sleep function The Sleep function shuts the audio off automatically within a selected time . The Sleep timer can be set for 60, 30 or 15 minutes . To choose a Sleep time or to turn the Sleep function OFF, press the SLEEP button with the Radio or AUX on to scroll through your choices of 60, 30, 15 and OFF . -
Page 17: Listening To The Radio
listening to the rADio Press the POWER button . The display will show the last mode and/or station chosen . After 7 seconds, the display will return to the current time . To toggle between FM Radio, AM Radio and Auxiliary modes, press the FM/AM/AUX button . -
Page 18: Presetting Radio Stations
presetting rADio stAtions Before tuning to your preferred station, press and hold the PRESET button for 2 seconds with the radio on and in either AM or FM mode . P1 (Preset 1) with a frame around it will appear on the screen . Then tune to your preferred station by using the FORWARD/BACK buttons . -
Page 19: Manually Setting The Time And Date
mAnuAlly setting the time AnD DAte Open the CONTROL COMPARTMENT COVER on the bottom of the clock to access the CONTROL PANEL . The time can be set by sliding the LOCK, TIME/DATE set switch to TIME/DATE . The time graphics will flash on the display . Press the FORWARD/BACK buttons to scroll to the desired time—... -
Page 20: Reset
reset If your clock is not working properly, use this function to reset the unit . Activating the RESET function will revert the date and time to January 1, 2008, 12:00 a . m . Open the CONTROL COMPARTMENT COVER on the bottom of the clock to access the CONTROL PANEL . -
Page 21: Specifications
SPecificaTionS Power Supply: . . . . . . . . . . . . . . . . . . . . . . . . . . . . . . . . . . . AC 120V 60Hz 5W (Input) DC 8V 250mA (Output) Battery: . -
Page 22: Warranty
(“Warranty Period”) . If a defect arises and a valid claim is received within the Warranty Period, at its option, Brookstone will either 1) repair the defect at no charge, using new or refurbished replacement parts, or 2) replace the product with a new product that is at least functionally equivalent to the original product, or 3) provide a store credit in the amount of the purchase price of the original product . - Page 23 Brookstone; d) accessories used in conjunction with a covered product; e) a product or part that has been modified to alter functionality or capability;...
- Page 24 Merrimack, New Hampshire USA 03054 • 800-846-3000 • www . B rookstone . c om 607960...
Need help?
Do you have a question about the TIMESMART Self-Setting Clock Radio and is the answer not in the manual?
Questions and answers