Table of Contents
Advertisement
Advertisement
Table of Contents

Subscribe to Our Youtube Channel
Related Manuals for Baumatic BCD901SS


Summary of Contents for Baumatic BCD901SS
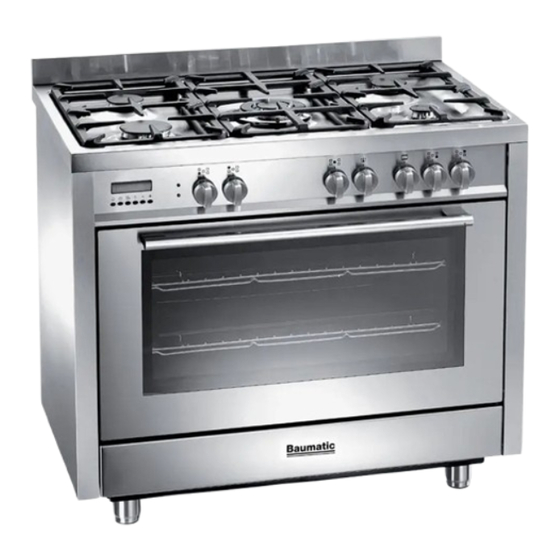
- Page 1 BCD901SS 90 cm Single cavity dual fuel cooker...
- Page 2 User Manual for your Baumatic BCD901SS 90 cm Single cavity dual fuel cooker NOTE : This User Instruction Manual contains important information, including safety & installation points, which will enable you to get the most out of your appliance. Please keep it in a safe place so that it is easily available for future reference;...
-
Page 3: Table Of Contents
Contents Environmental note Important safety information 5 – 9 Specifications 9 – 12 Dimensions Specifications 9 - 10 Electrical details Gas details Control panel Oven timer Setting and using the oven programmer/timer 12 - 15 Setting the time of day Setting the minute minder function Setting the duration function Setting the end cook function... -
Page 4: Environmental Note
Environmental note o The packaging materials that Baumatic uses are environmentally friendly and can be recycled. o Please discard all packaging material with due regard for the environment. -
Page 5: Important Safety Information
Baumatic’s Conditions Of Guarantee. The foregoing does not affect your statutory rights. o Repairs may only be carried out by Baumatic service engineers or their authorised service agents. - Page 6 Warning and safety instructions o This appliance complies with all current European safety legislation. Baumatic do wish to emphasise that this compliance does not remove the fact that the appliance surfaces will become hot during use and retain heat after operation.
- Page 7 o Do not place heavy objects on the oven door or lean on the oven door when it is open, as this can cause damage to the oven door hinges. Nobody should be allowed to sit or stand on any part of the cooker.
- Page 8 Please see the specific section of this booklet that refers to installation. o Baumatic Ltd. declines any responsibility for injury or damage, to person or property, as a result of improper use or installation of this appliance.
-
Page 9: Specifications
o The above directives comply with 93/68/EEC regarding CE marking. o The manufacturer declares that the oven is built using certified materials requires appliance installed accordance with the standards currently in force. This appliance must be used by a trained person for domestic purposes only. Specifications h= 760 mm H = 885 - 940 mm... -
Page 10: Electrical Details
o Energy efficiency class: A o LED full programmer o Thermostatically controlled grill o Double-glazed removable “cool touch” door o Removable full inner glass o Wipe Clean enamelled cavity o Adjustable feet Multifunction oven o 8 functions o Net oven capacity: 85 litres o Gross oven capacity: 112 litres Standard accessories: o Trivet... -
Page 11: Control Panel
Control Panel Cooking zone selection dial o Turn the relevant dial anticlockwise to select a power level for a chosen burner. 0 = Burner OFF position – Low temperature – High temperature Main oven thermostat dial o Turn the dial clockwise to select a main oven temperature (50 °C –... -
Page 12: Oven Timer
Oven timer 1) Minute minder button 2) Cooking time selection button 3) End of cooking time selection button 4) Manual operation mode button 5) Timer minus button 6) Timer plus button D = Digital display Setting and using the oven programmer/timer Setting the time of day After switching on your oven for the first time you should also set the time of day. -
Page 13: Setting The Minute Minder Function
Setting the minute minder function (main and secondary oven) You are able to set the minute minder at any time, regardless of whether an oven function has been selected. You can set a period of time using the minute minder function and an alarm will sound when this period of time has elapsed. -
Page 14: Setting The End Cook Function
Setting the end cook function This function is similar to the duration function, however instead of selecting a period of time that you wish the oven to switch off after. You select the time of day that you wish the oven to switch off at. -
Page 15: The Buzzer
The buzzer o The buzzer will go off at the end of a programme or at the end of the minute minder function. The alarm will last approximately seven minutes before automatically turning off. o The buzzer can be stopped by pressing any of the function buttons. -
Page 16: Using The Hob Top
Using the hob top Hob surface layout 2) 3.00 kW rapid burner 3) 1.80 kW semi-rapid burners 4) 1.00 kW auxiliary burner 6) 3.80 kW triple crown (wok) burner Before first use IMPORTANT: You should clean the hob surface (see “Cleaning and maintenance”... -
Page 17: Optimum Use Of The Burners
o Matches can also be used to light the burner during a power cut. Simply follow the previous step but place a lit match to the burner as you press the dial. Once lit, keep the dial pressed for about ten seconds. WARNING: Extra care should be taken when lighting a burner with matches. -
Page 18: Hob Guidelines
Hob guidelines o The diameter of the bottom of the pan should correspond to that of the burner. o The burner flame must never extend beyond the diameter of the pan. o Use flat bottomed pans only o When possible, keep a lid on the pan whilst cooking. o Cook vegetables with as little water as possible, to reduce cooking times. -
Page 19: Using The Main Oven
o After the cavity has cooled, it should then be cleaned with warm soapy water, using either a sponge or soft cloth. No abrasive cleaners should be used. o Outer parts of the oven should be cleaned with warm soapy water, using either a sponge or soft cloth. -
Page 20: Using The Grill
heat being evenly distributed in the cavity to cook food simultaneously on different shelves and also prevents the transmission of smells and tastes from one dish to another. CONVENTIONAL OVEN: This method of cooking provides traditional cooking, with heat from the top and lower elements. -
Page 21: Cooking Guidelines
REMEMBER: When using any of the grill functions, it is important to place a drip pan at the base of the oven cavity to collect any juices which may drip down (see image on next page). The oven walls of the two cavities are fitted with various guide bars on which you can place an oven shelf or a drip tray (see image below). -
Page 22: Warnings
o Try to open the door as little as possible to view the dishes. Warnings o Keep the oven door closed when using either the grill or oven functions. o During cooking, never place pans or cookware directly onto the bottom of the oven. - Page 23 Baked pasta Lasagne 210-225 60-75 225-MAX 30-40 Cannelloni 210-225 60-75 225-MAX 30-40 Pizza 225-MAX 25-30 225-MAX 20-25 Bread 225-MAX 20-25 Pastries Biscuits in 170-190 general Shortcrust 190-200 pastry Victoria 40-45 190-200 40-45 sponge Cakes Angel cake 170-190 Fruit cake 190-200 Chocolate 190-200 cake...
-
Page 24: Cooking Tips For Cakes And Bread
Cooking tips for cakes and bread o Heat the oven for at least 15 minutes before you start cooking bread or cakes. o Do not open the door during baking because the cold air will stop the yeast from rising. o When the cake is cooked turn the oven off and leave it in for about 10 minutes. -
Page 25: Cooking Tips For Meat
Cooking tips for meat o If, when cooking meat, the time needed is more than 40 minutes, turn the oven off 10 minutes before the end of cooking time to exploit the residual heat and save energy. o Your roast will be juicer if cooked in a closed pan. It will be crispier if cooked without a lid. -
Page 26: Cleaning The Gas Hob Top
Any damage that is caused to the appliance by a cleaning product will not be fixed by Baumatic free of charge, even if the appliance is within the guarantee period. Cleaning the gas hob top o Remove the dirty pan supports from the hob and place in warm soapy water for some time. -
Page 27: Cleaning The Burners
Cleaning the burners o Gas burners should be cleaned regularly and after each spillage to remove cooking residues and dirt. o To clean the burners, remove the caps and rings and place them separately in warm soapy water. After cleaning them, check that the burner ports are clear. -
Page 28: Replacing The Oven Bulb
Replacing the oven bulb IMPORTANT: The oven must be disconnected from your mains supply before you attempt to either remove or replace the oven bulb. o Draw out the side guide rails in order to provide access to the bulb. o Remove the glass protection cap (C) from the bulb socket by lifting it with a screwdriver placed between the cap and the oven wall. -
Page 29: Removing The Inner Door Glass For Cleaning
o Partially close the door, forcing it upwards at the same time to free the stop tooth and hinge sector. o Once the hinge is free, pull the door forwards tilting it slightly upwards to free the sector. o To reassemble, proceed in the reverse order, playing attention to the correct position of the sectors. -
Page 30: Removing The Side Racks For Cleaning
Removing the side racks for cleaning o For an effective cleaning of the oven side guide rails, these can be extracted by unscrewing the knurled nuts. o To fit the rails back in their place, first insert rear pins in the holes and then secure them with the knurled nuts. - Page 31 (including the burners). o Baumatic do not recommend that the cooker is positioned below wall cupboards, as the heat and steam from the appliance and what is being cooked, may damage the cupboard and its contents.
-
Page 32: Ventilation Requirements
o The cooker is fitted with four legs that can be adjusted to match the height of your kitchen cabinets. o If the cooker is not level or is unstable due to an uneven floor surface, use the adjustable feet to alter each corner until the cooker is level. -
Page 33: Securing The Back-Guard
o If the room has a volume of less than 5m³, it will require an air vent of 100cm² (effective area). o If there are any other fuel burning appliances in the same room the current edition of BS 5440: Part 2: should be consulted to determine air vent requirements. -
Page 34: Fitting The Safety Chain And Hook
o Fix the back-guard into place by screwing the screws back into the hob with the back-guard placed in between. Fitting the safety chain and hook o To prevent the cooker from tipping forward, two lengths of chain MUST BE fixed to the back of the oven which should be secured to the hook provided at all times. -
Page 35: Electrical Connection
Electrical connection This appliance must be installed by a qualified person in accordance with the latest edition of the I.E.E. Regulations and in compliance with Baumatic’s instructions. Before connecting the appliance, make sure that the supply voltage marked on the rating plate corresponds with your mains supply voltage. -
Page 36: Gas Connection
Conversion for use on LPG and other gases must only be undertaken by a qualified person. For information on the use of other gases, please contact the Baumatic Technical Department. o The cooker must be installed by a qualified person, in... -
Page 37: Gas Connection
o In the UK, GASSAFE registered installers work to safe standards of practice. The cooker must also be installed in accordance with the current edition of BS 6172. Failure to install the cooker correctly could invalidate the warranty, liability claims and lead to prosecution. -
Page 38: Gas Conversion To Lpg
o Care should be taken to ensure that the temperature rise of areas at the rear of the cooker that are likely to come in contact with the flexible hose do not exceed 70°C. o Gas pressure may be checked on a semi-rapid hob burner. Remove the appropriate injector and attach a test nipple. -
Page 39: Minimum Flow Adjustment For Hob Gas Taps
Burner Operating Rate Diameter Heat Input By-Pass pressure gas injector mbar 1/100mm 1/100mm G30 - 28 - 3000 Butane G31 - 3000 Rapid Propane G20 - 117 - Y 3000 Natural G30 - 28 - 1800 Butane G31 - 1800 Semi - Propane rapid... -
Page 40: Gas Tap Replacement
o The correct adjustment is obtained when the flame has a length of about 3 – 4 mm. o For butane/propane gas, the adjusting screw must be tightly screwed in. o Refit the control knob. o Make sure that the flame does not go out by quickly turning from maximum flow to minimum flow. -
Page 41: My Appliance Isn't Working Correctly
o Remove the hob by unscrewing the rear fixing screws (B) which lock the hob at the supports (C). o Unscrew the nuts (E) of the gas aluminium pipes and pull out the thermocouple quick connectors (F). o Unscrew the screws (D) which lock the crosspieces. -
Page 42: Replacing The Oven Bulb
o The grill function works but the main oven does not. * Check that you have selected the correct cooking function. o The grill and top oven element is not working, or cuts out for long periods of time during use. * Allow the oven to cool for approximately 2 hours. - Page 43 Or any installation other than the one specified by Baumatic Ltd. has been completed. Please refer to the conditions of guarantee that appear on the...
-
Page 44: Contact Details
Czech Republic Baumatic CR spol s.r.o. United Kingdom Lípovà 665 Baumatic Ltd., 460 01 Liberec 4 Baumatic Buildings, Czech Republic 6 Bennet Road, Reading, Berkshire +420 483 577 200 RG2 0QX United Kingdom www.baumatic.cz Sales Telephone Slovakia (0118) 933 6900 Baumatic Slovakia, s.r.o.
Need help?
Do you have a question about the BCD901SS and is the answer not in the manual?
Questions and answers