
Related Manuals for Azio KB351RT


Summary of Contents for Azio KB351RT
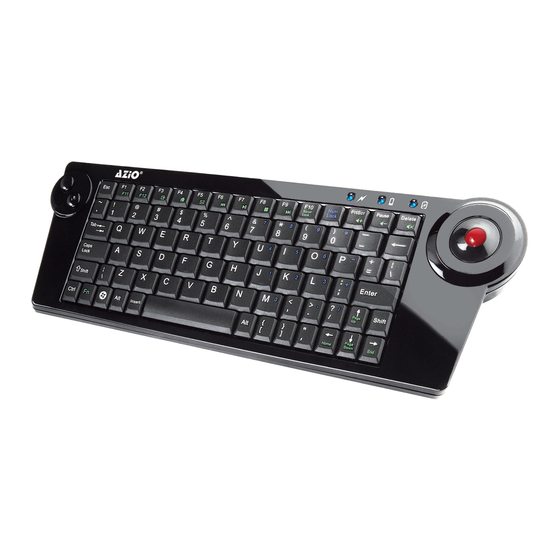
- Page 1 The Right Connection TM KB351RT The Right Connection TM Wireless Trackball Keyboard Quick Installation Guide...
- Page 2 Copyright of the whole product as integration, including its accessories and software, belongs to AZiO Corporation. Without the permission of AZiO Corporation, any individual or party is not allowed to copy, plagiarize, imitate or translate into other languages.
-
Page 3: Table Of Contents
KB351RT User Guide Table of Contents 1 Introduction…………………......………………………………… 3 1.1 Welcome………………………..……..……….……………………… 3 1.2 Product Features.……………………………….…………………………. 3 1.3 Package Contents………..…………...……………….………………… 3 1.4 Before You Begin…...……….………..………….………………… 3 2 Installation…………………………..……………………………………….…..… 4 2.1 Installation of the USB Receiver.…..……….……………………… 4 2.2 Installation of the Keyboard...……………………………….………… 5 2.3 Synchronization of the Radio Channel…………………….…………... -
Page 4: Introduction
1.1 Welcome Thank you for purchasing the AZiO KB351RT Wireless USB Trackball Keyboard. The KB351RT trackball keyboard connects you with your PC by Wireless RF technology via the mini USB receiver dongle. The keyboard features make it ideal as a handheld controller for your Media Center or Home Theater PC. -
Page 5: Installation
• Ensure your system’s USB connection is not disabled or missing its driver. Do this by checking your system’s device manager. • If all else fails, check to see if this keyboard works in another computer. If it does not, please contact AZIO support. -
Page 6: Installation Of The Keyboard
KB351RT User Guide 2.2 Installation of the keyboard The keyboard can be used wired with the included mini USB cable or wirelessly with the built-in RF wireless radio. When operating wirelessly, you can use either alkaline batteries or rechargeable batteries. The rechargeable battery can be charged while inside the keyboard with the included mini USB cable. -
Page 7: Synchronization Of The Radio Channel
KB351RT User Guide 2.3 Ssynchronization of the Receiver & Keyboard The RF Wireless Keyboard is equipped with the newest RF radio technology allowing for easy, auto-channel, synchronisation. • Place the keyboard and receiver dongle close to each other when synchronizing. Ideally, within 30cm. -
Page 8: How To Use The Keyboard
KB351RT User Guide How to use the keyboard After a successful installation, you are now free to move around the room to a location up to approx. 10 m from the PC. Range can be affected by dividing metallic surfaces, monitors, loudspeakers, switching power supplies, but also by low batteries. -
Page 9: Power Sources
KB351RT User Guide 4. Power sources This keyboard can be powered by the following three power sources. Primary battery (non-chargeable battery): 2 x AAA batteries are needed for operation. 3.0V to 2.0V only. Re-chargeable battery: 2 x AAA NI-MH batteries. 2.4V to 2.0V. When battery LED is on, you can connect a USB cable to charge the battery. -
Page 10: Troubleshooting
KB351RT User Guide Troubleshooting Things to Consider In the unlikely event the keyboard does not work, even after synchronization, you can try the following options to resolve this problem: • If your USB receiver is attached to a USB hub, please install it directly to the USB connector of your notebook or desktop. -
Page 11: Fcc Statement
KB351RT User Guide FCC Statement CAUTION: This device complies with Part 15 of the FCC Rules. Operation is subject to the following two conditions: (1) this device may not cause harmful interference, and (2) this device must accept any interference received, including interference that may cause undesired operation. -
Page 12: Warranty & Support
AZiO product, and all costs of shipping the AZiO product to AZiO for inspection shall be borne solely by the purchaser. In order to keep this warranty in effect, the product must have been handled appropriately and must not have been misused in any way.
Need help?
Do you have a question about the KB351RT and is the answer not in the manual?
Questions and answers