Table of Contents
Advertisement
Advertisement
Table of Contents
Troubleshooting

Subscribe to Our Youtube Channel
Related Manuals for Azio External HD Kit

Summary of Contents for Azio External HD Kit
- Page 1 AZiO External HD Kit User’s Guide...
-
Page 2: Table Of Contents
Formatting in Mac OS X ………………………………………………………………………………………. 21 Formatting in Mac OS 9 ………………………………………………………………………………………. 22 How to safely dismount the Drive ……………………………………………. 23 AZiO External HD Kit: Features Explored ……………………………...…… 24 Hi-Speed USB 2.0 ……………………………………………………………………………………………….. 24 FireWire 400 ……………………………………………………………………………………………………..24 Serial ATA ……………………………………………………………………………………………………..…… 25 Frequently Asked Questions …………………………………………………... -
Page 3: Overview
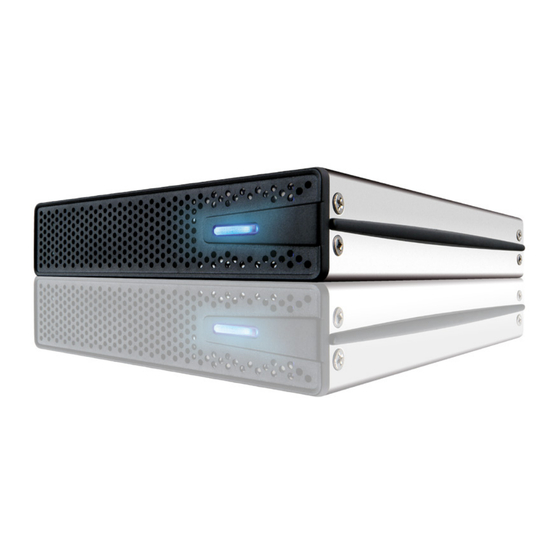
Overview Thank you for purchasing the AZiO External HD kit, one of the most stylish and practical data storage solutions available. The AZiO HD Kit can convert your internal 3.5” hard disk drive into a hi-speed external storage device. Use it to store your collection of documents, photos, media files, and/or backup a copy of all your important data. -
Page 4: Precautions
If using your AZiO product as a general-purpose storage device (as opposed to a backup device) AZiO strongly recommends that you backup the files stored on the device. AZiO will not be responsible for loss of data or corruption; nor will AZiO perform recovery of lost data or files. -
Page 5: Package Contents
8) 6-pin to 6-pin FireWire Cable (ENC311-C41 Only) 9) eSATA to eSATA Cable (ENC311SU31 & ENC311SU41) *If you are missing any item listed above, please contact Customer Service at support@aziocorp.com, or call (909) 468-1198. Copyright © 2006 by AZiO Corp. – www.aziocorp.com... -
Page 6: System Requirements For Pc
CD. (See “Mounting a USB-Connected Drive” for instructions). In order to use the FireWire connection, you will need Windows 98 Second Edition 1394 Storage Supplement. You can download it at http://www.microsoft.com/windows98/downloads/default.asp. Copyright © 2006 by AZiO Corp. – www.aziocorp.com... -
Page 7: System Requirements For Mac
6-pin to 4-pin FireWire cable (not included). eSATA users with SATA ports: If your computer has a SATA port, please upgrade to eSATA by using the included SATA to eSATA converter bracket. Copyright © 2006 by AZiO Corp. – www.aziocorp.com... -
Page 8: Technical Specifications
Power Requirement ………………………………………………………..+5VDC & +12VDC Startup Current (max A) …………………………………………..…………….……… 2.0 (12V) External Power Supply …………………………………………………………… 34W Switching AC Input ……………………………………………………………… 100-240V ~ 47/63Hz 1.2A DC Output ……………………………………………………………. 5.0V (2.0A), 12.0V (2.0A) Copyright © 2006 by AZiO Corp. – www.aziocorp.com... -
Page 9: Installing A 3.5" Hard Drive
If you do not have your drive’s manual, most manufacturers make manuals available for download from their websites. Be sure to download the correct manual for your specific model as jumper configurations can differ from model to model. Copyright © 2006 by AZiO Corp. – www.aziocorp.com... - Page 10 2. Disassemble the Drive Kit Using a Philips screw driver, remove all four screws located on both sides of the UPPER aluminum enclosure cover. (Do not remove the screws for the bottom aluminum case). Copyright © 2006 by AZiO Corp. – www.aziocorp.com...
- Page 11 Open the drive kit by carefully remove the top cover from the body chassis. Warning: When handling the opened kit, never touch the PCB (printed circuit board). It contains sensitive electronics that can be easily damaged. Copyright © 2006 by AZiO Corp. – www.aziocorp.com...
- Page 12 Unscrew both hard drive brackets and remove them for hard drive installation. Copyright © 2006 by AZiO Corp. – www.aziocorp.com...
- Page 13 Orient your 3.5” hard drive so that the drives connectors are aligned with the interface connector and the power cable. Match the bracket pins to the hard drive and snap on the support brackets to the drive. Copyright © 2006 by AZiO Corp. – www.aziocorp.com...
- Page 14 IDE cables to the drive. For SATA drives, there will not be a flat- ribbon cable. Simply install the hard drive into the interface connector. Insert the drive unit onto the bottom chassis of the drive kit. Copyright © 2006 by AZiO Corp. – www.aziocorp.com...
- Page 15 Screw the hard drive brackets securely onto the support brace of the drive kit. Copyright © 2006 by AZiO Corp. – www.aziocorp.com...
- Page 16 4. Re-assemble the Drive Kit Close the drive kit by carefully replacing the top cover back onto the enclosure base. Copyright © 2006 by AZiO Corp. – www.aziocorp.com...
- Page 17 Screw the top aluminum cover securely back onto the enclosure base. Make sure the AZiO logo is facing the front of the drive kit. Copyright © 2006 by AZiO Corp. – www.aziocorp.com...
-
Page 18: Setting Up The Drive
2. You will then see the message: “What do you want windows to do?” with two options. Select “Search for the best driver for your device (Recommended).” Click Next. 3. In the next window that appears, check the box labeled CD-ROM drive. Click Next. Copyright © 2006 by AZiO Corp. – www.aziocorp.com... - Page 19 Click Finish and then eject the CD. You should now see a new icon (a gray box with a green arrow) next to the time display on your system tray. Copyright © 2006 by AZiO Corp. – www.aziocorp.com...
-
Page 20: Naming Your Drive
2. In the My Computer window click on the Drive icon. 3. In the File menu, select Properties. 4. Under the General tab of the Properties window, type a name in the text field beside the Drive icon. Copyright © 2006 by AZiO Corp. – www.aziocorp.com... -
Page 21: Partitioning/Formatting The Drive
2. Click on Disk Management. A list of all the drives in your system will be displayed. 3. If the Write Signature and Upgrade Disk Wizard auto-starts, you can use this wizard to initialize the hard disk and create partition/format the drive. Copyright © 2006 by AZiO Corp. – www.aziocorp.com... - Page 22 Information on the Drive will appear in the information window. 3. Click on the Erase tab. In the Erase window you will see a Volume Format pop-up menu and a Name field. Copyright © 2006 by AZiO Corp. – www.aziocorp.com...
- Page 23 1. Insert the System Software CD into you CD drive. 2. With your AZiO External Drive connected and powered on, restart the computer and hold down the C key while the computer is starting up. 3. You will see an alert message: “This disk is unreadable by this computer.
-
Page 24: How To Safely Dismount The Drive
When you dismount a device, the communications link is severed and the computer can no longer access it. PC Users 1. Make sure your computer is no longer accessing the AZiO External Drive. 2. In the system tray at the bottom of your screen, click the Safely Remove icon. -
Page 25: Azio External Hd Kit: Features Explored
FireWire bus. With the use of FireWire hubs, up to 63 devices can be linked on a single FireWire bus. FireWire equipped AZiO Enclosures come with two FireWire ports: One port is for connecting the device... -
Page 26: Serial Ata
2.0 and FireWire 400. Hot-Pluggable: Devices can be added/removed while the computer is on and running. Robust and user friendly external connection. Up to 2-m shielded cables and connectors. Copyright © 2006 by AZiO Corp. – www.aziocorp.com... -
Page 27: Frequently Asked Questions
Drive using the NTFS file system. If you plan to use your drive on a Mac OS only, consider reformatting the Drive using the Mac OS Extended file system. Q: Does the AZiO External Drive work on Windows XP Media Center Edition? A: No. It is not supported at this time. - Page 28 However, computer use the binary (base 2) numbering system. In the binary number system, one megabyte is equal to 1,048,576 bytes, and one gigabyte is equal to 1,073,741,824 bytes. Copyright © 2006 by AZiO Corp. – www.aziocorp.com...
-
Page 29: Troubleshooting
1. Make sure you have followed all of the instructions in this guide. 2. Consult the Troubleshooting sections of this guide. 3. If the issue you are having is still not resolved, contact AZiO Customer Care by one of the following options: a) via LiveChat at our website’s support page,... -
Page 30: Troubleshooting For Mac Users
Q: When I connected the Drive to my computer, I got the following alert message: “Please insert disk ‘untitled’.” A: If you get this alert message, your Mac is not recognizing your AZiO Drive and the mouse curser may even freeze on screen. If this happens, hold down the Apple/Control key and press the Period “.”... - Page 31 A: If this message appears, you have no choice but to re-initialize (reformat) the AZiO Drive in order to use it on Mac OS X. You will need to copy the data stored on your Drive to another storage device before upgrading to Mac OS X. After the upgrade is complete, re-initialize the Drive on Mac OS X, and then copy the data back to it.
-
Page 32: Warranty
The warranty does not cover any damage caused by negligence, abuse, or non-authorized modifications. To the maximum extent permitted by applicable law, in no event shall AZiO Corporation, its affiliates, or its dealers be liable for any special, incidental, indirect or consequential damages whatsoever regardless of cause or form of action. -
Page 33: Contact Information
Contact Information Address: 19977 Harrison Ave. Walnut, CA 91789 Telephone: (909) 468-1198 Fax: (909) 839-2629 Website: www.aziocorp.com Customer Service: support@aziocorp.com Technical Support: support@aziocorp.com Pre-Sale Questions: sales@aziocorp.com Copyright © 2006 by AZiO Corp. – www.aziocorp.com... -
Page 34: Notices
AZiO assumes no liability resulting from errors or omissions in this document, or from the use of the information contained herein. AZiO reserves the right to make changes or revisions in the product design or the product manual without reservation and without obligation to notify any person of such revisions and changes. - Page 35 Copyright © 2006 by AZiO Corp. – www.aziocorp.com...
Need help?
Do you have a question about the External HD Kit and is the answer not in the manual?
Questions and answers