Table of Contents
Advertisement
Quick Links
Good Neighbour
GOOD NEIGHBOUR FENCING
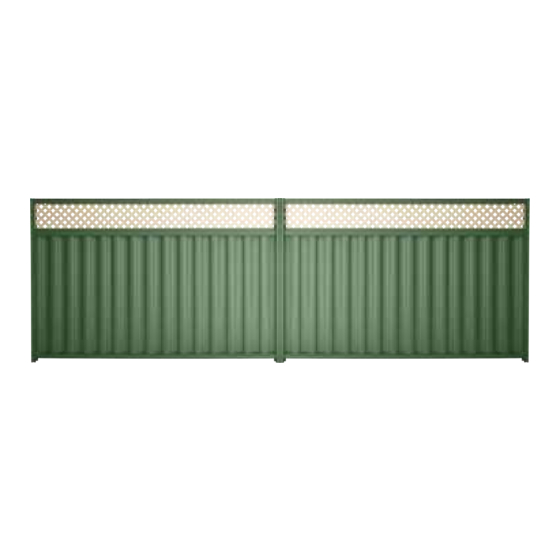
Stratco Good Neighbour fencing is both strong and attractive. Its design allows clean and uncluttered lines to be enjoyed by neighbours
on both sides of the fence. Good Neighbour's strength and style is achieved by using fence sheets that fit simply into profiled steel tracks
and posts. It is this simple design that makes Good Neighbour fencing so easy to install.
The wide range of colours, fencing profiles and accessories available, mean that a number of different looks can be achieved. Stratco
Good Neighbour fence sheet profiles include Superdek, Smartspan, CGI, CGI Mini and Wavelok. Wavelok is specifically designed for
fencing applications by Stratco, and features an identical appearance on both sides.
BEFORE YOU START
Ensure you have the correct components and tools before installing your fence. This installation guide should be read in conjunction with
the design guide. Gates should be installed before the fence is erected, to ensure a neat finish.
TOOLS AND HARDWARE REQUIRED
• Concrete
• Hack-saw
• Plumb Line
• Spirit Level
• Fencing Line
• Tape Measure
• Tin Snips
• Post Hole Digger
• Rivet Gun
• Drill and hex-head adaptor
INSTALLATION
GUIDE
Advertisement
Table of Contents

Related Manuals for Stratco Good Neighbour


Summary of Contents for Stratco Good Neighbour
-
Page 1: Before You Start
Stratco Good Neighbour fencing is both strong and attractive. Its design allows clean and uncluttered lines to be enjoyed by neighbours on both sides of the fence. Good Neighbour’s strength and style is achieved by using fence sheets that fit simply into profiled steel tracks and posts. - Page 2 Once the post has been positioned and propped into place, per side. Fix the hinges to the SHS gate post, making sure the top the concrete can be mixed and poured. Prepare the Stratco of the post is flush with the top of the gate. If the fence extends...
- Page 3 FENCE INSTALLATION Fence panels should be installed starting from a gate post, free Top Track Top Track end or corner. If you are working on sloped ground and intend to step or slope the fence see the sections on the following page for the correct installation procedure.
- Page 4 OVERLAP COVERAGE DETAILS FOR EACH SHEETING PROFILE Superdek Wavelok Ball cap Smartspan CGI Mini 300mm maximum The best visual result will be obtained when the sheet overlap is arranged to face away from the most commonly viewed angle. The best visual result will be obtained when the sheet overlap is arranged to face away from the most commonly viewed angle. Figure 3.5 SLOPING FENCE Step with post or ball cap...
- Page 5 Install the lattice track first. Place the lattice track on top of the Lattice clips existing Good Neighbour track and position it in the middle of the highest point of the track. Fix the lattice track using two self- Plastic lattice drilling screws at even spacings.
- Page 6 Post caps or ball caps are an optional item that can be ordered with a new fence or added to an existing Stratco fence. Caps must be installed upon completion of the fence. Place the chosen cap on top of the two joined posts. Push the cap into position.
Need help?
Do you have a question about the Good Neighbour and is the answer not in the manual?
Questions and answers