Sony Cyber-shot DSC-TX20 User Manual
Hide thumbs
Also See for Cyber-shot DSC-TX20:
- Instruction manual (631 pages) ,
- Service manual (36 pages) ,
- Product manual (73 pages)
Table of Contents
Advertisement
Quick Links
Cyber-shot User Guide
Before Use
Shooting
Viewing
Using MENU items (Shooting)
Using MENU items (Viewing)
Changing settings
Viewing images on a TV
Using with your computer
Printing
Troubleshooting
Precautions/About this camera
Contents list
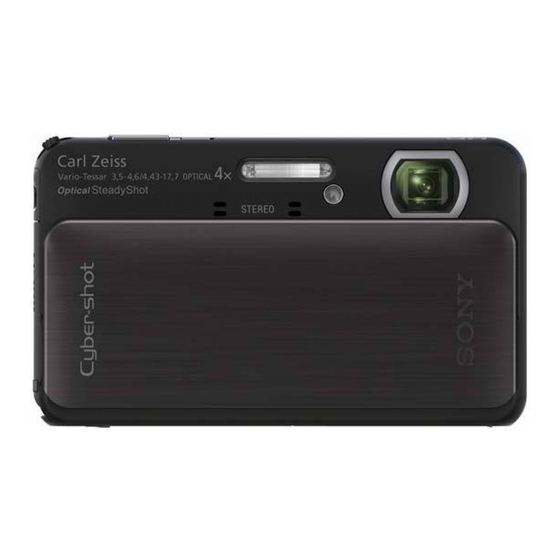
DSC-TX20
User Guide
Use this manual if you encounter any problems, or have any questions about the camera.
Copyright 2012 Sony Corporation
1
Search
Print
Top page
Back to top
Advertisement
Table of Contents
Troubleshooting

Related Manuals for Sony Cyber-shot DSC-TX20


Summary of Contents for Sony Cyber-shot DSC-TX20
-
Page 1: User Guide
Use this manual if you encounter any problems, or have any questions about the camera. Using MENU items (Shooting) Using MENU items (Viewing) Changing settings Viewing images on a TV Using with your computer Printing Troubleshooting Precautions/About this camera Contents list Back to top Copyright 2012 Sony Corporation... -
Page 2: Before Use
Precautions/About this camera Taking advantage of the touch panel Customizing the desired items Contents list Customizing the desired items Using the internal memory Using the internal memory Using the In-Camera Guide In-Camera Guide Back to top Copyright 2012 Sony Corporation... -
Page 3: Shooting
Program Auto iSweep Panorama Underwater iSweep Panorama Background Defocus Picture Effect Scene Selection 3D Still Image 3D Sweep Panorama Sweep Multi Angle Functions not available in some REC modes Using shooting functions Tracking focus Back to top Copyright 2012 Sony Corporation... -
Page 4: Viewing
Using with your computer Viewing movies Printing Viewing panoramic images Troubleshooting Scrolling the panoramic images for display Precautions/About this camera Viewing 3D images Viewing images shot in Sweep Multi Angle mode stereoscopically Contents list Back to top Copyright 2012 Sony Corporation... -
Page 5: Using Menu Items (Shooting)
Underwater White Balance Focus Metering Mode Scene Recognition Soft Skin Effect Smile Shutter Smile Detection Sensitivity Face Detection Anti Blink Movie SteadyShot In-Camera Guide Shooting MENU list MENU items not available in some REC modes Back to top Copyright 2012 Sony Corporation... -
Page 6: Using Menu Items (Viewing)
View Mode Display Cont. Shooting Group Protect Print (DPOF) Rotate Volume Exposure data Number of images in index In-Camera Guide Playback MENU list MENU items that cannot be set according to View Mode Back to top Copyright 2012 Sony Corporation... -
Page 7: Changing Settings
Cyber-shot User Guide Search Print Top page > Changing settings Before Use Changing settings Shooting Changing settings Viewing Changing camera settings Using MENU items (Shooting) Shooting Settings Using MENU items (Viewing) Movie format Changing settings AF Illuminator Grid Line Viewing images on a TV Clear Image Zoom Using with your computer Digital Zoom... - Page 8 Area Setting Date & Time Setting Back to top Copyright 2012 Sony Corporation...
-
Page 9: Viewing Images On A Tv
Viewing an image on a Standard Definition (SD) TV Viewing 3D images on a 3D TV Using with your computer Viewing 3D images on a 3D TV Printing Back to top Troubleshooting Precautions/About this camera Contents list Copyright 2012 Sony Corporation... -
Page 10: Using With Your Computer
Contents list Selecting the method for creating a disc of movies Copying high-definition image quality (HD) movies on to DVD discs (AVCHD discs) Creating standard definition image quality (STD) DVD discs Creating Blu-ray discs Back to top Copyright 2012 Sony Corporation... -
Page 11: Printing
Printing still images Viewing Printing still images Using MENU items (Shooting) Back to top Using MENU items (Viewing) Changing settings Viewing images on a TV Using with your computer Printing Troubleshooting Precautions/About this camera Contents list Copyright 2012 Sony Corporation... -
Page 12: Troubleshooting
Memory card Printing Internal memory Printing Troubleshooting Touch Panel/Screen Precautions/About this camera Others Contents list Warning indicators and messages Self-diagnosis display Messages Situations this camera has difficulty handling Situations this camera has difficulty handling Back to top Copyright 2012 Sony Corporation... -
Page 13: Precautions/About This Camera
Recordable time of movies Precautions/About this camera Using the camera abroad Contents list Using the camera abroad On TV color systems About this camera Carl Zeiss lens AVCHD format TransferJet standard License Trademarks Trademarks Back to top Copyright 2012 Sony Corporation... -
Page 14: Before Use
Cyber-shot User Guide Search Print Top page > Contents list Before Use Contents list Shooting Viewing Before Use Using MENU items (Shooting) How to use this User Guide How to use this User Guide Using MENU items (Viewing) Names of parts and list of icons displayed on the screen Changing settings Names of parts Viewing images on a TV... -
Page 15: Viewing
Background Defocus Picture Effect Scene Selection 3D Still Image 3D Sweep Panorama Sweep Multi Angle Functions not available in some REC modes Using shooting functions Tracking focus Back to top Viewing Viewing still images Viewing still images Playback zoom Wide Zoom Viewing burst images Viewing burst images Viewing movies... -
Page 16: Using Menu Items (Viewing)
White Balance Underwater White Balance Focus Metering Mode Scene Recognition Soft Skin Effect Smile Shutter Smile Detection Sensitivity Face Detection Anti Blink Movie SteadyShot In-Camera Guide Shooting MENU list MENU items not available in some REC modes Back to top Using MENU items (Viewing) Using MENU items (Viewing) Using MENU items (Viewing) -
Page 17: Viewing Images On A Tv
Shooting Settings Movie format AF Illuminator Grid Line Clear Image Zoom Digital Zoom Wind Noise Reduct. Scene Recog. Guide Red Eye Reduction Blink Alert Write Date Main Settings Beep Panel Brightness Language Setting Display color Demo Mode Initialize CTRL FOR HDMI Housing USB Connect Setting USB Power Supply... -
Page 18: Using With Your Computer
Viewing an image on a Standard Definition (SD) TV Viewing 3D images on a 3D TV Viewing 3D images on a 3D TV Back to top Using with your computer Recommended computer environment Recommended computer environment Using the software “PlayMemories Home” (Windows) Installing “PlayMemories Home”... -
Page 19: Precautions/About This Camera
Number of still images Recordable time of movies Using the camera abroad Using the camera abroad On TV color systems About this camera Carl Zeiss lens AVCHD format TransferJet standard License Trademarks Trademarks Back to top Copyright 2012 Sony Corporation... -
Page 20: Search Print
Cyber-shot User Guide Search Print Top page > Before Use > How to use this User Guide > How to use this User Guide Before Use How to use this User Guide Shooting Viewing Selecting a topic to display Using MENU items (Shooting) Searching a topic by keyword Returning to a previous page Using MENU items (Viewing) - Page 21 Changing the font size Change the font size by changing the setting of your web browser. For how to change the font size setting, refer to the Help of your web browser. Searching a topic by keyword Enter the keyword in the search window, then click the [Search] button. Returning to a previous page Use the browser’s back button to return to a previously viewed page, or use the breadcrumb trail navigation (A) to display the desired page.
- Page 22 Operate the camera in the order indicated. Icons in the operating procedure sentences appear when the camera is in its default settings. The default setting is indicated by indicates information that is useful to know. Back to top Copyright 2012 Sony Corporation...
-
Page 23: Names Of Parts
Cyber-shot User Guide Search Print Top page > Before Use > Names of parts and list of icons displayed on the screen > Names of parts Before Use Names of parts Shooting Viewing Using MENU items (Shooting) Using MENU items (Viewing) Changing settings Viewing images on a TV Using with your computer... - Page 24 W/T (zoom) lever Hook for wrist strap HDMI mini jack Multi connector (Type3b) Memory card slot Access lamp Battery eject lever Connector cover Battery/Memory card cover (TransferJet™) mark Battery insertion slot Tripod receptacle Back to top Copyright 2012 Sony Corporation...
-
Page 25: List Of Icons Displayed On The Screen
Cyber-shot User Guide Search Print Top page > Before Use > Names of parts and list of icons displayed on the screen > List of icons displayed on the screen Before Use Shooting List of icons displayed on the screen Viewing List of shooting mode icons Using MENU items (Shooting) - Page 26 Soft Skin Effect HDR Painting effect Color hue Extracted Color Display Indication Close Focus Red-eye reduction AE/AF lock NR slow shutter Shutter speed F3.5 Aperture value ISO400 ISO number +2.0EV Exposure value AF range finder frame indicator Flash mode Wind Noise Reduction Flash charging Display Indication...
- Page 27 Image size/Panorama image size/Quality AF range finder frame Spot metering cross-hairs Self-timer Warning indicator pertaining to still image recording Number of recordable images Write Date Destination Enable/Disable touch panel List of viewing mode icons Display Indication Playback Media (Memory card, internal memory) Image number/Number of images 12/12...
- Page 28 View mode Metering Mode Flash mode White balance +2.0EV Exposure value Display Indication C:32:00 Self-diagnosis display ISO400 ISO number Shutter speed F3.5 Aperture value Playback bar Playback Variable speed playback 00:00:12 Counter Volume Back to top Copyright 2012 Sony Corporation...
-
Page 29: Using The Wrist Strap
Attach the strap and place your hand through the loop to prevent the camera from damage by being Using MENU items (Shooting) dropped or submerged. Using MENU items (Viewing) Changing settings Viewing images on a TV Using with your computer Printing Back to top Troubleshooting Precautions/About this camera Contents list Copyright 2012 Sony Corporation... - Page 30 Do not carry the camera by holding the paint pen. The camera may drop. The supplied paint pen can be used only for this model. Using a pointed object other than the Precautions/About this camera supplied paint pen may cause a malfunction. Contents list Back to top Copyright 2012 Sony Corporation...
- Page 31 To operate the touch panel, press it lightly with your finger or the supplied paint pen. Pressing hard or using a pointed object other than the supplied paint pen could damage the touch panel. Back to top Copyright 2012 Sony Corporation...
-
Page 32: Customizing Menu Items
Cyber-shot User Guide Search Print Top page > Before Use > Customizing the desired items > Customizing the desired items Before Use Customizing the desired items Shooting Viewing You can customize the buttons to the desired shooting modes or MENU items and layout, so that you Using MENU items (Shooting) can conveniently locate frequently used buttons. - Page 33 Reducing the number of icons in the customization area Touch a MENU icon inside the customization area and drag it to the right. Note You cannot customize the MENU icon in Easy Mode. Back to top Copyright 2012 Sony Corporation...
-
Page 34: Using The Internal Memory
By making a USB connection between the camera and a computer, you can transfer data stored in the internal memory to a computer. However you cannot transfer data on a computer to the internal memory. Back to top Copyright 2012 Sony Corporation... - Page 35 (In-Camera Guide) is not available in Easy Mode. [Use this function] may not be available, depending on the selected functions. Depending on the selected functions, the operating guide and details may not be displayed. Back to top Copyright 2012 Sony Corporation...
-
Page 36: Shooting Still Images
Cyber-shot User Guide Search Print Top page > Shooting > Shooting still images > Shooting still images Before Use Shooting still images Shooting Viewing 1. Lower the lens cover to switch to shooting mode. Using MENU items (Shooting) Using MENU items (Viewing) Changing settings Viewing images on a TV Using with your computer... - Page 37 The subject is seen through glass. The subject is moving quickly. There is reflective light or shiny surfaces. The subject is backlit or there is a flashing light. Related Topic Viewing still images Still Image Size/Panorama Image Size Back to top Copyright 2012 Sony Corporation...
- Page 38 Cyber-shot User Guide Search Print Top page > Shooting > Shooting still images > Zoom (Still images) Before Use Zoom (Still images) Shooting Viewing Available zoom Using MENU items (Shooting) Zoom scale Enlarges images with the W/T (zoom) lever when shooting. The camera’s optical zoom function can Using MENU items (Viewing) enlarge images up to 4×.
- Page 39 [Still Image Size]: other than Zooming images without [16M] deterioration [Clear Image Zoom]: [Off] [Digital Zoom]: [Off] Shooting clear images using [Clear Image Zoom]: [On] [Clear Image Zoom] (close to the [Digital Zoom]: [Off] original image quality) [Clear Image Zoom]: [On] [Digital Zoom]: [On] When [Clear Image Zooming to the maximum zoom...
- Page 40 Back to top Copyright 2012 Sony Corporation...
-
Page 41: Shooting Movies
When movie recording is finished, you can restart recording by pressing the MOVIE button. Recording may stop to protect the camera depending on the ambient temperature. Related Topic Zoom (Movies) Shooting still images while recording a movie (Dual Rec) Movie Quality/Movie Size Movie format Back to top Copyright 2012 Sony Corporation... - Page 42 Cyber-shot User Guide Search Print Top page > Shooting > Shooting movies > Zoom (Movies) Before Use Zoom (Movies) Shooting Viewing Available zoom Using MENU items (Shooting) Zoom scale Enlarges images with the W/T (zoom) lever when shooting. The camera’s optical zoom function can Using MENU items (Viewing) enlarge images up to 4×.
- Page 43 Image size A: Optical zoom D: Zoom with maximum zoom scale 16× Movie mode 4× Notes [Clear Image Zoom] is not available while recording movies. The camera zooms slowly while recording movies. Back to top Copyright 2012 Sony Corporation...
-
Page 44: Shooting Still Images While Recording A Movie (Dual Rec)
When the camera is on [Standby] in movie mode, you cannot use [Smile Shutter]. If the memory card capacity is insufficient or 10 images have been shot, appears on the screen. This icon indicates that no more still images can be shot. Back to top Copyright 2012 Sony Corporation... - Page 45 (3D Sweep are compiled into a 3D image. [Details] Panorama) Allows you to shoot multiple images while the camera is moving; these images (Sweep Multi are compiled into a stereoscopic image. [Details] Angle) Back to top Copyright 2012 Sony Corporation...
- Page 46 Cyber-shot User Guide Search Print Top page > Shooting > Setting REC mode > Intelligent Auto Before Use Intelligent Auto Shooting Viewing On Scene Recognition Using MENU items (Shooting) Features of Auto shooting modes Allows you to shoot still images with the setting adjusted automatically. Using MENU items (Viewing) 1.
- Page 47 In [Superior Auto] mode, it takes some time to record an image, because the camera overlays the images. Related Topic Scene Recognition Functions not available in some REC modes MENU items not available in some REC modes Back to top Copyright 2012 Sony Corporation...
-
Page 48: Superior Auto
Cyber-shot User Guide Search Print Top page > Shooting > Setting REC mode > Superior Auto Before Use Superior Auto Shooting Viewing The camera combines Scene Recognition and high-quality image technology to automatically shoot the Using MENU items (Shooting) images with the optimal settings. 1. - Page 49 In low light conditions such as night scenes, set [Flash] to [Off] to achieve the optimal effect of the overlaid images. Related Topic Scene Recognition Functions not available in some REC modes MENU items not available in some REC modes Back to top Copyright 2012 Sony Corporation...
-
Page 50: Movie Mode
Using with your computer Printing Troubleshooting 3. Press the MOVIE (Movie) button. 4. Press the MOVIE button again to stop recording. Precautions/About this camera Contents list Related Topic MENU items not available in some REC modes Back to top Copyright 2012 Sony Corporation... -
Page 51: Program Auto
Using with your computer Printing Troubleshooting 3. Shoot with the shutter button. Precautions/About this camera Contents list Related Topic Functions not available in some REC modes MENU items not available in some REC modes Back to top Copyright 2012 Sony Corporation... -
Page 52: Isweep Panorama
Cyber-shot User Guide Search Print Top page > Shooting > Setting REC mode > iSweep Panorama Before Use iSweep Panorama Shooting Viewing Allows you to create a panoramic image from composite images. The camera also automatically detects Using MENU items (Shooting) people’s faces or moving subjects. - Page 53 There is too much camera shake. Related Topic Scrolling the panoramic images for display Still Image Size/Panorama Image Size Functions not available in some REC modes MENU items not available in some REC modes Back to top Copyright 2012 Sony Corporation...
-
Page 54: Underwater Isweep Panorama
Cyber-shot User Guide Search Print Top page > Shooting > Setting REC mode > Underwater iSweep Panorama Before Use Underwater iSweep Panorama Shooting Viewing When using Underwater iSweep Panorama, white balance is suited for shooting in underwater. Allows Using MENU items (Shooting) you to create a panoramic image from composite images. - Page 55 Related Topic Functions not available in some REC modes MENU items not available in some REC modes Back to top Copyright 2012 Sony Corporation...
-
Page 56: Background Defocus
Cyber-shot User Guide Search Print Top page > Shooting > Setting REC mode > Background Defocus Before Use Background Defocus Shooting Viewing Allows you to shoot an image with image processing so that the subject stands out from the background. Using MENU items (Shooting) Using MENU items (Viewing) Changing settings... - Page 57 Touch the area to adjust its focus. This function is not suited to underwater shooting. Related Topic Defocus Effect Tracking focus Functions not available in some REC modes MENU items not available in some REC modes Back to top Copyright 2012 Sony Corporation...
-
Page 58: Picture Effect
Cyber-shot User Guide Search Print Top page > Shooting > Setting REC mode > Picture Effect Before Use Picture Effect Shooting Viewing Allows you to shoot a still image with an original texture according to the desired effect. Using MENU items (Shooting) 1. - Page 59 Allows you to shoot soft, clear images with an emphasis on brightness. (Soft High-key) Related Topic HDR Painting effect Area of emphasis Color hue Extracted Color Functions not available in some REC modes MENU items not available in some REC modes Back to top Copyright 2012 Sony Corporation...
- Page 60 Cyber-shot User Guide Search Print Top page > Shooting > Setting REC mode > Scene Selection Before Use Scene Selection Shooting Viewing Allows you to shoot with preset settings according to the scene. Using MENU items (Shooting) 1. Set the camera to shooting mode. Using MENU items (Viewing) (REC Mode) (Scene Selection)
- Page 61 Allows you to shoot three images having different exposures to create a single image with a greater range of gradation. (Backlight Correction HDR) Allows you to shoot sharp images of people with the night view in the background without compromising the atmosphere. (Night Portrait) Allows you to shoot night scenes at far distance without losing the dark atmosphere of the surroundings.
- Page 62 Allows you to shoot scenes on the beach in bright and vivid colors even under the sunlight. (Beach) Allows you to record clear images preventing sunken colors in snowy scenes or other places where the whole screen appears white. (Snow) Allows you to record fireworks in all their splendor.
- Page 63 Some Scene Selection modes are available also in movie mode, but the selectable modes are limited. [Details] Related Topic Functions not available in some REC modes MENU items not available in some REC modes Back to top Copyright 2012 Sony Corporation...
-
Page 64: D Still Image
This function is not suited to underwater shooting. Related Topic Viewing 3D images on a 3D TV Functions not available in some REC modes MENU items not available in some REC modes Back to top Copyright 2012 Sony Corporation... -
Page 65: D Sweep Panorama
Cyber-shot User Guide Search Print Top page > Shooting > Setting REC mode > 3D Sweep Panorama Before Use 3D Sweep Panorama Shooting Viewing Multiple images are shot while the camera is moving, and these images are compiled into a 3D image. Using MENU items (Shooting) The recorded image can be played back on a 3D TV. - Page 66 There is too much camera shake. This function is not suited to underwater shooting. Related Topic Viewing 3D images on a 3D TV Functions not available in some REC modes MENU items not available in some REC modes Back to top Copyright 2012 Sony Corporation...
-
Page 67: Sweep Multi Angle
Cyber-shot User Guide Search Print Top page > Shooting > Setting REC mode > Sweep Multi Angle Before Use Sweep Multi Angle Shooting Viewing As you sweep the camera, the camera shoots multiple images, then compiles them into one Using MENU items (Shooting) stereoscopic image. - Page 68 Related Topic Viewing images shot in Sweep Multi Angle mode stereoscopically Viewing 3D images on a 3D TV Functions not available in some REC modes MENU items not available in some REC modes Back to top Copyright 2012 Sony Corporation...
-
Page 69: Functions Not Available In Some Rec Modes
Cyber-shot User Guide Search Print Top page > Shooting > Setting REC mode > Functions not available in some REC modes Before Use Functions not available in some REC modes Shooting Viewing Functions available in REC modes Using MENU items (Shooting) Functions available in Scene Selection Functions available in Picture Effect Using MENU items (Viewing) - Page 70 Functions available in Picture Effect Self- Close Face Tracking Flash Timer Focus Detection focus — (HDR Painting) (Rich-tone — Monochrome) — — — (Miniature) — (Toy camera) — (Pop Color) — (Partial Color) — (Soft High-key) Back to top Copyright 2012 Sony Corporation...
-
Page 71: Tracking Focus
However, if the target of the tracking focus is a specified face, the camera keeps tracking on that face even if the face disappears from the screen. This function cannot be used with underwater shooting. Related Topic Face Detection Functions not available in some REC modes Back to top Copyright 2012 Sony Corporation... - Page 72 Use a sufficiently charged battery to register images. If a battery with a low charge is used to register images, it may not be possible to register all of the data or the data may be corrupted if the battery charge runs out. Back to top Copyright 2012 Sony Corporation...
-
Page 73: Playback Zoom
Drag up/down/right/left Changes the zoom position. Changes the zoom scale. Cancels playback zoom. To save enlarged images You can save an enlarged image by using the trimming function. Touch MENU [Retouch] [Trimming (Resize)]. Back to top Copyright 2012 Sony Corporation... -
Page 74: Wide Zoom
3. To cancel Wide Zoom, touch (Wide Zoom) again. Note Wide Zoom is not available for the following image files: Movies Panoramic images Images displayed in a burst group 16:9 images 3D Still Image Back to top Copyright 2012 Sony Corporation... -
Page 75: Viewing Burst Images
Cyber-shot User Guide Search Print Top page > Viewing > Viewing burst images > Viewing burst images Before Use Viewing burst images Shooting Viewing Tilt playback Using MENU items (Shooting) Unfold You can select the playback method for continuous (burst) shots when [View Mode] is set to [Date View] Using MENU items (Viewing) and [Display Cont. - Page 76 3. The display switches between single image display and thumbnail image display each time you touch the screen. 4. To cancel the display, touch Related Topic View Mode Display Cont. Shooting Group Back to top Copyright 2012 Sony Corporation...
-
Page 77: Button Action
Cyber-shot User Guide Search Print Top page > Viewing > Viewing movies > Viewing movies Before Use Viewing movies Shooting Viewing 1. Press the (Playback) button to switch to playback mode. Using MENU items (Shooting) 2. Select a movie with Using MENU items (Viewing) Changing settings Viewing images on a TV... - Page 78 The screen changes to the next/previous image when you touch the Chapter advance/Chapter rewind button in Date View setting. You may not be able to play back some movies using other cameras. Related Topic View Mode Back to top Copyright 2012 Sony Corporation...
- Page 79 Panoramic images recorded using another camera may not be scrolled correctly when being played back. Note A panoramic image recorded in [High Resolution] size requires a longer time to scroll than a normal size panoramic image. Related Topic Still Image Size/Panorama Image Size Back to top Copyright 2012 Sony Corporation...
-
Page 80: Viewing Images Shot In Sweep Multi Angle Mode Stereoscopically
To view images shot in Sweep Multi Angle mode stereoscopically, tilt the camera to the right or left as illustrated, keeping the camera horizontal. Note 3D images shot in [3D Still Image], [3D Sweep Panorama] mode cannot be played back stereoscopically on the camera. Back to top Copyright 2012 Sony Corporation... - Page 81 The 4 menu items usually displayed under MENU will not appear on the MENU screen. Viewing images on a TV Using with your computer Printing Troubleshooting Precautions/About this camera 3. Touch MENU Contents list desired mode Back to top Copyright 2012 Sony Corporation...
-
Page 82: Movie Shooting Scene
Cyber-shot User Guide Search Print Top page > Using MENU items (Shooting) > MENU items (Shooting) > Movie shooting scene Before Use Movie shooting scene Shooting Viewing On Scene Recognition Using MENU items (Shooting) Allows you to shoot with preset settings according to the scene when the camera is in movie mode. Using MENU items (Viewing) (REC Mode) (Movie Mode) - Page 83 Copyright 2012 Sony Corporation...
-
Page 84: Easy Mode
Cyber-shot User Guide Search Print Top page > Using MENU items (Shooting) > MENU items (Shooting) > Easy Mode Before Use Easy Mode Shooting Viewing On Scene Recognition Using MENU items (Shooting) Shooting functions available in Easy Mode (Shooting) Allows you to shoot still images using the minimum necessary functions. Using MENU items (Viewing) The text size increases and indicators become easier to see. - Page 85 Mode Related Topic Scene Recognition MENU items not available in some REC modes Back to top Copyright 2012 Sony Corporation...
-
Page 86: For Movies
Cyber-shot User Guide Search Print Top page > Using MENU items (Shooting) > MENU items (Shooting) > Scene Selection Before Use Scene Selection Shooting Viewing Allows you to shoot with preset settings according to the scene. Using MENU items (Shooting) For still images: Using MENU items (Viewing) 1. - Page 87 Allows you to shoot indoor shots without using the flash to reduce subject blur. (Anti Motion Blur)* Allows easy shooting of distant scenes by focusing in the distance. Shoots vivid blue sky and flora colors. (Landscape) Allows you to shoot three images having different exposures to create a single image with a greater range of gradation.
- Page 88 For still images, allows you to shoot images without a flash under low light conditions, reducing blur. For movies, allows you to record low light scenes with more brightness. (High Sensitivity) Allows you to shoot food arrangements in delicious and bright color. (Gourmet)* Allows you to shoot images of your pet with the best settings.
- Page 89 To prevent blurring, the use of a tripod is recommended. Related Topic Functions not available in some REC modes MENU items not available in some REC modes Back to top Copyright 2012 Sony Corporation...
- Page 90 Cyber-shot User Guide Search Print Top page > Using MENU items (Shooting) > MENU items (Shooting) > Flash Before Use Flash Shooting Viewing (Flash) desired mode Using MENU items (Shooting) If the button is not displayed on the left side of the screen, touch MENU. Using MENU items (Viewing) Changing settings Viewing images on a TV...
- Page 91 Back to top Copyright 2012 Sony Corporation...
- Page 92 Cyber-shot User Guide Search Print Top page > Using MENU items (Shooting) > MENU items (Shooting) > Self-Timer Before Use Self-Timer Shooting Viewing Automatic shooting with Self-portrait timer Using MENU items (Shooting) (Self-Timer) desired mode Using MENU items (Viewing) If the button is not displayed on the left side of the screen, touch MENU. Changing settings Viewing images on a TV Using with your computer...
- Page 93 You can also shoot an image by pressing the shutter button during this operation. Related Topic Functions not available in some REC modes MENU items not available in some REC modes Back to top Copyright 2012 Sony Corporation...
-
Page 94: Defocus Effect
Changing settings Viewing images on a TV Using with your computer Printing Troubleshooting Precautions/About this camera (Low) Contents list Select a weak, medium or strong Background Defocus effect. (Mid) (High) Related Topic Background Defocus Back to top Copyright 2012 Sony Corporation... - Page 95 For prints up to 10×15 cm size Note The number of images you can shoot in Dual Rec mode varies depending on the still image size. Related Topic MENU items not available in some REC modes Back to top Copyright 2012 Sony Corporation...
- Page 96 Cyber-shot User Guide Search Print Top page > Using MENU items (Shooting) > MENU items (Shooting) > Still Image Size/Panorama Image Size Before Use Shooting Still Image Size/Panorama Image Size Viewing Image size when shooting still images Using MENU items (Shooting) 3D Still Image Size Using MENU items (Viewing) Image size in Easy Mode...
- Page 97 3D Still Image Size (Still Image Size) desired size (4608×3456) For prints up to A3+ size (4608×2592) For viewing on a high-definition TV and printing up to A3 size Note When you print still images recorded at a 16:9 aspect ratio or panoramic images, both edges may be cut off.
- Page 98 “PlayMemories Home”. “PlayMemories Home” allows you to resize panoramic images recorded in [High Resolution] to 50%, etc. Related Topic MENU items not available in some REC modes Back to top Copyright 2012 Sony Corporation...
- Page 99 Cyber-shot User Guide Search Print Top page > Using MENU items (Shooting) > MENU items (Shooting) > Movie Quality/Movie Size Before Use Movie Quality/Movie Size Shooting Viewing The larger the size of the movie image, the higher the image quality. The higher the amount of data Using MENU items (Shooting) used per second (average bit-rate), the higher the image quality.
- Page 100 When you create AVCHD discs from movies recorded in [AVC HD 24M (FX)], it will take time as the image quality must be converted. To save [AVC HD 24M (FX)] movies without converting the image quality, use Blu-ray discs. Related Topic MENU items not available in some REC modes Back to top Copyright 2012 Sony Corporation...
- Page 101 When the battery level is low, or when the internal memory or a memory card is full, the burst stops. In slow shutter speed conditions, the burst of shots per second may be decreased. Related Topic MENU items not available in some REC modes Back to top Copyright 2012 Sony Corporation...
- Page 102 This mode is cancelled if you turn off the power or switch the REC mode to another one. The flash mode settings you can use in this mode are [On] or [Off] only. The focus speed becomes slower. Related Topic MENU items not available in some REC modes Back to top Copyright 2012 Sony Corporation...
-
Page 103: Hdr Painting Effect
Using with your computer Printing Troubleshooting Precautions/About this camera (Low) Contents list Select weak, medium or strong effects that emphasize color, etc. (Medium) (High) Related Topic Picture Effect MENU items not available in some REC modes Back to top Copyright 2012 Sony Corporation... -
Page 104: Area Of Emphasis
Sets area of emphasis to the left. (Left) Sets area of emphasis in the middle. (Middle) Sets area of emphasis to the right. (Right) Related Topic Picture Effect MENU items not available in some REC modes Back to top Copyright 2012 Sony Corporation... -
Page 105: Color Hue
(Magenta hue) Adds a magenta filter-like hue and darkens the surroundings. Note It is recommended that you shoot a test image in advance for some subjects. Related Topic Picture Effect MENU items not available in some REC modes Back to top Copyright 2012 Sony Corporation... -
Page 106: Extracted Color
Extracts yellow only. (Yellow) Note When [Partial Color] is selected, images may not retain the selected color, depending on the subject. Related Topic Picture Effect MENU items not available in some REC modes Back to top Copyright 2012 Sony Corporation... - Page 107 If you shoot a subject in extremely bright or dark conditions, or when you use the flash, the exposure adjustment may not be effective. Related Topic MENU items not available in some REC modes Back to top Copyright 2012 Sony Corporation...
- Page 109 Cyber-shot User Guide Search Print Top page > Using MENU items (Shooting) > MENU items (Shooting) > ISO Before Use Shooting Viewing Adjusts the luminous sensitivity when the camera is set to Program Auto or [Underwater] is selected in Using MENU items (Shooting) Scene Selection.
- Page 110 Back to top Copyright 2012 Sony Corporation...
-
Page 111: White Balance
Cyber-shot User Guide Search Print Top page > Using MENU items (Shooting) > MENU items (Shooting) > White Balance Before Use White Balance Shooting Viewing To capture the basic white color in One Push Set mode Using MENU items (Shooting) Adjusts color tones according to the surrounding light conditions. - Page 112 Effects of lighting conditions The apparent color of the subject is affected by the lighting conditions. The color tones are adjusted automatically, but you can adjust color tones manually using the White Balance function. Daylight (White as Standard) Cloudy (Bluish) Fluorescent (Green-tinged) Incandescent (Reddish) Notes...
- Page 113 When flash mode is set to [On] or [Slow Synchro], the white balance is adjusted to the condition with the flash emitting. Related Topic MENU items not available in some REC modes Back to top Copyright 2012 Sony Corporation...
-
Page 114: Underwater White Balance
Depending on the color of the water, Underwater White Balance may not work correctly even though you select [Underwater 1] or [Underwater 2]. Related Topic MENU items not available in some REC modes Back to top Copyright 2012 Sony Corporation... - Page 115 Cyber-shot User Guide Search Print Top page > Using MENU items (Shooting) > MENU items (Shooting) > Focus Before Use Focus Shooting Viewing Focusing on subjects near the edge of the screen Using MENU items (Shooting) You can change the focus method. Use the menu when it is difficult to get the proper focus in auto focus mode.
-
Page 116: Focusing On Subjects Near The Edge Of The Screen
As long as you do not press the shutter button fully down, you can retry the procedure as many times as necessary. Related Topic Tracking focus MENU items not available in some REC modes Back to top Copyright 2012 Sony Corporation... -
Page 117: Metering Mode
(Spot metering). This function is useful when the subject is backlit or when there is strong contrast between the subject and the background. (Spot) Note [Spot] cannot be selected when recording movies. Related Topic MENU items not available in some REC modes Back to top Copyright 2012 Sony Corporation... -
Page 118: Scene Recognition
Cyber-shot User Guide Search Print Top page > Using MENU items (Shooting) > MENU items (Shooting) > Scene Recognition Before Use Scene Recognition Shooting Viewing Advanced mode Using MENU items (Shooting) The camera automatically detects shooting conditions, and then takes the shot. When a motion is detected, the ISO sensitivity is increased according to the movement to reduce subject blur. -
Page 119: Advanced Mode
If the eyes are closed in both images, the message “Blinked eye detected” is displayed. * except when the flash strobes/when the shutter speed is slow. Related Topic MENU items not available in some REC modes Back to top Copyright 2012 Sony Corporation... -
Page 120: Soft Skin Effect
Adds a weak, medium or strong Soft Skin Effect. (Mid) (High) Note The [Soft Skin Effect] may not be visible depending on the subject. Related Topic MENU items not available in some REC modes Back to top Copyright 2012 Sony Corporation... -
Page 121: Smile Shutter
Cyber-shot User Guide Search Print Top page > Using MENU items (Shooting) > MENU items (Shooting) > Smile Shutter Before Use Smile Shutter Shooting Viewing When the camera detects a smile, the shutter is released automatically. Using MENU items (Shooting) 1. - Page 122 Smiles may not be detected correctly depending on the conditions. You cannot use Smile Shutter when you use zoom functions other than optical zoom. Related Topic Smile Detection Sensitivity MENU items not available in some REC modes Back to top Copyright 2012 Sony Corporation...
-
Page 123: Smile Detection Sensitivity
Detects a big, normal or slight smile. (Normal Smile) Contents list (Slight Smile) Note Smiles may not be detected correctly depending on the conditions. Related Topic Smile Shutter MENU items not available in some REC modes Back to top Copyright 2012 Sony Corporation... -
Page 124: Face Detection
Cyber-shot User Guide Search Print Top page > Using MENU items (Shooting) > MENU items (Shooting) > Face Detection Before Use Face Detection Shooting Viewing When the Face Detection function is used, the camera detects the faces of your subjects and adjusts the Using MENU items (Shooting) focus, flash, exposure, white balance and red-eye reduction settings automatically. - Page 125 Tracking focus MENU items not available in some REC modes Back to top Copyright 2012 Sony Corporation...
-
Page 126: Anti Blink
When the Anti Blink function is set to [Auto] but only images with the subject’s eyes closed are recorded, the message “Blinked eye detected” is displayed on the screen. Shoot again as necessary. Related Topic Scene Selection MENU items not available in some REC modes Back to top Copyright 2012 Sony Corporation... -
Page 127: Movie Steadyshot
Provides a more powerful SteadyShot effect. (Active) Contents list Note If you change the setting for [Movie SteadyShot], the angle of view will change. Related Topic Shooting movies MENU items not available in some REC modes Back to top Copyright 2012 Sony Corporation... - Page 128 Search the function and meaning of displayed icons. Troubleshooting Search common problems and their solution. Operation Guide Search functions according to your needs. Keyword Search functions by keywords. History View the last 10 items displayed in [In-Camera Guide]. Back to top Copyright 2012 Sony Corporation...
- Page 129 Cyber-shot User Guide Search Print Top page > Using MENU items (Shooting) > Shooting MENU list > MENU items not available in some REC modes Before Use Shooting MENU items not available in some REC modes Viewing MENU items not available in Scene Selection/Picture Effect mode Using MENU items (Shooting) In the table below, a checkmark indicates settings that can be changed, while indicates settings that...
- Page 130 Smile Shutter Smile Detection Sensitivity Face Detection Anti Blink Movie SteadyShot In-Camera Guide (Settings) MENU items not available in Scene Selection/Picture Effect mode The icons below indicate the available modes. Menu items (Still images) (Movies) Movie shooting scene Easy Mode Flash Self-Timer Defocus Effect...
- Page 131 (Soft Skin). *3 [Off] cannot be selected for [Face Detection] when Scene Selection is set to (Soft Skin) or (Soft Snap). Note The 4 menu items displayed under MENU differ according to the mode. Back to top Copyright 2012 Sony Corporation...
- Page 132 The 4 menu items usually displayed under MENU will not appear on the MENU screen. Viewing images on a TV Using with your computer Printing Troubleshooting Precautions/About this camera 3. Touch the MENU items desired mode Contents list Back to top Copyright 2012 Sony Corporation...
- Page 133 (if selected) with [Delete All Images]. MENU Select [Exit Easy Mode] [OK] to exit Easy Mode. Note When a memory card is inserted in the camera, [View Mode] is set to [Date View]. Back to top Copyright 2012 Sony Corporation...
- Page 134 3. Display images shot on a specific date at center of the screen by dragging right or left on the screen to select the date. Precautions/About this camera 4. Touch the center of image. Contents list Back to top Copyright 2012 Sony Corporation...
- Page 135 Drag the thumbnails of images for the selected date (A) up or down to change the page. Touch an Precautions/About this camera image to return to the single-image screen for that image. Contents list Note This function is not displayed when the internal memory is used. Back to top Copyright 2012 Sony Corporation...
-
Page 136: Image Index
3. Touch the screen and drag up or down to change the page. Precautions/About this camera Touch an image on the index screen to return to the single-image screen for that image. Contents list Related Topic Number of images in index Back to top Copyright 2012 Sony Corporation... -
Page 137: Continuous Playback
Cyber-shot User Guide Search Print Top page > Using MENU items (Viewing) > MENU items (Viewing) > Slideshow Before Use Slideshow Shooting Viewing Continuous Playback Using MENU items (Shooting) Slideshow with music Images are automatically played back in succession. Using MENU items (Viewing) 1. - Page 138 Playback Selection Selects the group of images to be shown. The setting is fixed to [Folder] when the internal memory is used to record images. Plays a slideshow of all the images in order. This Plays a slideshow of images with the currently selected date range when View Mode is Date [Date View].
- Page 139 You can transfer a desired music file from your CDs or MP3 files to the camera to play back during slideshow. To transfer music, install the “Music Transfer” software to your computer. Related Topic “Music Transfer” Back to top Copyright 2012 Sony Corporation...
- Page 140 Cyber-shot User Guide Search Print Top page > Using MENU items (Viewing) > MENU items (Viewing) > Delete Before Use Delete Shooting Viewing Allows you to select unwanted images for deletion. Using MENU items (Shooting) 1. Press the (Playback) button to switch to playback mode. Using MENU items (Viewing) (Delete) desired mode...
- Page 141 Back to top Copyright 2012 Sony Corporation...
-
Page 142: Send By Transferjet
Cyber-shot User Guide Search Print Top page > Using MENU items (Viewing) > MENU items (Viewing) > Send by TransferJet Before Use Send by TransferJet Shooting Viewing Receiving images using TransferJet Using MENU items (Shooting) Using separately sold TransferJet-compatible devices TransferJet is a close-up, wireless transfer technology that allows data to be transferred by closely Using MENU items (Viewing) aligning two products that you want to communicate with each other. - Page 143 If no image is displayed, touch MENU (Settings) (Main Settings) [LUN Setting] [Single]. While connected, data cannot be written to or deleted from the camera. Do not disconnect while importing images to “PlayMemories Home”. Related Topic TransferJet TransferJet standard Back to top Copyright 2012 Sony Corporation...
- Page 144 Cyber-shot User Guide Search Print Top page > Using MENU items (Viewing) > MENU items (Viewing) > Paint Before Use Paint Shooting Viewing Paints or adds stamps to a still image and saves it as a new file. Using MENU items (Shooting) The original image is retained.
- Page 145 Clear all Erases all painting. Note You cannot paint or put stamps on the following images: Panoramic images 3D images Movies Images displayed in a burst group Back to top Copyright 2012 Sony Corporation...
- Page 146 Cyber-shot User Guide Search Print Top page > Using MENU items (Viewing) > MENU items (Viewing) > Retouch Before Use Retouch Shooting Viewing Retouches a recorded image and saves it as a new file. Using MENU items (Shooting) The original image is retained. 1.
- Page 147 Depending on the image, sufficient correction may not be applied and the image quality may deteriorate. Note You cannot retouch the following images: Panoramic images 3D images Movies Images displayed in a burst group Back to top Copyright 2012 Sony Corporation...
- Page 148 Setting to 3D Viewing mode easily You can set the camera to 3D Viewing mode by touching on the upper right side of the screen. Contents list Related Topic Viewing 3D images on a 3D TV Back to top Copyright 2012 Sony Corporation...
-
Page 149: View Mode
Use a sufficiently charged battery to register images. If a battery with a low charge is used to register images, it may not be possible to transfer all of the data or the data may be corrupted if the battery charge runs out. Back to top Copyright 2012 Sony Corporation... - Page 150 When Face Detection is not Image performed, the first image in the burst group is displayed as the main image. Only) Plays back all burst images one at a time. (Display All) Related Topic Viewing burst images Back to top Copyright 2012 Sony Corporation...
- Page 151 Releases all images in the date range or folder, or all AVCHD movies at (Remove All in This once. Folder) (Remove All AVCHD view files) Note When the internal memory is used to record images, still images are displayed in the Folder View. Back to top Copyright 2012 Sony Corporation...
- Page 152 (Print order) mark cannot be added to the following images: Movies Images in the internal memory You can add a (Print order) mark to a maximum 999 images. Related Topic Printing still images Back to top Copyright 2012 Sony Corporation...
- Page 153 Images displayed in a burst group You may not be able to rotate images shot with other cameras. When viewing images on a computer, the image rotation information may not be reflected depending on the software. Back to top Copyright 2012 Sony Corporation...
- Page 154 Movie playback: Touch the screen to display the operation buttons, touch and then touch to adjust the volume. Slideshow: Touch the screen to display the volume control screen, then touch to adjust the volume. Back to top Copyright 2012 Sony Corporation...
-
Page 155: Exposure Data
1. Press the (Playback) button to switch to playback mode. Printing 2. MENU (Exposure data) desired mode Troubleshooting Precautions/About this camera Contents list (On) Displays/Does not display the exposure data on the screen. (Off) Back to top Copyright 2012 Sony Corporation... - Page 156 Viewing images on a TV Using with your computer Printing Troubleshooting 3. MENU (Number of images in index) desired mode Precautions/About this camera Contents list (12-up) Displays 12-up images. (28-up) Displays 28-up images. Back to top Copyright 2012 Sony Corporation...
- Page 157 Search the function and meaning of displayed icons. Troubleshooting Search common problems and their solution. Operation Guide Search functions according to your needs. Keyword Search functions by keywords. History View the last 10 items displayed in [In-Camera Guide]. Back to top Copyright 2012 Sony Corporation...
- Page 158 Cyber-shot User Guide Search Print Top page > Using MENU items (Viewing) > Playback MENU list > MENU items that cannot be set according to View Mode Before Use Shooting MENU items that cannot be set according to View Mode Viewing Using MENU items (Shooting) In the table below, a checkmark indicates a user-changeable function, while —...
- Page 159 Back to top Copyright 2012 Sony Corporation...
-
Page 160: Changing Camera Settings
[Shooting Settings] appears only when settings have been entered from shooting mode. [Memory Card Tool] appears only when a memory card is inserted in the camera, while [Internal Memory Tool] appears only when a memory card is not inserted. Back to top Copyright 2012 Sony Corporation... -
Page 161: Movie Format
MP4 (AVC) movies are recorded. Sets the recording method to MP4, which is suitable for WEB uploads and e-mail attachments. No discs can be created from MP4 movies, even if you use the software “PlayMemories Home.” Related Topic AVCHD format Back to top Copyright 2012 Sony Corporation... - Page 162 AF operates with priority on subjects located near the center of the frame. The AF illuminator emits very bright light. Although there is no health hazard, do not look directly into the AF illuminator emitter at close range. Back to top Copyright 2012 Sony Corporation...
-
Page 163: Grid Line
Viewing images on a TV Using with your computer Printing Troubleshooting Precautions/About this camera On Displays the grid lines. The grid lines are not recorded. Off Does not display the grid lines. Contents list Back to top Copyright 2012 Sony Corporation... -
Page 164: Clear Image Zoom
Cyber-shot User Guide Search Print Top page > Changing settings > Shooting Settings > Clear Image Zoom Before Use Clear Image Zoom Shooting Viewing Total zoom scale when [Clear Image Zoom] is selected (including 4× optical zoom) Using MENU items (Shooting) [Clear Image Zoom] allows you to enlarge the image with close to the original image quality when shooting still images. - Page 165 Approx. 57× 16:9(12M) Approx. 8× 16:9(2M) Approx. 19× Back to top Copyright 2012 Sony Corporation...
-
Page 166: Digital Zoom
When [Self-Timer] is set to [Self-portrait One Person] or [Self-portrait Two People]. When (Backlight Correction HDR) mode is selected in Scene Selection. The Face Detection function does not operate in the range of [Digital Zoom]. Back to top Copyright 2012 Sony Corporation... -
Page 167: Wind Noise Reduct
Reduces/Does not reduce wind noise. Contents list Note If [Wind Noise Reduct.] is set to [On] even though the wind is not blowing strongly, the recorded sounds other than the wind may be hard to hear. Back to top Copyright 2012 Sony Corporation... - Page 168 Using with your computer Printing 1. Set the camera to shooting mode. Troubleshooting 2. MENU (Settings) (Shooting Settings) [Scene Recog. Guide] desired mode Precautions/About this camera Contents list Displays/Does not display the Scene Recognition Guide. Back to top Copyright 2012 Sony Corporation...
-
Page 169: Red Eye Reduction
Cyber-shot User Guide Search Print Top page > Changing settings > Shooting Settings > Red Eye Reduction Before Use Red Eye Reduction Shooting Viewing The flash strobes two or more times before shooting to reduce the red-eye phenomenon when using the Using MENU items (Shooting) flash. - Page 170 (Pet) or (Fireworks) mode is selected in Scene Selection. When Smile Shutter function is activated. Back to top Copyright 2012 Sony Corporation...
-
Page 171: Blink Alert
2. MENU (Settings) (Shooting Settings) [Blink Alert] desired mode Changing settings Viewing images on a TV Using with your computer Printing Troubleshooting Precautions/About this camera Auto Contents list Displays/hides the “Blinked eye detected” message. Back to top Copyright 2012 Sony Corporation... -
Page 172: Write Date
If you shot images with the date once, you cannot delete the date from the images later. The dates are doubly printed, if you set the camera to superimpose the dates when printing. The recorded time of the image cannot be superimposed on the image. Back to top Copyright 2012 Sony Corporation... - Page 173 Shutter Turns on the shutter sound when you press the shutter button. Precautions/About this camera Turns on the beep/shutter sound when you operate the touch panel/press the shutter button. Contents list Turns off the beep/shutter sound. Back to top Copyright 2012 Sony Corporation...
-
Page 174: Panel Brightness
The screen grows dark if you do not operate the camera while the power is on. When the high-temperature indicator ( ) is displayed, the screen may grow dark regardless of the settings. [Details] Back to top Copyright 2012 Sony Corporation... -
Page 175: Language Setting
Using MENU items (Shooting) 1. MENU (Settings) (Main Settings) [Language Setting] Using MENU items (Viewing) Changing settings Viewing images on a TV Using with your computer Printing Troubleshooting Back to top Precautions/About this camera Contents list Copyright 2012 Sony Corporation... -
Page 176: Display Color
Using MENU items (Viewing) Changing settings Viewing images on a TV Using with your computer Printing Troubleshooting Black Precautions/About this camera Sets the background color of the screen. White Contents list Pink Back to top Copyright 2012 Sony Corporation... -
Page 177: Demo Mode
During a demonstration, if the number of images saved in the internal memory increases, the camera may automatically delete the images. It is recommended to make a backup copy of the images on the internal memory before a demonstration. Back to top Copyright 2012 Sony Corporation... - Page 178 Using MENU items (Viewing) Changing settings Viewing images on a TV Using with your computer Printing Troubleshooting Note Be sure not to remove the battery pack while initializing. Precautions/About this camera Contents list Back to top Copyright 2012 Sony Corporation...
-
Page 179: Ctrl For Hdmi
You can perform the operation of the camera with the remote controller of your TV by connecting your camera to a “BRAVIA” Sync-compatible TV. Related Topic Viewing an image on a “BRAVIA” Sync-compatible TV Back to top Copyright 2012 Sony Corporation... - Page 180 Objects cannot be brought into focus by touching the screen. Some functions are limited, and the icon positions on the screen change. When [Housing] is set to [On], [View Mode] is set to [Date View]. Back to top Copyright 2012 Sony Corporation...
-
Page 181: Usb Connect Setting
If Device Stage* does not appear when connecting the camera to a Windows 7 computer, set [USB Connect Setting] to [Auto]. * Device stage is a manageable menu (Windows 7-specific function) for camera connection, etc. Back to top Copyright 2012 Sony Corporation... -
Page 182: Usb Power Supply
On The power is supplied when connected using the multi-use terminal USB cable. Disables USB power supplied function even if you connect the camera to a device such as a Contents list computer using the multi-use terminal USB cable. Back to top Copyright 2012 Sony Corporation... -
Page 183: Lun Setting
Note Set [LUN Setting] to [Multi] when installing “PlayMemories Home.” Back to top Copyright 2012 Sony Corporation... -
Page 184: Download Music
Printing 2. Make a USB connection between the camera and a computer, then start “Music Transfer.” Troubleshooting 3. Follow the instructions on the screen to change music files. Precautions/About this camera Contents list Back to top Copyright 2012 Sony Corporation... -
Page 185: Empty Music
1. MENU (Settings) (Main Settings) [Empty Music] [OK] Using MENU items (Viewing) Changing settings Viewing images on a TV Using with your computer Printing Troubleshooting Related Topic Precautions/About this camera “Music Transfer” Contents list Back to top Copyright 2012 Sony Corporation... - Page 186 Cyber-shot User Guide Search Print Top page > Changing settings > Main Settings > TransferJet Before Use TransferJet Shooting Viewing You can select TransferJet communication settings. TransferJet is a close-up, wireless transfer Using MENU items (Shooting) technology that allows data to be transferred by closely aligning two products that you want to communicate with each other.
- Page 187 Depending on the country or region, if you use the TransferJet function, you may be liable due to local restrictions on transmission of electromagnetic waves. Related Topic Send by TransferJet TransferJet standard Back to top Copyright 2012 Sony Corporation...
- Page 188 Cyber-shot User Guide Search Print Top page > Changing settings > Main Settings > Eye-Fi Before Use Eye-Fi Shooting Viewing Transferring image data using the Eye-Fi card Using MENU items (Shooting) Sets whether to use the upload function of an Eye-Fi card (commercially available), when you use the Eye-Fi card with this camera.
- Page 189 Memory Mode.” Make sure that Eye-Fi cards that you insert into this product have “Endless Memory Mode” turned off. For details on setting “Endless Memory Mode”, refer to the operating instructions supplied with the Eye-Fi card. Back to top Copyright 2012 Sony Corporation...
-
Page 190: Power Save
Does not use the Auto power-off function. Note The camera does not enter Power Save mode under conditions such as during a slideshow, during movie playback or when the camera is connected to a TV or a computer. Back to top Copyright 2012 Sony Corporation... - Page 191 Displays the software version installed on this camera. Using MENU items (Shooting) 1. MENU (Settings) (Main Settings) [Version] Using MENU items (Viewing) Changing settings Viewing images on a TV Using with your computer Printing Troubleshooting Back to top Precautions/About this camera Contents list Copyright 2012 Sony Corporation...
- Page 192 (Internal Memory Tool) [Format] Viewing images on a TV [OK] Using with your computer Printing Troubleshooting Precautions/About this camera Contents list Note Note that formatting permanently erases all data including even protected images. Back to top Copyright 2012 Sony Corporation...
- Page 193 When you insert a memory card that was used with other equipment into the camera and shoot images, a new folder may be automatically created. Up to 4,000 images can be stored in one folder. When the folder capacity is exceeded, a new folder is automatically created. Back to top Copyright 2012 Sony Corporation...
- Page 194 This item is not displayed when the internal memory is used to record images. You cannot select a folder with a number that has only “ MSDCF” or “ ANV01” as a recording folder. You cannot move recorded images to another folder. Back to top Copyright 2012 Sony Corporation...
- Page 195 If a folder contains protected images or files that cannot be played back by the camera, images other than these images are deleted and the folder will remain. Back to top Copyright 2012 Sony Corporation...
- Page 196 ([Format] in [Internal Memory Tool]). The data will be copied to the recording folder that is currently being used, with a number one higher than the largest data number in that folder. [Details] Back to top Copyright 2012 Sony Corporation...
-
Page 197: File Number
Contents list Starts from 0001 each time the folder is changed. (When the recording folder contains a Reset file, a number one higher than the largest number is assigned.) Back to top Copyright 2012 Sony Corporation... -
Page 198: Area Setting
Destination You use the camera set to the time at your destination. Set the destination area. 2. Touch the [Destination] area. 3. Select the area using 4. Touch Daylight Savings icon (A), then select Daylight Savings On/Off. 5. Touch [OK]. Back to top Copyright 2012 Sony Corporation... - Page 199 You can select the date and time display format. Precautions/About this camera Summer Time/Daylight Savings You can select Daylight Savings [On]/[Off]. Date & Time You can set the date and time. Contents list Back to top Copyright 2012 Sony Corporation...
- Page 200 “PhotoTV HD” allows for a highly-detailed, photo-like expression of subtle textures and colors. When the camera is connected to a Sony TV compatible with Video A mode using an HDMI Cable, your TV is automatically set to the picture quality suitable for still images. When the setting of the TV is set to Video, the picture quality is set to that suitable for movies.
- Page 201 TV are connected by an HDMI Cable (sold separately). Be sure to open the HDMI connector cover wide enough when connecting an HDMI cable to the camera. Related Topic Viewing 3D images on a 3D TV Back to top Copyright 2012 Sony Corporation...
-
Page 202: Menu Function
Cyber-shot User Guide Search Print Top page > Viewing images on a TV > Viewing an image on a “BRAVIA” Sync-compatible TV > Viewing an image on a “BRAVIA” Sync-compatible TV Before Use Shooting Viewing an image on a “BRAVIA” Sync-compatible TV Viewing Using MENU items (Shooting) When you use a TV that has “BRAVIA”... - Page 203 When the camera is in Easy Mode, SYNC MENU does not appear on the TV. Be sure to open the HDMI connector cover wide enough when connecting an HDMI cable to the camera. Back to top Copyright 2012 Sony Corporation...
- Page 204 3. Turn on the TV and set the input. 4. Press the (Playback) button to turn on the camera. Images shot with the camera appear on the TV. Touch displayed on the screen of this camera to select the desired image. Back to top Copyright 2012 Sony Corporation...
-
Page 205: Viewing 3D Images On A 3D Tv
Cyber-shot User Guide Search Print Top page > Viewing images on a TV > Viewing 3D images on a 3D TV > Viewing 3D images on a 3D Before Use Shooting Viewing 3D images on a 3D TV Viewing Using MENU items (Shooting) You can view 3D images recorded on the camera in 3D format by connecting the camera to a 3D TV using an HDMI Cable (sold separately). - Page 206 Be sure to open the HDMI connector cover wide enough when connecting an HDMI cable to the camera. Related Topic 3D Viewing Viewing an image on an HD TV using the HDMI Cable (sold separately) Back to top Copyright 2012 Sony Corporation...
-
Page 207: Recommended Computer Environment
(high speed transfer), as the camera is compatible with Hi-Speed USB (USB 2.0). When your computer resumes activity from suspend or sleep mode, communication between the camera and your computer may not recover at the same time. Back to top Copyright 2012 Sony Corporation... - Page 208 “PlayMemories Home” functions, connect to the Internet and install the “Expanded Feature”. Note Mac does not support “PlayMemories Home.” Use the application bundled with the Mac to play back images. Back to top Copyright 2012 Sony Corporation...
- Page 209 “Expanded Feature.” For details on “PlayMemories Home,” see (PlayMemories Home Help Guide) or the following PlayMemories Home support page (English only): http://www.sony.co.jp/pmh-se/ Notes Log on as Administrator. Set MENU (Settings) (Main Settings) [LUN Setting] to [Multi].
- Page 210 Accessing to “PlayMemories Home Help Guide” (Windows) 1. Double-click (PlayMemories Home Help Guide) on the desktop. To start “PlayMemories Home Help Guide” from the Start menu, select [Start] [All Programs] [PlayMemories Home] [PlayMemories Home Help Guide]. Back to top Copyright 2012 Sony Corporation...
-
Page 211: Music Transfer
(Settings) (Main Settings) Troubleshooting [Download Music], and connect the camera to the computer. For other details, see the help in “Music Transfer.” Precautions/About this camera Contents list Related Topic Download Music Empty Music Back to top Copyright 2012 Sony Corporation... -
Page 212: Software For Mac
(Main Settings) [LUN Setting] to [Multi]. Changing settings Viewing images on a TV Note The available software varies depending on the area. Using with your computer Printing Back to top Troubleshooting Precautions/About this camera Contents list Copyright 2012 Sony Corporation... -
Page 213: Connecting The Camera To The Computer
When connecting the camera to a computer using the multi-use terminal USB cable, power feeding from the computer starts if [USB Power Supply] is set to [On]. ([On] is the default Precautions/About this camera setting.) Contents list Related Topic USB Connect Setting LUN Setting Back to top Copyright 2012 Sony Corporation... - Page 214 PC, it may destroy the image file or playback may become impossible. Do not delete or copy AVCHD movies on the camera’s memory card from a PC. Sony bears no responsibility for the result of operations of this type.
-
Page 215: Deleting The Usb Connection
Mac computer, and the camera is disconnected from the computer. The disconnect icon may not appear when you use a Windows 7 computer. In this case, you can disconnect the camera from the computer without following the above steps. Back to top Copyright 2012 Sony Corporation... -
Page 216: Selecting The Method For Creating A Disc Of Movies
High-definition You can play a high-definition image quality (HD) disc on AVCHD format image quality playback devices, such as a Sony Blu-ray disc player and a PlayStation 3. You (HD) (AVCHD cannot play the disc on ordinary DVD players. disc) -
Page 217: Creating A Disc With A Device Other Than A Computer
For details on how to create a disc, refer to the operating instructions of the device you use. If you create a disc using Sony DVDirect (DVD Writer), use the memory card slot of the DVD Writer or connect the DVD Writer via USB connection to transfer the data. -
Page 218: Table Of Contents
When you create AVCHD discs from movies recorded in [AVC HD 24M (FX)], it will take time as the image quality must be converted. To save [AVC HD 24M (FX)] movies without converting the image quality, use Blu-ray discs. Disc creation may take time. Back to top Copyright 2012 Sony Corporation... - Page 219 Disc creation may take time due to converting the AVCHD movie to standard definition image quality (STD). The PC must be connected to the Internet the first time a DVD-Video disc is created. Back to top Copyright 2012 Sony Corporation...
- Page 220 To install, your PC must be connected to the Internet. Viewing images on a TV For detailed operations, see “PlayMemories Home Help Guide.” Using with your computer Printing Back to top Troubleshooting Precautions/About this camera Contents list Copyright 2012 Sony Corporation...
-
Page 221: Printing Still Images
Before you take image data to a shop, always copy (back up) your data. Precautions/About this camera Notes When you print still images shot in [16:9] mode, both edges may be cut off. Contents list You cannot print panoramic images depending on the printer. Back to top Copyright 2012 Sony Corporation... -
Page 222: If You Have Problems
Viewing images on a TV 3. Initialize the settings. [Details] 4. Consult your Sony dealer or local authorized Sony service facility. Using with your computer Be aware that by sending the camera for repair, you give consent that the contents of the internal Printing memory, music files may be checked. -
Page 223: The Power Turns Off Suddenly
This happens when you charge the battery pack in an extremely hot or cold location. Charge the battery pack within the proper charging temperature range of between 10°C to 30°C (50°F to 86°F). Back to top Copyright 2012 Sony Corporation... -
Page 224: Cannot Record Images
Cyber-shot User Guide Search Print Top page > Troubleshooting > Troubleshooting > Shooting still images/movies Before Use Shooting still images/movies Shooting Viewing Cannot record images. Using MENU items (Shooting) If images are recorded on the internal memory even when a memory card is inserted into the camera, Using MENU items (Viewing) make sure that the memory card is fully inserted into the camera. -
Page 225: Cannot Select The Face Detection Function
You cannot use the optical zoom in the following situations: Shooting in [iSweep Panorama] Shooting in [3D Sweep Panorama] Shooting in [Sweep Multi Angle] Shooting in [Underwater iSweep Panorama] The Close Focus mode is activated. You cannot use zoom functions other than optical zoom in the following situations: Shooting in [Background Defocus] Shooting in [Picture Effect] (Backlight Correction HDR) mode is selected in the Scene Selection... -
Page 226: The Image Colors Are Not Correct
There is no function for forcibly turning off macro shooting. In [Auto] mode, you can even shoot a distant subject. The date and time are not displayed on the screen. While shooting, the date and time are not displayed. They are displayed only during playback. The F value and shutter speed flash when you press and hold the shutter button halfway down. - Page 227 While you touch the upper right of the screen during shooting images, the buttons or icons are temporarily turned off. The buttons and icons will reappear when your fingers move away from the screen. Back to top Copyright 2012 Sony Corporation...
-
Page 228: Viewing Images
Check whether the connection is correct. [Details] The 3D images do not appear on the TV even though the camera is in [3D Viewing] mode. Check that the TV is set to display the 3D images. Back to top Copyright 2012 Sony Corporation... -
Page 229: Cannot Import Images
Cyber-shot User Guide Search Print Top page > Troubleshooting > Troubleshooting > Computers Before Use Computers Shooting Viewing Your computer does not recognize the camera. Using MENU items (Shooting) Set [USB Connect Setting] to [Mass Storage]. [Details] Using MENU items (Viewing) Use the multi-use terminal USB cable (supplied). - Page 230 Copyright 2012 Sony Corporation...
-
Page 231: Memory Card
Images are recorded on the internal memory even when a memory card is inserted into the camera. Troubleshooting Make sure that the memory card is fully inserted into the camera. Precautions/About this camera Contents list Back to top Copyright 2012 Sony Corporation... -
Page 232: Internal Memory
The memory card is full. Copy to a memory card with sufficient capacity. Using with your computer Printing Cannot copy the data on the memory card or the computer to the internal memory. Troubleshooting This feature is not available. Precautions/About this camera Contents list Back to top Copyright 2012 Sony Corporation... -
Page 233: Images Are Printed With Both Edges Cut Off
3D images displayed on the camera are MPO files, but the images to be printed are JPEG files, so in some cases, the images to be printed out will differ from the ones displayed on the screen. Back to top Copyright 2012 Sony Corporation... - Page 234 Using with your computer The paint pen operation reacts at inappropriate points. Printing Hold the paint pen straight up. Troubleshooting Avoid holding the point of the paint pen. Precautions/About this camera Back to top Contents list Copyright 2012 Sony Corporation...
-
Page 235: The Lens Gets Fogged
24 hours or more with the power left off. The date or time is incorrect. The Area Setting is set to a different location than your current location. Change the setting by MENU (Settings) [Clock Settings] [Area Setting]. Back to top Copyright 2012 Sony Corporation... - Page 236 A camera malfunction has occurred. Initialize the camera, then turn the power on again. [Details] E:94: There is a malfunction when writing or deleting data. Repair is required. Contact your Sony dealer or local authorized Sony service facility. Be prepared to give all numbers in the error code beginning from the E.
- Page 237 Cyber-shot User Guide Search Print Top page > Troubleshooting > Warning indicators and messages > Messages Before Use Messages Shooting Viewing If the following messages appear, follow the instructions. Using MENU items (Shooting) Using MENU items (Viewing) Changing settings The battery level is low. Charge the battery pack immediately. Depending on the conditions of use or the type of battery pack, the indicator may flash even though there are still 5 minutes to 10 minutes Viewing images on a TV of remaining battery time left.
- Page 238 This is a read- only memory card. The camera cannot record or delete images on this memory card. Writing to the memory card was not completed correctly Recover data Reinsert the memory card, and touch [OK] to recover the data. No images No images that can be played back have been recorded in the internal memory.
- Page 239 File protected Release the protection. [Details] Image size over limit You are playing back an image with size that cannot be played back on the camera. Unable to detect face for retouch You may not be able to retouch the image depending on the image. (Vibration warning indicator) Camera shake may occur due to insufficient light.
- Page 240 Either communication was cut off during image transfer, or transfer was cut off because device memory is full. Check the available memory capacity and try transferring data using TransferJet again. You may not be able to receive the image depending on the image. Back to top Copyright 2012 Sony Corporation...
-
Page 241: Situations This Camera Has Difficulty Handling
Cyber-shot User Guide Search Print Top page > Troubleshooting > Situations this camera has difficulty handling > Situations this camera has difficulty handling Before Use Shooting Situations this camera has difficulty handling Viewing Using MENU items (Shooting) The camera cannot take full advantage of some features under certain circumstances. When shooting under the following conditions, either recompose the shot or change the shooting mode, Using MENU items (Viewing) then shoot the images again. - Page 242 Panorama Underwater iSweep Panorama Superior Auto Many moving subjects, such as a school of fish Underwater iSweep Panorama When you cannot stand still to shoot images, such as when underwater Underwater iSweep Panorama Back to top Copyright 2012 Sony Corporation...
- Page 243 Cyber-shot User Guide Search Print Top page > Precautions/About this camera > Precautions > Precautions Before Use Precautions Shooting Viewing Internal memory and memory card back up Using MENU items (Shooting) On database files Do not use/store the camera in the following places Using MENU items (Viewing) On carrying Changing settings...
- Page 244 The camera conforms with DCF (Design rule for Camera File system) universal standard established by JEITA (Japan Electronics and Information Technology Industries Association). Sony does not guarantee that the camera will play back images recorded or edited with other equipment, or that other equipment will play back images recorded with the camera.
- Page 245 Be careful not to bump the lens, and be careful not to apply force to it. Back to top Copyright 2012 Sony Corporation...
-
Page 246: On The Internal Rechargeable Backup Battery
Charging method of the internal rechargeable backup battery Printing Insert a charged battery pack in the camera, and then leave the camera for 24 hours or more with the power off. Troubleshooting Precautions/About this camera Back to top Contents list Copyright 2012 Sony Corporation... - Page 247 Cyber-shot User Guide Search Print Top page > Precautions/About this camera > Precautions > Battery pack Before Use Battery pack Shooting Viewing On charging the battery pack Using MENU items (Shooting) Effective use of the battery pack Remaining battery charge Using MENU items (Viewing) How to store the battery pack Changing settings...
- Page 248 The battery life varies according to how it is stored and the operating conditions and environment in which each battery pack is used. Compatible battery pack The NP-BN (supplied) or NP-BN1 (sold separately) can be used with this model. Back to top Copyright 2012 Sony Corporation...
- Page 249 The supplied AC Adaptor is dedicated to this camera. Do not connect with other electronic devices. Using MENU items (Shooting) Doing so may cause a malfunction. Also, make sure to use a genuine Sony AC Adaptor. If the Power/charge lamp of the camera flashes during charging, remove the battery pack being Using MENU items (Viewing) charged, and then insert the same battery pack into the camera securely again.
- Page 250 Cyber-shot User Guide Search Print Top page > Precautions/About this camera > Precautions > Memory card Before Use Memory card Shooting Viewing Memory card Using MENU items (Shooting) Note on using the memory card adaptor (sold separately) “Memory Stick” media Using MENU items (Viewing) When using a “Memory Stick Duo”...
- Page 251 other storage location, then [Format]. A memory card formatted with a computer is not guaranteed to operate with the camera. Data read/write speeds differ depending on the combination of the memory card and the equipment used. Data may be corrupted in the following cases: When the memory card is removed or the camera is turned off during a read or write operation When the memory card is used in locations subject to static electricity or electrical noise We recommend backing up important data.
- Page 252 “M2” Adaptor as large as of Duo size, you might not be able to remove it from the camera. Do not leave the “Memory Stick Micro” media within the reach of small children. They might accidentally swallow it. Back to top Copyright 2012 Sony Corporation...
- Page 253 Do not touch the camera with any of the above on your hand. Precautions/About this camera Do not leave the camera in contact with rubber or vinyl for a long time. Contents list Back to top Copyright 2012 Sony Corporation...
-
Page 254: Number Of Still Images
When the number of remaining shootable images is greater than 9,999, the “>9999” indicator appears. When an image shot with other cameras is played back on this camera, the image may not appear in the actual image size. Back to top Copyright 2012 Sony Corporation... -
Page 255: Recordable Time Of Movies
When you record a fast-moving subject, the image is clearer but the recordable time is shorter because more memory is required for recording. The recordable time also varies depending on the shooting conditions, the subject or the image quality/size settings. Back to top Copyright 2012 Sony Corporation... -
Page 256: Using The Camera Abroad
Using MENU items (Viewing) Note An electronic voltage transformer is unnecessary and its use may cause a malfunction. Changing settings Back to top Viewing images on a TV Using with your computer Printing Troubleshooting Precautions/About this camera Contents list Copyright 2012 Sony Corporation... -
Page 257: On Tv Color Systems
Singapore, Slovak Republic, Spain, Sweden, Switzerland, Thailand, Turkey, United Kingdom, Viet Nam, Troubleshooting etc. Precautions/About this camera PAL-M system Contents list Brazil PAL-N system Argentina, Paraguay, Uruguay SECAM system Bulgaria, France, Greece, Guiana, Iran, Iraq, Monaco, Russia, Ukraine, etc. Back to top Copyright 2012 Sony Corporation... -
Page 258: Carl Zeiss Lens
Carl Zeiss in accordance with the quality standards of Carl Zeiss in Germany. Using MENU items (Viewing) Back to top Changing settings Viewing images on a TV Using with your computer Printing Troubleshooting Precautions/About this camera Contents list Copyright 2012 Sony Corporation... -
Page 259: Avchd Format
*2 720p specification A high definition specification which utilizes 720 effective scanning lines and the progressive system. *3 Data recorded in AVCHD format other than the above mentioned cannot be played on your camera. Back to top Copyright 2012 Sony Corporation... - Page 260 OBEX Push Client Use the “SCSI” communication protocol above when connecting to a TransferJet-compatible device Printing (sold separately). Or, use the “OBEX” communication protocol when sharing data between cameras. Troubleshooting Back to top Precautions/About this camera Contents list Copyright 2012 Sony Corporation...
- Page 261 We would prefer you do not contact us about the contents of source code. Licenses (in English) are recorded in the internal memory of your camera. Establish a Mass Storage connection between the camera and a computer to read licenses in the “PMHOME” - “LICENSE” folder. Back to top Copyright 2012 Sony Corporation...
- Page 262 Viewing images on a TV “Blu-ray Disc™” and “Blu-ray™” are trademarks of the Blu-ray Disc Association. “AVCHD” and “AVCHD” logotype are trademarks of Panasonic Corporation and Sony Corporation. Using with your computer Dolby and the double-D symbol are trademarks of Dolby Laboratories.
Need help?
Do you have a question about the Cyber-shot DSC-TX20 and is the answer not in the manual?
Questions and answers