Table of Contents
Advertisement
Quick Links
Advertisement
Table of Contents

Related Manuals for Asante GigaNIX 1000T


Summary of Contents for Asante GigaNIX 1000T
-
Page 3: Legal Notice
Inc. The use and purchase of this product does not convey a license under any patent rights, trademark rights, or any other intellectual property rights of Asanté Technologies, Inc. Asante, the Asanté logo, FriendlyNET and GigaNIX are trademarks or registered trademarks of of Asanté Technologies. All other brand names and products are trademarks or registered trademarks of their respective holders. -
Page 4: Table Of Contents
GigaNIX 1000T Table of Contents Table of Contents LEGAL NOTICE............................I TABLE OF CONTENTS ...........................II GIGANIX INTRODUCTION ........................1 GIGANIX INSTALLATION ON A G3 OR G4 PLATFORM ..............4 GIGANIX INSTALLATION ON A MAC OS X SERVER PLATFORM ..........15 GIGANIX INSTALLATION ON A WINDOWS NT/2000 PLATFORM...........22 GIGANIX WINDOWS NT HARDWARE INSTALLATION..............23... -
Page 5: Giganix Introduction
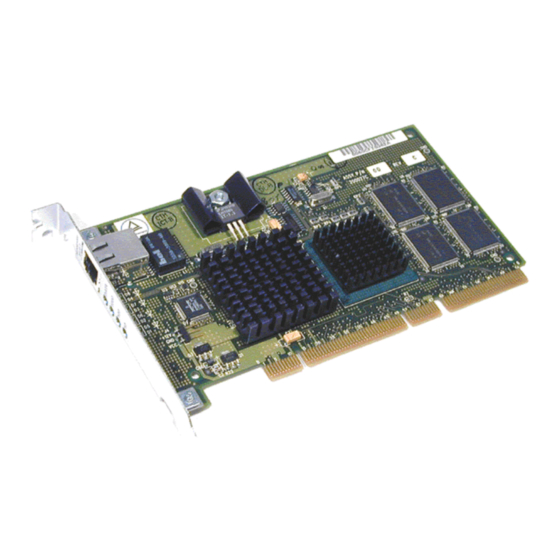
RISC processor _ 32/64 bit PCI Master and Slave interfaces _ Complies with all PCI mechanical and electrical requirements _ Seamless access to other GigaNIX Gigabit Ethernet equipped workstations using standard AppleShare operations GigaNIX 1000T User Manual Version 2.0... -
Page 6: Giganix Led Activity
10 Mbit Link Negotiated 10 Mbit Link Not Negotiated GIGANIX LED ACTIVITY Note: If all four LEDs remain on after power up or reset, the adapter driver software is either missing or improperly installed. Version 2.0 GigaNIX 1000T User Manual... -
Page 7: Systems Supported
3.75 inches Board Weight 9 ounces (Approx.) Environmental Operating temperature 0 to 70 C° Storage temperature -50 – 100 C° Relative Humidity 10 – 90% Operating Altitude 0 – 10,000 Ft. GIGANIX BOARD SPECIFICATIONS GigaNIX 1000T User Manual Version 2.0... -
Page 8: Giganix Installation On A G3 Or G4 Platform
If the machine does have PCI capabilities, insure there is at least one open PCI slot. Power down the Macintosh Workstation & peripherals. Turn off power to the Macintosh workstation and all attached peripheral devices, and remove the power cable. Version 2.0 GigaNIX 1000T User Manual... -
Page 9: Opening The G3/4 Case
Assess system power requirements —If you have one or more other PCI cards already in your Mac, you may want to take a moment to make sure that your system is able to provide necessary power to support the addition of the GigaNIX Interface card. GigaNIX 1000T User Manual Version 2.0... -
Page 10: Pci Card Installation In Motherboard Pci Slots
Close the cover of your Mac — Once the GigaNIX card has been successfully installed, close the G3/G4 system, reattach the power cable, and any other cables that were removed for the card installation procedure. Version 2.0 GigaNIX 1000T User Manual... -
Page 11: Diagram Showing Orientation For Utp Cat-5 Cable
Insert the Cat 5 cable into the UTP connector until self-locking tab clicks into position. Two types of cables are used when connecting the GigaNIX 1000T to the network.. A 1 to 1 cable is typically used to connect Ethernet adapters to Hubs and Switches, a Crossover cable may also be used to adapters to other adapters. -
Page 12: 1 To 1 Utp Cable Pinout
GigaNIX Installation Pinouts for both these cables are shown below. Pin Number Signal Transmit+ Transmit- Receive+ Unused Unused Receive- Unused Unused 1 TO 1 UTP CABLE PINOUT CROSSOVER UTP CABLE PIN OUT Version 2.0 GigaNIX 1000T User Manual... -
Page 13: Giganix Install Cd-Rom
Open GigaNIX CD-ROM — To start the installation, open the GigaNIX Installation CD-ROM by double clicking on the CD-ROM ICON. GIGANIX INSTALL CD-ROM Launch the GigaNIX Installer — Double click the GigaNIX 1000 installer to start the Installer. GigaNIX 1000T User Manual Version 2.0... - Page 14 Mac’s setup, this procedure will only have to be performed once. After that, your Mac will be able to locate and activate the interface automatically whenever you reset or power-up your machine. Version 2.0 GigaNIX 1000T User Manual...
-
Page 15: Typical Control Panel Display
Open the AppleTalk control, select the appropriate slot for the GigaNIX interface card using the Connect Via: option. Additional options may be selected based on the needs of the system, using options documented in the Apple network system administration guides and manuals. GigaNIX 1000T User Manual Version 2.0... -
Page 16: Appletalk Control Panel
Configuring GigaNIX 1000T for AppleTalk APPLETALK CONTROL PANEL Select Connect Via: window — To activate the GigaNIX interface, select the Connect Via: window and drag cursor to the external Ethernet interface in the appropriate slot and release. Close the panel to save your changes. -
Page 17: Typical Control Panel Display
GigaNIX interface card using the 'Connect Via: ' option. Additional options may be selected based on the needs of the system, using options documented in the Apple TCP/IP network system administration guides and manuals. TYPICAL CONTROL PANEL DISPLAY GigaNIX 1000T User Manual Version 2.0... -
Page 18: Tcp/Ip Control Panel
Configuring GigaNIX 1000T for TCP/IP Find and open the TCP/IP Control Panel — Scroll through the display of Control Panel items, if necessary, until you see the TCP/IP Icon. Clicking on it opens the TCP/IP Control Panel as shown in the display below: TCP/IP CONTROL PANEL Select Connect Via: window —... -
Page 19: Giganix Installation On A Mac Os X Server Platform
Follow each step below to complete the installation process: Insert the Asante_GigaNIX1000T install CD ROM into the CD ROM drive of your Mac OS X Server. GigaNIX 1000T User Manual Version 2.0... - Page 20 GigaNIX Mac OS X Server Driver Installation After the CD ROM mounts, double click on CD Icon. Double click on the giganix1000t.pkg icon, then select the asante_mac_osx _server item in Column two. Version 2.0 GigaNIX 1000T User Manual...
- Page 21 GigaNIX Mac OS X Server Driver Installation Double click on the osx item in column two. Double click on the menu item asante.pkg. GigaNIX 1000T User Manual Version 2.0...
- Page 22 GigaNIX Mac OS X Server Driver Installation Double click on the Install button. Version 2.0 GigaNIX 1000T User Manual...
- Page 23 GigaNIX Mac OS X Server Driver Installation Select the Install button to continue installation. GigaNIX 1000T User Manual Version 2.0...
- Page 24 GigaNIX Mac OS X Server Driver Installation The window above will be displayed during the actual installation. Version 2.0 GigaNIX 1000T User Manual...
- Page 25 GigaNIX Mac OS X Server Driver Installation NOTE: On successful completion of the GigaNIX adapter, the window above will be displayed. NOTE: If you are re-installing the GigaNIX, this message will be displayed. Select Continue button to re-install. GigaNIX 1000T User Manual Version 2.0...
-
Page 26: Giganix Installation On A Windows Nt/2000 Platform
One open 32/64 bit PCI slot 128 MB DRAM (Min.) Software: Operating System Microsoft Windows NT 4.0 (server or workstation) with Service Pack 4 or later Microsoft Windows 2000 WINDOWS NT SYSTEM REQUIREMENTS TABLE Version 2.0 GigaNIX 1000T User Manual... -
Page 27: Giganix Windows Nt Hardware Installation
Verify that the Windows NT system is upgraded with Service Pack 4 (or the latest available). Start your Windows NT system and log on. Note: You must have Network Administrator privileges to install the driver software! GigaNIX 1000T User Manual Version 2.0... - Page 28 GigaNIX Windows NT/2000 Driver Installation Open the Control Panel 4) In the Control Panel window, double click on the Network Icon: Version 2.0 GigaNIX 1000T User Manual...
- Page 29 When the Network Control Panel opens, select the “Adapters” tab. [2] GigaNIX PCI Adapter Asanté GigaNIX 1000TPC Adapter [Bus 2 Slot 6] To install the driver software for the GigaNIX driver, click the “Add” button. GigaNIX 1000T User Manual Version 2.0...
- Page 30 When the Select Network adapter window opens, click the “Have Disk” button. When prompted, insert the GigaNIX CD-ROM into your system’s CD-ROM drive. Type the path to the driver that matches your system and select “OK”. E:\Asante_NT_driver Version 2.0 GigaNIX 1000T User Manual...
- Page 31 The options under this tab are used for configuring basic adapter properties. Other tabs may be available for configuring optional properties (such as failover teaming and VLANs). Click on any tab to display its configurable options. GigaNIX 1000T User Manual Version 2.0...
- Page 32 When the system returns to proper operation, verify that the adapter port LEDs operate as described in the GigaNIX LED Activity Table in The GigaNIX Introduction chapter. GigaNIX installation on your Windows NT platform is now complete. Version 2.0 GigaNIX 1000T User Manual...
-
Page 33: Contacting Asanté
E-Mail Access: support@asante.com Send all technical queries to the above Technical support address. Email access is available to all accounts during product warranty period. sales@asante.com Send all sales related questions and comments to above address. GigaNIX 1000T User Manual Version 2.0...
Need help?
Do you have a question about the GigaNIX 1000T and is the answer not in the manual?
Questions and answers