Table of Contents
Advertisement
Quick Links
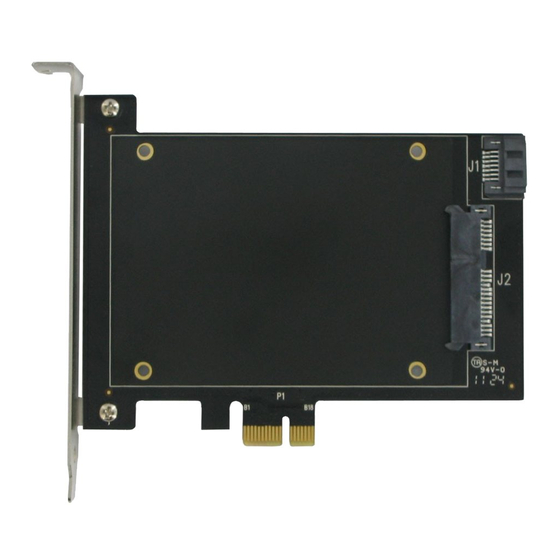
Velocity Solo x1 Quick Start Guide
Connecting your SSD to the
Velocity Solo Card
Slide your SSD onto
the SATA connector
on the Velocity Solo
Card. Use mounting
screws to secure the
drive in place.
NOTE: Windows XP users and those using the Velocity
Solo with a boot disk (i.e. with OS already installed)
Before connecting your SSD to the Velocity Solo, please refer
to the directions below for installation of Windows drivers.
Installing the Velocity Solo
in your desktop computer
Power-down the system and physically remove the power
1.
cord(s) from the system.
2.
Remove the cover from the system's chassis, following
instructions provided by the manufacturer.
3.
Select an available PCIe Gen 1 / Gen 2 (x1, x4, x8 or x16)
slot and insert the Velocity Solo card into the slot, as
shown in Figure 1.
4.
Hold the Velocity Solo card at the edges and press down
gently into place.
5.
Secure the Velocity Solo metal bracket to the system
chassis by tightening the slot screw.
6.
After the Velocity Solo is installed, replace the chassis
cover, reconnect the power cord(s) and boot the computer.
7.
Follow the directions below to complete your upgrade.
Figure 1. Installing the Velocity Solo
on PCIe Gen 1 / Gen 2 slot
SATA connector
IMPORTANT HANDLING INFORMATION
Use an ESD wrist strap or
touching a grounded bare metal surface
installing, and removing the Velocity Solo. Observe proper
ESD grounding techniques. Store your HDD or SSD in an
anti-static bag until you are ready to install it in the system.
When installing and removing the Velocity Solo Card hold by
the edge of the printed circuit board (PCB), and avoid
touching components including connectors.
Optional -
additional drive to the Velocity Solo
SATA III connector
1.
Using a SATA data cable connect an additional drive to the
SATA III port on the Velocity Solo card, as shown in Figure 2.
2.
Using a power cable connect the drive to your computer's
power supply, as shown below.
NOTE: Additional Power Cable is not available in Mac Pro
Figure 2. Connecting the Velocity Solo to a
HDD or SSD
To prevent ESD
(Electrostatic Discharge) damage
discharge static electricity by
before handling,
Connecting an
SATA connector
SATA cable
Power cable
Power connector
Advertisement
Table of Contents

Related Manuals for Apricorn Velocity Solo x1


Summary of Contents for Apricorn Velocity Solo x1
-
Page 1: Connecting Your Ssd To The Velocity Solo Card
Velocity Solo x1 Quick Start Guide Connecting your SSD to the To prevent ESD Velocity Solo Card (Electrostatic Discharge) damage SATA connector IMPORTANT HANDLING INFORMATION Use an ESD wrist strap or discharge static electricity by Slide your SSD onto touching a grounded bare metal surface... - Page 2 Apricorn’s EZ Gig for Windows Apricorn’s innovative EZ Gig allows you to clone your entire hard drive or deselect data files from the cloning process to save space, giving you the option to run your OS and applications from a fast, smaller SSD boot drive, while keeping your documents and media files on your original hard drive.
Need help?
Do you have a question about the Velocity Solo x1 and is the answer not in the manual?
Questions and answers