Table of Contents

Related Manuals for Vivitar V69379


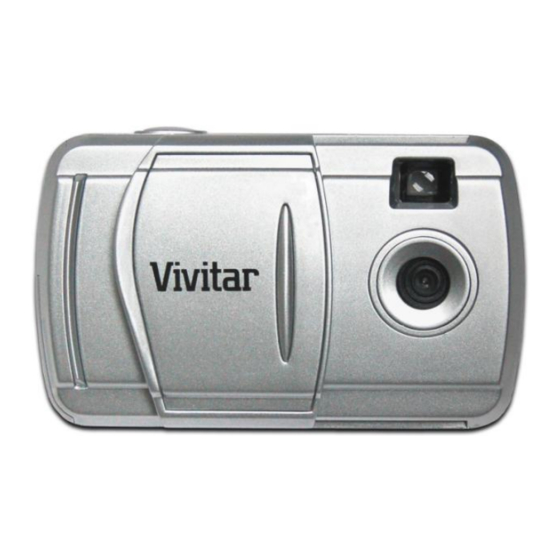
Summary of Contents for Vivitar V69379
-
Page 1: User Manual
V69379 Digital Camera User Manual © 2009-2012 Sakar International, Inc. All rights reserved. Windows and the Windows logo are registered trademarks of Microsoft Corporation. All other trademarks are the property of their respective companies. -
Page 2: Table Of Contents
Getting Photos and Videos from Your Camera to Your Computer ........12 Getting Started!........................13 Using Your Camera as a Webcam ..................13 Maintenance of Your Digital Camera ..................14 Sakar Warranty Card ......................15 Technical Support ........................15 Technical Specifications ......................16 Frequently Asked Questions ....................16... -
Page 3: Introduction
Introduction Thank you for purchasing this camera. Everything you need to take quality digital photos and videos is included with your camera Please read this manual carefully first in order to get the most out of your digital camera. Important Notice: Please do not plug the camera into the USB port of your computer until you have installed the Vivitar Experience Image Manager software and the camera’s driver. -
Page 4: Computer System Requirements
Computer System Requirements To be able to download photos and videos to your PC or Macintosh, you will need the following minimum configuration: WINDOWS OS WINDOWS XP SP3, Vista SP1 and Windows 7 Pentium® 4 processor (or above) 250 MB available hard disk space 1 GB of RAM 16-bit Color display, 1024 X 768 pixels CD-ROM Drive... -
Page 5: A Quick Look At Your Digital Camera
A Quick Look at your Digital Camera Installing the Batteries Your camera requires 2 AAA batteries (not included). Insert the batteries into the camera as shown: 1. Open the battery compartment. 2. Insert the batteries in accordance with the polarity (+/-) shown on the inside of the battery cover. -
Page 6: Starting Your Camera
WARNING: Please download any photos you have on the camera before opening the battery compartment. Opening the battery compartment and/or removing the batteries will erase the photos currently stored in the camera. Photos may be lost when batteries run low. ... -
Page 7: Taking Photos
Taking Photos 1. Compose your shot using the view finder. The optimal distance between the camera and the subject is approximately 5 feet. 2. Hold the camera steady and press the Shutter button to take the photo. 3. The camera will beep when a photo is taken. 4. -
Page 8: The Camera Modes
The Camera Modes Power Off - 1. Press the MODE button for the icon to appear on the LCD screen. 2. Press the Shutter button and the camera will switch off. Self-Timer - 1. Press the MODE button for the icon to appear on the LCD screen. - Page 9 Delete All - To delete all photos on the camera: 1. Press the MODE button for the icon to appear on the LCD screen. 2. Press the Shutter button and the photo counter will flash. 3. Press the Shutter button again within 5 seconds and all photos in the camera will be deleted.
- Page 10 Compression There are 2 photo compressions to select from: High density - or Low density - 1. Press the MODE button for the icons to appear on the LCD screen 2. If the LCD displays this means the present compression is Low density and in order to change to High density , click the Shutter button.
- Page 11 Frequency - The camera has 2 Frequency settings: 50HZ for Asia and Europe, and 60HZ for the U.S. and Japan. To set the camera for the correct frequency: 1. Press the MODE button for the 50HZ or the icon 60HZ icons to appear on the LCD screen.
-
Page 12: Installing The Vivitar Experience Image Manager Software And Camera Driver
Installing the Vivitar Experience Image Manager Software and Camera Driver Warning: Do not plug your camera into the computer until the Vivitar Experience Image Manager Software installation is complete. 1. Insert the installation CD into your CD-ROM drive. PC: The “Vivitar Experience Image Manager” will begin to install. MAC: Click icon to begin installation then click “Continue”. -
Page 13: Getting Photos And Videos From Your Camera To Your Computer
Getting Photos and Videos from Your Camera to Your Computer Do not disconnect the cable during transfer. Doing so will cancel the transfer of any files on their way to your computer. 1. Select the “Get Images” button from the Main menu. 2. -
Page 14: Getting Started
Getting Started! Using the Vivitar Experience Image Manager, you can: Upload and manage photos and videos to and from the most popular photo sharing and social networking sites - Facebook, Flickr, Picasa, MySpace, Photobucket, Twitpic, Twitgoo and YouTube Seamlessly transfer photos and videos from one social network to another ... -
Page 15: Maintenance Of Your Digital Camera
On Mac: The webcam driver is installed on your computer when you install Vivitar Experience Image Manager Software for this device. To activate the Webcam feature please follow these instructions: 1. Click the “Macintosh HD” icon on the desktop 2. Click the “Library” folder 3. -
Page 16: Sakar Warranty Card
Sakar Warranty Card This warranty covers for the original consumer purchaser only and is not transferable. Products that fail to function properly UNDER NORMAL USAGE, due to defects in material or workmanship. Your product will be repaired at no charge for parts or labor for a period of one year. -
Page 17: Technical Specifications
Technical Specifications Image Sensor CMOS Sensor Resolution 640 x 480 (VGA) 320 x 240 (QVGA) Memory 1M x 16 bytes SDRAM Number of pictures Hr/Ld : 26; Hr/Hd: 52; Lr/LD: 104; Lr/Hd: 208; Lens f=3.6/F2.4 Focus Range 1m to Infinity Shutter Range 1/6 ~1/15000 second Numeric –... - Page 18 Q: How do I make sure I don't lose important pictures? A: Your camera uses SDRAM memory, which requires a constant electric current to store your photos. Should your camera lose power (for instance if the batteries die, run out of power or are removed) all stored pictures will be lost.
Need help?
Do you have a question about the V69379 and is the answer not in the manual?
Questions and answers