Table of Contents
Advertisement
Advertisement
Table of Contents

Subscribe to Our Youtube Channel
Related Manuals for La Crosse Technology WT-5432


Summary of Contents for La Crosse Technology WT-5432
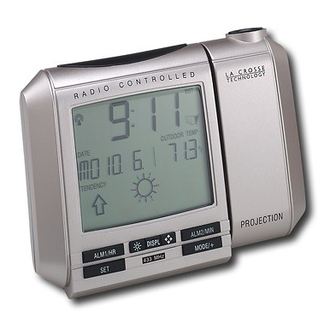
- Page 1 WT-5432 433 MHz Radio Controlled Projection Alarm Instruction Manual...
-
Page 2: Table Of Contents
TABLE OF CONTENTS Topic Page Inventory of Contents/ Additional Equipment About WWVB Quick Set-Up Guide Detailed Set-Up Guide Battery Installation Program Mode Programming Sequence Function Buttons Time Zone Setting DST (Daylight Saving Time) Setting Adjustable Snooze Time Setting Date Setting 12/24-Hour Setting/Selecting °F or °C Features &... -
Page 3: Inventory Of Contents/ Additional Equipment
INVENTORY OF CONTENTS 1) WT-5432 projection alarm 2) TX6U remote temperature sensor 3) AC adapter/transformer (6V) 4) Instruction manual and warranty card. ADDITIONAL EQUIPMENT (not included) 1) Three fresh 1.5V AA batteries (optional for alarm clock) 2) Two fresh 1.5V AA batteries (for remote sensor) ABOUT WWVB (Radio Controlled Time) The NIST (National Institute of Standards and Technology—Time and Frequency... -
Page 4: Quick Set-Up Guide
QUICK SET-UP GUIDE Hint: Use good quality Alkaline Batteries and avoid rechargeable batteries. 1. Have the indoor station and outdoor remote 3 to 5 apart. 2. Batteries should be out of both units for 10 minutes. 3. Place the batteries into the outdoor remote first then into the indoor station. (All outdoor remotes must be started before the indoor station) 4. -
Page 5: Detailed Set-Up Guide
DETAILED SET-UP GUIDE Important: Insert batteries into the sensor first, then into the alarm clock. Do not press any buttons until remote temperature is displayed. BATTERY INSTALLATION A. Remote Temperature Sensor 1. Remove the battery cover. 2. Observing the correct polarity, install 2 AA Battery batteries. -
Page 6: Program Mode
a search is automatically conducted nightly at midnight. If the signal is found at midnight the tower icon will remain. If the signal is not found another search will take place every hour, until 6:00 am, until the signal is found successfully. If no signal is found during this period the tower icon will not appear and the clock will search again at 12:00 am the next night. -
Page 7: Dst (Daylight Saving Time) Setting
Atlantic Time Eastern Time (default setting) Central Time Mountain Time Pacific Time Alaskan Time -10h Hawaiian Time -11h, -12h Next two time zones West of HAW Greenwich Mean Time -1h, -2h, -3h Three time zones West of GMT 4. From –5h to –8h, a US map with the highlighted time zone will also be displayed to the right of the time display. -
Page 8: Time Setting
F. Time Setting Note: When the WWVB signal is found that time will over-ride the manually set time. 1. Press and release the “+” button to select the hour. Note: when setting the hour, “PM” will appear to the left of the hour display, if it is AM nothing will be displayed. -
Page 9: Features & Operations
III. Features and Operations A. Features 1. Radio-controlled time and date 2. Projection of time and/or remote temperature 3. Forecast icon based on changing air pressure 4. EL backlight 5. Six modes of date/seconds/temperature display 6. Indoor temperature 7. Remote outdoor temperature 8. -
Page 10: Projection Of Time And/Or Remote Temperature
C. Projection of Time and/or Remote Temperature 1. When plugged into an AC outlet the projection alarm can continuously project the time and/or remote temperature. 2. When operating on batteries alone the projection alarm will only project when a button is pressed. 3. -
Page 11: Forecast Icon
1. The weather forecasting feature is estimated to be 75% accurate. The weather forecast is based solely upon the change of air pressure over time 2. The WT-5432 averages past air-pressure readings to provide an accurate forecast—creating a necessity to disregard all weather forecasting for 12-24 hours after the unit has been set-up, reset, or moved from one altitude to another (i.e. -
Page 12: Indoor Temperature
F. Indoor Temperature 1. The projection alarm measures indoor temperature with an internal sensor. 2. This temperature is displayed in °F or °C depending on the time format (12 or 24 hour mode). When in 12-hour format, the temperature will be in °F. When in 24-hour mode the temperature will be in °C. -
Page 13: Time Alarm
H. Time Alarm The projection alarm has two separate alarms for time, “ALM1” and “ALM2”. The alarms have a different sound; “ALM1” increases in volume after 25 seconds, and again after 50 seconds. “ALM2” is a constant volume. The total duration is 96 seconds for each alarm. -
Page 14: Changing Display Mode (Viewing Seconds)
Changing the Display Mode (Day, Seconds and Temperature) There are six possible display modes to view the day, seconds and temperature (remote temperature is constantly displayed). To change the display (starting at the default of day, month, date, remote temperature): 1. -
Page 15: Mounting
IV. Mounting the Remote Temperature Sensor The remote temperature sensor can be mounted in two ways: 1) with the use of screws 2) using the adhesive tape A. Mounting with Screws 1. Remove the mounting bracket from the remote temperature sensor. The bracket should snap off easily. -
Page 16: Maintenance & Care
D. Immediately remove all low powered batteries to avoid leakage and damage. E. Replace with new batteries only, and of recommended size. F. Opening the casings invalidates the warranty. Do not try to repair the units. Contact La Crosse Technology for Repairs. -
Page 17: Troubleshooting
1) Remote temperature is out of range, move closer. 2) Check batteries. 3) Interference from an outside source (cordless telephone, etc.) 4) Contact La Crosse Technology. Note: For any questions not answered, contact La Crosse Technology with the contact information found at the end of this instructional manual. -
Page 18: Specifications
SPECIFICATIONS Temperature: Measuring range: 32°F to 122°F with 0.2°F resolution (indoor) -21.8°F to 140°F with 0.2°F resolution (outdoor) (0°C to 50°C with 0.1°C resolution) Checking intervals: Every 10 seconds indoor, 3 times in 10 minutes for remote temperature. Power source: AC Adapter (included) Input: 120VAC/60Hz Output: DC 6V/100MA Battery type:... -
Page 19: Warranty And Contact Information
La Crosse Technology, Ltd or La Crosse Technology, Ltd’s authorized service center. La Crosse Technology, Ltd will repair or replace this product, at our option and at no charge as stipulated herein, with new or reconditioned parts or products if found to be defective during the limited warranty period specified above. - Page 20 For warranty work, technical support, or information contact: La Crosse Technology 2809 Losey Blvd. S. La Crosse, WI 54601 Phone: 608.782.1610 Fax: 608.796.1020 e-mail: support@lacrossetechnology.com (warranty work) sales@lacrossetechnology.com (information on other products) web: www.lacrossetechnology.com FCC ID: OMO-01RX (receiver) OMO-01TX (sensor) THIS DEVICE COMPLIES WITH PART 15 OF THE FCC RULES.
Need help?
Do you have a question about the WT-5432 and is the answer not in the manual?
Questions and answers