
Related Manuals for White and Brown MO 2630 Jazz

Summary of Contents for White and Brown MO 2630 Jazz
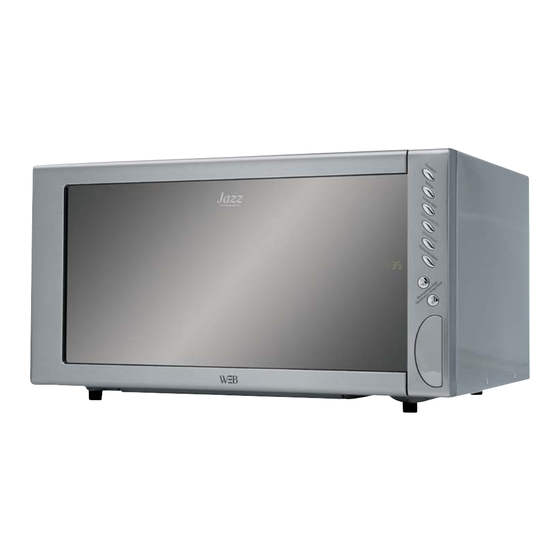
- Page 1 notice_MO2630-reso 23/12/05 11:08 Page 1 FOUR À MICRO-ONDES MULTI-CUISSON - 30L MICROWAVE OVEN WITH CONVECTION AND GRILL FUNCTIONS 30L MO 2630 “Jazz” - 30 L MODE D’EMPLOI USER MANUAL...
-
Page 2: Consignes De Sécurité
notice_MO2630-reso 23/12/05 11:08 Page 2 FRANÇAIS FRANÇAIS WHITE ANDBROWN vous félicite d’avoir choisi ce produit et vous remercie de votre confiance. Pour votre confort et votre sécurité, votre article a été vérifié à toutes les étapes de sa fabrication et a passé avec succès tous nos tests de qualité. - Page 3 notice_MO2630-reso 23/12/05 11:08 Page 3 • Au cours de son fonctionnement, l’appareil ne doit pas être mis en contact avec des matériaux inflammables tels que rideaux, tissus, etc… • Ne jamais toucher les surfaces chaudes de l’appareil afin d’éviter les brûlures. Eviter en particulier les parties métalliques et la porte qui deviennent très chauds pendant l’utilisation.
- Page 4 notice_MO2630-reso 23/12/05 11:08 Page 4 * Pour éviter de casser le plateau tournant : - le laisser refroidir avant de le nettoyer - ne pas mettre d’aliments ou plats chauds sur le plateau froid - ne pas mettre d’aliments surgelés sur le plateau chaud •...
-
Page 5: Installation Du Four À Micro-Ondes
notice_MO2630-reso 23/12/05 11:08 Page 5 FONCTIONNEMENT GÉNÉRAL D’UN FOUR À MICRO-ONDES La micro-onde est une onde de haute fréquence électromagnétique communément émise dans la nature mais tellement dispersée qu’elle ne peut produire de la chaleur. Le composant clé d’un four à... - Page 6 notice_MO2630-reso 23/12/05 11:08 Page 6 GUIDE DE COMPATIBILITÉ - Il est recommandé d’utiliser des plats compatibles avec un four à micro-ondes. Normalement les plats en céramique, verre ou plastique résistants à la chaleur, peuvent convenir. Ne jamais utiliser de plats en métal quelles que soient les fonctions du four que vous utilisez sinon cela fera des étincelles.
- Page 7 notice_MO2630-reso 23/12/05 11:08 Page 7 DESCRIPTION 1 - Grille 6 - Diodes électroluminescentes 2 - Crochets de fermeture de la porte 7 - Support du plateau tournant 3 - Panneau de contrôle 8 - Axe de rotation 4 - Plaque Mica 9 - Porte 5 - Plateau tournant en verre 10 - Bouton d’ouverture de la porte...
-
Page 8: Fonction Micro-Ondes
notice_MO2630-reso 23/12/05 11:08 Page 8 FONCTIONNEMENT DU PANNEAU DE CONTRÔLE 1. UNE FOIS BRANCHÉ Les diodes clignotent 3 fois lorsque vous branchez l’appareil. Puis va clignoter pour sélectionner le mode et le temps de cuisson 2. BOUTON DÉCONGÉLATION AUTO, TEMPÉRATURE, TEMPS, POIDS Augmenter ou diminuer le temps de cuisson, le poids et menu Auto pendant l’opération en appuyant sur les boutons, vers le haut ou vers le bas 3. - Page 9 notice_MO2630-reso 23/12/05 11:08 Page 9 Exemple : pour cuire à 80P pendant 10 mn 30 Boutons Diodes 1. Après avoir branché l’appareil, les diodes clignotent ou appuyer sur Pause / Annulation une fois 2. Sélectionner la puissance en pressant le bouton plusieurs fois 3.
- Page 10 notice_MO2630-reso 23/12/05 11:08 Page 10 Exemple : pour cuire avec la fonction chaleur tournante à 180°C pendant 20 mn Boutons Affichage diodes 1. Appuyer sur le bouton plusieurs fois pour sélectionner le programme 2. Sélectionner la température désirée en appuyant sur 3.
- Page 11 notice_MO2630-reso 23/12/05 11:08 Page 11 - Vérifier la cuisson une fois le programme terminé. Si elle n’est pas tout à fait finie, laisser le plat quelques minutes au chaud dans le four. Exemples de cuisson en mode chaleur tournante seule : Préparation Poids / Dimension Température...
-
Page 12: Mode Automatique
notice_MO2630-reso 23/12/05 11:08 Page 12 7. MODE AUTOMATIQUE Le four est doté de programmes définis par défaut pour des opérations simples. Lorsque les diodes clignotent, appuyer sur Cuisson Auto et les diodes vont défiler. Choisir le programme approprié à votre préparation, à son poids et suivre à la lettre les instructions du tableau suivant. - Page 13 notice_MO2630-reso 23/12/05 11:08 Page 13 Pommes Pommes vapeur. Choisir des pommes de terre de taille moyenne de terre (environ 200g). Les laver, les essuyer. Poids total 450-650g. Mettre les pommes de terre dans un plat large et couvrir avec du film de cuisson pour éviter les pertes d’eau.
- Page 14 notice_MO2630-reso 23/12/05 11:08 Page 14 5. Appuyer sur Valid/Départ pour commencer la cuisson, les diodes vont décompter le temps restant 6. A mi-décongélation, 3 bips vont retentir pour vous informer qu’il faut retourner les aliments. Ouvrir la porte, retourner la préparation. Appuyer sur “Valid/Départ” pour continuer la décongélation.
- Page 15 notice_MO2630-reso 23/12/05 11:08 Page 15 9. PROGRAMMATION Si vous voulez différer la cuisson, vous pouvez programmer le menu et le temps de cuisson et le four se mettra en marche à l’heure que vous avez programmée. La programmation consiste en 2 points : - programmer l’heure actuelle - choisir le programme et le temps de cuisson Exemple : il est actuellement 12h30 et vous voulez que le four micro-ondes se déclenche...
-
Page 16: Sécurité Enfants
notice_MO2630-reso 23/12/05 11:08 Page 16 10. CUISSON MULTI-SÉQUENTIELLE Pour obtenir un résultat optimum, certaines recettes feront appel à différents modes et temps de cuisson. Vous pouvez faire votre propre programmation comme indiqué ci-dessous : Exemple : vous voulez cuire des aliments sur mode micro-ondes 100P pendant 3min puis sur gril pendant 9min. - Page 17 notice_MO2630-reso 23/12/05 11:08 Page 17 ASTUCES POUR UNE BONNE CUISSON AU MICRO-ONDES 1. Placer les aliments correctement et la partie la plus épaisse vers le haut. 2. Sélectionner le temps de cuisson le plus faible et poursuivre si nécessaire. Il convient de bien surveiller la cuisson.
-
Page 18: Nettoyage Et Entretien
notice_MO2630-reso 23/12/05 11:08 Page 18 NETTOYAGE ET ENTRETIEN - Débrancher l’appareil avant de le nettoyer. Si possible laisser la porte du four ouverte pour être sûr qu’il soit inactif pendant le nettoyage. Il est conseillé de mettre la sécurité enfant avant de le nettoyer. - Page 19 WHITE AND BROWN creates original products to please you, as far as design and easiness to use are concerned in order to give you complete satisfaction.
- Page 20 notice_MO2630-reso 23/12/05 11:08 Page 20 • Do not place frozen foods or utensils on the hot turntable. • Make sure the utensils do not touch the interior walls during cooking. • Do not store food or any other things inside the oven. •...
-
Page 21: Installation Of Microwave Oven
notice_MO2630-reso 23/12/05 11:08 Page 21 OPERATION OF MICROWAVE OVEN 1. Microwave is a kind of high frequency electromagnetic wave. The key component of a microwave oven is the magnetron that will transform the energy of electricity to microwave and huge energy of microwave field is established under the closed cavity. So the molecule of food will vibrate at very high speed and the friction heat produced will cook the food in a fast way. - Page 22 notice_MO2630-reso 23/12/05 11:08 Page 22 Material of container Microwave Grill Conv Combi Notes Heat-resistant ceramic Never use ceramics which are decorated with metal rim or glazed Heat-resistant plastic Cannot be used for long time microwave cooking Heat-resistant glass Grill rack Plastic film It should not be used when cooking meat or chops as...
- Page 23 notice_MO2630-reso 23/12/05 11:08 Page 23 KNOW YOUR MICROWAVE OVEN 1. Grill rack 7. Rotating ring 2. Door interlock 8. Rotating axis 3. Control panel 9. Oven door 4. Waveguide cover 10. Release button 5. Glass turnable 6. LED Notes: 1. Door interlock ensures the oven can only be activated when the door is properly closed 2.
-
Page 24: Operation Of Control Panel
notice_MO2630-reso 23/12/05 11:08 Page 24 OPERATION OF CONTROL PANEL 1. AFTER POWER-UP The LED Display will flash 3 times when plugged in power supply . Then it will flash , ready to receive the cooking menu and time. 2.AUTO.DEFROST TEMP. TIME. WEIGHT BUTTON Increase or decrease cooking time, weight and Auto menu during operation by pressing upper or lower button 3. - Page 25 notice_MO2630-reso 23/12/05 11:08 Page 25 3. Set cooking time by pressing button. 4. Press to start, and LED will count down to show running time. You can change the cooking time during cooking. 6.CONVECTION/COMBINATION/GRILL/COMBINATION A) CONVECTION/COMBINATION C--- Convection, the convection unit will be activated during operation time. In this mode, hot air will circulate throughout the oven cavity to brown and crisp foods quickly and evenly.
- Page 26 notice_MO2630-reso 23/12/05 11:08 Page 26 5. Press to start cooking 6. The temperature is rising constantly during preheating period and LED will show as follows while temperature changes The oven will be heated from 100°C. Once the oven has reached the 100° C will go steady and the oven temperature is approaching 140°C.
- Page 27 notice_MO2630-reso 23/12/05 11:08 Page 27 B) GRILL/COMBINATION G--- Grill, the heating element will be energized during operation time. Which is applicable of grilling thin meats or pork, sausage, chicken wing as good brown colour can be obtained. G1--- Combination of Grill and microwave cooking. Heating element and magnetron are energized in an alternate way.
- Page 28 notice_MO2630-reso 23/12/05 11:08 Page 28 3. Press to select the desired weight 4. Press . And LED will show the default running time. AUTOCOOK TABLE Function Category Direction Rice/Pasta Place rice & boiling water with 0.25 to 1 teaspoon salt in a deep and large bowl .Refer the water volume as follows rice 100g 200g 300g cover pasta 100g 200g 300g cover...
- Page 29 notice_MO2630-reso 23/12/05 11:08 Page 29 Note: 1. The cooking time above are based on food which are at room temperature of 20-25°C. Results will vary for food with different temperature. 2. The temperature, weight and shape of food will largely influence the cooking effect. If any deviation has been found to the factor noted on above menu, you can adjust the cooking time for best result.
- Page 30 notice_MO2630-reso 23/12/05 11:08 Page 30 DEFROST GUIDE STEAKS CHOPS - position the food with thinner parts in the centre in a single layer on a shallow dish. If pieces are stuck together, try to separate them as soon as possible. - when the oven Beeps, it is to prompt you to turn over the food.
-
Page 31: Automatic Starting (Delayed Function)
notice_MO2630-reso 23/12/05 11:08 Page 31 9.AUTOMATIC STARTING (DELAYED FUNCTION) If you do not want the menu be started immediately, you can preset the cooking menu and time and the preset menu will automatically start at your set time. The setting will consist of 2 steps: 1. Setting the current clock;... -
Page 32: Multi-Sequence Cooking
notice_MO2630-reso 23/12/05 11:08 Page 32 10. MULTI-SEQUENCE COOKING To obtain best cooking result ,some recipes call for different cooking modes and times. You may program your personalized menu as follows: Example :you want to cook food with 100p microwave for 3 minutes then grill food for 9 minutes . You will set 2 sequences. -
Page 33: Microwave Cooking Tips
notice_MO2630-reso 23/12/05 11:08 Page 33 MICROWAVE COOKING TIPS 1) Arrange food carefully, place thickest areas towards outside of the dish. 2) Watch cooking time, cook for the shortest amount of time indicated and add more time as needed. 3) Cover food before cooking check recipe for suggestions: microwave plastic wrap or a lid. Covers prevent from spattering and help foods to cook evenly. -
Page 34: Cleaning And Maintenance
notice_MO2630-reso 23/12/05 11:08 Page 34 CLEANING AND MAINTENANCE Disconnect the power supply cord before cleaning. And if possible leave the door open to inactivate the oven during cleaning. Exterior: The outside may be cleaned with mild soap and warm water, wipe clean with a damp cloth. Avoid the use of harsh abrasive cleaners. - Page 35 notice_MO2630-reso 23/12/05 11:08 Page 35 SERVICING Warning: it is hazardous for anyone, other than a qualified service technician, to carry out any ser- vice for repairing operation which involves removal of any cover which gives protection against exposure to microwave energy. Caution: MICROWAVE RADIATION Do not become exposed to radiation from the microwave generator or other parts conducting microwave energy.
- Page 36 notice_MO2630-reso 23/12/05 11:08 Page 36 Indications relatives à la protection de l’environnement Au terme de sa durée de vie, ce produit ne doit pas être éliminé avec les ordures ménagères mais doit être remis à un point de collecte destiné au recyclage des appareils électriques et électroniques. Le symbole figurant sur le produit, la notice d’utilisation ou l’emballage vous indique cela.
Need help?
Do you have a question about the MO 2630 Jazz and is the answer not in the manual?
Questions and answers