Korg nanoKey Owner's Manual
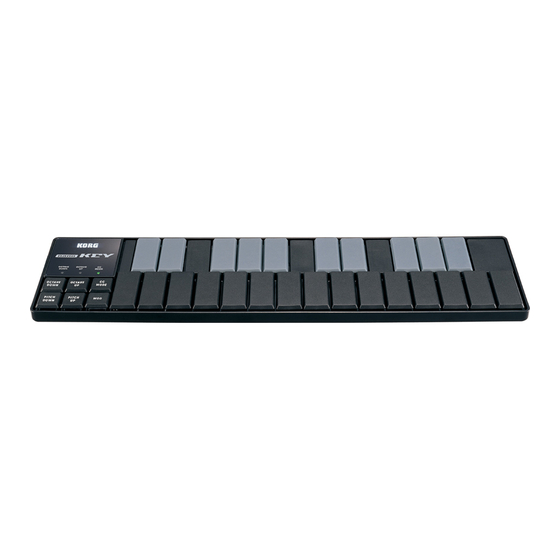
Slim-line usb keyboard
Hide thumbs
Also See for nanoKey:
- Quick start manual ,
- Owner's manual (27 pages) ,
- Quick start manual (7 pages)
Advertisement
Quick Links
Download this manual
See also:
Owner's Manual
Introduction
Thank you for purchasing the Korg nanoKEY slim-line USB keyboard. To help
you get the most out of your new instrument, please read this manual care-
fully.
In order to take full advantage of this product, you'll need to create set-
tings in the host application that you're using. Please follow the directions
as described in the owner's manual of your host application to define
these settings.
Parts and their functions
8
3
5
OCTAVE
OCTAVE
CC
DOWN
UP
MODE
4
OCTAVE
OCTAVE
CC
DOWN
UP
MODE
PITCH
PITCH
MOD
DOWN
UP
6
7
2
1
1. Keyboard
There are twenty-five velocity-sensitive keys that transmit note messages. When
CC mode is on, they transmit control change messages.
2. [CC MODE] button
This button will toggle the CC mode on or off.
3. CC mode LED
When the CC mode is on this LED is lit, when it is off the LED is dark.
4. [OCTAVE DOWN] / [OCTAVE UP] buttons
These select the pitch of the keyboard in steps of an octave.
The pitch will shift downward by one octave each time you press the [OC-
TAVE DOWN] button. The pitch will shift upward by one octave each time
you press the [OCTAVE UP] button.
By pressing the [OCTAVE DOWN] button and [OCTAVE UP] button si-
multaneously you can reset the octave shift to +/-0.
5. Octave LEDs
These indicate the keyboard's octave shift status as follows.
Octave shift status
Octave LED color
±0
Unlit
+1 / -1
Green
+2 / -2
Orange
+3 / -3
Red
+4 / -4
Blinking red
6. [PITCH DOWN] / [PITCH UP] buttons
These buttons transmit pitch bend messages.
7. [MOD] button
This buttons transmits modulation messages.
8. USB connector
Connect the nanoKEY to your computer with a USB cable via this port.
Setup
Operating requirements
Mac OS X
Computer
Apple Macintosh computer with an Intel or PowerPC
processor that has a USB port and satisfies the
requirements for running Mac OS X
Operating system
Mac OS X 10.3.9, or Mac OS X 10.4.7 or later
Windows
Computer
Computer that has a USB port and satisfied the
requirements for running Microsoft Windows XP/
Vista (a USB chipset made by the Intel Corporation is
recommended)
Operating system
Microsoft Windows XP SP2 or later, or Microsoft
Windows Vista SP1
Connections and power
Connect the nanoKEY to your computer with a USB cable.
The power will turn on, and the KORG name will light up.
USB cable
nanoKEY
USB connector
Computer
If you're using a passive (non-powered) USB hub, the nanoKEY may fail
to power-on because it isn't receiving enough power. If this is so, please
connect the nanoKEY to a powered USB hub or directly to your computer.
Installing the driver
Installation
When you first connect the nanoKEY to your computer, the standard USB-
MIDI driver for your operating system will be installed automatically.
If you're using Microsoft Windows XP/Vista, the USB-MIDI driver that is
automatically installed won't allow you to use the nanoKEY with mul-
tiple applications simultaneously.
If you want to use the nanoKEY with multiple applications simultaneously,
you'll need to install the Korg USB-MIDI driver.
Even if you don't need to use the nanoKEY with multiple applications
simultaneously, we recommend that you install the Korg USB-MIDI driver
for more stable operation. You can download the Korg USB-MIDI driver
from the Korg website, and install it as described in the included docu-
mentation.
(http://www.korg.co.jp/English/Distributors/ or http://www.korg.com)
If you want to use the Korg Kontrol Editor, you'll need to install the Korg
USB-MIDI driver.
Driver ports
The nanoKEY's USB-MIDI I/O will be seen from the computer as 1IN-1OUT.
As shown in the following table, the name of the ports depend on which oper-
ating system you're using, and whether or not you've installed the Korg USB-
MIDI driver.
OS
MIDI IN
MIDI OUT
Mac OS X 10.3 or 10.4 nanoKEY Port 1
nanoKEY Port 1
Mac OS X 10.5 or later nanoKEY KEYBOARD
nanoKEY CTRL
Windows XP
USB audio device
USB audio device
Windows Vista
nanoKEY
nanoKEY
Windows XP/Vista +
nanoKEY 1 KEYBOARD
nanoKEY 1 CTRL
KORG USB-MIDI Driver
MIDI IN port
This is where MIDI messages from the nanoKEY's various controllers are re-
ceived. If you want to use the nanoKEY to control an application on your com-
puter, then select this port in the MIDI input settings of your application.
This is also used by the Korg Kontrol Editor to control the nanoKEY.
MIDI OUT port
This port is used by the Korg Kontrol Editor to control the nanoKEY.
Making detailed settings
The following settings cannot be edited from the nanoKEY itself, so you'll
need to use the Korg Kontrol Editor. You can download the Korg Kontrol
Editor from the Korg website.
(http://www.korg.co.jp/English/Distributors/ or http://www.korg.com)
Global MIDI channel
Global MIDI channel [1...16]
This specifies which MIDI channel the nanoKEY will use to transmit note
messages, pitch bend messages, as well as MIDI messages that are sent when
you press the [MOD] button. This should be set to match the MIDI channel of
the MIDI application that you're controlling.
Keyboard
The keyboard transmits note messages, and it is velocity sensitive.
You can specify the transposition and the velocity curve. MIDI messages are
transmitted on the Global MIDI Channel.
Transpose [-12...+12]
Use this to transpose the pitch of the keyboard up or down in semitone steps.
The range is -12 to +12.
Velocity Curve [Velocity Curve 1...3/Const Velocity]
The velocity curve determines how the force with which you play the key-
board will affect the output level. You can choose one of three velocity curves,
or select a fixed velocity.
127
Curve 1
Curve 1 A curve that allows even soft strikes
Curve 2
to produce loud notes
Curve 2 The normal curve
Curve 3
Curve 3 A curve that requires strong strikes
to produce loud notes
Const
The velocity value will always be
constant
1
Soft
Strong
Const Velocity Value [1...127]
This specifies the velocity value that is transmitted if the velocity curve is set
to Const. This is useful for sounds such as organ, etc.
[PITCH DOWN] / [PITCH UP] buttons
You can transmit pitch bend messages by operating the [PITCH DOWN]/[PITCH
UP] button. These MIDI messages are transmitted on the Global MIDI Channel.
Pitch Bend Speed [1...4]
The pitch bend speed specifies the amount of time between when the [PITCH
DOWN]/[PITCH UP] buttons are pressed and when the pitch bend reaches its
maximum value. A setting of 1 is the fastest, and higher values will produce a
slower pitch bend.
[MOD] button
The [MOD] button transmits a control change message. With the factory set-
tings, a modulation message (CC#1) is assigned. You can choose whether this
button will be enabled, the type of button operation, the control change num-
ber, and the values that will be transmitted when the button is pressed. These
MIDI messages are transmitted on the Global MIDI Channel.
Button Enable [Disable/Enable]
Enables or disables the button.
If a button is disabled, operating that button will not transmit a MIDI message.
Button Behavior [Momentary/Toggle]
Selects one of the following two modes:
Momentary
Pressing the button will send a control change message with
the On value, releasing the button will send a control change
message with the Off value.
Toggle
Each time that you press the button, the control change message
will alternate between the On value and the Off value.
Control Change Number [0...127]
Specifies the CC number of the control change message that will be transmitted.
On Value [0...127]
Specifies the On value of the control change message.
Off Value [0...127]
Specifies the Off value of the control change message.
Keyboard operation in CC mode
The twenty-five keys of the keyboard will function as independent buttons to
transmit control change messages.
You can specify which MIDI channel the control change message is transmit-
ted on, whether or not each key is enabled, the key type, the control change
number, as well as the On and Off value.
CC MIDI Channel [1...16]
This specifies the MIDI channel that control change messages will be transmit-
ted on. Set this to match the MIDI channel of the application you're controlling.
Key Enable [Disable/Enable]
Enables or disables the key.
If a key is disabled, operating that key will not transmit a MIDI message.
Key Behavior [Momentary/Toggle]
Selects one of the following two modes:
Momentary
Pressing the key will send a control change message with the
On value, releasing the key will send a control change message
with the Off value.
Toggle
Each time you press the key the control change message will
alternate between the On value and the Off value.
Control Change Number [0...127]
Specifies the CC number of the control change message that will be transmitted.
On Value [0...127]
Specifies the On value of the control change message.
Off Value [0...127]
Specifies the Off value of the control change message.
Restoring the factory settings
If you turn on the power while holding down the [OCTAVE DOWN] button,
[OCTAVE UP] button, and [MOD] button, the settings of the nanoKEY will
return to their factory-set condition, and the KORG logo will light up.
The process of restoring the factory settings will take several seconds after
you turn on the power. You must not turn off the power during this time.
Troubleshooting
Power does not turn on
- If you're using a passive (non-powered) USB hub, the nanoKEY may fail to
power-on because it is not getting enough power. If this is so, please connect
the nanoKEY to a powered USB hub or directly to your computer.
Software does not respond
- Make sure that the nanoKEY has been detected by the computer. If you're
using Windows XP, go to the Control Panel, open "Sounds and Audio
Devices," and check the "Hardware" tab page.
If you're using Windows Vista, go to the Control Panel, open "Hardware
and Sounds" ➞ "View Hardware and Devices" ➞ "Device Manager," and
check the "Sound, Video, and Game Controllers" tab.
If you're using Mac OS X, open "Applications" ➞ "Utilities" ➞ "Audio MIDI
Setup," and check the "MIDI Devices" tab page.
- Make sure that the nanoKEY is selected in the MIDI port settings of the
application you're using.
- The application you're using might not support a specific function. Please
check the owner's manual of your host application.
Keyboard does not respond to velocity
- Check the velocity curve setting of the keyboard.
Specifications
Connectors:
USB connector (mini B type)
Power supply:
USB bus power mode
Current consumption:
100 mA or less
Dimensions (W x D x H):
12.6 x 3.3 x 0.6 inches / 320 x 83 x 14 mm
Weight:
7.1 oz / 220 g
Included items:
USB cable, Owner's manual
* Specifications and appearance are subject to change without notice.
Advertisement


Need help?
Do you have a question about the nanoKey and is the answer not in the manual?
Questions and answers