Table of Contents
Advertisement
BUmLTBETTER THAN iT HAS TO B_
TM
Owner's
Manual
Coveting
model
A C01850A
Electric
Microwave
Keep
instructions
for future
reference.
Be sure
manua!
stays
with
microwave.
Important Safety Information .............. 3
Installation ..........................................
6
Features ...........................................
22
Operation ..........................................
25
Using the Metal Rack ....................... 36
Cooking ............................................
37
Maintenance .....................................
42
Recommended Utensil ...................... 44
Troubleshooting ................................
45
Amana Warranty ..............................
47
Part No.3828W5A1885
Advertisement
Table of Contents

Subscribe to Our Youtube Channel
Related Manuals for Amana ACO1860A


Summary of Contents for Amana ACO1860A
- Page 1 Manual Coveting model A C01850A reference. microwave. Important Safety Information ... 3 Installation ... Features ... Operation ... Using the Metal Rack ... 36 Cooking ... Maintenance ... Recommended Utensil ... 44 Troubleshooting ... Amana Warranty ... Part No.3828W5A1885...
- Page 2 Thank you for buying Please take the time to complete the registration card and return promptly. If the registration card is missing, call Amana Consumer Affairs Department. When contacting Amana, provide product information from serial plate: Model Number Manufacturing (P) Number...
- Page 3 iMPORTANT SAFETY INFOMATION PRECAUTIONS TO EXCESSIVE DO NOT attempt to operate this oven with the door open since open-door operation can result in harmful exposure to microwave energy. It is important not to defeat or tamper with safety interlocks. DO NOT place any object between the oven front face and the door or allow soil or cleaner residue to accumulate on sealing surfaces.
-
Page 4: Safety Infomation
iMPORTANT When using electrical equipment, basic safety precautions should be followed to reduce the risk of burns, electrical shock, fire, or injury to persons. READ all instructions before using equipment. READ AND FOLLOW the specific "PRECAUTIONS TO AVOID POSSIBLE EXPOSURE TO EXCESSIVE MICROWAVE ENERGY"... -
Page 5: Safety Information
IMPORTANT FEDERAL COMMUNICATIONS STATEMENT ( U.S.A. ONLY) This equipment generates and uses ISM frequency energy and if not installed and used properly, that is in strict accordance with the manufacturer's instructions, may cause interference to radio and television reception. It has been type tested and found to comply with limits for ISM Equipment pursuant to part 18 of FCC Rules, which are designed to provide reasonable protection against... -
Page 6: Installation
A. GROUNDING INSTRUCTIONS This appliance must be grounded. In the event of an electrical short circuit, grounding reduces the risk of electric shock by providing an escape wire for the electric current. This appliance is equipped with a cord having a grounding wire with a grounding plug. The plug must be plugged into an outlet that is properly installed and grounded. -
Page 7: Your Safety
YOUR SAFETY FIRST Read this entire manual before you begin. • Proper installation is the installer's responsibility! - Write the model & serial numbers on the owner's manual. The model number label is located on the oven front. The mounting plate is located on the back side of the microwave oven. See Figure 1. BE SURE TO READ THE FOLLOWING SAFETY INSTRUCTIONS: Mounting ( Remove from... - Page 8 YOUR SAFETY FIRST To avoid risk of personal injury, install microwave oven only as instructed. To avoid risk of personal injury, place a piece of the carton or other heavy material, such as a blanket, over the countertop or cooktop to protect it. DO NOT use a plastic cover. •...
-
Page 9: Parts, Tools
PARTS, TOOLS, MATERIALS THE FOLLOWING PARTS ARE SUPPLIED WITH THE OVEN: NOTE: Depending on your ventilation requirements, you may not use all of these parts. Backdraft damper / duct connector (for roof-venting or wall-venting installation) Not Actual Size ( 2 pieces must be assembled as shown ) Two self - tapping screws - Actual Size (for attaching the damper duct connector) - Page 10 PARTS, TOOLS, MATERIALS YOU WILL NEED THE FOLLOWING TOOLS AND MATERIALS FOR THE INSTALLATION: Carton or other heavy material for covering the counter top. Clear tape (for taping the templates to the wall) Saber saw (for cutting vent holes for roof or wall venting) Phillips screwdriver (for the screws) Pencil Flat blade screwdriver (for the toggle bolts)
- Page 11 STEP 1" PREPARE THE ELECTRICAL To avoid risk of personal injury, electrical shock or death, this oven must be grounded. • DO NOT, UNDER ANY CIRCUMSTANCES, PRONG! This appliance MUST be grounded! 1. Locate the grounded electric outlet for this oven in the cabinet above the oven, as shown in Figure 4.
-
Page 12: The Venting System
STEP 2: PREPARE THE VENTING To avoid risk of personal injury, property damage, or fire this microwave oven must be properly vented. NOTE: The ductwork you need for outside ventilation is not included with your oven. The standard ductwork fittings and length are shown in Figure 9. You may vent your oven in one of three ways. - Page 13 STEP 2: PREPARE THE VENTING STANDARD FITTINGS NOTE: If the existing duct is round, you must use a rectangular-to-round extension duct installed between the damper assembly and the adapter to prevent the exhaust damper's sticking. DUCT LENGTH The total length of the duct system, including straight duct, elbows, transitions, and wall or roof caps must not exceed the equivalent of 140 feet.
- Page 14 STEP 3: PREPARE THE VENTING To avoid risk of property damage, unplug the microwave oven or disconnect power at source by removing fuse or throwing circuit breaker. To avoid risk of personal injury, wear protective gloves when handling mounting plate. •...
- Page 15 STEP 3: PREPARE THE VENTING 4. Reassemble the blower wire. See Figure 15. 5. Rotate the unit so that the exhaust ports face the rear of the cabinet. See Figure 16. When you insert blower unit, blower wire must be like figure 16. 6.
-
Page 16: For Installation
STEP 4: PREPARE THE WALL AND UPPER CABINET To avoid personal injury or property damage, do not ateempt to install this microwave oven if you cannot find a wall stud. MEASURE AND TACK / TAPE UP THE TEMPLATES 1. Using a plumb line and (metal) measuring tape, find and mark the vertical center line on the back wall, as in Figure 22. - Page 17 STEP 4: PREPARE THE WALL AND UPPER To avoid risk of personal injury, electrical shock or death: • Note where electrical outlets and electrical wires are before you drill into the wall. • Locate and disconnect power to any electrical circuits that could be affected by installing this oven. To avoid risk of personal injury, electrical shock or death, cover the edge of the power supply cord hole with the power supply cord bushing.
-
Page 18: The Mounting Plate
STEP 5: INSTALL THE MOUNTING THE OVEN MUST BE CONNECTED TO AT LEAST ONE WALL STUD. 1. Draw a vertical line on the wall at the center of the 30" wide space. Use the mounting plate as the template for the rear wall. - Page 19 STEP 5: INSTALL THE MOUNTING TO PREPARE THE REAR WALL CUTOUT OPENING AND EXHAUST ADAPTOR/MOUNTING WALL-VENTED: 1. Place the mounting plate against the rear wall as described in step 5 item 1. 2. Using a pencil, put dots through slots F and G, and through holes H and I.
-
Page 20: Step 6: Attach The Oven To The Wall
STEP 6: ATTACH THE OVEN TO THE WALL To avoid risk of personal injury or property damage, you will need two people to install this microwave oven. 1. Carefully lift microwave oven and hang it on support tabs (See Figure 26 at the bottom of the mounting plate.) Reaching through upper cabinet, thread power supply cord through the power supply cord hole in the bottom of the upper cabinet. - Page 21 STEP 6: ATTACH THE OVEN TO THE WALL 6. Roof venting installation: Install ductwork through the vent opening in the upper cabinet. Complete the venting system through the roof according to the method needed. See Figure 34. See PREPARE THE VENTING SYSTEM, STEP 2.
-
Page 22: Oven Features
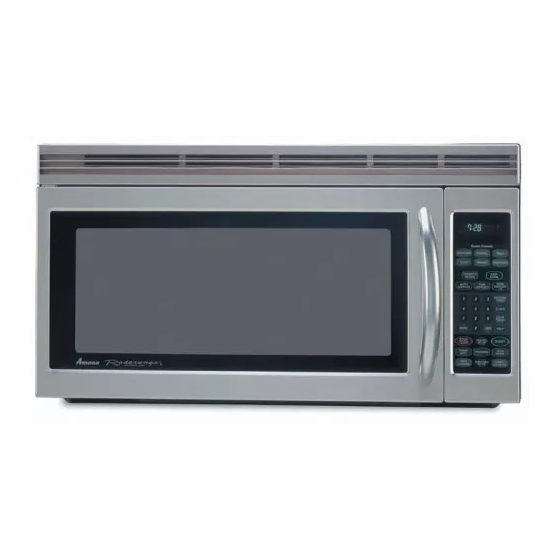
MICROWAVE OVEN FEATURES Door Handle Door Safety Lock System OVEN SPECIFICATIONS Model Power Supply Input Power Cooking Power Frequency Rated Current Outer Dimensions (WxHxD) Cavity Volume Net Weight FEATURES Model and Serial Number Plate Two-position Metal Rack Window with Metal Shield Glass Turntable Cooktop/Countertop Light... -
Page 23: Oven Control
OVEN CONTROL PANEL FOR MODEL ACO1860ABNV/C POPCORN POTATO PIZZA cook REHEAT V EGETABLE ® ® © FEATURES CLOC_ i__@ T_!M E[_ START T_RNTABLE - 23 - FOR MODEL ACO1860AS Sensor Controls _U'70''"_ _'"h _'TIM°_'""_ I DEFROST_ _DEFROST EELS;... -
Page 24: Light Hi/Low/Off
1. DISPLAY: The Display includes a clock and indicators to tell you time of day, cooking time settings and cooking functions selected. 2. POPCORN: Touch this pad when popping popcorn in your microwave oven. The oven's sensor will tell the oven how long to cook depending on the amount of humidity it detects from the popcorn. -
Page 25: Operation
LEARN ABOUT YOUR MICROWAVE This section discusses the concepts behind microwave cooking and introduces you to the basics you need to know to operate your microwave oven. Please read this information before use. CAUTION To avoid risk of personal injury or property damage, do not use stoneware, aluminum foil, metal utensils, or metal trimmed utensils in the oven. - Page 26 VENT HI-LOW-OFF The VENT moves steam and other vapors from the cooking surface. Touch VENT once for High fan speed, twice for Low fan speed, or three times to turn the fan off. NOTE: If the temperature gets too hot around the microwave oven, the fan in the vent hood will automatically turn on at the LOW setting to cool the oven.
-
Page 27: Favorite Recipe
EASY COOK A time-saving pad, this simplified control lets you quickly set and start microwave cooking without the need to touch START pad. Example: To set EASY COOK 1. Touch EASY COOK 4 times. The oven begins cooking and display shows time counting down. -
Page 28: Cooking At High Cook Power
COOKING AT HIGH COOK POWER Example: To cook food for 8 minutes 30 seconds. 1. Enter the cook time. 2. Touch START pad. When the cook time is over, you will hear four beeps and END will display. COOKING AT LOWER POWER LEVELS HIGH power cooking does not always give you the best results with foods that need slower cooking,... -
Page 29: Power Level
COOKING GUIDE FOR LOWER The 10 power levels in addition to HIGH allow you to choose the best power level for the food you are cooking. Below are listed all the power levels, MICROWAVE OUTPUT POWER LEVEL HIGH OPERATION POWER LEVELS examples of foods best cooked at each level, and the amount of microwave power you are using. -
Page 30: Sensor Cooking Guide
SENSOR OPERATING INSTRUCTIONS Sensor Cook allows you to cook most of your favorite foods without selecting cooking times and power levels. The display will indicate SENSING during the initial sensing period. The oven automatically determines required cooking time for each food item. When the internal sensor detects a certain amount of humidity coming from the food, it will tell the oven how much longer to heat. - Page 31 ADDING OR SUBTRACTING COOK TIME If the SENSOR function is too long or too short, you can increase or decrease the cook time by 10% after choosing the function. You can only increase or decrease cook time before cooking starts. Example: If you want to adjust the Sensor Cook (casserole) cooking time for longer time.
- Page 32 VEGETABLE VEGETABLE has preset cook powers for 3 food categories: Fresh, Frozen, and Canned. Example: To reheat Frozen Vegetable. 1. Touch VEGETABLE 2. Choose food category. Category Fresh Frozen Canned When the cook time is over, you will hear four beeps and END will display.
-
Page 33: Auto Defrost
AUTO DEFROST Your microwave oven is preset with three defrost sequences, Using AUTO DEFROST is the best way to defrost frozen foods, The Auto Defrost Sequence Table below provides some basic guidelines for using the three defrost sequences, Example: To defrost 1.2 Ibs. of ground beef, 1. - Page 34 AUTO DEFROST CHART Meat setting FOOD SETTING BEEF MEAT Ground Beef, Remove thawed portions with Bulk fork. Turn over. Return remainder to oven. MEAT Ground Beef, Separate and rearrange. Patties Round Steak MEAT Turn over. Cover warm areas with aluminum foil. Tenderloin MEAT Turn over.
- Page 35 AUTO DEFROST CHART (CONTINUED) Poultry setting FOOD SETTING CHICKEN Whole (up to POULTRY Turn over (finish defrosting 6 Ibs) breast-side down). Cover warm areas with aluminum foil. Cut-up Separate pieces and rearrange. Turn over. Cover warm areas with aluminum foil. CORNISH HENS Whole...
-
Page 36: Time Defrost
TIME DEFROST This feature allows you to choose the time you want to defrost. Example: To defrost for 2 minutes. 1. Touch TIME DEFROST pad. 2. Enter the defrosting time you want. 3. Touch START pad. (Defrost starts) When the defrost time is over, you will hear four beeps and END will display. -
Page 37: Fish & Shellfish
GETTING THE BEST COOKING To get the best results from your microwave oven, read and follow the guidelines below. • Storage Temperature: Foods taken from the freezer or refrigerator take longer to cook than the same foods at room temperature. The time for recipes in this book is based on the normal storage temperature of the food. - Page 38 APPETIZERS / SAUCES / SOUPS Cooking Appetizers: Tips and Techniques Recommended • Crisp crackers, such as melba toast, shredded wheat, and crisp rye crackers are best for microwave use. Wait until party time to add the spreads. Place a paper towel under the crackers while they cook in the microwave oven to absorb extra moisture.
-
Page 39: Cooking Time
Meat Cooking Table POWER MEAT LEVEL Beef Hamburgers, Fresh or defrosted (4 oz. each) 1 patty 2 patties 4 patties Sirloin tip roast (3-4 Ibs.) Lamb Lamb roast, rolled boneless (3-4 Ibs.) Pork Bacon slices 2 slices 4 slices 6 slices Chops (5-7 oz. - Page 40 POULTRY Cooking Poultry: General Directions • Prepare the poultry for cooking. - Defrost completely. - Arrange poultry pieces with thicker pieces at the outside edge of the baking dish. When cooking legs, arrange them like the spokes of a wheel. - Cover the baking dish with waxed paper to reduce splattering.
-
Page 41: Pasta And Rice
PASTA AND RICE Microwave cooking and conventional cooking of pasta, rice, and cereal require about the same amount of time, but the microwave is a more convenient method because you can cook and serve in the same dish. Cooking Pasta and Rice: Tips and Techniques •... -
Page 42: Maintenance
The charcoal filter cannot be cleaned. To order a new charcoal filter, contact the Parts Department at your nearest Authorized Service Center or call Amana at 1-800-843-0304(inside 1-319-622-5511 (outside U.S.A). Order Charcoal Filter kit # : MVHRK3. 1. Disconnect Power to oven. -
Page 43: Oven Light Replacement
COOKTOP/NIGHT LIGHT REPLACEMENT 1. Unplug the oven or turn off power at the main power supply. 2. Remove the bulb cover mounting screws. 3. Replace bulb(s) with 30 watt appliance bulb(s). 4. Replace bulb cover, and mounting screws. 5. Turn the power back on at the main power supply. CAUTION To avoid personal injury or property damage, wear gloves when replacing light bulb. -
Page 44: Utensil Guide
RECOMMENDED MICROWAVE UTENSIL GUIDE OVENPROOF GLASS (treated for high intensity heat): utility dishes, loaf dishes, pie plates, cake plates, liquid measuring cups, casseroles and bowls without metallic trim. CHINA: bowls, cups, serving plates and platters without metallic trim. PLASTIC: Plastic wrap (as a cover)-- lay the plastic wrap loosely over the dish and press it to the sides. -
Page 45: Calling For Service
TROUBLE BEFORE CALLING FOR SERVICE Check the following list to be sure a service call is really necessary. A quick reference of this manual as well as reviewing additional information on items to check may prevent an unneeded service call. Problem If nothing on the oven operates: If the oven interior light does not work:... - Page 46 TROUBLE To avoid electrical shock which can cause severe personal injury or death, do not remove outer case at any time, Only an authorized servicer should remove outer case. QUESTIONS AND ANSWERS Question Can I use a rack in my microwave oven so that I may reheat or cook in two levels at a time? Can I use either metal or aluminum...
-
Page 47: Amana Warranty
Limited Warranty After one year from the date of original retail purchase, Amana will provide a free part, as listed below, to replace any part that fails due to a defect in materials or workmanship. The owner will be responsible for paying all other costs including labor, mileage, and transportation.
Need help?
Do you have a question about the ACO1860A and is the answer not in the manual?
Questions and answers