Table of Contents
Advertisement
Quick Links
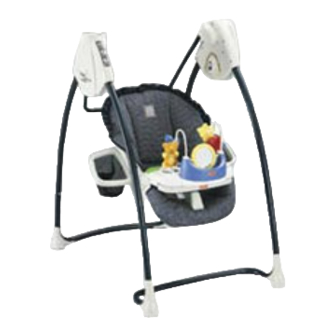
Deluxe Smart Response
Swing
™
Product features and decorations may vary from picture above.
Accessories sold separately.
Model Numbers: 79644, B2388
PLEASE KEEP FOR FUTURE REFERENCE.
Please read these instructions before assembly and use of this product, as they contain important information.
Adult assembly is required.
Tool needed for assembly: Phillips Screwdriver (not included).
Requires four "D" (LR20) alkaline batteries for swinging and sound operation;
three "AA" (LR6) alkaline batteries for sound 'n lights tray operation (batteries not included).
Maximum Weight Limit: 24 lbs. (10.9 kg).
IMPORTANT! The maximum weight limit for this product is 24 lbs. If your child weighs
less than 24 lbs., but is really active and appears to be able to climb
out of the swing, immediately discontinue its use.
Advertisement
Table of Contents

Related Manuals for Fisher-Price DELUXE SMART RESPONSE 79644


Summary of Contents for Fisher-Price DELUXE SMART RESPONSE 79644
- Page 1 Deluxe Smart Response Swing ™ Product features and decorations may vary from picture above. Accessories sold separately. Model Numbers: 79644, B2388 PLEASE KEEP FOR FUTURE REFERENCE. Please read these instructions before assembly and use of this product, as they contain important information. Adult assembly is required.
-
Page 2: Warnings And Caution
Usually, we can solve the problem over the telephone or send you replacement parts. Please call Fisher-Price® Consumer Relations, toll-free at 1-800-432-5437, 8 AM - 6 PM EST Monday through Friday. Hearing-impaired consumers using TTY/TDD equipment, please call 1-800-382-7470. - Page 3 Parts 2 Front Legs (Longer) Front Base Seat with Restraint 2 Seat Wire Seat Wire M4 Screw - 4 Shown Actual Size Note: Tighten and loosen all screws with a Phillips screwdriver. Do not over-tighten the screws. Housing Motor Housing 2 Rear Legs (Shorter) Rear Base...
- Page 4 IMPORTANT! Before assembly, inspect this product for damaged hardware, loose joints, missing parts or sharp edges. DO NOT use if any parts are missing or broken. Contact Fisher-Price® for replacement parts and instructions if needed. Never substitute parts. Front Legs...
- Page 5 Assembly Pull Rear • Pull both rear legs out until they “snap” into place. Press Button Front Rear Base Base • Place the rear base on a flat surface so that the buttons face the front base. • While pressing the buttons on each side of the rear base, fit the rear legs onto the rear base.
- Page 6 Assembly M4 Lock Nut Rounded Side Shown Actual Size Seat Lock Nut Tubes Hexagonal Opening • Position the bracket so that the tall end is toward the bottom edge of the seat. Hint: The M4 lock nuts have been assembled to the bracket at the factory.
- Page 7 Assembly Slots • Lift the seat tubes slightly. • With the seat wire hanging down, insert the ends of the seat wire through the slots in the seat, as shown. Rounded Edge Up Seat Wire Cap Hole Seat Wire Ends of Seat Wire Seat Wire •...
- Page 8 Assembly Frame Hub Push Button Swing Tube Front of Seat Curved Front Base • Position the seat assembly so that the front of the seat is toward the curved front base. • While pressing the buttons on the swing tubes, insert them into the frame hubs.
- Page 9 Assembly Elastic Loop • Fit the bottom edge of the pad around the bottom edge of the seat. • Hook the elastic loops on each side of the pad to the peg on the back of the accessory bins. • Position the lights ‘n sounds tray on a flat surface, with the roller facing you.
-
Page 10: Battery Installation
Battery Installation Hint: When swinging, sound or power L.E.D. slows/dims/stops, it’s time to replace the batteries! We recommend using alkaline batteries for longer battery life. Battery Compartment Door Swing • Locate the battery compartment door on the swing frame. • Insert a coin into the battery compartment door and pry the battery compartment door off of the swing frame. -
Page 11: Securing Your Child
IMPORTANT! Before each use, inspect this product for damaged hardware, loose joints, missing parts or sharp edges. DO NOT use if any parts are missing or broken. Contact Fisher-Price® for replacement parts and instructions if needed. Never substitute parts. WARNING •... -
Page 12: Adjusting The Seat
Adjusting the Seat Upright Recline Adjust the seat angle in any of three positions: Upright, Semi-Recline or Recline. To adjust the seat angle: Push down on the seat back to position the seat wire in the desired groove in the bracket for Upright, Semi-Recline or Recline. - Page 13 Baby Sounds Activated Sound Sensitivity Dial Music/Volume Switch Sound Sensitivity Dial • Slide the switch to high sensitivity for incoming sounds (listens for shallow sounds). • Slide the switch to low sensitivity for incoming sounds (listens only for loud sounds). Hint: You may want to start with the high sensitivity setting at first.
- Page 14 Parent Activated Swing Mode Switch • Slide the switch to parent activated. The power L.E.D. lights and the swing begins swinging. • Be sure to turn the product off when not in use. Speed Dial • Select any of five speed settings. Hint: As with most battery-powered swings, a heavier child will reduce the amount of swinging motion on all settings.
- Page 15 Sound ‘n Lights Tray • Fit the sound ‘n lights tray to the tray, as shown. • Baby activates sounds and lights by pulling on the dog or cat; or rolling the bar. Storage Press Buttons • Press the button on the inside of each housing and push the rear legs toward the front legs.
- Page 16 YOU MAY ALSO HAVE OTHER RIGHTS WHICH MAY VARY FROM STATE TO STATE. Fisher-Price, Inc., a subsidiary of Mattel, Inc., East Aurora, NY 14052 U.S.A. ©2003 Mattel, Inc. All Rights Reserved. ® and ™ designate U.S. trademarks of Mattel, Inc.
Need help?
Do you have a question about the DELUXE SMART RESPONSE 79644 and is the answer not in the manual?
Questions and answers