
Related Manuals for Poulan Pro PR55R21AB


Summary of Contents for Poulan Pro PR55R21AB
- Page 1 OPERATOR'S MANUAL SELF-PROPELLED ROTARY LAWN MOWER • Assembly • Operation • Maintenance • Service and Adjustments • Storage • Troubleshooting 172787 Rev. 7 05.15.03 Printed in U.S.A.
- Page 2 Service and Adjustments ....21-25 Safety Rules .......... Storage ..........25-26 Assembly ..........Troubleshooting ......... 27-28 Operation ..........9-17 Maintenance ........18-21 IMPORTANT: This cutting machine is capable of amputating hands and feet and throw- ing objects. Failure to observe the following safety instructions...
-
Page 3: Operation
IV. SERVICE II. SLOPE OPERATION Slopes are a major factor related to slip • Use extra care in handling gasoline and fall accidents which can result in other fuels. They are flammable severe injury.All slopes require extra cau- vapors are explosive. tion. - Page 4 TO REMOVE MOWER FROM CARTON • Remove all loose parts from carton. • Remove lawn mower housing with care. Avoid touching blade under housing. Always wear gloves or other protection when working under or lifting mower. THINGSTO KNOW BEFOREYOU ASSEMBLE OR OPERATE YOUR LAWN MOWER Do I have a side or rear discharge...
- Page 5 3 POSITION "QUICK" HANDLES Operator I control bar • Raise lower handle section to operating position and squeeze the bottom ends Upper handle of lower handle towards each other until the pin in handle can be inserted into LIFT one of the three height adjustment holes.
- Page 6 ASSEMBLE GRASS CATCHER HINGE BRACKET MOUNTED (REAR DISCHARGE MOWERS ONLY) Rear door iMPORTANT: If your model lawn mower is mulcher ready, the mulcher plate or plug _ebracket must be removed before using mower as a bagger. To convert mower to bagging or G rass discharging, see the Operation section in catcher...
- Page 7 "HARD TOP" GRASS CATCHER • Install two (2) blunt pointed screws in front holes and tighten securely. ASSEMBLE FRAME AND BAG • Thread upper tubular frame into hem of bag as shown. Be sure angled ends of Sharp pointed screws Catcher top frame point downwards.
-
Page 8: Spark Plug Boot
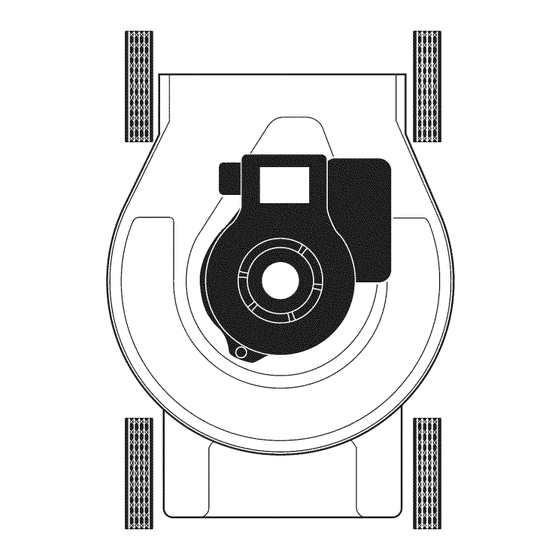
SPARK PLUG BOOT IMPORTANT: The engine alternator will not charge a discharged battery. On some models a spark plug boot is packed loose in the parts bag. if your ALL UNITS: model has the boot, install on spark plug At the end of the mowing season the wire and reconnect spark plug wire to battery should be charged for 48 hours to spark plug. - Page 9 The operation of any lawn BRIGGS & STRATTON CLASSIC or SPRINT SAFETY GLASSES m ower can result in foreign ENGINE MOUNTED SPEED CONTROL objects thrown into the eyes, which can result in severe eye damage. Always wear safety glasses or eye shields while operating your lawn mower or performing any adjustments or repairs.
- Page 10 TO ADJUST CUTTING HEIGHT FOR MULCHING MOWERS ONLY Most mulching mowers are shipped ready Adjust cutting height to suit your require- to be used as a mulcher. ments. Medium position is best for most lawns. Raise wheels for low cut and lower "REAR DISCHARGE ONLY"...
- Page 11 MULCHER PLUG BUILT INTOREARDOOR • Position lock lever over hinge bracket as shown and raise lever to lock mulcher plug in place. • Allow discharge guard to rest against lock lever. • To return to discharging or bagging operation, simply lower lock lever and remove mulcher plug from mower.
- Page 12 "COMBI-CUT" MOWERS MULCHER PLUG TYPE "B" To convert to mulching operation, mulcher Your lawn mower was shipped ready to be plug must be installed into discharge open- used as a mulcher. To convert to bagging ing of mower. or discharging: •...
- Page 13 SIDE DISCHARGING Open mulcher door • Mulcher plug must be installed into rear discharge opening of mower. • Open mulcher door and install discharge deflector under door as shown. • Mower is now ready for discharging operation. • To convert to mulching or bagging operation, discharge deflector must be removed and mulcher door must be closed.
- Page 14 DRIVE CONTROL SIMPLE STEPS TO REMEMBER WHEN CONVERTING YOUR "COMBI=CUT" FRONT WHEEL DRIVE "MULTI=CUT" LAWN MOWER • Self-propelling is controlled by holding the operator presence control bar down FOR MULCHING to the handle and pushing the drive • Rear mulcher plate installed and rear control lever forward until it clicks;...
- Page 15 TO OPERATE DRIVE SYSTEM O _=ratorpresence control bar • With engine running, select ground speed by moving speed control lever to desired position. • To start forward motion, pull drive control bar back against handle. Drive control • To stop forward motion, release drive...
-
Page 16: Before Starting Engine
"VARI-SPEED" ADJUSTMENT carburetor are empty. Use fresh fuel next season. See Storage Instructions for Over time, the drive control system additional information. Never use engine or become "loose", resulting in decreased carburetor cleaner products in fuel tank or speed. There is a thumbscrew on the underside... -
Page 17: Mowing Tips
MOWING TIPS MULCHING MOWING TIPS (MULCHING MOWERS ONLY) • For most cutting conditions and better bagging performance, the engine speed IMPORTANT: For best performance, should be set in the FAST position. keep mower housing free of built-up • Under certain conditions, such as when grass and trash. -
Page 18: Maintenance
MAINTENANCE SCHEDULE .,,____._°_o_°_ FILL IN DATES _._ ,-4, J__YSERVICE AS YOU COMPLETE REGULAR SERVICE f_r.._ _.."_ _ )_r.._"" _.._y! DATES i,,' Lubrication Check Tires Check Drive Wheels (Power-Propelled Mowers) Check for Loose Fasteners Clean/Inspect Grass Catcher (If Equipped) Clean Lawn Mower E Clean Under Drive Cover (Power-Propelled... -
Page 19: Lawn Mower
TO SHARPEN BLADE LAWN MOWER Care should be taken to keep the blade Always observe safety rules when perform- balanced. An unbalanced blade will cause ing any maintenance. excessive vibration and eventual damage to lawn mower and engine. TIRES • The blade can be sharpened with a file •... -
Page 20: Air Filter
ENGINE REAR WHEEL GEAR DRIVE ONLY: • If you remove the drive pinions, wipe clean Read the maintenance section of your with dry cloth. Reassemble dry. Do not engine manual. lubricate. Do not use oil or grease. LUBRICATION NOTE: The pinion gears, on both sides of Change the oil after the first two hours... - Page 21 CLEANING We do not recommend using a garden hose to clean your lawn mower unless iMPORTANT: For best performance, keep electrical system, muffler, air filter, and mower housing free of grass build-up carburetor are covered to keep water out. trash. Clean the underside of your mower Water...
- Page 22 3 POSITION"EURO"OR "EZ" Lndle pin The handleon your lawn mowerhas three Handle (3) height positions- adjustto heightthat adjustment Medium bracket suits you. • Removeknob and carriage bolt on one side of the lower handle. While holding handleassembly,remove knob and carriage bolt from opposite side, align hole in handlewith desired hole in handlebracketand reassemble bolt and knob and tightensecurely.
- Page 23 TO REMOVE / REPLACE DRIVE BELT FRONT WHEEL GEAR DRIVE • Remove drive cover. Remove belt from gearcase pulley by pushing down on pul- ley and rolling belt off it. Turn lawn mower on its side with air filter Drive and carburetor cove r Remove...
- Page 24 • Turn lawn mower on its side. Make sure • When reinstalling the belt cover be sure the front hook is under clutch frame. air filter and carburetor are up. Reinstall in rear of cover. • Use a wood block between blade and mower housing...
-
Page 25: Engine Speed
ENGINE SPEED THROTTLE CONTROL The engine speed has been factory set. Do If it becomes necessary to adjust or not attempt to increase engine speed as it replace the throttle control, see the adjust- may result in personal injury. If you believe ment section of your engine manual. - Page 26 • Use fresh fuel next season. NOTE: Fuel stabilizer is an acceptable alternative in minimizing the formation Knob of fuel gum deposits during storage. stabilizer to gasoline in fuel tank or storage container. Always follow the mix ratio found Handle on stabilizer container.
-
Page 27: Troubleshooting
TROUBLESHOOTING - See appropriate section in manual unless directed to an authorized Service Center. CORRECTION PROBLEM CAUSE Does not start Dirty air filter. 1. Clean/replace air filter. Out of fuel. Fill fuel tank. Stale fuel. Drain fuel tank and refill tank with fresh, clean gasoline. - Page 28 TROUBLESHOOTING - See appropriate section in manual unless directed to an authorized Service Center. PROBLEM CAUSE CORRECTION Hard to push 1. Grass is too high or wheel Raise cutting height. height is too low. 2. Rear of lawn mower 2. Raise rear of lawn mower housing or cutting blade housing one (1) setting dragging in grass.
Need help?
Do you have a question about the PR55R21AB and is the answer not in the manual?
Questions and answers