
Related Manuals for Pentax OPTIO S40


Summary of Contents for Pentax OPTIO S40
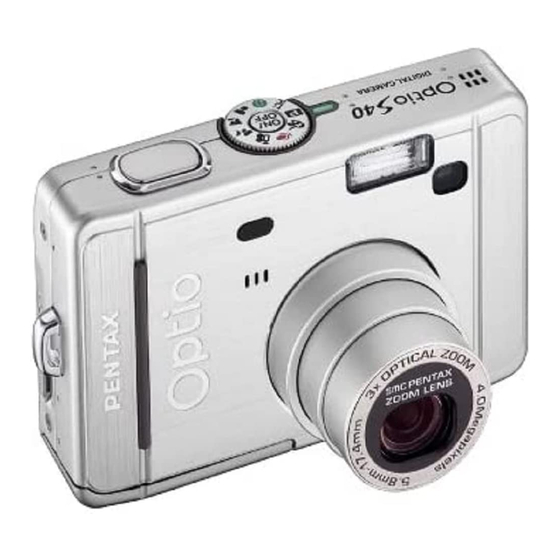
- Page 1 PENTAX Digital Camera Optio)f!40 Operating Manual To ensure the best performance from your camera, please read the Operating PictBridge Manual before using the camera.
- Page 2 Regarding trademarks • The SD logo ,_'_ is a trademark. • PENTAX is a trademark of PENTAX Corporation. • Optio is a trademark of PENTAX Corporation. • All other brands or product names are trademarks or registered trademarks of their respective companies.
- Page 3 AC adapter and contact your nearest PENTAX service center. Continued use of the camera may result in fire or electric shock.
- Page 4 iiiiiiiiiiiiiiiiiiiiiiiiiiiiiiii iiiiiiiiiiiiiiiiiiiiiiiiiiiiiiii iiiiiiiiiiiiiiiiiiiiiiiiiiiiiiii HHHHHHHHHHHHHHH_ i± coo,!co • Never try to disassemble or short the battery. Also, do not dispose of the battery in fire, as it may explode. • Do not charge any batteries other than rechargeable Ni-MH batteries. The battery could explode or catch fire.
- Page 5 If the AC plug cord becomes damaged, consult PENTAX Service Center. • Do not short or touch the output terminals of the product while it is still plugged • Do not plug in the AC plug cord with wet hands. This can cause an electrical shock.
- Page 6 (such as at a wedding or during traveling). PENTAX is not responsible consequential damages (costs incurred as a result of taking pictures, loss of benefits that were to be obtained through taking pictures) arising from failure of this product.
- Page 7 • If the camera is subjected to rapid temperature changes, condensation may form on the inside and outside of the camera. Therefore put the camera in a bag or plastic bag, and take the camera out when the difference in temperature has subsided.
- Page 8 iiiiiiiiiiiiiiiiiiiiiiiiiiiiii_ HHHHHHHHHHHHHHH_ HHHHHHHHHHHHHHH_ HHHHHHHHHHHHHHH_ HHHHHHHHHHHHHHH_ HHHHHHHHHHHHHHH_ HHHHHHHHHHHHHHH_ FOR SAFE USE OF YOUR CAMERA ..........Care to be Taken During Handling ........... Contents ................... Contents of the Operating Manual ............ Checking the Contents of the Package .......... Names of Parts ................Names of Operating Parts ..............
- Page 9 Settingselecting the FunctionSMode the Picture (Pr°gram Mode) .......... According the Shooting Scene 41to .... i"" (Picture Mode) ................Taking Pictures of Dark Scenes (Night-Scene Mode) ....44 Taking Landscape Views (Landscape Mode)....... Taking Portrait Pictures (Portrait Mode) ......... Taking Moving Pictures (Moving Picture Mode) ......Using the Zoom ................
- Page 10 iiiiiiiiiiiiiiiiiiiiiiiiiiiiii_ HHHHHHHHHHHHHHH_ HHHHHHHHHHHHHHH_ HHHHHHHHHHHHHHH_ HHHHHHHHHHHHHHH_ HHHHHHHHHHHHHHH_ Displaying Shooting Information in Playback Mode ....... 85 Nine Image Display ................ Slideshow ..................Deleting ....................Deleting Single images and Sounds ..........Deleting All Images ................. Protecting Images and Sounds from Deletion (Protect) ....91 Viewing Images on a TV ..............
-
Page 11: Getting Started
" I t ° 0 ° _A_l This operating manual contains following chapters. Getting Started This chapter explains what you need to do after purchasing the camera before you start taking pictures. Be sure to read it and follow the instructions 2 Quick Start This chapter explains the simplest way to take pictures and play back images Use it if... - Page 12 iiiiiiiiiiiiiiiiiiiiiiiiiiiiii HHHHHHHHHHHHHHH_ HHHHHHHHHHHHHHH_ HHHHHHHHHHHHHHH_ HHHHHHHHHHHHHHH_ HHHHHHHHHHHHHHH_ iiiiiiiiiiiiiiiiiiiiiiiiiiiiiiii iiiiiiiiiiiiiiiiiiiiiiiiiiiiiiii Camera Strap Software(CD-ROM) opt,os_0 o_sT20_._ s_swl0 iiHHHHHHHHHHHHHH_ iiiiiiiiiiiiiiiiiiiiiiiiiiiiiiii iiiiiiiiiiiiiiiiiiiiiiiiiiiiiiii iiiiiiiiiiiiiiiiiiiiiiiiiiiiiiii iiiiiiiiiiiiiiiiiiiiiiiiiiiiiiii iiiiiiiiiiiiiiiiiiiiiiiiiiiiiiii AV cable USB cable iiiiiiiiiiiiiiiiiiiiiiiiiiiiiiii _-Avc7(,) _-usB7(,) TwoA_batter_es iiiiiiiiiiiiiiiiiiiiiiiiiiiiiiii iiiiiiiiiiiiiiiiiiiiiiiiiiiiiiii oE.,Ax _.,_ iiiiiiiiiiiiiiiiiiiiiiiiiiiiiiii ..o;,,o,o o_,_ iiiiiiiiiiiiiiiiiiiiiiiiiiiiiiii _< ::'_ _ ::_ iiiiiiiiiiiiiiiiiiiiiiiiiiiiiiii ili! ..
- Page 13 Front Shutter reIease button Remote control receiver Self-timer lamp Power switch .Flash Speaker )hone input terminal Back Viewfinder Focus status lamp (green) Mode dial status lamp (red) p lug cover Battery cover LCD monitor Tripod socket...
- Page 14 1111111111111111111111111111117 1111111111111111111111111111117 HHHHHHHHHHHHHHH_ ,utto !!!!!!!!!!!!!!!!!!!!!!!!!!7!! iiiiiiiiiiiiiiiiiiiiiiiiiiiiiiii C O_>,L!,!' _ ou_-_ayoo_,o,e, 1111111111111111111111111117 • (_,)• (MF,'_I) -°-o _ .<+°>. .DISPLAY button .o,,_,._,oo .,,°,.,ton iiiiiiiiiiiiiiiiiiiiiiiiiiiiiiii Guidelndications iiiiiiiiiiiiiiiiiiiiiiiiiiiiiiii A guide to available button operations appears on the LCD monitor iiiiiiiiiiiiiiiiiiiiiiiiiiiiiiii duringoperation. iiiiiiiiiiiiiiiiiiiiiiiiiiiiiiii The buttons are indicated as shown below.
- Page 15 Pass the narrow end of the strap through the strap lug and pass the other end through the loop.
- Page 16 iiiiiiiiiiiiiiiiiiii_!ill iiiiiiiiiiiiiiiiiZi:il iiiiiiiiiiiiiiiiiiii_;_i_ii iiiiiiiiiiiiiiiiiiii iiii i ! (when using AA batteries) (when using a CR-V3 battery) iiiiiiiiiiiiiiiiiiiiiiiiiiiiiiii Insert the batteries in the camera. Use two AA alkaline, AA lithium, Ni-MH, AA nickel or AA nickel manganese batteries or one CR-V3 battery.
- Page 17 !i iiiii AA alkaline batteries Approx. 50 pictures Approx. 35 minutes • The above figures are based on PENTAX measuring conditions and may vary depending on capture mode and shooting conditions. iiii ii i!i!i!! • In general, battery performance temporarily...
- Page 18 DC terminal AC adapter To power outlet iiiiiiiiiiiiiiiiiiii !ill iiiiiiiiiiiiiiiiiiii_;_i_ii iiiiiiiiiiiiiiiiiiii iiii i ! AC power cable iiiiiiiiiiiiiiiiiiiiiiiiiiiiiiii If you intend to use the LCD monitor for a long time or connect camera to a PC, use of the AC adapter D-AC5 is recommended.
- Page 19 SD Memory Card Card cover This camera uses an SD Memory Card. Captured images are recorded on the SD Memory Card ifa card is inserted appears on the LCD monitor) or in the built-in memory if no card is inserted appears the LCD monitor).
- Page 20 • The data on the SD Memory Card may be deleted in the following circumstances. PENTAX does not accept any liability for data that is deleted (1) when the SD Memory Card is mishandled by the user. (2) when the SD Memory Card is exposed to static electricity or electrical interference.
- Page 21 Choose the number of recorded pixels and quality best suited to your purpose. Higher quality levels and numbers of recorded pixels produce clearer images for printing, but the resulting increase in data volume reduces total number of pictures that can be taken. Choose the appropriate number...
- Page 22 16MB ii! • The above table is based on standard shooting conditions specified iiiiiiiiiiiiiiiiiiiiiiii SDMemoryCard. iiiiiiiiiiiiiiiiiiiiiiiiiiiiii_ PENTAX and may vary depending on the subject, shooting conditions, capture iiiiiiiiiiiiiiiiiiiiiiiiiiiiiiii mode, SDMemoryCard, etc. iiiiiiiiiiiiiiiiiiiiiiiiiiiiiiii iiiiiiiiiiiiiiiiiiiiiiiiiiiiiiii iiiiiiiiiiiiiiiiiiiiiiiiiiiiiiii iiiiiiiiiiiiiiiiiiiiiiiiiiiiiiii...
- Page 23 Press the power switch. The camera turns on. The lens cover opens and the lens extends when the camera is turned Press the power switch again. The camera turns off. Switching between Capture Mode and Playback Mode ,_p.58 I Taking Pictures ,_p.39 When the camera is turned on in the Playback...
- Page 24 iiiiiiiiiiiiiiiiiiii_i_ii_! Mode Dial iiiiiiiiiiiiiiiiii_;i!iii_i! iiiiiiiiiiiiiiiiiiii_i!i!iii Voice Recording Only mode is for recording sound only. The lens does not extend in this mode. You can use the camera as a voice recorder. Set the mode dial to _ and press the power switch. The camera turns on in Voice Recording Only mode.
- Page 25 FcqPtayback button Four-way controller Power switch OK button DISPLAY button MENU button If the Initial Settings screen or Date Adjust screen appears when you turn the camera on, follow the procedure below to set the display language and/or current date and time. If the Initial Settings screen appears...
- Page 26 ..o I _ m _ I _}l Usethefour-waycontro er(&v) Set the current date and time and the display style. to choose the date and time ..i4h'_ display style. 0I, 01,2004 00:00 ... _E,lt Press the four-way contro er (•) I ..........
- Page 27 iiiiiii i Repeat Step 7 to change the [year], [hour] and [minutes]. i_ii_i_i_ Choose AM or PM if you selected [12h] in Step 3. Press the OK button when you have finished settings. The camera is ready to take pictures. If you set the date and time using the MENU button, you will return to the Menu screen.
- Page 28 Taking Still Pictures Power switch Mode Dial Shutter release butto_ Viewfinder_'] _Zoom/Z/O. button Jft_' LCD monitor__._ _r_L_/ DISPLAY button The standard procedure for taking still pictures is described below. flash fires automatically depending on the light conditions. Press the power switch. The camera turns on iiiiiiiiiiiiiiiii...
- Page 29 The shutter release b utton w orks i natwo-step action a sfollows. Press halfway The focus and exposure are locked when the shutter release button pressed lightly (halfway). The shutter speed and aperture settings only appear on the LCD monitor when the shutter release...
- Page 30 Playing Back Still Pictures LCD monitor-- []E] Ptayback button_ Four-way controller iiiiiiiiiiiiiiiiiiiiiiiiiiiiiiii Youcandisplaythestillpictureyouhavejusttaken. iiiiiiiiiiiiiiiiiiiiiiiiiiiiiiii Pressthe F_ Playbackbutton iiiiiiiiiiiiiiiiiiiiiiiiiiiiiiii aftertakingapicture. iiiiiiiiiiiiiiiiiiiiiiiiiiiiiiii TheimageappearsontheLCDmonitor. iiiiiiiiiiiiiiiiiiiiiiiiiiiiiiii iiiiiiiiiiiiiiiiiiiiiiiiiiiiiiii iiiiiiiiiiiiiiiiiiiiiiiiiiiiiiii iiiiiiiiiiiiiiiiiiiiiiiiiiiiiiii Stillpicturescanbeplayedbackoneatatime, proceedingeitherforward iiiiiiiiiiiiiiiiiiiiiiiiiiiiiiii orbackward. Press the F_ Playback button after taking a picture. The image appears on the LCD monitor.
- Page 31 ;;;;;;;;;;;;;;;; Press the F_ Playback button after taking a picture. The image appears on the LCD monitor. Press the four-way controller (v). The image is rotated 90 ° clockwise each time the button is pressed. iiii_iiiiiii iiii iiii ]-he zoom disp ay and nine-image display functions cannot be used with rotated images, nor can DPOF or de]ate!protect settings be made.
- Page 32 ®® _ ®® ,®,® iiiiiiiiiiiiiiiiiiii'_!i!;_i_iii_!{i!!ill iiiiiiiiiiiiiiiiiiii=_i_;, Playback button iiiiiiiiiiiiiiiiiiii61{ii Switches to the Playback mode. (7p.28) iiiiiiiiiiiiiiiiii_iiiiiii '"'"'"'"'"'""_';iiiiiiiiiiiiiiiiiiii_!i!_i!;J Zoombutton You can change the shooting area by pressing the Zoom button. (,_p.26) iiiiiiiiiiiiiiiiiiiii_!ii!i!i!:i li_/Fn button iiiiiiiiiiiiiiiiiiii_iliiiiiiiiii!i D isptaystheHeIpscreenin #) mode. (p.40) iiiiiiiiiiiiiiiiiiiiiiiiiiiiiiii Activates the function assigned by [Fn Setting] on the [:(i Set-up] menu...
- Page 33 iiiiiiiiii IIIIIIIIIIIIII ® Deletes the image displayed on the LCD monitor. 0_p.88) _+!++++ i-¢q Playback button Switches to the Capture mode. (_p.28) Zoom/[]/O_ button Press [] during normal playback to display nine images at once. (_, p.86) Press Zoom/[]/O. during zoom playback to change the size of the Zoom Display image displayed on the LCD monitor.
- Page 34 _;iii!:!_! iiiiiiiiiiiiiiiiiiii'_!i!;_i_ii i_!ii!!ill (_ Shutter r elease b utton iiiiiiiiiiiiiiiiiiiilQ_ii!_ When p ressed, starts r ecording, and when p ressed again, stops iiiiiiiiiiiiiiiiiiiii_ii_i, iiiiiiiiiiiiiiiiiiii6;iiii recording. (_p.78) iiiiiiiiiiiiiiiiii_iiiiiii _¢_ (_) I-_ Playback button iiiiiiiiiiiiiiiiiiii_i!!!il Switches to the Playback mode. When pressed again, returns to Voice iiiiiiiiiiiiiiiiiiiii_!ii!i!i!ii Recording mode.
- Page 35 When you press the MENU button, the menus appear on the LCD monitor. You can set functions, save the settings and change the camera settings on these menus. When you are making settings from a menu, a guide to operation appears on the LCD monitor.
- Page 37 iiiiiii [i-€'1 Playback] Menu [_'i Set-up] Menu .rot.or ,4=For..t t DPOF Sound SHdeshow 3sec Date Adjust 511712004 Resize World Time li_iJ Copy image/sound Filter Language/_ Screen Setting English J_E×it _Exit _o__oK ,l,I ,d%, I,!, I,!, To the next screen To the next screen iiiiiiiiiiiiiiiii HHHHHHHHHH HHHHHHHHHH...
- Page 38 menu. Press _€_, to return to the original display. Example of Menu Operation Pressing the zoom button ( _ ) while a menu is displayed enlarges to=00 =°°0 I/o=00 °0°0 AE Metering Sens,t,v,ty Auto _ ..............iiiiiiiiiii_iil, Whit e Bal ance _uality Level Aoto $$$...
- Page 39 [1_ Rec. Mode] Menu Yes... Adjustable PIOT, ...Any changes made invalid ",_ and • modes..Any changes made invalid. change the setting on the menu changes make invalid in actual operation. Item Description Default i_JPICT_ Page Setting -,,A-,'#. _ For selecting Image Quality number of pixels and Super...
- Page 40 [I-_-I Playback] Menu Item Description Page Protect For protecting images from deletion p.91 DPOF For setting the printing service to print out images p.99 Slideshow For playing back recorded images successively p.87 Resize For changing the size of images p.101 Copy image/sound For copying files from the built-in memory to the SD p105...
- Page 41 @ (Easy) mode is the simplest way to take pictures without having to set any functions. The camera automatically chooses the optimal settings the shooting scene when the shutter release button is pressed halfway. Set the mode dial to ©. Press the shutter release button halfway.
- Page 42 3, 4 mode. The Help screen describes the function of each button, such as You can display the Help screen while taking or viewing pictures in Easy the four-way controller keys and zoom button. Set the mode dial to ©. Press the I_l/Fn button.
- Page 43 In [] (Program) mode, the camera automatically sets the shutter speed and aperture for taking still pictures. However, you can select other functions such as the flash mode or continuous shooting mode. Set the mode dial to I_. Set the functions you want to use.
- Page 44 You canselect thePicture m ode according totheshooting scene. There aretenavailable modes i nPicture m ode. •t:_ Flower (default setting) Lets you take brightly colored flower pictures. Lets you take pictures of yourself or be included Self-portrait >ictures. Lets you take photos against dazzling backgrounds Surf...
- Page 45 Use the four-way controller (A • 4 I_) to choose the Picture mode. FI0wer Press the OK The Picture mode is selected. Press the shutter release button button..halfway. The focus frame turns green if the subject is Press the shutter release button fully.
- Page 46 You cantake pictures ofdark scenes, such asnightscapes, with the appropriate settings. Set the mode dial to _-'. Press the shutter release button The focus frame turns green if the subject is iiiiiiiiiiiiiiiiiiiiiiiiiiiiiiii Presstheshutterreleasebutton iiiiiiiiiiiiiiiiiiiiiiiiiiiiiiii fu,y. iiiiiiiiiiiiiiiiiiiiiiiiiiiiiiii Thepictureistaken. iiiiiiiiiiiiiiiiiiiiiiiiiiiiiiii I Using the Shutter Release Button _-p.27 iiiiiiiiiiiiiiiiiiiiiiiiiiiiiiii '_*_, Total recording time wil! be longer when the picture is taken at slower...
- Page 47 This mode l etsyoutake landscape views u sing t heoptimal settings. Set the mode dial to "_i,. Press the shutter release button halfway, The focus frame turns green if the subject is in focus. Press the shutter release button fully. The picture is taken, I Using the Shutter Release Button _, p.27 This mode lets you capture...
- Page 48 This mode lets you take moving pictures. Sound can be recorded at the same time. Set the mode dial to ,_'. The following information appears on the LCD monitor. 1 Flash Off icon 2 Moving Picture mode icon 3 Card/Built-in memory 4 Recordable time...
- Page 49 HHHHHHHHHH HHHHHHHHHH HHHHHHHHHH HHHHHHHHHH HHHHHHHHHH Recording starts when you keep the shutter release button pressed iiiiiiiiiiiiiiiii more than one second. Pictures will be taken for as long as you keep the iiiiiiiiiiiiiiiii button pressed. Recording stops when you take your finger off the iiiiiiiiiiiiiiiii shutterre,easebutton...
- Page 50 • Sound cannot be recorded in Marine Moving Picture mode. , The optical zoom is not available in Marine Moving Picture mode. Only the digital zoom can be used dudng shooting. , The flash will not discharge in Marine Moving Picture mode. Self-timer mode, Continuous Shooting mode and Remote Control mode are not available in Marine Moving...
- Page 51 iiiiiiiiii @ PICT _ _ ,_' "- ",& .= iiiiiii iiiiiiiiiiiiiiiii You can use the zoom to change the shooting area. iii_iiiiii%i! Press the Zoom/$$¢/€ button in Capture mode. € (Tele) : enlarges the subject. _,_, (Wide) : enlarges the area captured iiii_!iiiiii!il the camera.
- Page 52 Press the MENU button in Capture mode. The [1_1 Rec. Mode] menu appears. Use the four-way controller (A v) to select [Digital Zoom]. Use the four-way controller (4 •) to select _f (On). SaturationSharpnessMemoryli stant Review 0,Ssec -rlq+-EJE]÷ lii] ........Press the OK button.
- Page 53 Press the four-way controller (A) in Capture mode to display _ or _2_ on the LCD monitor. Press the shutter release button. The self-timer is engaged and the self- timer lamp lights for about seven seconds. The picture is taken approximately three seconds after the...
-
Page 54: Recorded Pixels And Quality
Pictures are taken continuously while the shutter release button i spressed. Press the four-way controller (•) in Capture mode to display % on _D_j the LCD monitor. Press the shutter release button halfway. The focus frame turns green if the subject is in focus. - Page 55 Control Unit A signal can be sent from the remote control unit to the camera iiiiiiiiiiii approximately 30,000 times. Contact your nearest PENTAX customer iiiiiiiiiiii service center if the battery needs changing. (A charge is made iiiiiiiiiiii changing the battery.)
- Page 56 2, 3 _You can take pictures with digital filters in a variety of colors, such as red, blue and green. iiiiiiiiiiiiiiiiiiii_! Set the mode dial to @. Press the four-way controller (v). iiiiiiiiiiiiiiiiiiii_ii!!_ The screen for choosing a digital effect mode appears.
- Page 57 ili!i!i!i!i iiiiiiii You can take two images in succession and place them side by side to form a single picture. The first image is positioned in the left half of the picture and the second image in the right half. Set the mode dial to @.
- Page 58 4, 8 ---- 2, 3, 5 You can take a number of images and join them together to form a panorama picture. The panorama software supplied with the camera (ACDSee for PENTA×) and a computer are necessary for joining the images.
- Page 59 To cancel Panorama Assist mode. change to another mode. _emo • The camera cannot join the images. Use the panorama software supphed with the camera (ACDSee for PENTAX. ACD Phetostitcher_. Refer to "Viewing D_gital Camera Images on a PC" for instructions on creabng panorama pictures.
- Page 60 Capture m ode isfortaking pictures andPlayback mode isforplaying back ordeleting images. • Tochange f rom Capture m ode t oPlayback mode, press t he Playback button. • Tochange f rom Playback mode toCapture mode, press t he Playback button o rpress t heshutter release button halfway. Capture Modes Program...
- Page 61 The LCD monitor display changes each time you press the DISPLAY button. Display I 2 3 4 5 6 Shooting information is displayed when the power is turned 1 Flash mode 2 Drive mode 3 Focus mode 4 Capture mode 5 Focus frame 6 Card/Built-in memory...
- Page 62 @ PICT _ _ ,'_ "_'- " ,_ ,,= Autofocus mode • icon) Use this mode when the distance to the subject is more than 40 on1 (16 in.). iiiiiiiiiiiiiiiiiiii_! This mode is used when the distance to the subject iiiiiiiiiiiiiiiiii_i;...
- Page 63 When the mode is set to MF (Manual Focus), the central portion of the picture is enlarged to full screen on the LCD monitor for focus adjustment. Pressing the four-way controller (• •) displays the indicator on the LCD monitor. Use the indicator as a guide while adjusting...
- Page 64 @ PICT _ _ "'- ",& ,= Auto The flash discharges automatically depending on the light icon) conditions. The flash will not discharge, regardless of the brightness. Flash Off Use this mode to take pictures at dusk or in museums etc. where flash photography is prohibited.
- Page 65 iiiiiiiiiiiiiiiiiiiiiiiiiiiiii HHHHHHHHHH HHHHHHHHHH HHHHHHHHHH HHHHHHHHHH HHHHHHHHHH I ecor°o°Pi,ois uality Level Focusing Area Multi AE Metering lhit e Balance ensitivity Auto l_E_it You can choose the number of recorded pixels from [2304xl 728], [2048x1536], [1600x1200], [1024x768] and [640x480]. The more pixels there are, the larger the picture and the bigger the file...
- Page 66 PIGT C_3 _ "'- "_ ,,= You can choose the image compression rate. The more stars, the clearer the quality and the larger the volume. data volume also varies depending on the recorded pixels setting iiiiiiiiiiiiiiiiiiii_,ii!_ii (_÷p.63). iiiiiiiiiiiiiiiiiiii_!i iiiiiiiiiiiiiiiiiiii=;i_iiJ Quality Levels iiiiiiiiiiiiiiiiiiii_i_i_i _-*-k...
- Page 67 /, X!CCW 1 {(2048x1536: -_t_ You can set the recorded pixels and quality together in Easy mode. combination of recorded pixels and quality for each setting is shown below. Image Quality setting RecordedPixels Quality Superior 2304×I728 -#-k-# Suitable for printing on large paper (such as A4) Suitable for printing on paper slightly larger Super 2048×I536...
- Page 68 I_lr_V IJQuaHtyLeve] White Balance I/;00.,..,,, , 0,0 AE Metedng according to the light conditions at the time of shooting. You can take pictures in natural colors by adjusting the white balance White Balance iiiiiiiiiiiiiiiiiiii_! Auto The camera adjusts the white balance automatically. iiiiiiiiiiiiiiiiii_;;...
- Page 69 Have a blank sheet ofwhite paper r eady. Select [_:z_] ( manual) on the [White Balance] screen. Point the camera at the blank Nhite Balance sheet of paper so that it fills the frame of the LCD monitor. Press the OK button. The white balance is automatically adjusted.
- Page 70 I ecordodPi,ois uaHty Level Focusing Area Multi AE Metering lhite Balance AWB ! ensitivity Auto l_E_it PICT_ J'-'_. Focusing Area You can change the autofocus area (Focusing Area). Multipte Normal range Spot The autofocus range becomes smaller. iiiiiiiiiiiiiiiiii_;; Press the MENU button in Capture mode. The [1_ Rec.
- Page 71 Recorded uality Level Pixels 2304 Focusin 0 Area Multi AE Metedn 0 lhite alance AWB ! ensitivity Auto I _E_,t PICT _ ,_ ._' "- ",& ,= You can choose which part of the screen to use to measure brightness and determine the exposure.
- Page 72 PIGT _ _ "'- "_ ,,= You can select the sensitivity to suit the brightness of the surroundings. Sensitivity Auto The camera sets the sensitivity automatically. • The lower the sensitivity, the sharper the image and the less noise. The shutter speed will be slower in low light conditions.
- Page 73 iiiiiii Recorded uality Level Pixels 2304 Focusing Area Multi AE Metering lhite Balance AWB ! ensitivity Auto I _E,,it P,CT ®_ "., _ " ii You can choose the instant Review time from 0.5 sec., 1 sec., 2 sec., 3 sec., 5 sec. and Off (no display). Press the MENU button in Capture mode.
- Page 74 I_ecor°o°Pi,oIs uaHty Level Focusing Area Multi AE Metering lhite Balance AWB ! ensitivity Auto l_E_it _OK I [] _ outlines. You can choose whether you want the to have soft image sharp Press the MENU button in Capture mode. The [1_ Rec. Mode] menu appears. iiiiiiiiiiiiiiiiii_;;...
- Page 75 I ec0r°e°Pi,els uality Level Focusing Area Multi AE Metering lhit e Balance ensitivity Auto You can set the color saturation. Press the MENU button in Capture mode. The [1_1 Rec. Mode] menu appears. Use the four-way controller (• • ) [ORec.
- Page 76 Recorded uality Level Pixels 2304 Focusing Area Multi AE Metering lhite alance AWB ! ensitivity Auto l_Exit Press the MENU button in Capture mode. You can set the image contrast. iiiiiiiiiiiiiiiiiiii_,;!_ii The [1_1 Rec. Mode] menu appears. iiiiiiiiiiiiiiiiiiii_!i iiiiiiiiiiiiiiiiiiii=_i:_ Use the four-way controller (A v) ioR0c M0_0 iiiiiiiiiiiiiiiiii_i;...
- Page 77 i 0cor°o°P,,o,s uaHty LeveJ Focusing Area Multi AE Metering lhit e Balance ensitivity Auto l_E_it PICT (_3 _ ,_' "'- ",,J, ; You can adjust the overall brightness of the picture. Use this function to take pictures that are intentionally overexposed underexposed.
- Page 78 choose whether want set values to be saved when camera is turned off. If you select (On), settings will saved status they were in immediately before the camera turned off. select [] (Off), settings will be reset to the defaults when camera is turned...
- Page 79 iiii ..• to select [Memory]. _ g alzoom _ _il Instant Review 0.5sec Press the four-way controller (•)....... '_ ......I_il _harpness -liC3+_ The [Memory] menu appears. Isat_t'ation -E_÷_, |_ontrast -E_3+_ I _Exit t- ............ 'g0}{ Use the four-way controller (• • ) MFM_m0,'y /......
- Page 80 You can record sound. The recordable time appears on the LCD monitor according to how much space is available on the SD Memory Card or the built-in memory. cropho0e_ _speaker Set the mode dial to ÷ and press the power switch. The recordable time appears on the LGD monitor.
- Page 81 You canplay back therecording youmade inVoice Recording mode. Press the t-_ Playback button. Use the four-way controller (< •) to choose the recording to play back. Press the four-way controller (A). Playback starts. • The following operations can be File recording time performed during playback.
- Page 82 You can add sound (voice memo) to a captured image. 2, 3 the four-way controller ( < • ) to Enter the Playback mode and use choose the image to which you want to add a voice memo. iiiiiiiiiiiiiiiiiiii_iiiii '_ appears on the four-way controller operation...
- Page 83 Enter the Playback mode and use the four-way controller ( _ • ) to choose the image with the voice memo that you want to play back. If ['._q appears, a voice memo has been recorded for the displayed image. Press the four-way controller (•).
-
Page 84: Playback Only Mode
1_Ptayback button Press Playback button. Refer to "Playing Back Images" (p.28) for instructions. appears on the LCD monitor during magnification. _)You can display images magnified up to 12 times. A guide to operation Enter the Playback mode and use the four-way controller ( 4 •... - Page 85 Ii_'f II DPI'_t p Protect Copy image/sound ResizeSIidesh°w ilit al Filter 3sec !
- Page 86 _1,2,3 You can play back moving pictures. A guide to operation appears on the LCD monitor during playback. You can play back the recording made in Voice Recording mode at the same time. Enter the Playback mode and use the four-way contro,,er •)toc,oose the moving picture top,ay...
- Page 87 Shooting information canbedisplayed ontheLCD monitor inPlayback mode. Pressing theDISPLAY button changes thedisplay m ode. Display O n Shooting information isdisplayed. 1 Protect icon 2 Voice Memo i con 3 Folder name and filename 4 Card/Built-in memory icon 5 Four-way controller operation guide 6 Shooting date and time 7 Battery l evel i ndicator 8 Aperture...
- Page 88 You can display nine images at the same time. Enter the Playback mode and use the four-way controller (.q • ) to choose an image. Press $$_/[] on the Zoom/[]/O. 100-0017 button..Nine images appear with the selected _'_ii _l'_ image in the center.
- Page 89 1,3,4 You can play back all the images on the SD Memory Card or in the built- in memory continuously. Enter the Playback mode and use the four-way controller ( _ • ) to choose the image with which to start the s.deshow.
- Page 90 iii,. You can delete single images and sound recordings one at a time. iliiiii!iii!i!i!i!i! .Oncode,eted. imoges0an0otboresto,ed. _ ..• You cannot delete protected images. (_p.91) controller ( < • ) to choose the image or sound to Enter the Playback mode and use the four-way delete.
- Page 91 Ifanimage h asavoice memo, youcandelete t he voice memo w ithout deleting theimage. Enter the Playback mode and use the four-way controller ( ,q • ) to choose an image with a voice memo to delete. Press the -_ button. t_>...
- Page 92 Youcandelete a lltheimages andsounds atonce. t Once d eleted, images cannot berestored. • Protected images and sounds cannot bedeleted Press the -_ button twice in Playback mode. The Delete All screen appears. [All data deleted]. se the four-way controller (•) to select Press the OK button.
- Page 93 Ii_ll'f II DPI'_t p Protect Copy image/sound ResizeSIidesh°w ilit al Filter 3sec ! You can protect images and sounds from being accidentally deleted. Press the MENU button in Playback mode. The [F_"I Playback] menu appears. Use the four-way controller (• • ) to select [Protect]. Press the four-way controller ( •...
- Page 94 Protect SHdeshow 3sec 3, 5 Resize Copy image/sound ilit al Filter You can protect all the images and sounds. Press the MENU button in Playback mode. The [I-_'-I Playback] menu appears. Use the four-way controller (• •) to select [Protect]. Press the four-way controller (I,.).
- Page 95 PC/AV terminal By using the AV cable, you can capture and play back images on a TV or other equipment with a video IN jack. Make sure that both TV and the camera are turned off before connecting the cable. Open the terminal cover and connect the AV cable to the PC/AV terminal.
- Page 96 Youcan print t he images ontheSD Memory Card orthebuilt-in m emory using a DPOF ( Digital Print Order F ormat) compatible printer orata printing s ervice. Protect DPOF Slideshow 3sec 3, 4, 5, 6 Resize _iil PJ!!e'i ........Copy image/sound !MENU_Exit Set the , o,,owing ,tams for each image.
- Page 97 Use the four-way controller ( _ • ) to choose the number of copies, then press the four-way controller (v). The frame moves to [Date]. Use the four-way controller (_ • ) to choose whether to insert the date or not. _(On) : The date will be imprinted.
- Page 98 • The number of copies specified in the DPOF settings applies to all the images Before printing, check that the number is correct. • Pictures may not be printed correctly when the camera is connected directly to a PictBridge-compatlble printer if the number of copies exceeds 500.
- Page 99 Byconnecting thecamera toaprinter thatsupports PictBridge using t he USB cable (I-USB7) supplied withthecamera, youcanprint i mages directly from thecamera without using a PC. S elect theimages you want toprint a nd thenumber ofcopies o nthecamera a fter i thasbeen connected totheprinter. •...
- Page 100 Use the four-way controller (A to select [Print One]. Press the OK button. The Print One screen appears. DPOF settings Print w/ Use the four-way controller ( < • ) to choose the image to print..£1'int Jl hlage_ Use the four-way controller (A v)
- Page 101 Use the four-way controller (• •) to select [Print All]. Press the OK button. The Print All screen appears. Use the four-way controller (• •) Date D to choose the number of copies. _Date oral The number of copies you choose applies to _Exit _Print all the images.
- Page 102 Disconnect thecamera from the printer when youhave finished printing. Turn the camera off. Disconnect the USB cable from the camera. Disconnect the USB cable from the printer. '_er_0 The camera automatically switches to Capture mode when the USB .." cable is disconnected: iliiiii!iii!i!i!i!i! iiiiiiiiiiiiiiiiii'_!!i_...
- Page 103 JProtect IDPOF IISlldesh0w 3sec _1 Copy image/sound Resize !ilit al Filter _Exit iiiiiii By changing the size and quality of a selected image, you can make the file smaller than the original. You can use this function to continue taking pictures when the SD Memory...
- Page 104 Use the four-way controller (4 •) to change the recorded pixels. Press the four-way controller (v). The frame moves to [Quality Level]. Use the four-way controller (< • ) to change the quality. Press the OK button. Use the four-way controller (- v) to select [Overwrite] or [Save as].
- Page 105 Ii:tll,f II DPI'_t p Protect 3, 4, 5, 7 Copy image/sound ResizeSIidesh°w ilit al Filter 3sec ! The digital filters consist of eight color filters (black-and-white, sepia, red, green, blue, black-and-white + red, black-and-white + green, black-and- white + blue), a soft filter and three illustration filters.
- Page 106 Use the four-way controller (• •) to choose a digital filter. The filter effect is created and the image appears on the LCD monitor. The example shows an image with illustration filter 1 effect. Press the OK button. Use the four-way controller (•...
- Page 107 JProtect IDPOF IISlldesh0w 3sec _1 Copy image/sound Resize !ilit al Filter iiiiiiiii _Exit You can copy image and sound files from the built-in memory to the SD Memory Card and vice versa. This function can only be selected when a !!!!!!! card has been inserted...
- Page 108 Use the four-way controller (• •) to select [13--_] and press the OK button. All the files are copied to the SD Memory Card. /L ............[!_Exit Use the four-way controller (• •) to select [_--_1 and press the OK button. Use the four-way controller (4 •) to select the file to copy.
- Page 109 Memo...
- Page 110 How to call the [_i Set-up] menu Recorded Pixels 2304 Quality Level "kY_ White Balance Four-way Focusing Area Multi AE Metering _';_ ensJtivity Auto OK button _Ex'i .........._-4_ MENU button Formatting will delete all the data on the SD Memory Card if you are a card, and all the data in the built-in...
- Page 111 Format Sound Date Adjust 5/17/2004 Wodd Time Language/_ E ng l i sh _etting _Exit iiiiiiiiiiiiiiiiiiiiiiiiiiiiii iiiiiii HHHHHHHHHH HHHHHHHHHH HHHHHHHHHH You can adjust the playback volume and the volume of operation HHHHHHHHHH HHHHHHHHHH sounds, such as the start-up sound, shutter sound and key operation HHHHHHHHHH HHHHHHHHHH sound.
-
Page 112: Initial Settings
How tocall t he[_i Set-up] menu IJ_uo,,tyLove, _°.' Ij Recorded Pixels 2304 contro;ler Focusing Area Multi i,,,t°°a,..A"O 1'. , A° Metering ensitivity Auto _°xit CCCCCCII iiiiiiiiiiiiiiiiiiiiiiiiiiiiiiii You can change the initial date and time settings. You can also set the iiiiiiiiiiiiiiiiiiiiiiiiiiiiiiii style in which the date appears... - Page 113 Format Sound Date Adjust 5/17/2004 World Time Language/_ E ng l i sh _etting _Exit iiiiiiiiiiiiiiiiiiiiiiiiiiii iiiiiiiiiiiiiiiiiiiiiiiiiiii Use the four-way controller (4 • ) to select _ or _. HHHHHHHHHH [_ :The time in the city selected in World Time is displayed. D: The time in the city selected in Home Time is displayed.
- Page 114 How tocall t he[_i Set-up] menu IJ_uo,,t, Love,_°.' Ij Recorded Pixels 2304 Focusing Area Multi contro;ler i,,,t°°a, ..A"O 1', A° Metering ensitivity Auto _°xit Select [Screen Setting] on the [_i Set-up] menu. iiiiiiiiiiiiiiiiiiiiiiiiiiiiiiii Press the four-way controller (•). lscre0,s0tt_,_ /....... The Screen Setting screen appears.
- Page 115 iiiiiii iiiiiiiiiiiiiiiiiiiiiiii Format Sound Date Adjust 5/17/2004 Wodd Time Language/_ E ng l i sh _etting _Exit HHHHHHHHHH HHHHHHHHHH Press the OK button four times. '..iiiiiiiiiiiiiiiiiiiiiiH H H H HHHHHHHHHH HHHHHHHHHH The camera is ready to take or play back images. Once the start:up screen has been set, it will !not be deleted even if the original image is deleted or the SD Memory Card or built:in memory is formatted:...
- Page 116 How tocall t he[_i Set-up] menu IJ_uo,,t, Love,_°.' Ij Recorded Pixels 2304 contro;ler Focusing Area Multi i'hit°Ba' ..A"O 1', AE Metering ensitivity Auto _Bxit iiiiiiiiiiiiiiiiiiiiiiiiiiiiiiii Youcanchangethelanguageinwhichthemenus, errormessages, etc. iiiiiiiiiiiiiiiiiiiiiiiiiiiiiiii aredisplayed. iiiiiiiiiiiiiiiiiiiiiiiiiiiiiiii Youcanchoosefrom English, French, German, Spanish, Italian, Select [Language/_] on the [_i Set-up] menu.
- Page 117 Format Sound Date Adjust 5/17/2004 World Time Language/_ E ng ]i sh _etting _Exit You can choose the output format (NTSC or PAL) for taking or playing back images on a TV. Select [Video Out] on the [_i Set-up] menu. Use the four-way controller ( ,q •...
- Page 118 How tocall t he[_i Set-up] menu IJLo,,t, Love, Ij Recorded Pixels 2304 contro;ler Focusing Area Multi i,,,t°°a, ..A"O 1', A° Metering ensitivity Auto _°xit You can change the USB connection mode depending on whether USB cable is to be connected to a printer (PictBridge)or a computer.
- Page 119 Format Sound Date Adjust 5/17/2004 World Time Language/_ E ng ]i sh _etting _Exit You can set the camera to turn off automatically when no operation is performed for a fixed time. Select [Auto Power Off] on the [_i Set-up] menu.
-
Page 120: Capture Mode
How tocall t he[_i Set-up] menu IJ uo,,tyLove, Recorded Pixels 2304 contro;ler F0cuslng Area Multi i,,,t°°a, ..A"01' A° Metering ensitivity Auto _°xit iiiiiiiiiiiiiiiiiiiiiiiiiiiii:i You can choose the functions you use most frequently from those listed in the [t"! Rec. Mode] menu and register them on the four-way controller. - Page 121 Format Sound Date Adjust 5/17/2004 World Time Language/_ E ng l i sh _etting _Exit • Only one function can be registered on each key of the four-way con[roller • You can choose from the following ten functions: Recorded Pixels Quality Level.
- Page 122 Refer to the following list of city codes when setting World Time. Tokyo Johannesburg Guam Istanbul Sydney Cairo Noumea Jerusalem Wellington Moscow Auckland Jeddah Pagopago Tehran Honolulu Dubai Anchorage Karachi Vancouver Kabul San Francisco Male Los Angeles Delhi Calgary Colombo Denver Kathmandu Mexico...
- Page 123 A number of dedicated accessories are available for this camera. AC adapter D-AC5 USB cable I-USB7 (_) AV cable I-AVC7 (_) Camera case O-CC16 Strap O-ST20 Remote control unit F Waterproof case O-WP3 Products marked with an asterisk (_) are the same as those supplied with the camera.
- Page 124 )))))))))))))))))))))))))))))))) MessagessuchasthefollowingmayappearontheLCDmonitorduring ))))))))))))))))))))))))))))))ii cameraoperation. Compression error Compression of the image you captured has failed. Change the quality/size and try again. No image & sound There are no image/sound files on the SD Memory Card or in the built-in memory. Memory card full.
- Page 125 Messages such asthe following may appear ontheLCD monitor when using thePictBridge function. No paper inaprinter There isno paper inthe printer. No ink inaprinter There isnoink inthe printer. Printer error An error message has b een sent from the printer. image data e rror Adata e rror message has b een s ent from the printer.
-
Page 126: Taking Pictures
Camera wil! not Battebes are not Check batteries are installed .If not, install turn on installed batteries. Batteries are installed Check orientation of batteries, incorrectly Reinsert batteries according to the _ symbols on the battery compartment. (p,14) Battery power is tow Insert new or charged batteries or use the AC adapter. - Page 127 Subject is not in Subject difficult to focus Subjects difficult to focus on using focus autofocus: objects with little contrast (blue sky, white wails, etc.), dark objects, finely _atterned objects, fast-moving objects, scenery through window or net, etc. Lock focus on another object located at same...
- Page 128 iiiiiiiiiiiiiiiiiiiiiiiiiiiiii_ HHHHHHHHHHHHHHH_ HHHHHHHHHHHHHHH_ HHHHHHHHHHHHHHH_ ..............................................Type Fully automatic compact digital still camera with built-in zoom lens Effective Pixels 4.0 megapixels Sensor 4.23 megapixels (total pixels), 1/2.5-inch interline transfer CCD with a primary color filter Recorded Pixels Still Picture 2304x1728 pixels, 2048x1536 pixels, 1600x1200 pixels,...
-
Page 129: Slideshow
Battery Life Approx. (at 25°C with LCD monitor on, flash fired for 50% of pictures shots and using a lithium battery CR-V3, in accordance with PENTAX measuring conditions) In/Out Port USB/AV terminal (PC communication type USE 1.1), external power supply... -
Page 130: Warranty Policy
Shipping charges are to be borne by the owner. If your PENTAX was purchased outside of the country where you wish to have it serviced during the warranty period, regular handling and servicing fees may be... - Page 131 • This warranty policy does not affect the customer's statutory rights. • The local warranty policies available from PENTAX distributors in some countries can supersede this warranty policy. Therefore, we recommend that you review the warranty card supplied with your product at the time...
- Page 132 iiiiiiiiiiiiiiiiiiiiiiiiiiiiii_ iiiiiiiiiiiiiiiiiiiiiiiiiiiiii_ HHHHHHHHHHHHHHH_ HHHHHHHHHHHHHHH_ HHHHHHHHHHHHHHH_ HHHHHHHHHHHHHHH_ For customers in USA STATEMENT OF FCC COMPLIANCE This device complies with Part 15 ofthe FCC Rules. Operation is subject to the following two conditions: (1) This device may not cause harmful interference, and (2)this device must accept any interference...
- Page 133 Memo...
- Page 134 Memo...
- Page 135 The above named party is responsible for ensuring that the equipment complies with the standards of 47CFR §15.101 to §15.109. Product Name: PENTAX Diqital Still Camera Model Number: O__ptio $40 Contact person: Customer Service Manaqer Date and Place: February, 2004, Colorado...
- Page 136 PENTAX Europe GmbH (European Headquarters) Julius-Vosseter-Strasse, 104, 22527 Hamburg, GERMANY (HQ - http://www.pentaxeurope.com) (Germany - http://www.pentax.de) PENTAX U.K. Limited PENTAX House, Heron Drive, Langley, Slough, Berks SL3 8PN, U.K. (http://www.pentax.co.uk) PENTAX France S.A.S. 12/14,rue JeanPoulmarch,95106ArgenteuilCedex, FRANCE PENTAX Benelux B.V. (for Netherlands) Spinveld 25, 4815 HR Breda, NETHERLANDS (http://www.pentax.nl)
Need help?
Do you have a question about the OPTIO S40 and is the answer not in the manual?
Questions and answers