Table of Contents
Advertisement
Advertisement
Table of Contents
Troubleshooting

Related Manuals for GSI Outdoors PNEG-552


Summary of Contents for GSI Outdoors PNEG-552
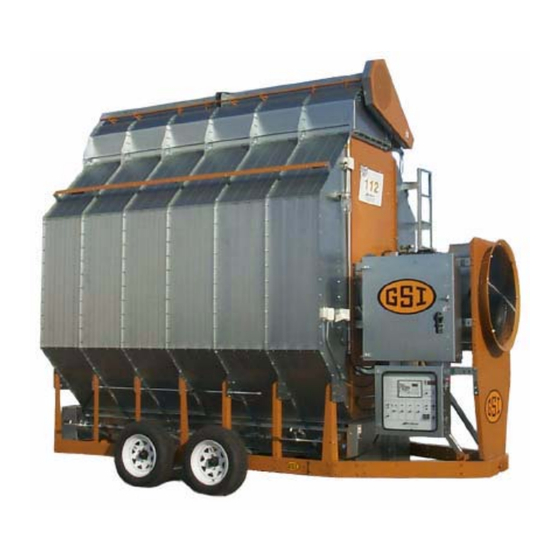
- Page 1 100 Series Dryer Operation and Service Manual PNEG-552 Date: 11-02-07 PNEG-552...
- Page 2 PNEG-552 100 Series Dryer...
-
Page 3: Table Of Contents
Fan Motor Removal and Installation ....................38 Heater Parts Removal and Installation ..................... 40 Metering Roll Servicing ........................41 How to Determine a Metering Roll Problem ..................42 How to Clear a Jammed Metering Roll ..................... 43 PNEG-552 100 Series Dryer... - Page 4 100 Series 220 Volt 1 Phase Power Schematic ................54 100 Series 220VAC 3 Phase Power Schematic ................55 100 Series 440VAC 3 Phase Power Schematic ................56 Chapter 10 Troubleshooting ..........................57 Chapter 11 FAQs ............................... 61 Chapter 12 Warranty ............................63 PNEG-552 100 Series Dryer...
-
Page 5: Chapter 1 Safety
Personnel operating or working around electric fans should read this manual. This manual must be delivered with the equipment to its owner. Failure to read this manual and its safety instructions is a misuse of the equipment. PNEG-552 100 Series Dryer... -
Page 6: Dryer Operation
The emergency stop switch is located on the upper control box on the door. Pushing the emergency stop switch will interrupt the control power and stop all dryer functions. Pushing the emergency stop switch does not interrupt the main power to the upper control box panel. PNEG-552 100 Series Dryer... -
Page 7: Safety Precautions
For a safe and dependable drying system, follow the recommendations within the Owner’s Manual and make it a practice to regularly inspect the unit for any developing problems or unsafe conditions. Take special note of the Safety Precautions before attempting to operate the dryer. PNEG-552 100 Series Dryer... -
Page 8: Chapter 2 Safety Alert Decals
Decal: DC-889 Decal DC-889 has two locations. One is located inside the fan/heater control box and another one is on the dryer upper control box door next to the main power disconnect. PNEG-552 100 Series Dryer... -
Page 9: Safety Alert Decals
Rotating auger will crush and cut. Auto equipment can start at anytime. Do not enter until electric power is locked in off position. Failure to do so will result in serious injury or death. DC-974 PNEG-552 100 Series Dryer... - Page 10 DC-1225 Decal: DC-1229 WARNING Decal DC-1229 is located on each of the meter roll access doors. Rotating metering roll. Equipment can start automatically. Keep hands clear. Can cause serious injury. Disconnect power before servicing. DC-1229 PNEG-552 100 Series Dryer...
- Page 11 TIGHTEN TO Decal DC-1249 is located on 90FT-LBS. 150° the hitch tongue. Dryer must be towed empty and in accordance with state and 55-60 PSI COLD provincial regulations. CHECK AFTER 50 MILES AND EVERY 200 MILES DC-1294 PNEG-552 100 Series Dryer...
-
Page 12: Chapter 3 Dryer Control Panel
3. Dryer Control Panel Figure 3A Grain Dryer Control Panel PNEG-552 100 Series Dryer... -
Page 13: Dryer Control Panel Featuring The 100 Series Control System
The AUTO position is used in batch mode only and allows the heater to be turned OFF to cool the grain and during the unloading operation. The burner light comes ON only when flame is detected. PNEG-552 100 Series Dryer... - Page 14 This switch starts and operates the dryer based on switch settings. If other switch settings are in the OFF position, individual dryer components can be operated by turning the drying mode switch to continuous flow, pressing the dryer power start button and then turning on the desired dryer component. PNEG-552 100 Series Dryer...
- Page 15 Liquid Crystal Display (LCD). Turning ON the 100 Series Control System Turn the CONTROL POWER switch to ON. The monitor will display “GSI” and the current software version number. Figure 3B 100 Series Dryer Control Panel PNEG-552 100 Series Dryer...
- Page 16 2. Use the UP and DOWN arrow keys to change from the present time to the new one. The new time is automatically entered. 3. Keep pressing the PROGRAM (DELAYS) button until the carrot disappears or press the mode select button once to exit. PNEG-552 100 Series Dryer...
- Page 17 For example, five (5) screens displaying 5 | 23 | 12 | 144 | 188 would be: 523 Hours, 12 minutes on the Hour Meter, Batch Count at 144 and 188 minutes since the last shut down. PNEG-552 100 Series Dryer...
-
Page 18: Special Features
This shut down message indicates that the LP gas vapor temperature sensor, located in the gas pipe train downstream from the vaporizer has opened. This indicates that the vaporizer is running too hot and must be readjusted. This sensor is set at 200°F and automatically resets itself when cool. PNEG-552 100 Series Dryer... - Page 19 200° setpoint or one or both have failed. They will automatically reset when the temperature returns below 200°. NOTE: The emergency cooling feature will not function if either or both of these mechanical sensors are tripped. PNEG-552 100 Series Dryer...
-
Page 20: Chapter 4 Error Conditions
4. Error Conditions Figure 4A PNEG-552 100 Series Dryer... - Page 21 4. Error Conditions Figure 4B PNEG-552 100 Series Dryer...
-
Page 22: Chapter 5 Dryer Pre-Start Checks
1 MINUTE (Reset to 8 Minutes after testing) Load Delay 30 SECONDS Unload Delay 30 SECONDS Metering Roll Speed LOW AND HIGH SPEED SETTINGS PUT ON ZERO Dry Timer 60 MINUTES Cool Timer 20 MINUTES Unload Timer 10 MINUTES Mode Switch CONTINUOUS FLOW PNEG-552 100 Series Dryer... -
Page 23: Electrical Power
The metering roll drive motor should rotate clockwise, as viewed from the drive end of the gear box. If the dry grain take away auxiliary is wired to the dryer, it should start and rotate in the proper direction. PNEG-552 100 Series Dryer... -
Page 24: Metering Roll Operation
ON turns the Air Switch OFF. Dip switch number eight (#8) must be turned back to the OFF position after this test is complete or no air testing will occur. PNEG-552 100 Series Dryer... -
Page 25: Burner Safety
ON turns the Air Switch OFF. Dip switch number eight (#8) must be turned back to the OFF position after this test is complete or no air testing will occur. PNEG-552 100 Series Dryer... -
Page 26: Dryer Shut Down
In case of emergency, push the emergency stop button located at the bottom of the Upper Control Box. (See Page 6.) Figure 5C The dryer fan/heater controls featuring: Ref # Description Pressure Regulator Low-Fire Solenoid Adjustment High Pressure Solenoid Low Pressure Solenoid Supply Line Solenoid PNEG-552 100 Series Dryer... -
Page 27: Chapter 6 Dryer Start-Up
(If the switch is set to the AUTO position, the dryer will shut down each time the out of grain timer times out, and will have to be restarted.) 6. When the dryer has filled, turn the LOAD AUGER switch to the AUTO position. PNEG-552 100 Series Dryer... -
Page 28: Staged Batch Operation
9. The fan will start and airflow is checked. PNEG-552 100 Series Dryer... - Page 29 Turn OFF the main power supply to the dryer. 17. In case of an emergency, press the dryer power stop button. The burner, fan and all augers will stop immediately. PNEG-552 100 Series Dryer...
-
Page 30: Starting The Dryer
If flame is detected the dryer will run, if not, a “loss of flame” error will occur. If this happens, check gas supply, and all valves in the fuel line to make sure they are ON and attempt again. PNEG-552 100 Series Dryer... -
Page 31: Adjusting The Temperature
Either one or both methods may need to be used to get the vaporizer to the proper temperature, but the first almost always gives adequate adjustment. Natural gas does not use a vaporizer. PNEG-552 100 Series Dryer... -
Page 32: Full Heat Continuous Flow Operation
9, the moisture control and the meter roll speeds can be adjusted if required. Each time an adjustment to the moisture control is made, it will take approximately the time as shown in the example in Step 5 to see the results of this adjustment. PNEG-552 100 Series Dryer... -
Page 33: Adjusting The Moisture Control
7. When adjusting the METER ROLL SPEEDS it is better not to change the speed more than 20 points (2%) at a time. 8. Anytime a change is made, wait the approximate dry time for that moisture grain from the Chart above before checking the grain moisture level and making another change if necessary. PNEG-552 100 Series Dryer... -
Page 34: Chapter 7 Service
50 to 150 3 months shaft end gets hot * The bearings have been lubricated at the factory, thus no lubrication should be added before start up. PNEG-552 100 Series Dryer... -
Page 35: Suggested Lubricants
4. Inspect and manually rotate the top auger paddle assembly. The paddle unit must rotate freely without any indication of sticking or binding. 5. Inspect the top auger and bottom auger drive lines for proper adjustment and condition. Readjust line tension as required. PNEG-552 100 Series Dryer... - Page 36 If guards or warning decals are missing, contact your dealer for a free replacement. 10.Test fire the dryer several weeks ahead of the drying season. Check for possible gas leaks. (See page 25 for heater test fire.) PNEG-552 100 Series Dryer...
-
Page 37: Fan Propeller Removal And Installation
1. Lock out the fan power supply, remove the fan guard and the venturi, as required on some models. 2. Remove the three cap screws from the clearance holes in the taper-lock bushing. Capscrews installed through threaded holes of bushing Fan hub Split taper bushing Figure 7B Fan Blade Installation PNEG-552 100 Series Dryer... -
Page 38: Fan Motor Removal And Installation
1. Make certain power is shut OFF and locked out. Remove fan guard and propeller. (See Figure 7D.) 2. Remove cover from fan heater control box, and disconnect the motor lead wires within the box. NOTE: Tag or otherwise identify wires for ease of reassembly. PNEG-552 100 Series Dryer... - Page 39 If required, remove the fan blade and fully tighten all four motor mount bolts. NOTE: Make sure to install and tighten the propeller in accordance with previous instructions. PNEG-552 100 Series Dryer...
-
Page 40: Heater Parts Removal And Installation
Disconnect gas solenoid valve coils. Be sure to mark which one goes where. c. Lift pipe (with orifice, solenoid valve and other parts attached) straight up and remove from fan heater housing. Orifice and other parts can now be removed from pipe train, if desired. PNEG-552 100 Series Dryer... -
Page 41: Metering Roll Servicing
BPH for 370,1928 BPH for 400, 2142 BPH for 460, 2356 BPH for 511 and 2785 BPH for 601 model dryers. NOTE: When the control is set to the maximum discharge rate (999), the metering roll speed should be 17.5 RPM. PNEG-552 100 Series Dryer... -
Page 42: How To Determine A Metering Roll Problem
Check for a break in the power train, chain, drive key, pin, etc. Keep hands away from sprocket teeth to avoid injury from chain backlash, as a result of torsion build up in the system caused by the jam. PNEG-552 100 Series Dryer... -
Page 43: How To Clear A Jammed Metering Roll
Never run the unload auger or the metering rolls with anyone inside the dryer. PNEG-552 100 Series Dryer... -
Page 44: Chapter 8 Wiring Diagrams
8. Wiring Diagrams 100 Series Single Fan Wiring to Control Box PNEG-552 100 Series Dryer... -
Page 45: 100 Series Front Panel External Wiring
8. Wiring Diagrams 100 Series Front Panel External Wiring PNEG-552 100 Series Dryer... -
Page 46: 100 Series Front Panel Internal Wiring
8. Wiring Diagrams 100 Series Front Panel Internal Wiring PNEG-552 100 Series Dryer... -
Page 47: 100 Series Lower Back Panel Wiring
8. Wiring Diagrams 100 Series Lower Back Panel Wiring PNEG-552 100 Series Dryer... -
Page 48: 100 Series External Wiring To Dryer
8. Wiring Diagrams 100 Series External Wiring to Dryer PNEG-552 100 Series Dryer... -
Page 49: 100 Series Upper Control Box Wiring
8. Wiring Diagrams 100 Series Upper Control Box Wiring PNEG-552 100 Series Dryer... -
Page 50: 100 Series Main Power Wiring
8. Wiring Diagrams 100 Series Main Power Wiring PNEG-552 100 Series Dryer... -
Page 51: Chapter 9 Schematic Diagram
9. Schematic Diagram 100 Series Control Schematic PNEG-552 100 Series Dryer... - Page 52 9. Schematic Diagram 100 Series Control Schematic (Continued) PNEG-552 100 Series Dryer...
- Page 53 9. Schematic Diagram 100 Series Control Schematic (Continued) PNEG-552 100 Series Dryer...
-
Page 54: 100 Series 220 Volt 1 Phase Power Schematic
9. Schematic Diagram 100 Series 220 Volt 1 Phase Power Schematic PNEG-552 100 Series Dryer... -
Page 55: 100 Series 220Vac 3 Phase Power Schematic
9. Schematic Diagram 100 Series 220VAC 3 Phase Power Schematic PNEG-552 100 Series Dryer... -
Page 56: 100 Series 440Vac 3 Phase Power Schematic
9. Schematic Diagram 100 Series 440VAC 3 Phase Power Schematic PNEG-552 100 Series Dryer... -
Page 57: Chapter 10 Troubleshooting
Display shows “LOSS OF FLAME” message. The flame sensor has failed to detect a burner flame, indicating that the burner has failed to light. There is a problem with the flame sensing circuitry or the dryer is not getting burner fuel. PNEG-552 100 Series Dryer... -
Page 58: Troubleshooting
Inspect contactor for defective points, or a burned out coil. 6. Inspect connections, and check voltage applied to motor leads in motor junction box to determine if motor is defective. 7. Check that the mercury switch box is in the proper position. PNEG-552 100 Series Dryer... - Page 59 1. Make sure the low flow control valve is not completely closed. cycles from high-fire to OFF (without going to Valve must be adjusted open to provide the proper low-fire gas low-fire). pressure listed in this manual. 2. Check low-fire solenoid valve for proper operation. PNEG-552 100 Series Dryer...
- Page 60 If the Load and Unload Auger does not start but Check the fuse on the I/O Board in the back of the lower everything else seems to work. control Box. PNEG-552 100 Series Dryer...
-
Page 61: Chapter 11 Faqs
How often do I make speed adjustments? Step 4 on Page 33 in the Adjusting the Moisture Control section. How do I set the moisture control? Step 1 on Page 33 in the Adjusting the Moisture Control Section. PNEG-552 100 Series Dryer... - Page 62 NOTES PNEG-552 100 Series Dryer...
-
Page 63: Chapter 12 Warranty
PRIOR TO INSTALLATION, PURCHASER HAS THE RESPONSIBILITY TO COMPLY WITH ALL FEDERAL, STATE AND LOCAL CODES WHICH MAY APPLY TO THE LOCATION AND INSTALLATION OF PRODUCTS MANUFACTURED OR SOLD BY GSI. PHLEGAL: #1832020 v1 (139LG01!.DOC) (revised December 2005) PNEG-552 100 Series Dryer... - Page 64 This equipment shall be installed in accordance with the current installation codes and applicable regulations which should be carefully followed in all cases. Authorities having jurisdiction should be consulted before installations are made. GSI Group 1004 E. Illinois St. Assumption, IL 62510-0020 Phone: 1-217-226-4421 Fax: 1-217-226-4420 www.gsiag.com...
Need help?
Do you have a question about the PNEG-552 and is the answer not in the manual?
Questions and answers