Advertisement
Quick Links
GE
English
Step 1. Unpacking
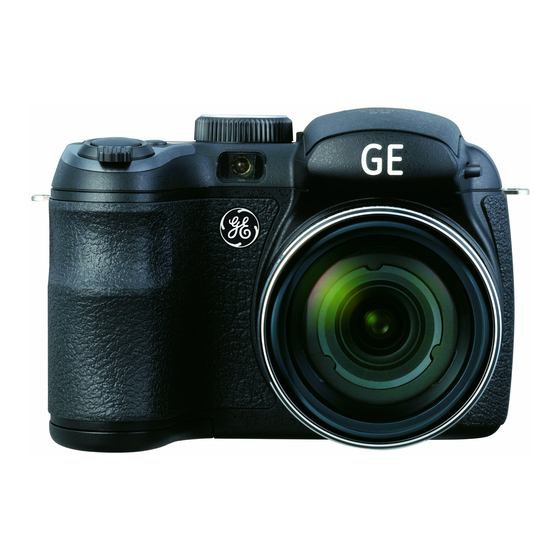
Your package should contain the camera model you
purchased along with the following items.
If anything is missing or appears to be damaged,
please contact your vendor.
AA-size Alkaline Batteries
CD-ROM
Lens Cap
USB Cable
Shoulder Strap
Warranty Card
Step 2. Inserting the battery
Slide open the battery cover in the direction
shown by
and then lift the cover
in direction
as shown.
Insert the battery as shown by
Close battery cover and slide it to the
right to lock
.
5
Français
étape 1. Déballage
La boîte de l'appareil photo que vous venez d'acheter
devrait aussi contenir les éléments suivants. Si l'un des
éléments est manquant ou abîmé, contactez votre
revendeur.
Piles alcalines AA
Cache-objectif
CD-ROM
Câble USB
Courroie d'épaule
Carte de garantie
étape 2. Insérer la batterie
1. Ouvrez le compartiment de la batterie.
2. Insérez le clos batterie dans le créneau de la batterie
Dans la correcte direction.
3. Fermez le compartiment de la batterie.
5
CR710080399-2
(1/2)
Step 3. Setting the language
Step 5. Using the Mode dial
The GE camera provides a convenient mode dial that
allows you to switch between different modes with ease.
Press power to turn on the camera and the language
menu will appear.
Use Up/Down/Left/Right to select a language, then
press
to confirm the language.
Step 4. Setting the time and date
Use Up/Down/Left/Right again to set the date and time,
and press
to confirm.
étape 3. Réglage de la langue
étape 5. Utilisation de la molette des modes
L'appareil photo GE est doté d'un sélecteur de commande
pratique permettant de commuter entre les différents modes
avec facilité.
Appuyer sur Power (Marche/arrêt) pour mettre
l'appareil sous tension. Le menu Langue apparaît.
Utiliser les flèches vers le haut, vers le bas, à gauche
ou à droite pour sélectionner la langue.
Puis appuyer sur
pour confirmer votre choix.
étape 4. Réglage de l'heure et de la date
Utiliser à nouveau les flèches vers le haut,
vers le bas, vers la gauche ou vers la droite pour
régler la date et l'heure.
Appuyer ensuite sur
pour confirmer.
Step 6. Taking a picture
Hold the camera securely.
Mode dial
Press the Zoom wheel on either the Tele
or Wide position of the camera to zoom in
or out on your subject while taking pictures.
Auto mode
Manual mode
Lightly press the shutter button halfway to
focus on the subject then press the button fully
to take a picture.
étape 6. Prendre une photo
Maintenir fermement l'appareil photo.
Mode Cadran
Composer votre image depuis l'écran LCD.
Mode Auto
Mode manuel
Appuyer légèrement sur le bouton de l'obturateur
pour faire la mise au point sur le sujet au centre
de l'image, puis appuyer complètement sur le bouton
de l'obturateur pour prendre la photo.
For more information, please refer to the user manual found on
the CD included or visit : http://www.ge.com/digitalcameras
10
Step 7. Viewing your picture
Press the Playback button to switch to
Playback mode.
Use Left/Right to browse through your photos.
Previous picture
w
T
Step 8. Deleting a picture
Press
to delete the picture currently on screen.
étape 7. Afficher votre image
Placer la molette des modes en mode Lecture.
Utiliser les flèches vers la gauche ou vers la droite
pour passer d'une photo à une autre.
Bouton Lecture
Image précédente
w
T
étape 8. Suppression d'une image
Appuyer sur
pour supprimer l'image à l'écran.
Playback button
Next picture
Image suivante
Advertisement

Summary of Contents for GE Digital Camera
- Page 1 Step 5. Using the Mode dial Press the Playback button to switch to Your package should contain the camera model you The GE camera provides a convenient mode dial that Playback mode. purchased along with the following items. allows you to switch between different modes with ease.
- Page 2 Etapa 1. Conteúdo da embalagem A embalagem da câmera deve incluir a câmera que A câmera GE possui um disco seletor de modo conveniente adquiriu juntamente com os seguintes itens. Se algum que permite a você alternar entre diferentes modos facilmente.


Need help?
Do you have a question about the Digital Camera and is the answer not in the manual?
Questions and answers