Brocade Communications Systems Brocade M5424 Quick Start Manual
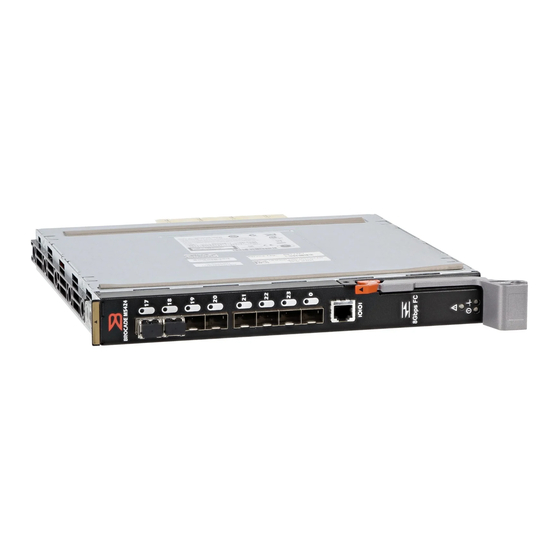
San i/o module
Hide thumbs
Also See for Brocade M5424:
- Administrator's manual (268 pages) ,
- Hardware reference manual (48 pages) ,
- Administrator's manual (96 pages)
Table of Contents
Advertisement
Advertisement
Table of Contents

Related Manuals for Brocade Communications Systems Brocade M5424


Summary of Contents for Brocade Communications Systems Brocade M5424
- Page 1 53-1001081-01 September 29, 2008 M5424 SAN I/O Module QuickStart Guide...
- Page 2 Copyright © 2008 Brocade Communications Systems, Inc. All Rights Reserved. Brocade, Fabric OS, File Lifecycle Manager, MyView, and StorageX are registered trademarks and the Brocade B-wing symbol, DCX, and SAN Health are trademarks of Brocade Communications Systems, Inc., in the United States and/or in other countries. All other brands, products, or service names are or may be trademarks or service marks of, and are used to identify, products or services of their respective owners.
-
Page 3: Unpacking And Installing The San I/O Module
SAN I/O Module. NOTE The SAN I/O Module is designed to work only in I/O bays B1/B2 and C1/C2 of the Dell M1000e Blade Server Enclosure. Make sure to comply with installation requirements in the Blade Server Enclosure Hardware Owner’s Manual. -
Page 4: Configuring San I/O Module
Cabling guidelines After modifying the SAN I/O Module’s IP address and domain name (if Module is in Fabric OS Native mode), we recommend that you cable all external ports to fabric connections before bringing the SAN I/O Module online. Refer “Configuring the SAN I/O Module”... -
Page 5: Modify San I/O Module Ip Address
• Access Gateway Administrator’s Guide • Web Tools Administrator’s Guide Modify the SAN I/O Module IP address By default, the IP address for the SAN I/O Module is configured as 10.77.77.77 with a default Ethernet subnet mask of 255.255.255.0. Reset the IP address using three methods. If the IP values are set using either of these methods, the IP values are stored on the SAN I/O Module. - Page 6 e. From the COM Port Properties window, select the following configuration values: • Bits per second: 9600 • Databits: 8 • Parity: None • Stop bits: 1 • Flow Control: None For LINUX or UNIX a. Enter the following at the command prompt: tip /dev/ttyb -9600 b.
-
Page 7: Connecting The San I/O Module To The Ethernet Network
4. Use the appropriate CLI commands to change the IP address of the selected SAN I/O module. Refer to your Blade Server Enclosure CLI documentation. Using the CMC GUI to set the IP address To change the IP address, use the following steps: 1. -
Page 8: Connecting San I/O Module To Fabric
Connecting the SAN I/O Module to the fabric NOTE Refer to “Cabling guidelines” on page 6 before beginning the following procedure. Before beginning the following steps, determine whether the SAN I/O Module is in Access Gateway or Fabric OS Native mode. This affects the configuration process. Using the SAN I/O Module CLI, you can enter the ag –– modeShow command to determine the current operating mode. - Page 9 Repeat for the remaining transceivers as required. 6. Check the LEDs to verify that all components are functional. For information about LED patterns, see the “Operating the SAN I/O Module” chapter in the Brocade M5424 SAN Blade Server I/O Module Hardware Reference Manual.
-
Page 10: Changing From Fabric Os Native To Access Gateway Mode
9. Back up the SAN I/O Module configuration to an FTP server by typing the configUpload command and following the prompts. This command uploads the SAN I/O Module configuration to the server, making it available for downloading to a replacement SAN I/O Module if necessary. Brocade recommends backing up the configuration on a regular basis to ensure that a complete configuration is available for downloading to a replacement SAN I/O Module. -
Page 11: From Access Gateway To Native Mode
NOTE You should save the configuration file if you are converting an SAN I/O Module to Access Gateway mode. To save your current configuration, click the Show Advanced Mode button in the top right-hand corner of the Switch Administration window. Select the Configure tab, then select the Upload/Download tab. Enter the relevant information to upload the configuration file. -
Page 12: Activating Ports On Demand (Pod)
For complete instructions on disabling Access Gateway Mode using the CLI and joining the switch to the fabric, refer to the “Disabling Access Gateway Mode” section in the Access Gateway Administrator’s Guide. NOTE Disabling Access Gateway mode is disruptive because the switch is disabled and rebooted. Always back up the current configuration before enabling or disabling Access Gateway mode. -
Page 13: Connecting To The San I/O Module Using Web Tools
Connecting to the SAN I/O Module Using Web Tools Complete the following steps to connect to the SAN I/O Module using Web Tools. 1. On the management console, open a Web browser such as Internet Explorer. The Web browser must be connected to the same network as the SAN I/O Module. 2. - Page 14 16 of 16 M5424 QuickStart Guide Publication Number: 53-1001081-01...
Need help?
Do you have a question about the Brocade M5424 and is the answer not in the manual?
Questions and answers