Nikon COOLPIX S4100 User Manual
Hide thumbs
Also See for COOLPIX S4100:
- Quick start manual (240 pages) ,
- User manual (208 pages) ,
- Brochure (2 pages)
Table of Contents
Advertisement
Quick Links
Advertisement
Table of Contents

Related Manuals for Nikon COOLPIX S4100


Summary of Contents for Nikon COOLPIX S4100
- Page 1 DIGITAL CAMERA COOLPI.X $4100 User's Manual...
- Page 2 • SDXC,SDHC,and SD Logos are trademarks of SD-3C,LLC. • PictBridge is a trademark. • All other trade names mentioned in this manual or the other documentation provided with your Nikon product are trademarks or registered trademarks of their respective holders.
- Page 3 More on Playback...
-
Page 4: Warnings
To prevent damage to your Nikon product or injury to yourself or to others, read the following safety precautions in their entirety before using this equipment. Keep these safety instructions where all those who use the product will read them. - Page 5 Should the insulation • Do not expose the battery to flame be damaged and the wires become or to excessive heat. exposed, take it to a Nikon- • Do not immerse in or expose to authorized service representative for water.
- Page 6 When connecting cables to the input Should the monitor break, care should and output jacks, use only the cables provided or sold by Nikon for the be taken to avoid injury caused by purpose, to maintain compliance with broken glass and to prevent liquid product regulations.
- Page 7 Nikon This equipment generates, uses,and Corporation may void the user's can radiate radio frequency energy authority to operate the equipment.
- Page 8 This symbol on the battery Wash hands after handling. indicates that the battery is Nikon Inc., to be collected separately. 1300 Walt Whitman Road The following apply only to Melville, New York 11747-3064 users in European countries: •...
-
Page 9: Table Of Contents
For Your Safety ............................i i WARNINGS ..............................Notices ............................... Introduction ............................1 About This Manual ..........................Information and Precautions ......................Parts of the Camera ..........................The Camera Body ............................Basic Operations ............................. The I_1 (Shooting Mode) Button ....................... The [] (Playback) Button ........................... - Page 10 Deleting Unwanted Pictures ........................Using the Basic Shooting Functions ..................... Flash Mode ............................... Taking Pictures with the Self-timer ....................Macro Mode ............................Changing the Brightness Using Exposure Compensation ..........More on Shooting ..........................4 0 Selecting a Shooting Mode ......................Adjusting the I_1 (Auto) Mode setting ..................
- Page 11 Playback Options ................ Setting the Picture Rating ..............Playing Back Pictures by Rating ............Enjoying Slide Show ..............@-n Protecting Important Pictures (Protect) ..........Protecting One P icture ..............Protecting Multiple Pictures ............Removing Protection from Pictures ............. _1, Creating a DPOF Print Order ....................Creating a Print Order for One Picture ....................
- Page 12 Connecting to a Printer ........................Connecting the Camera to a Printer ..................... Printing Pictures One at a Time ....................... Printing Multiple Pictures ........................... Basic Camera Setup ........................1 46 Setup Menu ............................Operating the Setup Menu ........................I_1 Welcome Screen ............................ _) Time Zone and Date ..........................
-
Page 13: Introduction
Thank you for your purchase of a Nikon COOLPIX $41O0digital camera. This manual was written to help you enjoy taking pictures with your Nikon digital camera. Read this manual thoroughly before use, and keep it where all those who use the product will read it. -
Page 14: Information And Precautions
• Nikon will not be held liable for any damages resulting from the use of this product, • While every effort was made to ensure that the information... - Page 15 Notice Concerning Prohibition of Copying or Reproduction Note that simply being in possession of material that was digitally copied or reproduced by means of a scanner, digital camera or other device may be punishable by law. • Items prohibited by law from being copied or reproduced Do not copy or reproduce...
-
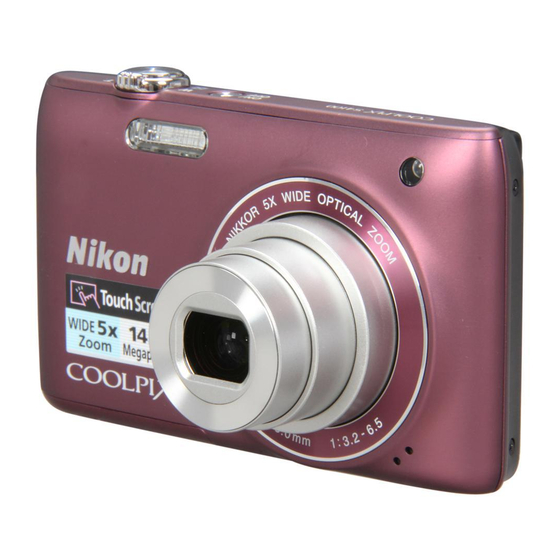
Page 16: Parts Of The Camera
The Camera Body Lens cover closed Shutter-rdease button Flash ..............Zoom control ..........Self-timer lamp ..........AF-assist illuminator ......... W: Wide-angle .......... T: Telephoto ..........Lens ............171,187 _';;_:Thumbnail playback ..... C_:Playback zoom ........Builbin microphone ...... 108, 126 Power switch/power-on ]amp Lens cover ............ - Page 17 Under the connector Cover Monitor/touch panel ......10, 27 Tripod socket movie-record) button..6, 126 Speaker ..........109, 131 Charge lamp ......... 19, 139 Connector cover ....132, 135, 141 Flash lamp ............Battery-chamber/ I_I (shooting mode) button ..... 6, 40 memory card slot cover ....
-
Page 18: Basic Operations
I_1 (Shooting Mode) Button • Presstile I_1 button in playback mode to enter shooting mode. • Press tile I_1 button in shooting mode to display tile shooting-mode selection menu and switch shooting modes (_ 40). The [] (Playback) Button • Presstile [] button in shooting mode to enter playback mode. -
Page 19: Shutter-Release Button
Shutter-release Button Tile camera features a two-stage shutter-release button. To set focus and exposure, press tile shutter-release button halfway, stopping when you feel resistance. When tile shutter-release button is pressed halfway, focus and exposure (shutter speed and aperture value) are set. Focus and exposure remain locked while... -
Page 20: Operating The Touch Panel
The monitor on the COOLPIX $4100 is a touch panel display. Use a finger or the supplied stylus to operate the touch panel. Tapping Tap the touch panel. Use this operation to: Select icons or other controls Select pictures in thumbnail playback mode (1_ 81) Perform touch shutter (_... -
Page 21: Using The Stylus
Using Stylus Use tile stylus for operation% such as when using the draw option (_ 71) or the paint option 112), that require more precision than using a finger. Attaching the Stylus Attach the stylus to the strap as shown. Notes on the Touch... -
Page 22: Main Display Of The Monitor/Touch Panel And Basic Operations
Shooting (Information Display) F)ispByed information on the monitor varies depending on the c:amera settings status. £ S_] ¸ IJ_ la_®®a Shooting mode 1 ......26, 58, 74 a Number of exposures remaining Macro mode ............ (still pictures) 2..........b Movie }ength ..........Zoom indicator ........ -
Page 23: Shooting (Operation Controls)
Shooting (Operation Controls) Tap tile following controls to change settings. • Tap the tab to display the setting controls and shooting settings can be changed (_ 14). • The controls available and indicators displayed vary with shooting mode and the current camera settings. Tab ................. -
Page 24: Playback (Information Display)
Playback (Information Display) Tile following rnonitor display shows information for the picture currently displayed and camera status. • The displayed information vary depending on the picture played back and the current camera status. • Indicators below are displayed when turning on the camera or operating camera,... -
Page 25: Playback (Operation Controls)
Playback (Operation Controls) Tap tile following controls to change settings. • Tap the tab to display the setting controls and deleting or editing will be available (_ 14). • The controls available and indicators displayed vary with the picture played back and the current camera settings. -
Page 26: Operating The Tabs
Operating the Tabs When in shooting or playback mode, use the setting controls to make shooting or playback settings. Display the controls by tapping the tab at the bottom, left and right sides of the monitor. • Tap the icon of the desired item to display the setting screen for that item. •... - Page 27 Shooting Shooting settings can be made. • The available setting items vary depending on the shooting mode (_ 40). • Each icon also indicates the current setting. Flash mode ..........Self-timer ........... Macro mode ........... Exposure compensation ...._;" Image mode ........... Touch shooting Touch shutter ........
-
Page 28: First Steps
Insert a Rechargeable Li-ion Battery EN-EL19 (supplied) into the camera. • __}harge the battery before the first use or when the battery is running 18). Open battery-chamber/memory card slot cover. \\ -_\_\ Insert the battery. Battery chamber Use the edge of the battery to push the orange battery latch in the direction indicated by the arrow (Q) and fully insert the battery ({2}). -
Page 29: Removing The Battery
Removing the Battery Turn tile camera off (_ 21 ) and be sure that tile power-on lamp and tile monitor have turned off before opening tile battery-chamber/memory card slot cover. To eject tile battery, open tile battery<hamberi memory card slot cover and slide tile orange battery latch... -
Page 30: Charging The Battery
Charge the supplied Rechargeable Li-ion Battery EN-EL19 inserted into the camera, by connecting the supplied Charging AC Adapter EH-69P to the camera via the supplied USB Cable UC-E6, and then plugging the Charging AC Adapter into an electrical outlet. Prepare the Charging ACAdapter EH-69P. - Page 31 Plug the Charging AC Adapter into an electrical outlet. The charge lamp slowly blinks green to indicate that the battery is charging. About two hours and ten minutes are required to charge a fully exhausted battery. The following chart explains charge lamp status when the camera is plugged into the electrical outlet.
- Page 32 Notes on Charging AC Adapter • The Charging AC Adapter EH 69P is _r use only with compatible devices. Do not use with another make or model of device, • Be sure to read and follow the warnings for the Charging AC Adapter on page iii and the section, "The Battery"...
-
Page 33: Turning On And Off The Camera
Turning On and Off the Camera Press the power switd_ to turn on the camera. The power-on lamp (green) will light, and then the monitor will turn on (the power-on lamp turns off when the monitor turns on). Toturn off the camera,pressthe power switchagain. When the camera is turned off, the power-on lamp and the monitor will turn off. -
Page 34: Setting Display Language, Date And Time
Alanguage-selection dialog is displayed the first time t he camera is turned on. Press the power switch to turn on the camera. The power-on lamp (green) will light, and then the monitor will turn or] (the power-on lamp turns off when the monitor turns on). - Page 35 Tap the order in which the day, month, year are displayed. • Edit the date and time. Tap the desired field and D or D to edit the value. Tap[]. The settings are applied, the lens extends, and the camera enters shooting mode.
-
Page 36: Inserting Memory Cards
Image, sound, and movie files are stored in the camera's internal memory (approximately 20 MB) or on removable Secure Digital (SD) memory cards (available commercially; _ 173). If a memory card is inserted in the camera, data are automatically stored on the memory card and data recorded to the memory card can be played back, deleted or transferred. - Page 37 Formatting Memory Cards If the message at right is displayed when the camera is turned the memory card must be _rmatted be_re use (_ 159). Note that formatting permanently deletes all pictures and other data the memory card. Be sure to make copies of any pictures you wish to keep before formatting the memory...
-
Page 38: Basic Photography And Playback: I_1 (Auto) Mode
This section describes how to take pictures in I_1 (auto) mode, an automatic:, "point-and-shoot" mode recommended for first-time users of digital cameras. Press the power switch to turn on the camera. The lens will extend, and the monitor will turn on. The camera is set to I_1 (auto) rnode at the time of purchase. -
Page 39: Indicators Displayed In I_1 (Auto) Mode
Indicators Displayed in I_1 (Auto) Mode icon mode Internal memory indicator F," Indicates that images will be stored in the camera's internal memory (approximately 20 MB). When a memory card is inserted in the camera, does not appear and images will be stored on the memory... -
Page 40: Step 2 Frame A Picture
Readythe camera. ._:--_-__ _---_I Hold the camera steadily in both hands, keeping your fingers and other objects away from the lens, flash, AF- assist illuminator, built-in microphone, and speaker. When taking pictures in portrait ("tall") orientation, turn the camera so that the built-in flash is above the lens. F,"... -
Page 41: Using The Zoom
Using the Zoom Rotate the zoom control to activate optical zoom. To Zoom Zoom zoom in so that the subject fills a larger area of the frame, rotate to T.To zoom out so that the area visible W__T in the frame increases, rotate to W. •... -
Page 42: Step 3 Focus And Shoot
Pressthe shutter-release button halfway. When the shutter-release button is pressed halfway (_ 7), the camera sets focus and exposure (shutter speed and aperture value). Focus and exposure remain locked while the shutter-release button is pressed halfway. When a face is detected, it is framed by the double border F,"... - Page 43 During Recording While pictures are being recorded, the number of exposures remaining will blink, Do not open the battery-chamber/memory card slot cover while pictures are being recorded. Cutting power removing the memory card in these circumstances could result in loss of data or in damage to the camera or card,...
-
Page 44: Step 4 Playing Back And Deleting Pictures
Playing Back Pictures (Playback Mode) Press the []E] (playback) button. • (,I_ movie-record) button Internal idicator The last picture taken will be displayed in full-frame playback mode. Drag the current picture left or right to display the previous or next picture. Drag your finger quickly across half of the monitor or more to skip past the previous or next five pictures. -
Page 45: Deleting Unwanted Pictures
Deleting Unwanted Pictures Play back a picture to be deleted, tap the bottom tab to display the setting controls ([_[_ 14), and tap _1. Tap the desired delete option. Current image: Delete the currently displayed full-frame picture or movie (_ 131). -
Page 46: Using The Basic Shooting Functions
Flash Mode Flash mode can be selected to suit the shooting conditions. • When ISO sensitivity is set to Auto, tile flash has a range of 0.5-4.5 m (1 ft. 8 in.-14 ft.) at tile maximum wide-angle zoom position and a range of 0.5-2.2 m (1 ft. - Page 47 Shooting When Flash is Disabled or Lighting is Dim • Use of a tripod is recommended. • The noise reduction function may be activated with some shooting conditions such as dim lighting. More time than usual is required to record pictures to which noise reduction is applied.
-
Page 48: Taking Pictures With The Self-Timer
_) Taking Pictures with Self-timer The camera is equipped with a ten-second and two-second timer for self-portraits. This feature is useful for reducing the effects of camera shake that occurs when pressing the shutter-release button. When using the self-timer, use of a tripod is recommended. - Page 49 Press the shutter-release button rest of the way down. The self-timer starts, and the number of seconds remaining before the shutter is released is displayed in the monitor.The self- timer lamp blinks while the timer is counting down. About one second before the shutter is released, the lamp stops blinking and glows steadily.
-
Page 50: Macro Mode
Macro Mode Macro mode is used for taking pictures of objects as close as 10 cm (4 in.). Note that the flash may be unable to light the entire subject at distances of less than SOcm (1 ft. 8 in.). Tap the left tab to display setting... -
Page 51: [] Changing The Brightness Using Exposure Compensation
[] Changing the Brightness Using Exposure Compensation Exposure c:ornpensation is used to alter exposure from the vahJe suggested by the camera to make pictures brighter or darker. Tap the left tab to display setting controls ([_[_ 14) and tap the exposure compensation icon. -
Page 52: Selecting A Shooting Mode
Following shooting modes can be selected. I_1 Auto mode [:[_ 26 Pictures can be taken with an automatic, "point-and-shoot" mode recommended first-time users of digital cameras. The flash mode and macro mode settings can be changed, and other settings are available, such as the continuous setting or the "subject tracking"... - Page 53 Face Detection When the camera is pointed at a human face in the shooting modes listed below, the camera automatically detects the face and focuses on it. When the camera detects more than one face, the double border (focus area) is displayed around the face that is focused on, and single borders around the others.
-
Page 54: Adjusting The I_1 (Auto) Mode Setting
In I_ (auto) mode, the camera settings indicated below can be adjusted by tapping the tabs to display the setting controls. • Each icon also indicates the current setting. • Tap the icon of the desired item to display the setting screen for that item. •... -
Page 55: 41"Image Mode (Changing Image Quality/Image Size)
_" Image Mode (Changing Image Quality/Image Size) I_1 (auto) -) Tap the bottom tab -) _;" Image mode Image mode refers to the combination of image size and image quality (compression) at which pictures are recorded. Choose the image mode best suited to the manner... - Page 56 Number of Exposures Remaining The _llowing table lists the approximate number of pictures that can be stored in internal memory and on a 4 GB memory card, Note that the number of pictures that can be stored will differ depending on the composition of the picture (due to JPEG compression),...
-
Page 57: L_ Touch Shutter (Tapping The Monitor To Release The Shutter)
Touch Shutter (Tapping the Monitor to Release the Shutter) I_1 (auto) -_ Tap the bottom tab -_ L_/{]_'_/AE_I Touch shooting "" AF[] Pictures can be taken by simply tapping the monitor. • Touch shutter is set by default. Proceed to step 2. Tap the bottom tab, tap... - Page 58 Notes on Touch Shutter • When taking pictures with Continuous or BSS in Continuous setting 54) enabled, or in Sports or Museum scene mode 58), use the shutter release button to take pictures. Only one picture can be taken at a time using the touch shutter function, •...
- Page 59 Shooting Modes That Support Touch Shutter The touch shutter can be used in I_1 (auto) mode and other shooting modes. Touch shutter operation differs according to the current shooting mode as follows. Shooting mode Touch shutter operation I_1 (auto) mode ([._..] 26), Sports, Party!indoor,...
-
Page 60: Subject Tracking (Focusing On A Moving Subject)
Subject Tracking (Focusing on a Moving Subject) I_1 (auto) -) Tap the bottom tab -) L_/{_'_/AE_Touch shooting "" AF[] In I_1 (auto) mode (_ 26), the touch shooting setting can be changed from Touch shutter (default setting) to Subject tracking. Use this option to take pictures of moving subjects. - Page 61 Press the shutter-release button to take a picture. The camera focuses on the focus area when the shutter- release button is pressed halfway. The focus area will glow green and focus will be locked. When the camera is unable to focus, the focus area wi]] blink.
-
Page 62: E_Touch Af/Ae (Tapping The Monitor To Focus)
_c_Touch AF/AE (Tapping the Monitor to Focus) I_1 (auto) -_ Tap the bottom tab -_ L_/{_'_/AE_I T ouch shooting "" AF[] The touch shooting setting can be changed from Touch shutter (default setting) to Touch AF/AE in tile monitor to select tile area at which tile camera focuses. Press a subject the shutter-release button halfway to lock focus and exposure for the area tapped, and press the shutter-release button the rest of the way down to take the picture. - Page 63 Press the shutter-release button to take a picture. Press the shutter-release button halfway to acquire focus and exposure and press it aH the way down to release shutter. Note on Touch AF/AE When shooting subjects with which auto_cus may not per_rm as expected, the subject may not...
- Page 64 Taking Pictures of Subjects with Which Autofocus Perform Expected When taking pictures of su_ects with which auto_cus may not per_rm as expected 31), try pressing the shutter release button halfway to refocus several times, or try the following techniques. 1 Switch to I_1 (auto) mode ([.]_ 26) and select Touch AF/AE...
-
Page 65: Is0 Iso Sensitivity
ISOISO sensitivity I_1 (auto) -) Tap the bottom tab -) ISOISO sensitivity The higher the sensitivity, the less light is needed to expose an image, allowing captu ring darker subjects. Also, a higher sensitivity allows higher shutter speeds, resulting in the picture with less camera shake and subject... -
Page 66: Continuous
Continuous (auto) _' Tap the bottom tab _' _ Continuous Enable continuous shooting or BSS (best shot selector). Single (default Setting) One picture is taken each time the shutter-release button is pressed. Continuous tlitIt While the shutter-release button is held down, up to three pictures are taken at a rate of about 0.7 frames per second (at an Image mode setting of [] 4320x3240). -
Page 67: Wbwhite Balance (Adjusting Hue)
WB White Balance (Adjusting Hue) I_1(auto) -) Tap the bottom tab -) WB White balance The color of light reflected from an object varies with the color of the light source. The human brain is able to adapt to changes in the color of the light source, with the result that white objects appear white whether seen in the shade, direct sunlight, or under incandescent lighting. - Page 68 Preset Manual The preset manual option is effective with mixed lighting or to compensate for light sources with a strong color cast when the desired effect has not been achieved with white balance settings like Auto and Incandescent (for example, to make pictures taken under a lamp with a red shade look as though they had been shot under white light).
- Page 69 Noteon Preset Manual A value fop flash lghting cannot be measured with Preset manual, When shooting using the flash, set White balance to Auto or Flash.
-
Page 70: Shooting Suited To Scenes (Scene Mode)
Camera settings are automatic:ally optimized for the selected subject type. The following scene modes are available. Sceeauo Lans Night portrait _" Party/indoor Beach Sunset DusWdawn Night landscape _1 Food Museum Fireworks show [)raw BacHighting Panorama assist tlitIt Selecting a Scene Mode Press the I_1 button in shooting mode... - Page 71 Shooting Settings in Scene Mode The shooting settings for each scene mode are shown below. Exposure Flash mode Self-timer ?..M acro mode Compensation shooting ([_[_]34) ([_ 38) ([_[_]39) 45, 50) AUTO off2 "_-"_@_ off2 '_ .............._'_ ..........o_:_,,,,,,_,_? ..................
- Page 72 Adjusting Scene Effect Tile scene effect adjustment slider is displayed in tile scene modes listed below. Tap or drag tile scene effect adjustment slider to adjust tile degree of effect to be applied to pictures taken in tile selected scene mode. Scene effect adjustment slider...
-
Page 73: (Scene Auto Selector)
Shooting in the Scene Mode Selected by the Camera (Scene Auto Selector) The camera simplifies shooting by automatically selec:ting the optimum scene mode from the list below when the shot is framed. • ___,_:Auto ( general shooting) • _: Portrait •... - Page 74 Notes on Scene Auto Selector Scene Mode • Digital zoom is not available. • Depending upon shooting conditions, the camera may not select the desired scene mode, Should this occur, switch to I_ (auto) mode ([]_ 26) or select the desired scene mode manually 5a),...
-
Page 75: Selecting A Scene Mode To Take Pictures (Features)
Selecting a Scene Mode to Take Pictures (Features) See"%ooting in the %ene Mode Selectedby the C_amera ( SceneAuto Selector)" 61)for more information on sceneauto selector scenemode. -_- Portrait Use this mode for portraits. • When the camera detects a human face, that face will be framed by a yd]ow double border (focus area). - Page 76 _ Sports Use this mode for dynamic action shots that freeze the action in a single shot and record motion in a series of pictures. • The camera focuses on the subject at the center of the frame. The area focused can be changed by the touch shutter (1_] 45) or touch AF/AE (_ 50).
- Page 77 _._ P a r ty/indoor Captures the effects ofcanal]dight and o ther indoor background lighting. • Camera focuses on the s ubject atthe c enter of t he frame. area focused can b e changed by the touch shutter (_ 45) or touch AF/AE (_ 50).
- Page 78 _sunset Preserves the deep hues seen in sunsets and sunrises. • Camera focuses on the subject at the center of the frame. • The default setting for flash mode is _) Off. • Use the scene effect adjustment slider (_ 60) to adjust picture color.
- Page 79 _ Close-up Photograph flowers, insects and other small objects at close range. • Macro mode (_) 38) is enabled and the camera automatically zooms to the closest position at which it can fOCUS. • The closest possible shooting distance may vary according to the zoom position.
- Page 80 i_ Museum Use indoors where flash photography is prohibited (for example, in museums and art galleries) or in other settings in which you do not want to use the flash. • Camera focuses on subject at the center of the frame. The area focused can be changed by the touch shutter (_ or touch AF/AE ([_) 50).
- Page 81 _Draw Write a memo or draw a picture on the touch panel display and save it as an image. See "Using the Draw Option" (_ 71) for more information. t_ Backlighting Use when light is coming from behind subject, throwing features or details into shadow.
- Page 82 Pet portrait Use this mode for taking portraits of pets (dogs or cats). When the camera detects the face of a dog or cat, it focuses on the face and automatically releases the shutter (pet portrait auto release) three times at the default setting. Up to five faces can be detected.
-
Page 83: Using The Draw Option
Using Draw Option Write a memo, or draw a picture, on the touch panel display and save it as an image. The image is saved at an image mode setting of _ 640x480. Press the I_1 button in shooting mode and tap stE,_. -
Page 84: Shooting For A Panorama
Shooting for a Panorama The camera focuses on the subject at the c:enter of the frame. Use a tripod for the best results. Press the I_1 button in shooting mode and tap stm_. The scene mode selection screen is displayed. tlitIt Panorama assist. - Page 85 Take the next picture. Frame the next picture so that one-third of the frame overlaps the previous picture press the shutter-release button. Repeat this process until the necessary number of pictures have been taken complete the scene. Tap [] when shooting is complete.
-
Page 86: Shooting Smiling Faces (Smart Portrait Mode)
At the default settings, the camera uses the face detection function to detect human faces, and then automatically releases the shutter when a smile is detected (smile timer). The skin softening option can be used to smooth skin tones of human faces. - Page 87 Notes on Smart Portrait Mode • Digital zoom is not available. • Under some shooting conditions, the camera may be unable to detect faces or smiles. • See "Notes on the Face Detection Function" ([._ 41 ) for more information. Notes on Skin Softening...
-
Page 88: Changing The Smart Portrait Mode Settings
Changing Smart Portrait Mode Settings Tile settings indicated below carl be made by tapping tile tabs to display tile setting controls in smart portrait mode. • Each icon also indicates the current setting. • Tap the icon of the desired item to display the setting screen for that item. •... - Page 89 [_ Touch Shutter Switch between the touch shutter ([_) 45) and touch AF/AE (_ 50). Both are disabled when Smile timer is set to On (_ 77). _'F_J Skin Softening Enable skin softening. When the shutter is released, the camera detects one or more human faces (up to three), and processes the image to soften facial skin tones before saving the picture.
-
Page 90: Camera Settings That Cannot Be Applied Simultaneously
Some shooting settings cannot be used with other functions. Restricted _,u,,=_----=_u,,=_ function ..........When Continuous, BSS, or Multi-shot 16 is selected, flash is disabled. Flash mode ([]_] 54) Blink proof When On is selected, flash is disabled. ([]_] 77) _'_!"!_?_ Subject tracking When the touch shooting is set to Subject... - Page 91 Restricted Functions in Shooting Mode The restricted functions vary with the shooting mode 40). See the _llowing pages for details on the functions available in each shooting mode: • I_1 (auto) r'node • Scene mode *[._] 59 • Smart portrait mode More Information...
-
Page 92: Operations In Full-Frame Playback Mode
Press the [] (playback) button toenter playback mode _ 'L,:¢_,.; ,_-L L sJsl and display pictures that have been taken (_ 32). _ c¢:_,_,,, The following operations are available in full-frame playback mode. T_"-'_!_i Description Drag the picture to the right to display the Select a picture previous picture and to the left to display the next picture. -
Page 93: Viewing Multiple Pictures: Thumbnail Playback
Rotate the zoom control to W (I_;_) in full-frame playback mode (_ 80) to display pictures in "contact sheets" of thumbnail images. The following operations are available while thumbnails are displayed. Description ....................Increasethe number W (_) increase the number of the picture of pictures displayed thumbnails displayed: 4 _ g -_ 16. - Page 94 Thumbnail Playback Mode Display Pictures with ratings ([.]]_) 99/and protected Protect icon pictu res (_ 101) are displayed with the icons shown at right, Movies are displayed as film frames. Rating setting icon Film frames Thumbnail Display in Favorite Pictures and Auto Sort Mode •...
-
Page 95: Taking A Closer Look: Playback Zoom
Rotating the zoom control to T (c_)in full-frame playback mode (_ 80) enlarges display of the center portion of the current picture. • The guide displayed at bottom right shows the portion of the image currently displayed. The following operations can be performed while picture display is enlarged. - Page 96 Pictures Taken with Face Detection or Pet Detection When rotating tile zoom control to T (q) to zoom in (playback zoom) on a picture taken using tile face detection (_ 41) or pet detection (_ 70) function, tile picture is enlarged with tile detected face at tile center of the monitor except pictures taken using Continuous, BSS, and Multi-shot 16, or tile subject...
-
Page 97: Selecting Playback Mode
Following playback modes can be selected. i-_-i Playback mode Play back aHpictures. I_ Favorite p ictures m ode Play back pictures added to an album. Autosort mode Play back pictures and movies automatically sorted to the selected category with shooting. List by date mode Play back pictures taken on the selected date. -
Page 98: Sorting Favorite Pictures (Favorite Pictures Mode)
Pictures can be sorted to albums. Once pictures have been sorted to albums, favorite pictures mode can be used to play back only the pictures in a specific album. • Adding pictures to albums makes finding a particular picture faster and easier. •... - Page 99 Notes on Adding Favorite Pictures • An album can contain up to 200 pictures, • Movies cannot be added to albums, • If the selected picture has already been added to an album, the album icon turns yellow. • When pictures are added to albums, they are not physically...
-
Page 100: Viewing Pictures In An Album
Viewing Pictures in an Album Pictures carl be displayed by selecting tile album to which they were added "f_l favorite pictures mode". • In full-frame playback mode, just as with normal playback mode, picture display can be enlarged, or pictures can be displayed as thumbnails. -
Page 101: Removing Pictures From Albums
Removing Pictures from Albums To remove a picture frorn an album without perrnanentiy deleting it, follow tile procedures described below. • Select tile desired picture in full-frame display in step 2 in favorite pictures mode (_ 88), tap tile bottom tab to display the setting controls, and then tap I_. -
Page 102: Operations In Favorite Pictures Mode
Operations in Favorite Pictures Mode The folk)wing operations are available in the album list so:teen shown in step 2 on page 88. Description Change the album Tap the bottom tab to display the setting icon controls, and tap I_. _"T_:_'_ When the bottom tab is tapped to display the Delete all pictures in setting controls, and _ is tapped, the album... -
Page 103: Changing Icons Assigned To Albums
Changing Icons Assigned to Albums The icon assigned to an album can be changed to reflect the theme of pic:tures included in the album. Press the_ button in playback mode and tap !_1. A list of albums is displayed. Tap the bottom tab to display the setting controls and tap I_i. - Page 104 Adding/Viewing Favorite Pictures When pictures are added to albums, they are not physically copied to albums or moved from the folder to which they were originally recorded 174), Only the file names of pictures are added to albums, in favorite pictures mode, pictures with...
-
Page 105: Viewing Pictures In Auto Sort Mode
No reproduction in any form of this manual, in whole or in part (except for brief quotation in critical articles or reviews), may be made without written authorization from NIKON CORPORATION. NIKON CORPORATION YP1A02(11) 6MMO 1011-02 © 2011 Nikon Corporation...
Need help?
Do you have a question about the COOLPIX S4100 and is the answer not in the manual?
Questions and answers