LG DLG2302W User's Manual & Installation Instructions
Hide thumbs
Also See for DLG2302W:
- User's manual & installation instructions (125 pages) ,
- Service manual (43 pages) ,
- User's manual & installation instructions (83 pages)
Table of Contents
Advertisement
Available languages
Available languages
DRYERS
USER'S GUIDE&
INSTALLATION
INSTRUCTIONS
Before
begInnIng
installation,
read these
InstructIons
carefullY.
This wll simplify
installation
and ensure
that the dryer
is installed
correctly
and
safely. Leave these
instructions
near the dryer
after
installation
for future
reference.
SECADOAS
GU|ADE[ USUARIO E
INSTRUCCIONES
DE INSTA[ACION
Antes de comenzar
la instalacion,
lea atentamente
estas
instrucciones.
Esto
simplificara
la instalacion
y asegurara
que
la secadora
est_l
instalada
en forma
correcta
y segura.
Conserve
estas
instrucciones
cerca de la secadora
Iuego
de la
instalacion
para
futuras
consultas.
SECHEUSES
TO contact LG Electronics, 24 hours a day,
7 days a week:
1-800-243-0000
Or visit us on the Web at: us.lge.com
Pour contacter LG Electronics, 24 heures
par jour, 7 jours par semaine :
1 =800=243=0000
ou visitez notre site Web a I'adresse :
us.lge.com
To contact LG Electronics, 24 hours a day,
7 days a week:
1-888-LGCANADA
Or visit us on the Web at: ca.lge.com
Pour contacter LG Electronics, 24 heures
par jour, 7 jours par semaine :
1=888=LGCANADA
Ou visitez notre site Web a I'adresse "
ca.lge.com
GUIDEDE ['UTI[ISATEUR ET
DIRECTIVES D'INSTA[[ATION
Avant de commencer a installer votre secheuse, Iisez
attentivement ces instructions. Celasimplifiera votre
installation et assurera que la s¢cheuse est installce
correctement et en route securit¢. Conservez ces
instructions a proximit¢ de la secheuse apres son
installation, pour reference future.
Models/Modelos/Modeles
Eiectric/Electrica/Eiedrique
DLE2301w
DLE2301 R
DLE2301S
(;as/Gas/A _oaz
DLG2302W
DLG2302R
DLG2302S
P/No. 3828EL3003Y
Advertisement
Chapters
Table of Contents

Related Manuals for LG DLG2302W


Summary of Contents for LG DLG2302W
- Page 1 TO contact LG Electronics, 24 hours a day, 7 days a week: 1-800-243-0000 Or visit us on the Web at: us.lge.com DRYERS Pour contacter LG Electronics, 24 heures par jour, 7 jours par semaine : USER'S GUIDE& 1 =800=243=0000 ou visitez notre site Web a I'adresse :...
-
Page 2: Table Of Contents
Safety Instructions for Connecting Electricity ..7 Congratulations on your purchase PARTS AND FEATURES Special Features ............. welcome to the LG family. Your Key Parts and Components ........INSTALLATION INSTRUCTIONS LG Dryer combines most Choose the Proper Location ........ advanced... -
Page 3: Important Safety Instructions
IMPORTANT SAFETYINST UcTIONS READ ALL iNSTRUCTiONS BEFORE WARNING safety, For yo.r the information in this manual must be followed to minimize the risk of fire or e×plosion, electric shock, or to prevent property damage, personal injury, or loss of life. Your Safety and the safety... -
Page 4: What To Do If You Smell Gas
I PORTANTSAFETYiNSTRUcTiONS READ ALL iNSTRUCTiONS BEFORE _WARNING safety, For your the information in this manual must be followed to minimize the risk of fire or explosion, electric shock, or to prevent property damage, personal injury, or loss of life. • installation and service must be •... -
Page 5: Grounding Instructions
IMPORTANT SAFETYINST UcTIONS READ ALL iNSTRUCTiONS BEFORE WARNING safety, For yo.r the information in this manual must be followed to minimize the risk of fire or explosion, electric shock, or to prevent property damage, personal injury, or loss of life. GROUNDING iNSTRUCTiONS This appliance must be grounded. - Page 6 I PORTANTSAFETYiNSTRUcTiONS READ ALL iNSTRUCTiONS BEFORE WARNING safety, For yo.r the information in this manual must be followed to minimize the risk of fire or explosion, electric shock, or to prevent property damage, personal injury, or loss of life. SAFETY iNSTRUCTiONS FOR iNSTALLATiON Exhaust/Ducting: , Gas dryers MUST be exhausted to the...
-
Page 7: Safety Instructions For Connecting Electricity
IMPORTANT SAFETYINST UcTIONS READ ALL iNSTRUCTiONS BEFORE WARNING safety, For yo.r the information in this manual must be followed to minimize the risk of fire or explosion, electric shock, or to prevent property damage, personal injury, or loss of life. SAFETY iNSTRUCTiONS FOR CONNECTING ELECTRiCiTY AWARNING: To reduce the risk of fire, electric shock, or injury to persons when using this... -
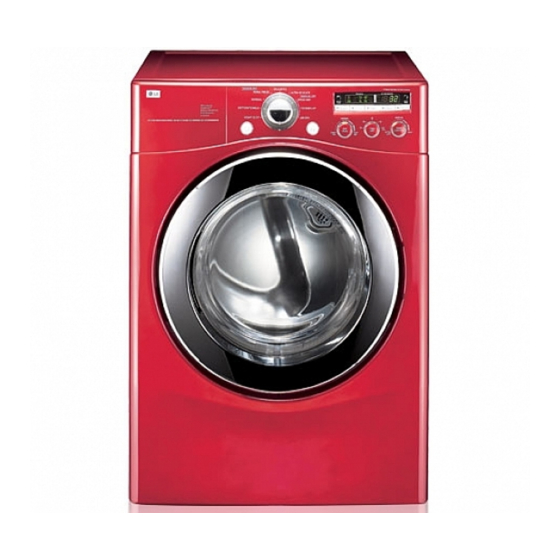
Page 8: Parts And Features
PARTSAND FEATU ES SPECIAL FEATURES EASY-TO-USE CONTROL PANEL Rotate the Cycle Selector Knob to select the desired dry cycle. Adjust settings and add cycle options with the touch of a button. EASY-ACCESS REVERSIBLE DOOR Wide-opening door provides easy access for loading and unloading. -
Page 9: Key Parts And Components
PARTSAND FEATU ES KEY PARTS AND COMPONENTS In addition to the special features and components outlined in the Special Features section, there are several other important components that are referenced in this manual. FRONT-MOUNT LINT FILTER Front-mounted lint filter allows for easy access and cleaning after every load. -
Page 10: Installation Instructions
INSTAllATION INSTRUCTIONS IMPORTANT: Read all installation instructions completely before installing and Operating your dryer! It is important that you review this entire manual before installing and using your dryer. Detailed instructions concerning electrical connections, gas connections, and exhaust requirements are provided on the following pages. -
Page 11: Pedestal Base Or Stacking Kit
90.8 cm) 90,,_ 1_4,, (78.1 cm) (1 0 cm) (68.6 cm) (2.54 cm) OPTIONAL ACCESSORIES For these and other LG products, contact your local LG dealer, or visit our Web site at usJge.com. Stacking Kit (sold separately) Pedestal (sold separately) -
Page 12: Leveling The Dryer
INSTALLATION INSTRUCTIONS LEVELING THE DRYER To ensure that the dryer provides optimal drying • All four leveling feet must rest solidly on the performance, it must be level. To minimize floor. Gently push on the top corners of the vibration, noise, and unwanted movement, the dryer to make sure that the dryer does not rock from corner to corner. -
Page 13: Changing The Dryer Vent Location
Screw or side (right-side venting is not available on gas models). An adapter kit, part number 383EEL9001B, may be purchased from your LG retailer. This kit contains the necessary duct components change the dryer vent location. Rear Exhaust Duct Remove the rear exhaust duct retaining screw. -
Page 14: Venting The Dryer
INSTALLATION INSTRUCTIONS VENTING THE DRYER WARN|NG: to reduce the risk of fire, electric shock, or injury to persons when using this appliance, follow basic precautions, including the following: • Do not crush or collapse ductwork. Failure * Rigid or semirigid metal ducting is to follow these instructions can result in fire or recommended... -
Page 15: Venting The Dryer
INSTA[/MION INST UcTIONS VENTING THE DRYER {cont.) Ductwork 65 ft. (19.8 m) 45 ft. (13.7 m) Recommended 55 ft. (16.8 m) 35 ft. (10.7 m) _'--_-L 47 ft. (13.7 m) 36 ft. (11.0 m) 30 ft. (9.1 m) 25 ft. (7.6 m) /_02om/ /_0_om/ 28 ft. -
Page 16: Connecting Gas Dryers
INSTALLATION INSTRUCTIONS cONNEcTiNG GAS DRYERS _WAF_N|NG-" To reduce the risk of fire, electric shock, or injury to persons when using this appliance, follow basic precautions, including the following: • Gas supply requirements: • Connect the dryer to the type of gas shown As shipped from the factory, this dryer on the nameplate. - Page 17 INSTA[[MION INST UcTIONS cONNEcTiNG GAS DRYERS (cont.) WARNiNG: To reduce the risk of fire, electric shock, or injury to persons when using this appliance, follow basic precautions, including the following: • Installation and service must be performed • if necessary, the correct nozzle (for the LP by a qualified installer, service agency, or the...
-
Page 18: Connecting Electric Dryers
INSTALLATION INSTRUCTIONS CONNECTING ELECTRIC DRYERS _WARN|_I_G -= To help prevent fire, electric shock, serious injury or death, the wiring and grounding must conform to the latest edition of the National Electrical Code, ANSI/NFPA 70 and all applicable local regulations. Please contact a qualified electrician to check your home's wiring and fuses to ensure that your home has adequate electrical power to operate the dryer. - Page 19 INSTA[/MION INST UcTIONS cONNEcTiNG ELEcTRic DRYERS WARN|NG: • Connect the power cord to the terminal block. Each colored wire should be connected same color screw. Wire color indicated on manual is connected to the same color screw in block. Failure to follow these instructions...
- Page 20 INSTAllATION INSTRUCTIONS cONNEcTiNG ELEcTRic DRYERS {cont.) WARN|NG: • Connect the power cord to the terminal block. Each colored wire should be connected same color screw. Wire color indicated on manual is connected to the same color screw in block. Failure to follow these instructions...
- Page 21 INSTA[/MION INST UcTIONS cONNEcTiNG ELEcTRic DRYERS {cont.) WARN|NG: • Connect the power cord to the terminal block. Each colored wire should be connected same color screw. Wire color indicated on manual is connected to the same color screw in block. Failure to follow these...
- Page 22 INSTALLATION INSTRUCTIONS cONNEcTiNG ELEcTRic DRYERS {cont.) WARNiNG: • Connect the power cord to the terminal block. Each colored wire should be connected same color screw. Wire color indicated on manual is connected to the same color screw in block. Failure to follow these instructions...
-
Page 23: Special Requirements For Manufactured Or Mobile Homes
INSTALLATIONINST UCTIONS SPEciAL REQUIREMENTS FOR MANUFACTURED OR MOBILE HOMES Any installation in a manufactured or mobile The dryer exhaust duct must be affixed securely to the manufactured or mobile home structure, home must comply with the Manufactured Home and the exhaust duct must be made of a Construction and Safety Standards Title 24 CFR, Part 32-80 or Standard CAN/CSAOZ240 MH and... -
Page 24: Duct Condition Testing
INSTALLATION INSTRUCTIONS DUCT CONDiTiON TESTING Your dryer features FIowSense an innovative Correct Venting sensor system that automatically detects blockages and restrictions in dryer ductwork. Keeping ductwork clean of lint build-up and free of restrictions allows clothes to dry faster and reduces energy use. -
Page 25: How To Use
HOW TO USE Following are instructions for starting and using your new dryer. Please refer to specific sections of this manual for more detailed information. Important Warning: To reduce the risk of fire, electric shock, or injury to persons, read this entire manual, including the Important Safety Instructions, before... -
Page 26: Control Panel Features
OW TO USE CONTROL PANEL FEATURES Following are instructions for starting and using your new dryer. Please refer to specific sections of this manual for more detailed information. Important warning: To reduce the risk of fire, electric shock, or injury to persons, read this entire manual, including the Important safety Instructions, before operating this dryer. -
Page 27: Cycle Guide
Adjustable Sensor Dry Cycles Manual Dry Cycles Sensor Dry cycles utilize LG's unique dual sensor Use Manual Dry cycles to select a specific amount of drying time and a drying temperature. system to detect and compare the moisture level in clothes and in the air and adjust the drying When a Manual Dry cycle is selected, the time as needed to ensure superior results. -
Page 28: The Time And Status Display
OW TO USE THE TiME AND STATUS DISPLAY The display shows the settings, estimated time remaining, options, and status messages for your dryer. FLOW SENSE DUCT BLOCKAGE ESTIMATED TIME REMAINING SENSING SYSTEM INDICATOR When the START/PAUSE button is pressed, The FLOW SENSE duct blockage sensing the display will indicate the estimated time system detects and alerts you to blockages... -
Page 29: Operating The Dryer
flOW TO USE OPERATING THE DRYER Once you have loaded the dryer: Press the ON/OFF button to turn Press the START/PAUSE button to begin the dryer. The lights around the cycle cycle. The display will change, selector knob will illuminate. and the dryer will display the estimated (SENSOR DRY) or set time (MANUAL DRY) remaining... -
Page 30: Cycle Setting Buttons
OW TO USE CYCLE SETTING BUTTONS Sensor Dry cycles have preset settings that are NOTE: To protect your garments, not every selected automatically and cannot be changed. dryness level, temperature, or option is available Manual Dry cycles have default settings, but you with every cycle. -
Page 31: Cycle Option Buttons
flOW TO USE CYCLE OPTION BUTTONS RACK DRY Your dryer features several additional cycle options to customize cycles to meet your Use RACK DRY with items, such as individual needs. Certain option buttons also wool sweaters, silk, and lingerie, that feature a special function (see the following page should dry flat. -
Page 32: Special Functions
OW TO USE SPEciAL FUNcTiONS The option buttons also activate special functions, including CHILD LOCK and BEEPER ON/OFR Press and hold the option button marked with the special function for 3 seconds to activate. BEEPER ON/OFF CHILD LOCK To turn the beeper off, press and hold Use this option to prevent unwanted DAMP DRY BEEP for 3 seconds. -
Page 33: Regular Cleaning
CARE AND €lEANING REGULAR CLEANING • II_WARN|NG -u To reduce the risk of fire, electric shock, or injury to persons when using this appliance, follow basic precautions, including the following: • Unplug the dryer before cleaning to avoid the risk of electric shock. -
Page 34: Troubleshooting
TROUBLESHOOTING BEFORE CALLING FOR SERVICE Your dryer is equipped with an automatic error-monitoring system to detect and diagnose problems at an early stage. If your dryer does not function properly or does not function at all, check the following before you call for service. - Page 35 TROU LES OOTING BEFORE CALLING FOR SERVICE (cont.) Clothes take too • Load is not properly sorted. Separate heavy items from lightweight items. Larger long to dry and heavier items take longer to dry. Heavy fabrics take longer to dry because they tend Large load of heavy fabrics.
-
Page 36: Specifications/Optional
FLOW SENSE display shows 4 bars. SPEcIFIcATIONS/OPTIONAl A ccESSO IES OPTIONAL AccESSORIES For these and other LG products, contact your local LG dealer, or visit our Web site at us.lge.com. Pedestal Stacking Give your LG washer and dryer a boost... -
Page 37: Pedestal Installation
SPECIFICATIONS/OPTIONAL ACCESSOIES PEDESTAL iNSTALLATiON The pedestal accessory includes: To ensure safe and secure installation, please thoroughly follow the instructions below. = Drawer divider (1) = Wrench (1) • Screws (18) 1- • Retainers (4) 1-1- WARN|NG = incorrect installation can cause serious accidents. -
Page 38: Pedestal Installation
SPECIFICATIONS/OPTIONAL ACCESSO IES PEDESTAL iNSTALLATiON (cont. For dryer -::::@ For washer/combo Place the dryer on the pedestal. Make sure Make sure the screws on the pedestal align the front and back feet are in the correct with the holes in the retainers, then install 4 positions. -
Page 39: Stacking Kit Installation
SPECIFICATIONS/OPTIONAL ACCESSOIES STACKING KiT iNSTALLATiON To ensure safe and secure installation, please This stacking kit includes: observe the following instructions. * Two (2) side rails &WARNING * One (1) front rail Four (4) screws • Incorrect installation can cause serious accidents. -
Page 40: Key Dimensions And Specifications
SPECIFICATIONS/OPTIONAL ACCESSO IES STACKING KiT iNSTALLATiON ccont. Dryer Washer Insert the front rail between the bottom of Place the dryer on top of the washer by fitting the dryer feet into the side brackets as the dryer and the top of the washer. Push the front rail toward the back of the washer until it illustrated. - Page 41 Your LG Dryer will be will repaired or replaced, at LG's option, if it proves to be defective in material or workmanship under normal use, during the warranty period ("Warranty Period") set forth below, effective from the date ("Date of Purchase") of original consumer purchase of the product.
- Page 42 Should your product prove to be defective in materials or workmanship under normal use during the warranty period listed below, which warranty period runs from the original date of purchase, LG Electronics will, at its option, repair or replace the product at no charge to you.
- Page 43 NOIE...
- Page 44 ....... 47 Instrucciones importante para la instalaci6n..47, Instrucciones importante para conectar Felicitaciones por su compra la electricidad ............bienvenido a la familia LG, Su PIEZAS Y CARACTERJSTICAS nueva Secadora LG combina Caracteristicas especiales ........Piezas y componentes clave ........
-
Page 45: Precauciones B_.Sicas De Seguridad
INST UCCIONESIMPORTANTE DE SEGU IDAD I.SA TODA$ LA INSTRUCCIONSS ANTSS DS USAR ADVERTENCiA i.fom, oi6, i.dio d en este manual para minimizar el riesgo de incendio o e×plosi6n, descarga el_ctrica, o para prevenir dahos a la propiedad, lesiones personales o muerte. Su Seguridad y la de los demas son de suma... -
Page 46: Qu6 Hacer Si Huele Gas
INST UCCIONES! PORTANTE DE SEGU 1DAD LF_ TODAS LA INSTRUCCIONSS ANTSS DS USAR _ADVERTENC|A po_ _, _g,_id_d. _ d_b_ _g,i_ I_i,fo_oi6, indicada en este manual para minimizar el riesgo de incendio o explosi6n, descarga el_ctrica, o para prevenir dahos a la propiedad, lesiones personales o muerte. -
Page 47: Instrucciones De Conexi6N A Tierra
INST UCCIONESIMPORTANTE DE SEGU IDAD LF.A TODAS LA INSTRUCCIONSS ANTSS DS USAR ADVERTENCiA i.fo oi6. indicada en este manual para minimizar el riesgo de incendio o e×plosi6n, descarga el_ctrica, o para prevenir dahos a la propiedad, lesiones personales o muerte. INSTRUCCiONES DE CONEXION A TIERRA Este electrodom6stico deber_ estar conectado... - Page 48 INST UCCIONES! PORTANTE DE SEGU IDAD LF.A TODAS LA INSTRUCCIONES ANTSS DE USAR _ADVERTENCiA po_ _. _g._id_d, _ d_b_ _g.i_ I_i.fo_oi6. indicada en este manual para minimizar el riesgo de incendio o e×plosi6n, descarga el_ctrica, o para prevenir dahos a la propiedad, lesiones personales o muerte.
- Page 49 INST UCCIONESIMPORTANTE DE SEGU IDAD LF.A TODAS LA INSTRUCCIONSS ANTSS DS USAR _ADVERTENC|A po_ _, _g,_id_d. _ d_b_ _g,i_ I_i,fo_oi6, indicada en este manual para minimizar el riesgo de incendio o e×plosi6n, descarga el_ctrica, o para prevenir dahos a la propiedad, lesiones personales o muerte.
-
Page 50: Caracteristicas Especiales
PIEZASY CARACTERiSTICAS CARACTER|STICAS ESPEClALES PANEL DE CONTROL FACIL PARA USAR Gire la perilla selectora de ciclos al ciclo de secado deseado. Afiada los ajustes de ciclo o e'_®O00 programe las opciones con el toque de un bot6n. PUERTA REVERSIBLE DE FAClL ACCESO La amplia puerta provee acceso para carga y descarga. -
Page 51: Piezas Y Componentes Clave
PIEZASY CA ACTE jSTICAS PIEZAS Y COMPONENTES CLAVE Ademas de las caracteristicas y componentes descritos en la secci6n de Caracterfsticas especiales, hay varios componentes importantes adicionales a los cuales se hace referencia en este manual. FILTRO DE PELUSA MONTADO AL FRENTE El filtro de pelusa montado al frente permite un facil acceso y limpieza despues de cada carga. -
Page 52: Escoja El Lugar Adecuado
INSTRUcclONES PARA/A INSTA/AciON IMPORTANTE: iLea todas las instrucciones de instalacion completamente antes de instalar y hater funcionar su secadora! Es importante que revise todo este manual antes de instalar y usar su secadora. Se proporcionan instrucciones detalladas pertinentes alas conexiones electricas, de gas y los requisitos de escape en las siguientes paginas. -
Page 53: Instalaciones Con La Base Pedestalo Kit De Apilado Opcionales
771/2" 90.5 cm) ACCESORIOS OPCIONALES Para estos y otros productos LG, Ilame a su distribuidor LG local, o visite nuestro sitio Web en usJge.com. Pedestal Kit de apilado (Adquirido pot separadoJ... -
Page 54: Nivelaci6N De La Secadora
INSTRUcclONES PARA/A INSTA/AclON NIVELACl0N DE LA SECADORA • Las 4 patas niveladoras deberan apoyarse Para asegurar que la secadora brinde un firmemente en el piso. Empuje suavemente desempedo 6ptimo de secado, debe estar las esquinas superiores de la secadora para nivelada. -
Page 55: De Ventilaci6N De La Secadora
INST UcclONES PA A iA INSTAiAclON COMO CAMBIAR LA UBICACiON DEL CONDUCTO DE VENTILACl0N DE LA SECADORA SU secadora esta equipada de fabrica para Tornillo de ventilar en la parte traserao Tambien puede seguridad configurarse para ventilar en la pare inferior lateralmente (no esta disponible... -
Page 56: Conexi6N Del Conductode Ventilacionde La Secadora
INSTRUcclONES PARA[A INSTA[AciON CONEXION DEL CONDUCTO DE VENTILACION DE LA SECADORA ADVERTENC|A Para reducir el r iesgo de incendio, descargas el ct.cas o heridas al usar su electrodom6stico, siga las precauciones basicas, incluyendo Io siguiente: = No aplaste ni doble el sistema de conducto. El conducto de escape debera tener 10 cm Si no se siguen estas instrucciones se podra... - Page 57 INST UcclONES PA A iA INSTAiAclON CONEXION DEL CONDUCTO DE VENTILACl0N DE LA SECADORA (cont.) Sistema de conducto 65 pies (19,8 m) 45 pies (13,7 m) Recomendado 55 pies (16,8 m) 35 pies (10,7 m) 47 pies (13,7 m) 30 pies (9,1 m) 36 pies (11,0 m) 25 pies (7,6 m) (10.2...
-
Page 58: Conexi6N De Secadoras A Gas
INST UCCiONESPA A LA INSTALACION CONEXION DE SECADORAS A GAS heridas al usar su electrodom_sti¢o, siga las precauciones basicas, incJuyendo Io siguiente: = Requisitos de suministro de gas: Conecte la secadora aJ tipo de gas indicado en Como enviado de fabrica, si configura la secadora la placa del hombre. - Page 59 INSTRUcclONES PARA/A INSTA/AclON CONEXION DE SECADORAS A GAS (cont.) ADVI RTENCiA • La instalaci6n y el mantenimiento deben se usara (gas natural o petr61eo liquido, LP). proveerse per un instalador calificado, agencia Si no se cumple con esto se podr& producir de mantenimiento o compahia de gas.
-
Page 60: C6Mo Conectar Las Secadoras El6Ctricas
INST UCCiONESPA A LA INSTALACION COIVlO CONECTAR LAS SECADORAS ELI_CTRlCAS ADVERTENC|A: Para ay°dar aevitar ioceodios, descargas el ct.cas, .e.das graves o muerte, el cableado e instalaci6n a tierra deben cumplir con la ultima edici6n del C6digo El_ctrico Nacional, ANSI/NFPA 70 y todas las regulaciones locales aplicables. - Page 61 INSTRUcclONES PARA/A INSTA/AclON C0MO CONECTAR LAS SECADORAS ELECTRlCAS (cont.) ADVERTENCiA: Conecte el cable de suministro de corriente al bloque terminal. Cada cable se debe conectar al tornillo del mismo color. El color del cable que figura en el manual se conecta el tornillo dei mismo color en el bloque.
- Page 62 INST UCCiONESPA A LA INSTALACION COMO CONECTAR LAS SECADORAS ELECTRICAS (cont.) ADVERTENCiA: Conecte el cable de suministro de corriente al bloque terminal. Cada cable se debe conectar al tornillo del mismo color. El color dei cable que figura en el manual se conecta el tornillo del mismo...
- Page 63 INSTRUcclONES PARA/A INSTA/AclON C0MO CONECTAR LAS SECADORAS ELECTRlCAS (cont.) ADVERTENC|A: • Conecte el cable de suministro de corriente al bloque terminal. Cada cable se debe conectar al tornillo del mismo color. El color dei cable que figura en el manual se conecta el tornillo del mismo...
- Page 64 INST UCCiONESPA A LA INSTALACION COMO CONECTAR LASSECADORAS ELECTRlCAS(cont.) ADVERTENCiA: Conecte el cable de suministro de corriente al bloque terminal. Cada cable se debe conectar al tornillo del mismo color. El color dei cable que figura en el manual se conecta el tornillo del mismo color...
-
Page 65: M6Viles O Prefabricadas
INSTRUcclONES PARA/A INSTA/AclON REOUISITOS ESPEClALES PARA VIVlENDAS MOVlLES O PREFABRlCADAS Cualquier instalaci6n en una vivienda m6vil o El conducto de escape de la secadora debe prefabricada debe realizarse de conformidad estar bien fijado a la estructura de la vivienda los Estandares de seguridad y construcci6n m6vil o prefabricada, y el conducto de escape debe estar fabricado de un material resistente al viviendas prefabricadas, Titulo 24 CFR, Parte... -
Page 66: Sistema De Evaluaci6N Del Estado Del Conducto
SISTEMA DE EVALUACION DEL ESTADO DEL CONDUCTO La secadora incluye FIowSense un sistema de sensor innovador que detecta en forma Correcta automatica bloqueos y restricciones en la Ventilaci6n tubeda de su secadora. Mantener la tuberia sin acumulaci6n de pelusa y libre de restricciones hace posible que la ropa se seque mas rapido, reduce el uso de corriente. -
Page 67: C6Mo Cargar La Secadora
0 USAR A continuaci6n encontrara instrucciones para comenzar a usar su secadora nueva. Para mas informaci6n pot favor consulte las secciones especificas de este manual. Advertencia importante: Para reducir riesgo de incendios, descargas el_ctricas o heridas, lea este manual en su totalidad, incluyendo las Instrucciones Importantes... -
Page 68: Caracteristicas Del Panel De Control
cOmo Usa CARACTERJSTICAS DEL PANEL DE CONTROL A continuaci6n encontrara instrucciones para comenzar a usar su secadora nueva. Para mas informaci6n pot favor consulte las secciones especificas de este manual. Advertencia importante: Para reducir riesgo de incendios, descargas el_ctricas o heridas, lea este manual en su totalidad, incluyendo las Instrucciones Importantes de Seguridad, antes de operar la secadora. -
Page 69: Guia De Ciclos
Los ciclos de secado por sensor utilizan el sistema Use los ciclos de secado manual para exclusivo de sensor dobie de LG para detectar y seieccionar una cantidad especifica de tiempo y comparar ei nivel de humedad en las prendas y en temperatura de secado. -
Page 70: La Pantalla De Hora Y Estado
cOmo usa LA PANTALLA DE HORA Y ESTADO La pantalla muestra los ajustes, el tiempo restante estimado, las opciones y los mensajes de estado correspondientes a su secadora. TIEMPO RESTANTE ESTIMADO INDICADOR DEL FILTRO DE PELUSA La secadora detecta en forma automatica la (ESTIMATE[:) TiME REMAiNiNG) reducci6n del flujo de aire producida Cuando se apdete el bot0n inicio/pausa... -
Page 71: Funcionamiento De La Secadora
0 USAR FUNClONAMIENTO DE LA SECADORA Una vez que ha cargado la secadora: Apriete el bot6n encendido/apagado (ON/ Apriete el bot6n de inicio/pausa (START/ OFF) para encender la secadora. PAUSE) para iniciar el ciclo. La Las luces alrededor de la perilla pantalla cambiara, y la secadora selectora de ciclos se iluminaran. -
Page 72: Botones De Ajuste De Ciclo
cOmo usa BOTONES DE AJUSTE DE ClCLOS Los ciclos de secado por sensor tienen NOTA: Para proteger las prendas, no todos los ajustes preprogramados que se seleccionan niveles de secado, temperatura u opciCn estan automaticamente y no pueden cambiarse. disponibles en todos los ciclos. -
Page 73: Botones De Opci6N De Ciclo
0 USAR BOTONES DE OPClON DE ClCLO SECADO EN ESTANTE (RACK DRY) Su secadora dispone de varias opciones de ciclo adicionales, las cuales personalizan los ciclos Use el ciclo RACK DRY con art{culos para satisfacer sus necesidades individuales. tales como sueteres de lana, sedas Ciertos botones de opci6n tambien incorporan y lenceria, que se deberian secar una funci6n especial (vea la siguiente pagina para... -
Page 74: Funciones Especiales
cOmo usa FUNClONES ESPEClALES Los botones de opciones tambien activan funciones especiales, incluyendo el seguro infantil (CHILD LOCK) y el pitido encendido/apagado (BEEP ON/OFF (LANGUAGE). Apriete y mantenga apretado el bot6n de opci6n marcado con la funci6n especial pot 3 segundos para activar. PITIDO ENCENDIDO/APAGADO (BEEPER SEGURO INFANTIL... -
Page 75: Mantenimientoy Limpieza Limpieza Regular
ANTENI lENTO Y/IMPIEZA LilVlPIEZA REGULAR ADVERTENCiA - Papa ed°c, el . esgo d e incendio, desca gas ei ct.cas o heridas al usar su electrodom_stico, siga las precauciones basicas, incluyendo Io siguiente: , Desenchufe la secadora antes de limpiar la misma para evitar el riesgo de descargas el_ctricas. Si no se cumple con esta advertencia se podran producir heridas graves, incendios, descargas electricas o muerte. -
Page 76: Antes De Ilamar A Mantenimiento
ESO[UciON DE P 0 [E AS ANTES DE LLAMAR A MANTENIMIENTO Su secadora esta equipada con un sistema de monitoreo de errores automatico para la detecci6n y el diagn6stico de problemas en una etapa temprana. Si su secadora no funciona adecuadamente o no funciona... - Page 77 ESO/UclON DE P 0 [E ANTES DE LLAMAR A MANTENIMIENTO (cont.) Separe los articulos pesados de los livianos. Los articulos Las prendas • La carga no esta tardan demasiado correctamente mb,s grandes y pesados requieren de mayor tiempo de clasificada. secado.
-
Page 78: Accesorios Opcionaies
Si no se dispone de espacio, Incremente el desempedo de su lavadora utilice este kit para apilar de LG con los pedestales de 35,5 centimetros manera segura su lavadora de (14 pulgadas) de alto correspondientes. carga frontal y secadora LG. -
Page 79: Instalaci6N Del Pedestal
ACCESO lOS OPCIONALES INSTALACION DEL PEDESTAL El a¢¢esorio de pedestal in¢luye: Para asegurar la instalaci6n segura, siga cuidadosamente las siguientes instrucciones. • Divisor de caj6n (1) • Llave (1) • Tornillos (18) 1- • Sujetadores (4) 1-1- ,ADVERTENC|A • La instalaci6n incorrecta puede causar accidentes graves. - Page 80 ACCESO lOS OPCiONALES INSTALACION DEL PEDESTAL (cont) Para la lavadora/combinaci6n Coloque el electrodomestico encima del Aseg0rese de que los orifi cios del pedestal. AsegOrese que los pies frentes y pedestal se alinean con los orifi icios de los traseros se encuentren en las posiciones sujetadores, luego instale 2 tornillos en cada correctas.
-
Page 81: Instalaci6N Del Kit De Apilado
ACCESOfllOS OPCIONALES INSTALA¢ION DEI_ KiT DE APILADO Para asegurar la instalaci6n segura, siga las siguientes instrucciones. ADVERTENC|A Este kit de apilado incluye: • Dos (2) deles laterales. • La instaiaci6n incorrecta puede causar Un (1) riel frontal. accidentes graves. Cuatro (4) tomillos. = El peso de la secadora y la altura de la instalaci6n hacen que el procedimiento... -
Page 82: Dimensiones Y Especificaciones Clave
ACCESO lOS OPCiONAI_ES INSTALACi0N DEL KiT DE APILADO Secadora Lavadora Coloque la secadora sobre la lavadora Insterte el riel frontal entre la parte inferior haciendo coincidir las patas en las de la secadora y la parte superior de la abrazaderas laterales como se indica. lavadora. -
Page 83: Revise El Filtro De Pelusa Antes Jnformaci6N De Registro D Elproducto
Su secadora LG sera reparada o reemplazada, a discreci6n de LG, si se comprueba que existe un defecto en el material o la mano de obra bajo condiciones de uso normales, durante el periodo de garantia ("Periodo de garantia') establecido mas abajo, vigente desde la fecha ("Fecha de compra') de la compra del cliente original de producto. - Page 84 & la terre ......Pr6cautions de s6curit6 pour I'installation ..87, 88 Felicitations pour votre achat et Instructions de s6curit6 pour la raccordement & 1'61ectricit6 ............bienvenue dans la famille LG. Votre PI_:CES ET CARACTERISTIOUES nouvelle secheuse LG associe Oaract6ristiques sp6ciales ........Oomposantes et pieces principales .....
- Page 85 I PO TANTESINST UCTIONS DE SECU L|SEZ TOUTES LES DiRECTiVES AVANT D'UT|L|SER L'APPARE|L AVSRT|SSEIVlSNT Pour votr ourit ,vou uivr I'information contenue darts ce manuel afin de r_duire les risques d'incendie d'e×plosion, de choc _lectrique, ainsi que pour _viter les domrnages materiels, blessures corporelles,...
- Page 86 I PORTANTES INST UCTIONS DE SECU L|SEZ TOUTES LES DiRECTiVES AVANT D'UT|L|SER L'APPARE|L _AV==RT|SSi=IVlI_NT Pour votre _ourit_, vou_ deve_ _uivre I'information contenue dans ce manuel afin de r_duire les risques d'incendie d'e×plosion, de choc _lectrique, ainsi pour _viter les dommages materiels, les blessures corporelles,...
- Page 87 I P0 TANTESINST LICTIONS DE SECU L|SEZ TOUTES LES DiRECTiVES AVANT D'UT|L|SER L'APPARE|L AV :RT|SSSlVlI NT Pour votre ourit ,vou deve uivre I'information contenue darts ce manuel afin de r_duire les risques d'incendie d'e×plosion, de choc _lectrique, ainsi que pour _viter les dommages materiels, les blessures...
- Page 88 I PORTANTES INST UCTIONS DE SECU L|SEZ TOUTES LES DIRECTIVES AVANT D'UTILISER L'APPARE|L AV==RT|SSI=MI NT pour v otr ourit ,vou uivr I'inforrnation contenue dans ce manuel afin de r_duire les risques d'incendie d'explosion, de choc _lectrique ainsi que pour _viter les dommages materiels, les blessures...
- Page 89 I PO TANTESINST LICTIONS DE SECU L|SEZ TOUTES LES DiRECTiVES AVANT D'UT|L|SER L'APPARE|L AVSRT|SS :M :NT pour v otr ourit ,vou uivr I'information contenue dans ce manuel afin de r_duire les risques d'incendie d'explosion, de choc _lectrique ainsi que pour _viter les dommages materiels, les blessures...
- Page 90 PIECES ET CARACTERISTIQUES CARACTi RISTIOUES SPi ClALES PANNEAU DE COMMANDE CONVIVIAL Faites pivoter le bouton selecteur de cycle au cycle d6sire. Ajoutez des options ou ajustez les parametres de cycles au moyen d'une simple touche. PORTE RI:I:VERSlBLE A ACC[::S FACILE Une porte a grande ouverture facilite I'acces au chargement et dechargement de I'appareil.
- Page 91 PIECESET cAP, A cTE ISTIQUES COMPOSANTES ET Pli_CES PRINClPALES En plus des composantes et caracteristiques speciales detaill6es dans la section Caract_ristiques sp_ciales, ce manuel fait ref6rence a de nombreuses autres composantes importantes. FILTRE A CHARPIE EN FACADE Le filtre a charpie en fagade facilitent I'acces et le nettoyage apres chaque brassee.
- Page 92 INSTRUCTIONS D'INSTA[[ATION IMPORTANT- Lire toutes ies directives d'instailation dans ieur irltegralite avarlt d'irlstaller et d'Lltiliser votre secheLise II est important que vous lisiez ce manuel dans son integralit6 avant d'installer et d'utiliser votre secheuse. Vous retrouverez dans les pages qui suivent des directives detaill6es pour les raccords electdques et de gaz, ainsi que les exigences en matiere d'evacuation de Fair.
- Page 93 (10 cm) Ipo-_l I _--27po_ I_-I p o (2.54 cm) (68.6 cm) (2.54 cm) ACCESSOIRESEN OPTION Pour ces produits LG et les autres, contactez votre detaillant LG local ou visitez notre site Internet au ca.lge.com. Piedestal Trousse d'empilage (vendu separement) (vendu...
- Page 94 INSTRUCTIONS D'INSTA[[ATION IVllSEA NIVEAU DE LA SECHEUSE Pour optimiser le rendement de I'appareil, la • Les quatre pieds de nivellement doivent secheuse doit _tre a niveau. Pour minimiser reposer solidement sur le plancher. Appuyez la vibration, le bruit, et les mouvements delicatement sur les coins superieurs de la indesirables, le plancher doit _tre une surface secheuse pour vous assurer qu'elle ne balance...
- Page 95 (la sortie d'air sur le c6t_ droit n'est pas offerte sur les modeles & gaz). Une trousse de conversion, piece no 383EEL9001 B, est offerte chez votre detaillant LG. L'ensemble comprend les 61ements n6cessaires pour modifier I'emplacement du conduit de la sortie d'air.
- Page 96 INSTRUCTIONS D'INSTALLATION VENTiLATiON DE LA Si CHEUSE &AVERT|SSEM Afin de reduire les risques d'incendie, et d'explosion, de choc electrique, ou les blessures corporelles Iorsque vous utilisez des electrom6nagers, vous devez toujours suivre les precautions de base, y compris ce qui suit : = N'_crasez pas et ne laissez pas le syst_me •...
- Page 97 INST UCTIONSD'INSTA//ATION VENTiLATiON DE LA Si_CHEUSE {suite) Systeme d'evacuation d'air 65 pi (19,8 m) 45 pi (13,7 m) Recommand6 55 pi (16,8 m) 35 pi (10,7 m) 47 pi (13,7 m) 30 pi (9,1 m) 36 pi (11,0 m) 25 pi (7,6 m) (10.2 (10.2 28 pi (8,5 m)
- Page 98 INSTRUCTIONS D'INSTA[[ATION RACCORDEMENT DES Si CHEUSES A GAZ AVERT|SSEMENT • [] Afin de reduire les risques d'incendie, et d'explosion, cho¢ electrique, ou les blessures corporelles Iorsque vous utilisez des electrom6nagers, vous devez toujours suivre les precautions de base, y compris ce qui suit : = Aliraentation en gaz requis :...
- Page 99 INST UCTIONSD'INSTA//ATION RACCORDEMENT DES Si CHEUSES A GAZ (suite) AVERT|SSEMENT • [] Afin de reduire les risques d'incendie, et d'explosion, choc electrique, ou les blessures corporelles Iorsque vous utilisez des electrom6nagers, vous devez toujours suivre les precautions de base, y compris ce qui suit : •...
- Page 100 INSTRUCTIONS D'INSTA[[ATION RACCORDEMENT DES Si CHEUSES i LECTRIQUES AVERT|SSEMENT Pour aider A emp_cher des incendies, des electrocutions, des blessures graves, ou des deces, le c_blage et la mise a la terre doivent se conformer a I'edition la plus recente du National Electrical Code, ANSI/NFPA 70 eta tous les reglements Iocaux en vigueur. Veuillez faire verifier par un technicien qualifie que votre maison a une alimentation electrique suffisamment puissante pour faire fonctionner...
- Page 101 INST UCTIONSD'INSTA//ATION EXIGENCES PARTICULIERES POUR LES MAISONS MOBILES OU PREFABRIOUEES Toute installation dans une maison mobile ou secheuse a gaz vers I'exterieur par le panneau prefabriqu6e dolt _tre conforme au chapitre 24 de la lateral droit en fonction de la presence du module du br01eur.
- Page 102 INSTRUCTIONS D'INSTA[[ATION (---VALUATION DE L'i TAT DU CONDUIT D'(---VACUATION Votre secheuse est equip6e du FLOW SENSET% un systeme innovateur qui detecte correcte automatiquement les blocages dans le conduit Circulation d'air d'evacuation de la secheuse. Le fait d'emp_cher I'accumulation de charpie et les blocages permet aux v_tements de secher plus rapidement et reduit la consommation d'energie.
- Page 103 MODE D'EMP/OI Voici les instructions de mise en marche et d'utilisation de votre nouvelle secheuse. Veuillez consulter des sections particulieres de ce manuel pour de plus amples informations. Avertissement important • Pour r_duire le risque d'incendie, de choc _lectrique, ou de blessure, lisez tout le manuel, y compris les instructions importantes...
- Page 104 ODE D'E P[OI CARACTi RISTIOUES DU PANNEAU DE COIVlMANDE Voici les instructions de mise en marche et d'utilisation de votre nouvelle secheuse. Veuillez consulter des sections particulieres de ce manuel pour de plus amples informations. Avertissement important : Pour r_duire le risque d'incendie, de choc _lectrique, ou de blessure, lisez tout le manuel, y compris...
- Page 105 Utilisez les cycles Manual Dry (rCglage manuel) pour utilisent le syst_me exclusif A double capteur de sClectionner un temps et une tempCrature de sCchage. LG qui decele et compare le niveau d'humidit6 Lors de la s_lection d'un cycle Manual Dry (r_glage v_tements...
- Page 106 ODE D'EMP[Oi AFFICHEUR DE TEMPS ET D'ETAT L'afficheur illustre les reglages, le temps restant estime, les options, et les messages d'etat de votre secheuse. _) VOYANT DE FILTRE A CHARPIE TEMPS RESTANT ESTIMi_ La secheuse detecte automatiquement (Estimated time remaining) blocages dans la circulation d'air Lorsque le bouton MARCHE/PAUSE est enfonce, causes par un filtre a charpie plein.
- Page 107 MODE D'EMP/OI FONCTIONNEMENT DE LA Si CHEUSE Une fois la secheuse chargee : Appuyez le bouton MARCHE/ARRI_T Appuyez sur le bouton DI_MARRER/ pour mettre en marche la PAUSE pour demarrer le cycle. secheuse. Les lumieres autour L'afficheur changera et la du bouton selecteur de cycle secheuse affichera le temps s'allumeront.
- Page 108 ODE D'EMP[Oi BOUTONS DE REGLAGE DU CYCLE Les cycles SENSOR DRY (reglage automatique) REMARQUE : Pour proteger vos v_tements, possedent des reglages preprogrammCs qui se les differentes options de niveau de sechage, selectionnent automatiquement et ne peuvent temperature, ou autres ne sont pas toutes _tre modifies.
- Page 109 MODE D'EMP/OI BOUTONS D'OPTIONS DU CYCLE Votre secheuse vous offre plusieurs options de SECHAGE AVEC GRILLE (RaCk dry) cycle supplementaires pour personnaliser les Utilisez la fonction RACK DRY cycles et ainsi satisfaire vos besoins individuels. (sechage avec grille) avec des articles Certains boutons d'options comportent comme les gilets en laine, la sole, egalement une fonction speciale (consultez la...
- Page 110 ODE D'EMP[Oi FONCTIONS SPEClALES Les boutons d'options activent egalement des fonctions speciales comme : CHILD LOCK (verrouillage pour enfants) et BEEPER ON/OFF (sonnerie marche/arr_t). Appuyez et maintenez enfonce le bouton d'option marque de la fonction speciale pendant 3 secondes pour I'actionner. SONNERIE ACTIV_=E/DESACTIVEE VERROUILLAGE POUR ENFANTS...
- Page 111 ENTRETIENET NETTOYAGE NETTOYAGE RI_GULIER AVERT|SSEMENT Afin de reduire les risques d'incendie, de choc electrique, ou les blessures corporelles Iorsque vous utilisez des electrom6nagers, vous devez toujours suivre les precautions de base, y compris ce qui suit " • D_branchez votre s_cheuse avant de la nettoyer pour _viter le risque de choc _lectrique.
- Page 112 DEPANNAGE D'APPELER LE SERVICE AVANT Votre secheuse est dotee d'un systeme de contr6ie des erreurs automatique qui detecte et diagnostique problemes des leur apparition. Si votre secheuse ne fonctionne pas correctement ou ne fonctionne pas du tout, verifiez les el6ments suivants avant d'appeler le service. La s_cheuse refuse Assurez-vous...
- Page 113 DEPANNAGE AVANT D'APPELER LE SERVICE {suite) Le temps de s_chage • Les param_tres de s6chage, Le temps de s6chage d'une charge varie selon la taille de la brass6e, et le le param_tre de chaleur, le type de chaleur utilis6 n'est pas constant taux d'humidit6 (61ectrique, &...
- Page 114 DEPANNAGE AVANT D'APPELER LE SERVICE (suite) Le voyant CHECK • Le filtre b.charpie est Interrompre le cycle de s6chage et nettoyer le filtre & charpie. FILTER (v_rifier le presque plein. fBtre) est aBum_ pendant le cycle de s_chage Le conduit d'6vacuation Le voyant FLOW •...
- Page 115 CEI 7,3 pi cu. (22,5 Ib/10,2 kg) *Reportez-vous & la plaque signal6tique de votre s6cheuse. ACCESSOIRES EN OPTION Pour ces produits LG et les autres, contactez votre detaillant LG local ou visitez notre site Internet au ca.lge.com. piedestal Trousse d'empilage Donnez a votre machine...
- Page 116 ACCESSORIES EN OPTION iNSTALLATiON DU Pli_DESTAL Le piedestai accessoire ¢omprend Pour vous assurer que I'installation est securitaire et sore, conformez-vous aux directives suivantes. • Diviseur a tiroir (1) • Cle (1) 1-1- • Vis (18) 1- • Supports (4) , AVERT|SSEMENT •...
- Page 117 ACCESSO IES EN OPTION iNSTALLATiON DU Pli DESTAL Pourla s6cheuse ::@@ Pour la machine & laver/combo ,,,_J Positionnez la secheuse sur le piedestal. Assurez-vous que les trous du piedestal sont alignes avec les trous des souteneurs. Assurez-vous que les pieds A I'avant et A Inserez et serrez 2 vis A chaque coin pour I'arriere de la machine se Iogeront en les fixer solidement I'appareil au piedestal.
- Page 118 ACCESSORIES EN OPTION iNSTALLATiON DE LA TROUSSE D'EMPILAGE ta trousse d'empilage ¢omprend : Pour vous assurer que rinstallation est securitaire et sore, conformez-vous aux directives suivantes. • Deux (2) rails lateraux ,AVERT|SSEMENT • Un (1) rail avant , Une installation incorrecte peut entrainer Quatre (4) vis accidents graves.
- Page 119 ACCESSO IES EN OPTION iNSTALLATiON DE LA TROUSSE D'EMPILAGE csuite S6cheuse Machine & laver Inserez le rail avant entre le bas de la Placez la secheuse par-dessus la machine secheuse et le haut de la machine a laver. laver en ajustant les pattes de la secheuse Poussez le rail avant vers I'arriere de la dans les rails lateraux tel qu'illustre.
- Page 120 Aux dommages au produit causas par accident, vermine, incendie, inondation, ou actes de Dieu. Aux raparations lorsque le produit LG est utilisa it des fins autres que normales, utilisation rasidentielle unifamiliale ou contraire aux instructions donnaes dans te guide du propriataire du produit.
- Page 121 P/NO. 3828EL3003Y...
Need help?
Do you have a question about the DLG2302W and is the answer not in the manual?
Questions and answers