
Related Manuals for Omega CO-BD7 series

Summary of Contents for Omega CO-BD7 series
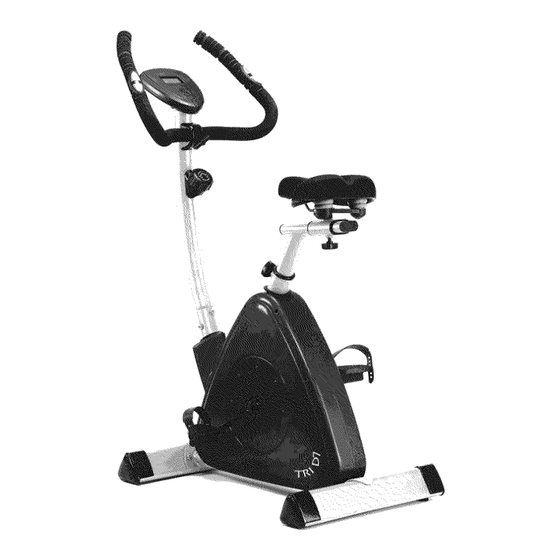
- Page 1 OMEGA MAGNETIC ililililili_ iNSTRUCTiON...
-
Page 2: Introduction
CTIO Thank you for purchasing the CO-BD7 magnetic bike. Please take time to read these instructions which have been written to ensure that you get the very best from your purchase. SAFETY PRECAUTI ARNING: To reduce the risk of serious injury, read the following important precautions before using the magnetic... -
Page 3: Table Of Contents
CONTENTS INTRODUCTION ........................SAFETY PRECAUTIONS ....................... PARTS LIST ........................TOOLS LIST ........................ASSEMBLING ........................Front and rear support ..................... Handlebar post ....................... Seat and seat support post ....................Handle bar ........................Monitor and pedals ......................USING THE EXERCISE BIKE Making adjustments to the seat .................. -
Page 4: Parts List
PARTS LIST OMEGA FITNESS... -
Page 5: Tools List
PARTS LIST Main frame T-knob Tension control Front support Rear support Foam grip X 2 Adjustment knob M8 Adjustment knob M16 Washer 8*20 X 4 Console cable Arc washer 8*20 X 4 Console Bolt M8"16 X 4 Screw M5"16 X Washer 8"17 X4 Sensor cable Seat... -
Page 6: Assembling
ASSEMBLING STEP 1 OF 5 FRONT AND REAR SUPPORTS FIG 1 The screws may be prefitted to the supports. Unpack the carton and place all the parts on the floor. Tilt the main frame (1) backwards and fit the front support (2) onto the main frame(fig Secure with 2bolts(6) and washers(5) -
Page 7: Handlebar Post
ASSEMBLING STEP 2 OF 5 HANDLEBAR POST FIG 2 The screws may be prefitted to the supports. Remove the screws (23) and washers (5A) from the handlebar post (12). Connect the two end parts of tension control cable up (13) and low (14). Remove the metal clip (14A). Connect console cable (19) and sensor cable (21) together. -
Page 8: Seat And Seat Support Post
ASSEMBLING STEP 3 OF 5 ;EAT AND SEAT SUPPORT POST FIG 3 The screws may be prefitted to the supports. Remove the 3 nuts (11) and washers (7) from the seat (8). Place the seat (8) over seat support tube (9A) and secure using the 3 nuts (11) and washers (7). -
Page 9: Handle Bar
ASSEMBLING STEP 4 OF 5 HANDLEBARS FIG 4 © The screws may be prefitted to the supports. Fit the handlebar (25) across the handlebar bracket on the handlebar post (12). Cover the protection cap (24) over the handlebar (25). Tighten the T-knob (15) and washer (7) to secure the handlebars (25) into position. -
Page 10: Monitor And Pedals
ASSEMBLING STEP 5 OF 5 MONITOR AND PEDALS FIG 5 The screws may be prefitted to the supports. Connect the console cable (19) to the console (20). Position the console (20) carefully onto the Bracket on the top of the handlebar post (12),secure with 2 screws (20A) provided. -
Page 11: Making Adjustments To The Seat
USING THE MAGNETIC BIKE MAKING ADJUSTMENTS SEAT POSITION There are 4 seat positions both by adjusting the seat post or the seat support post. adjust, loosen the seat adjustment knob (4, 18). Pull out against the spring and move the seat to the desired position. -
Page 12: Using The Console
USING THE EXERCISE CONSOLE FUNTIONAL BUTTONS MODE -Press to select functions. -To set the values of time, distance and calories when not in the scan mode. RESET -Press to reset time, distance and calories. SELECTING MODES The console's mode function enables you to monitor your performance as you exercise and input values for specific exercise parameters. -
Page 13: Omega Fitness
USING THE EXERCISE CONSOLE SELECTIING MODES PULSE RATE (I') -Press "MODE" button until "qp "appears. Before measuring your pulse rate, place both your hands on the contact sensors and the monitor will show the heart beat rate in beats per minute (aMP) of current on the LCD after 3-4 seconds. NOTE: During the process of pulse measurement, because... -
Page 14: Workout Tips
TCHI G I E TIPS STRETCHING • Begin with gradual mobility exercises of all the joints, i.e. simply rotate the wrists, bend the arm and roll your shoulders. This will allow the body's natural lubrication (synovial fluid) to protect the surface of your bones at these joints. -
Page 15: Stretching Guide
TCHI G I E CALF STRETCH Stand with one leg in front of the other; both feet facing forwards and the front leg bent (the knee should be above the ankle). Press the heel of the back leg into the floor until you begin to feel the calf muscle in the back of the rear leg starting to stretch. - Page 16 G I E QUADRICEPS STRETCH With one hand against a wall for balance, reach back and grasp one foot with your other hand. Bring your heel as close to your buttocks possible. Hold for the required count and then relax. INNER THIGH STRETCH Sit with the soles of your feet together...
- Page 17 TCHI G I E TOE TOUCH STRETCH Stand with your knees bent slightly and slowly bend forward from your hips. Allow your back and shoulders relax as you reach down toward your toes, stretch as far as possible. Hold for the required count, then slowly return to the upright position and relax.
- Page 18 G I E LOWER BACK Lie on your back with your knees bent. Keeping your upper back firmly on the floor, allow your knees to fall to one side, your lower back will rotate naturally. Hold for the required count and then relax.
- Page 19 TCHI G I E UPPER BACK Start off on all fours looking down towards the floor. Push your shoulders as high as possible, imagine a wire placed between your shoulder blades lifting you. Hold for the required count, then relax. Note.
- Page 20 G I E DELTOIDS SHOULDER STRETCH Stand up and place one arm across the front of the body. Use the other arm to push the outstretched arm into your chest. Note: Push at the point just above the elbow. Try to keep the arm straight and breathe normally.
-
Page 21: Specifications
SPECIFICTIONS 1040mm x 530mm x 1330mm Dimensions (L x H x W): 44in x 21in x 52in 30KG / 67LB Net weight: Class Rating (European safety standard): 100KG / 220LB Maximum user weight: Please note that the specifications are subject to change without notice. OMEGA FITNESS...
Need help?
Do you have a question about the CO-BD7 series and is the answer not in the manual?
Questions and answers
The readout on my co-bd7 bike stopped reading. I've replaced the batteries but it still will show nothing on the display. Any recommendations on how to repair? Thanks
If the display on your Omega CO-BD7 bike is not working after replacing the batteries, follow these steps:
1. Check Battery Orientation – Ensure the two AA (UM3) batteries are installed correctly, matching the polarity (+/-) as indicated.
2. Reconnect Cables – Verify that the console cable (19) and sensor cable (21) are securely connected. Loose connections can cause display issues.
3. Reset the Console – Remove the batteries for a few minutes, then reinstall them to reset the system.
4. Check Battery Condition – Use new, fully charged AA batteries, as weak or old batteries may not provide enough power.
5. Inspect for Damage – Look for any visible damage to the display, cables, or connectors.
If the display still does not work, consider consulting the manual or contacting customer support.
This answer is automatically generated