
Subscribe to Our Youtube Channel
Related Manuals for Jaclyn Smith SS-I-138-3GZN

Summary of Contents for Jaclyn Smith SS-I-138-3GZN
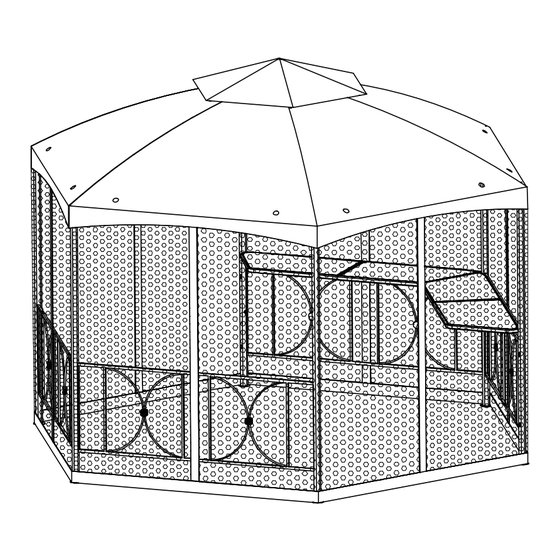
- Page 1 OWNER’S MANUAL Dutch Harbor Gazebo Product code: 0-02670067-4 UPC code: 769455757999 Vendor Item: SS-I-138-3GZN Date of purchase: _____/ _____/ _____...
- Page 2 Special Warning Assemble your gazebo on a soft, non-abrasive surface to avoid damage. The gazebo is heavy. Use care when handing. Assembly by four adults is recommended. The gazebo is not intended to be a permanent structure. Take it down during high winds or it may be damaged.
- Page 3 M (1) N (6) Canopy Fabric ACCESSORIES Oa (16 + 1 spare) Oh (12) M6 x 15L Bolt Lawn Stake Oi (1) Ob (48 + 3 spares) Hook M6 x 20L Bolt Oj (2) Oc (6 + 1 spare) M6 x 25L Bolt Open Hex Wrench Od (12 + 1 spare) Ok (2)
-
Page 4: Assembly Instructions
ASSEMBLY INSTRUCTIONS Attach a decorative panel (C) to two leg Fig. 1 posts (A). Insert two hooks of decorative panel (C) into two holes of two leg posts (A). See Fig. 1. Then insert the pins through the decorative panel (C) and into the leg post (A) for each hole. - Page 5 Attach a tabletop crossbar (D) to the assembled frame (A&C) Line up all holes, for each hole insert an M6 x 15L bolt (Oa) through the bracket of tabletop crossbar (D) and secure into the leg post (A) or the decorative pannel (C). Don’t tighten completely.
- Page 6 Place the completed canopy onto the top of assembled leg posts. Line up the holes, for each hole insert an M6 x 30L bolt (Od) through a metal washer (Oe), a short bar (F), a bracket (Og), another metal washer (Oe) and secure with a nut (Of). Don’t tighten completely.
- Page 7 : Repeat step for remaining tabletop (K&L). : Attach the tabletop (J&I) to the tabletop (K&L). Line up the hole, insert an M6 x 15L bolt (Oa) through the support long bar (G) and secure into the decorative panel (C) for total of 2 holes. See Fig. 15. Don’t tighten completely.
- Page 8 Fig. 20 Locate the nets (N) to the net bars of top crossbars (B) with Velcro tabs. See Fig. 20. Make sure the top crossbar is between two edges of the canopy fabric (M). Affix inner edges with Velcro tabs. See Fig. 21. Your gazebo is now ready for use.
Need help?
Do you have a question about the SS-I-138-3GZN and is the answer not in the manual?
Questions and answers
Can I order a manuel