Inglis GAS RANGE Use & Care Manual
By whirlpool corporation
Hide thumbs
Also See for GAS RANGE:
- Use & care manual (22 pages) ,
- Use & care manual (36 pages) ,
- Use & care manual (24 pages)
Table of Contents
Advertisement
Quick Links
by Whirlpool
Corporation
GASRANGE
Forquestions aboutfeatures, o peratJon/perbrrnance, parts,
accessories o r service, c all:1-800-253-1301.
Table of Contents .................................................
2
To the installer: Please leave this
instruction book with the unit.
To the consumer: Please read and
keep this book for future reference.
W10017540
Advertisement
Table of Contents

Related Manuals for Inglis GAS RANGE


Summary of Contents for Inglis GAS RANGE
- Page 1 by Whirlpool Corporation GASRANGE Forquestions aboutfeatures, o peratJon/perbrrnance, parts, accessories o r service, c all:1-800-253-1301. Table of Contents ..........To the installer: Please leave this instruction book with the unit. To the consumer: Please read and keep this book for future reference. W10017540...
-
Page 2: Table Of Contents
TABLEOF CONTENTS RANG E SAFETY ................OVEN USE ..................The Anti-Tip Bracket ..............Positioning Racks and Bakeware ..........Aluminum Foil ................PARTS AND FEATURES ..............Bakeware ..................COOKTOP USE ................Meat Thermometer ............... Cooktop Controls ................. Oven Vent ..................Sealed Surface Burners ............... Baking and Roasting .............. -
Page 3: The Anti-Tip Bracket
may result causing property damage, personal injury or death, I WARNING: If the information in this manual is not followed exactly, a fire or explosion - Do not store or use gasoline or other flammable vapors and liquids in the vicinity of this or any other appliance, - WHAT TO DO IF YOU SMELL GAS: •... -
Page 4: Partsand Features
iMPORTANT SAFETY iNSTRUCTiONS WARNING: To reduce the risk of fire, electrical shock, [] This range is equipped with a three-prong grounding plug injury to persons, or damage when using the range, follow for your protection against shock hazard and should be basic precautions, including the following: plugged directly into a properly grounded receptacle. -
Page 5: Cooktopuse
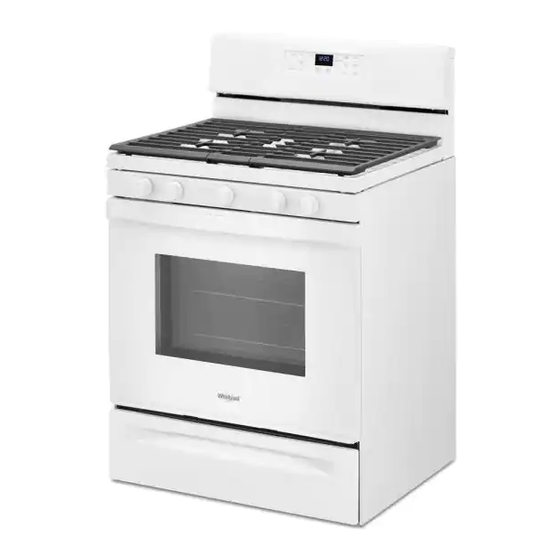
Range A. Oven vent F Doorstop clip K. Right front surface burner B. Left rear surface burner G. Model and serial number plate L. Cooktop control panel (behind left side of storage drawer) C. Left front surface burner M. Door gasket H. -
Page 6: Sealed Surface Burners
To Clean: REMEMBER: When range is in use or (on some models) IMPORTANT: Before cleaning, make sure all controls are off and during the Self-Cleaning cycle, the entire cooktop area may the oven and cooktop are cool. Do not use oven cleaners, bleach become hot. -
Page 7: Electronicovencontrol
Use thefollowing c hart a saguide forcookware material characteristics. COOKWARE CHARACTERISTICS When power is first supplied to the appliance, "PF" or a flashing time will appear on the display. Press OFF/CANCEL to clear. Aluminum Heats quickly and evenly. If "PF" or a flashing time appears at any other time, a power failure has occurred. -
Page 8: Control Lock
IMPORTANT: Donotuseathermometer tomeasure oven The Timer c anbesetinhours o rminutes upto12hours a nd 59minutes a nd counts d own thesettime. temperature because opening t heoven door a ndelement or burner cycling m ay give incorrect readings. NOTE: The Timer does notstart o rstop theoven. The oven provides accurate temperatures;... -
Page 9: Aluminum Foil
BAKEWARE BAKEWARE/RESULTS RECOMMENDATIONS To cook food evenly, hot air must be able to circulate. Allow 2" (5 cm) of space around bakeware and oven walls. Use the Stoneware/Baking • Follow manufacturer's following chart as a guide. stone instructions, NUMBER OF POSITION ON RACK •... -
Page 10: Broiling
Preheating Approximate After S TART/ENTER istouched, theoven will e nter a timed RACK Time (minutes) preheat conditioning cycle. The Temp, Bake, and Onindicator lights will l ightup.The Electronic Oven C ontrol automatically FOOD POSITION SIDE 1 SIDE 2 selects theconditioning cycle time based ontheoven temperature selected. -
Page 11: Rangecare
5. Press START/ENTER. Do not block the oven vent(s) during the Self-Cleaning cycle. Air must be able to move freely. Depending on your model, see The display will count down the time. "Oven Vent" or "Oven Vents" section. When the time ends, the oven will shut off automatically Do not clean, rub, damage or move the oven door gasket. -
Page 12: General Cleaning
IMPORTANT: Before cleaning, make sure all controls are off and • All-Purpose Appliance Cleaner Part Number 31662 (not the oven and cooktop are cool. Always follow label instructions included): See "Assistance or Service" section to order. on cleaning products. Soap, water and a soft cloth or sponge are suggested first unless otherwise noted. -
Page 13: Oven Light
3. Turn bulb counterclockwise to remove from socket. BROILER PAN AND GRID (on some models) 4. Replace bulb, then bulb cover by turning clockwise. 5. Plug in range or reconnect power. Do not clean in the Self-Cleaning cycle, Cleaning Method: •... -
Page 14: Storage Drawer
To Replace: 1. Lift up the back of the drawer and place it inside the range in its fully forward position. The storage drawer can be removed. Before removing, make sure 2. Lift up the front of the drawer to a level position. drawer is cool and empty. -
Page 15: Assistance Or Service
Customer experience Center 553 Benson Road right and work right because they are made with the same precision used to build every new INGLIS BY WHIRLPOOL Benton Harbor, MI 49022-2692 CORPORATION appliance. Please include a daytime phone number in your correspondence. - Page 16 WHIRLPOOLCORPORATION MAJORAPPLIANCEWARRANTY ONE YEAR LIMITED WARRANTY For one year from the date of purchase, when this major appliance is operated and maintained according to instructions attached to or furnished with the product, Whirlpool Corporation or Whirlpool Canada LP (hereafter "Whirlpool") will pay for FSP replacement parts and repair labor to correct defects in materials or workmanship.
Need help?
Do you have a question about the GAS RANGE and is the answer not in the manual?
Questions and answers
how do you convert oven to propane
The document does not provide specific instructions for converting an Inglis gas range oven to propane. However, it mentions that if propane gas is being used, the appliance may have been converted improperly and suggests contacting a service technician. For proper conversion, it is recommended to consult a qualified technician or refer to the appliance's official installation instructions.
This answer is automatically generated