Table of Contents
Advertisement
Quick Links
Download this manual
See also:
Basic Manual
DiGiTAL
CAMERA
FIN_PlX
F" E_O/_
Owner's
Manual
Thank you for your purchase of this product. This manual
describes how to use your FUJIFILM FinePix F6Ofd digital
camera and the supplied software. Be sure that you have read
and understood
its contents before using the camera.
For information
on related products, visit our website at
h_:p.i/www.fujifilm.corn/produc_s/index.h_ml
SUPER
xD_PlctureCard
=.
_
PJctBridge
BeforeYouBegin
FirstSteps
Basic Photography andPlayback
MoreonPhotography
MoreonPlayback
Movies
Connections
Menus
Technical Notes
Troubleshooting
Appendix
Advertisement
Table of Contents

Related Manuals for FujiFilm FINEPIX F60FD


Summary of Contents for FujiFilm FINEPIX F60FD
- Page 1 Owner's Manual Basic Photography andPlayback Thank you for your purchase of this product. This manual describes how to use your FUJIFILM FinePix F6Ofd digital MoreonPhotography camera and the supplied software. Be sure that you have read and understood its contents before using the camera.
-
Page 2: For Your Safety
For Your Safety IMPORTANT SAFETY INSTRUCTIONS • Reedlnstru_tions:All the safety and operating instructions should be read before Attachments: use attachments recommended by the video product manufacturer as they may cause hazards appliance is operated • Retain Instructions: safety operating instructions should retained WaterandMoisture:Do not use this video product near water... -
Page 3: Safety Notes
For Your Safety Power Lines: An outside antenna system should located in the vicinity ovelhead power lines or othel electric light or power circuits, or where it can fall into PJ" • ",o • i" • • such power lines or circuits When installing... - Page 4 Donotleave thiscanlerainplacessubjedtoextremel_hiqh temperatures Do riot leave the electric shock Contact youl FUJIFILM dealer di_assembb in locations such sealed ve}l[cle in direct camera as a sunliclht This can cause Don ot chanqe, heator unduly twistor pull the connedion cordand do not placeheavy ohjeds...
- Page 5 Chalge battery before Keep the battery in its case when in use ACAdapters (Available Separately) Notes on the Battery Use only FUJIFILM AC adapters designated for use with this camera Other adapters The battery gradually loses its chalge when...
-
Page 6: Notices
Notesonthe Grant To comply with Part 15 of the F(-C Rules, this product must be used with a Fujifilm specified ferrite core A/V cable, USB cable, and DC supply cord,... - Page 7 For Your Safety Unless intended solely for personal use, images recorded using your digital Disposalof UsedElectricaland Electronic Equipment (Applicablein the EuropeanUnion, camera system cannot be used in ways that infringe copyright laws without Norway, Icelandand Liechtenstein) consent of the owrler. Note that some...
-
Page 8: A Special Feature
A Special Feature of This Camera Using SR_fi'_ SCENE RECOGNITION Simply by pointing the camera at the subject, the camera automatically analyzes and selects the most appropriate setting from 4 settings: 0 PORTRAIT, 0 LANDSCAPE, (_ NIGHT, o r @ MACRO. Then you can just press the shutter button to capture the moment. -
Page 9: About This Manual
About This Manual Before using the camera, read this manual and the warnings on pages ii-vii. For information on specific topics, consult the sources below. name for it? Find the answer in "Camera Q &A." entire manual. The principal camera operations t......... -
Page 10: Camera Q &A
Camera Q & A Find items by task. Camera Setup Question Keyphrase Seepage How do I set the camera clock? Date and time Car] I set the clock to local time when I travel? Time difference How do I keep the monitor from turning off automatically-? Auto power off... - Page 11 Camera Q & A Taking Pictures Question Key phrase Seepage Memory capacity How many pictures car] I take? mode Isthere a quick and easy way to take snapshots? Dual ISmode How car] I avoid blurred pictures? Intelligent FaceDetection How can I make good portraits? Car] the camera automatically select the most suitable mode? SRI_...
- Page 12 Camera Q & A Viewing Pictures Question Key phrase Seepage Single-frame playback How do I view my pictures? Deleting pictures How do I get rid of unwanted pictures? Erase How do I delete a lot of pictures at once? Playbackzoom Carl I zoom in ors pictures during playback-? Multi-frame playback...
-
Page 13: Table Of Contents
Table of Contents For Your Safety ................. i i Exposure Compensation ............30 IMPORTANT SAFETY INSTRUCTIONS ........ii Shooting Mode ................32 Safety Notes ..................iii I_I AUTO ..................32 NOTICES ................... v i SCENE RECOGNITION ..........32 NATURAL & _. (Dual Shot Mode) ......... 33 A Special Feature of This Camera ......... - Page 14 ISO ..................64 Technical Notes QUALITY ................65 Optional Accessories ..............92 FINEPIX COLOR ..............66 Using the Shooting Menu ............67 Accessories from Fujifilm ............93 Shooting Menu Options ............68 Caring for the Camera ..............95 PHOTOMETRY ..............68 Troubleshooting WHITE BALANCE ...............69 Troubleshooting ................96 CONTINUOUS ..............70...
-
Page 15: Introduction
Introduction Symbols and Conventions The following symbols are used in this manual: Caution:This information should be read before use to ensure correct operation. d- Note: Points to note when using the camera. % Tip:Additional information that may be helpful when using the camera. Menus and other text in the camera monitor are shown in bold. -
Page 16: Parts Of The Camera
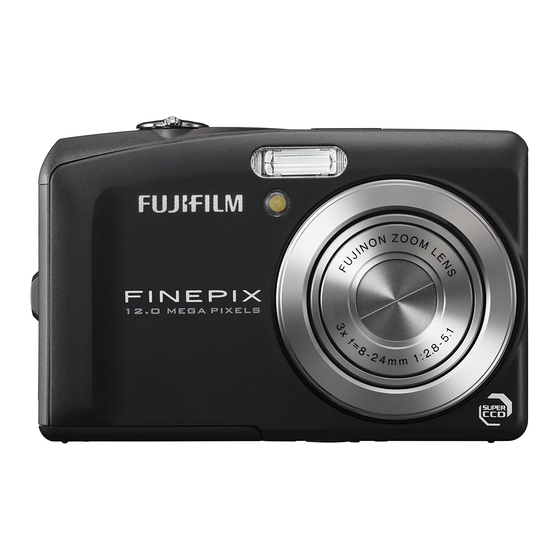
htroduction Parts of the Camera For more information, refer to the page listed to the right of each item. Selector button Move cursorup (exposure compensation) button (pg. 30) buiion (delete) button (pg. 20) i (pg. 13) Move cursor right (macro) button ,_ (flash) button (pg. -
Page 17: The Monitor
htroduction The Monitor The following indicators may appear in the monitor during shooting and playback: • Shooting Silent mode ........Intelligent Face Detection indicator ..........Flash mode ......... o" Dual IS mode ........Image quality ........Shooting mode ....... Number of exposures 5=""'_,_'5 E®] _... -
Page 18: The Mode Dial
htroduction The Mode Dial To select a shooting mode, align the mode icon with the mark next to the mode dial. (NATURAL & _.): Helps ensure (Aperture-Priority/Shutter-Priority Auto): Adjust shutter speed or aperture good results situations with manual control over a wide variety of camera settings (pg. -
Page 19: Charging The Battery
Charging the Battery The battery is not charged at shipment. Charge the battery before use. Tile charging indicator shows battery charge status asfollows: Place the battery in the charger. Charging i ndicator Batterystatus Action Insert the battery into the supplied BC-50 Battery not Insert the... - Page 20 Charging the Battery [M Cautions: Caring fortheBattery • Do not affix stickers or other objects to the battery. Failure to observe this precaution could make it impossible to remove tile battery from tile camera. • Do not short tile battery terminals. The battery could overheat. •...
-
Page 21: Inserting The Battery
Inserting the Battery After charging the battery, insert it in the camera Insert the battery. as described below. Align the orange stripe on the battery with the I_ Open the battery-chamber cover. orange battery latch and slide the battery ..pressed side. - Page 22 hserting the Battery Cautions • Insert tile battery in the correct orientation. After turning the camera off, open the battery- not use force or attempt to insert the battery chamber cover, presstile battery latch to the side, and upside down orbackwards. Tile battery will slide slide tile battery out of tile camera asshown.
-
Page 23: Inserting A Memory
Cards and SanDisk SD and SDHC memory cards have been tested and approved for use in the F60fd. A complete list of approved memory cards is available at http://www.fujifilm.com/products/ digitol_comeros/index.html. Operation is not guaranteed with other cards. The camera can not be used with multimedia cards. - Page 24 hserdng a Memory Card • Inserting aMemoryCard Close the battery-chamber cover. Open the battery-chamber cover. Insert the memory card. Holding the memory card so that the gold Press the card in and then release it slowly. The card carl now be removed by hand. contacts face the gold...
- Page 25 • Do not affix labels to memory cards. Peeling labels carl cause camera malfunction. • FUJIFILM xD-Picture Cards are recommended. Resultscarl not be guaranteed with xD-Picture Cards from other manufacturers. The camera carl be used with type M, type M+ or type H xD-Picture Cards; note, however, that type H cards are not compatible with the optional DPC-UD1xD-Picture Card USBdrive.
-
Page 26: Turning The Camera
Turning the Camera On and Off Shooting Mode Playback Mode Pressthe ON/OFF button to turn the camera on. To turn the camera on and begin playback, press the [] button for about a second. The lens will extend and the lens cover will open. Press the ON/OFF button to turn the camera off. -
Page 27: Basic Setup
Basic Setup Set the date and time. A language-selection dialog is displayed the first time the camera is turned on. Set up the camera as described below (for information on resetting the clock or changing languages, see page 85). Choosea language. - Page 28 Basic Setup Choose power management options, % Tip:The Camera C lock If the battery is removed for an extended period, the camera clock will be reset and tile language-selection dialog will be displayed when tile camera is turned on. If the battery is left in the camera or optional DC coupler and AC adapter connected for about four days, they carl be removed for about seven days without 3.1 Press the selector up or down...
-
Page 29: Taking Pictures In I_1 (Auto)
Taking Pictures in _ (AUTO) Mode Checkthe battery level, This section describes how to take pictures in mode. Check the battery level in the monitor. Turn the cameraon. Press the ON/OFF button to turn the camera ® ® Indicator Description (]) (white) Battery partially discharged. - Page 30 Taking Pictures ir_ !_ (AUTO} Mode Frame the picture. Position the main subject in the focus area Hold the camera steady and use the zoom control to frame the with both hands and picture in the monitor. your elbows against sides.
-
Page 31: Dual Ismode
Taking Pictures in_ (AUTO) Mode display a framing gridortoview orhide otherI Iftilesubject ispoorly l it,blurring caused bycamera indicators intilemonitor, press tile DISP/BACK button, shake carl be reduced by pressing the ((,Ill)) button (dual ISmode). In I_ mode, pressingtile ((,Ill)) b utton also reduces blur caused by subject movement. - Page 32 Taking Pictures ir_ !_ (AUTO) Mode Shoot. Focus. Press the shutter button halfway to focus on Smoothly press the shutter button the rest of the way down to take _ the main subject in the focus frame. the picture. Tip: TheShutter Button The shutter button has two positions.
- Page 33 Taking Pictures ir_ !_ (AUTO) Mode %- ThendcaterLamp Indicator lamp indicator lamp shows camera status asfollows: Indicator l amp Camera s tatus Glows green Focus locked. Camera unable to focus. Picture carl Blinksgreen be taken. Blinksgreen Recording pictures. Additional aictures carl be taken. and orange Recording pictures.
-
Page 34: Viewing Pictures
Viewing Pictures Pictures can be viewed in the monitor. When taking important photographs, take a test shot To delete the picture currently displayed in and check the results. tile monitor, presstile selector up (_). The following dialog will be displayed. Press the [] button. -
Page 35: E O_ Intelligent Face Detection
L e] Intelligent Face Detection Red-Eye Removal Intelligent Face Detection allows the camera to Optien Descriptien automatically detect human faces and set focus ['-] OFF and red-eye removal off. and exposure for a face anywhere in the frame for shots that emphasize portrait subjects. Choose for ['-] FACE D ETECTION , "... - Page 36 E_] htelligent Face Detection and Red-Eye Removal Focus. Press the shutter button halfway Intelligent Face Detection to set focus and exposure for the subject in the green border. Shoot. Press the shutter button all the way down to shoot. $4),and cropping (pg. 84). Cautions If re] FACE DETECTION _ REMOVAL ON...
-
Page 37: Focus Lock
Focus Lock Recompose the picture. compose photographs with off-center subjects: Keeping the shutter button pressed halfway, recompose the picture. Position the subject in the focus frame, Shoot. Focus, Press the shutter-release button the rest of Press the shutter button halfway to set focus the way down to take the picture. - Page 38 Focus Lock ..........................ii _TheAF-AssistHiuminator Althoughthe camera boasts a high-precision i ithesubject ispoorly lit,the AF-assist illuminator will autofocus system, itmay beunable tofocus o ntile ' lighttoassist tilefocus o peration when tileshutter subjects listed b elow. Ifthecamera isunable tofocus button ispressed halfway.
-
Page 39: Close-Ups
Close-ups (Macro Mode) Macro mode can be used for close-ups in _, o_, _1]_, SP (?_, -_, Ifi_l), _M and A/S modes (pp. 32- 40). To select macro mode, press the selector left (_). _ icon appears in when _SOAUTC_ monitor camera E[+] _... -
Page 40: Flash)
Using the Flash (Intelligent Flash) When the flash is used, the camera's Intelligent Flash system instantly analyzes the scene based on such factors asthe brightness of the subject, its position in the frame, and its distance from the camera. Flash output and sensitivity are adjusted to ensure that the main subject is correctly exposed while preserving the effects of ambient background lighting, even in dimly-lit indoor scenes. - Page 41 Using t heHash ( Intelligent Hash} ®'_ R ed-Eye Removal When _REMOVAL ON is selected for Intelligent FaceDetection (pg. 21), red-eye removal (<t_)is available in AUTO (_,o),fill caused when light from tile flash is reflected from tile' subject's retinas as shown in tile illustration at right.
-
Page 42: . Using The Flash
Using the Self-Timer The camera offers a ten-second timer that allows photographers to appear in their own photographs, and a two-second timer that can be used to avoid blur caused bythe camera moving when the shutter button is pressed. The self-timer is available in all shooting modes. - Page 43 © Using the SeNti-Timer The self-timer lamp on the front of the camera will blink immediately before the picture is taken. If the two-second timer is selected, the self-timer lamp will blink as the timer counts down. Because it ensures that tile faces of portrait subjects will be in focus, Intelligent Face Detection (pg. 21) is _"...
- Page 44 Exposure Compensation exposure compensation when To choose a value for exposure compensation: photographing very bright, very dark, or high- Pressthe button. contrast subjects. Press the selector ([]). Exposure Choosepositive (+) wJlues compensation will be highlighted in the tO Jr?cre_se exposure monitor.
-
Page 45: Exposure Compensation
Exposure Compensation ql- Notes • Exposure compensation is available in I_IMand MS Backlit subjects: choose values modes only. from +2/s EVto + 12/s • At settings other than _+0, a [] icon isdisplayed in the EV (for an explanation of the monitor. -
Page 46: Shooting Mode
Shooting Mode Choose a shooting mode according to the scene Icon Description Subject or type of subject. To choose a shooting mode, For soft-toned portraits with PORTRAIT natural skirl tones. rotate the mode dial to the desired setting (pg. 4). The following modes are available: For crisp, clear... -
Page 47: Natural & _ (Dual Shot Mode)
Shooting Mode Frame the picture. NATURAL & _ (Dual Shot Mode) The camera analyzes a This mode helps ensure good results with backlit subject based subjects and in other situations with difficult scene recognition, lighting. Each time the shutter button is pressed, then an icon appears in the camera takes two shots: one shot without the bottom... -
Page 48: Natural Light
Shooting Mode NATURAL LIGHT 3 Press the selector up or down /,_\"A" Capture natural light indoors, highlight SCENE POSITION. '_f_ under low light, or where the flash can not be used. The • - Note:SP flash turns offand sensitivity is 1_11. - Page 49 Shooting Mode Press MENU/OK to select SPORT Choose this mode when highlighted option. photographing moving Until a new scene is chosen as described above, the subjects. Quick AF (1_1-) is scene assigned to SP will be selected whenever selected automatically mode dial is rotated to SP.
- Page 50 Shooting Mode _i_ FIREWORKS _1 BEACH Choose for crisp, clear shots Slow shutter speeds are used j_® capture expanding that capture the brightness of sunlit beaches. Press the selector left or right burst of light from a firework. r[+]_ to choose from shutter speeds _ MUSEUM between 1/2s.
-
Page 51: I_Im Manual
Shooting Mode FLOWER A/S Aperture/Shutter Priority Choose for vivid close-ups of A/S mode offers a choice of Gperture priority AE flowers. The camera focuses in (autoexposure), in which you adjust aperture to the macro range and the flash soften background details bring both... - Page 52 Shooting Mode A APERTURE PRIORITY AE 3 Press the selector up or down to /A._ In this mode, you choose the aperture while the highlight [] SHOOTING MODE .._9_=_ camera adjusts shutter speed for optimal exposure. Choose small apertures (large f-numbers) to bring objects behind...
- Page 53 Shooting Mode SSHUTTER PRIORITY AE Choose an aperture. In this mode, you choose the shutter speed while Press the selector left or right to the camera adjusts aperture for optimal exposure. choose an aperture, q_<_P" Take pictures. Choose fast shutter speeds to freeze motion.
- Page 54 Shooting Mode Choose the shutter speed. Press the selector left or right to choose the shutter speed, q_lPo Take pictures. Take pictures. If the _®E_ ,so_0 correct exposure can not ,E-iTiT-q achieved selected shutter speed, aperture will displayed in red when the shutter button is pressed halfway.
-
Page 55: Single-Frame Playback
Single-Frame Playback To view the most recent picture in the monitor, _ Choosing a Display F ormat press the [] button. Pressthe DISP/BACK button to cycle through playback display formats as shown below. Pressthe selector right to view pictures in the order recorded, left to view pictures in reverse order. -
Page 56: Playback Zoom
Single-Frame Phyback • - Note Playback Zoom Tile maximum zoom ratio varies with image size. Select Eel to zoom in on images Playbackzoom is not available with pictures taken atan displayed in single-frame playback; image size of I_. select _ to zoom out. -
Page 57: Multi-Frame Playback
Multi-Frame Playback To change the number of images Use the selector to highlight images and press displayed, select liiil when a picture is MENU/OK to view the highlighted image full frame. shown full-frame in the monitor. In the nine- and hundred-frame displays, press the selector up or down to view more pictures. -
Page 58: Sort By Date
Sort by Date % Tips: R apid Scroll In single-frame playback, press DISP/ • Pressand hold tile selector up or down to scroll dates BACKrepeatedly until the sort-by- BACK rapidly. date screen is displayed. • Pressand hold tile selector left or rig ht to rapidly scroll The picture displayed in pictures taken on tile same date. -
Page 59: Erase
Deleting Pictures The ERASE option in the playback menu can be Press the selector right to display used delete still pictures movies, delete options. increasing the amount of space available on the memory card internal memory (for information on deleting pictures in single-frame playback, see page 20). - Page 60 Deleting Pictures • F RAM E: Deleting Selected Images • ALL FRAMES: Deleting AIIImages Selecting FRAMES Selecting FRAME displays the dialog shown at right. displays confirmation shown at right. Highlight OK and press the MENU/01(button to delete all Pressthe selector left or right to scroll through pictures and press MENU/OKto delete...
-
Page 61: Movies
m _ Recording Movies 2 Frame the scene using the zoom Shoot short movies at 25 frames per second. control. Sound is recorded via the built-in microphone; do not cover the microphone during recording. Rotate the mode dial to m _ (movie mode). -
Page 62: Recording Movies
Recording Movies 3 Press theshutter button alltheway 4 Press the shutter button halfway to down tostart r ecording. recording. Recording ends automatically when movie reaches maximum length memory is full. % Tip remaining are There is no need to keep tile shutter button pressed displayed in monitor during recording. -
Page 63: Viewing Movies
Viewing Movies During playback (pg. 41), Progress is shown in the monitor during playback. movies are displayed in the monitor as shown at right. following operations can be performed while a movie is displayed: Tip:ViewingMoviesona Computer Copy movies to the computer before viewing. -
Page 64: Viewing Pictures On Tv
Viewing Pictures on TV Connect the camera to a TV and tune the television to the video channel to show pictures and slide shows (pg. 75) to a group. The supplied A/V cable connects as shown below. _bnnec_ye//owp/ug to video-inj_ck cTudio-in j_ Press [] for about a second to turn the camera on. -
Page 65: Printing Picturesvia
Printing Pictures via USB Printing Selected Pictures If the printer supports PictBridge, the _,_f" camera can be connected directly to the 1 Press the selector left or right to printer pictures can be printed PicEBridge display a picture you wish to print. without first being... -
Page 66: Printing The Dpof Print Order
Printing Pictures via USB Tip: Printing theDateofRecording Printing the DPOF Print Order To print the date of recording on pictures, press DISP/ To print the print order created with [] PRINT BACK in steps 1-2 to display the PictBridge menu (see ORDER (DPOF) in the playback menu (pg. - Page 67 Printing Pictures via USB • - Notes • Use an optional AC-SVX AC adapter and CP-50 DC Tile message shown at right is coupler to power tile camera for extended periods. displayed during printing. Press • Print pictures from internal memory or a memory card DISR/BACKto cancel before that has been formatted...
-
Page 68: Creating A Dpof Print Order
Printing Pictures via USB Press MENU/0Kand follow the steps below. Creating a DPOF Print Order The [] PRINT ORDER (DPOF) option in the Press the selector left or right to playback f-MODE menu can be used to create display a picture you wish to include a digital "print order"... - Page 69 Printing Pictures via USB • RESET ALL Repeat steps 1-2 to complete print order. Press MENU/OKto save To cancel the current print order, select RESET ALL in the the print order when settings without I_PRINT ORDER (DPOF) complete, DISP/BACK to exit menu.
-
Page 70: Viewing Pictures On A Computer
Viewing Pictures on a Computer The supplied FinePixViewer software can be used to copy pictures to a computer, where they can be stored, viewed, organized, and printed. Before proceeding, install FinePixViewer as described below. Do not connect the camera to the computer until installation is complete. -
Page 71: Pictures On A Computer
Viewing Pictures on a Computer Start the computer. Log in to an account with administrator privileges before proceeding. Exit any applications that may be running and insert the installer CD in a CD-ROM drive. The installer will start automatically; click Installing FinePi×Viewer and follow the on-screen... - Page 72 Viewing Pictures on a Computer Installing FinePixViewer: Macintosh 1 Confirm that the computer meets the following system requirements: Power Macintosh G3, PowerBook G3, Power Macintosh G4, iMac, iBook, Power Macintosh G4 Cube, Model PowerBook G4, Power Macintosh GS, MacBook, MacBook Pro, Mac mini, or Mac Pro CI_U PowerPC or Intel Mac OS X version 10.3.9...
- Page 73 Viewing Pictures on a Computer 4 Remove the installer CD from the CD-ROM drive. Note that you may be unable to remove the CD if Safari is running; if necessary, quit Safari before removing the CD. Store the installer CD in a dry location out of direct sunlight in case you need to re-install the software.
-
Page 74: Connecting The Camera
Viewing Pictures on a Computer Press the [] button for about a second to turn Connecting the Camera camera FinePixViewer will start 1 If the pictures you wish to copy are stored on a automatically and the "Save Image Wizard" will memory card, insert the card into the camera displayed. - Page 75 Viewing Pictures on a Computer Cautions • Useonly memory cards that have been formatted in Confirm that the indicator lamp isout and press [] to tile camera and contain pictures taken with tile turn tile camera off. Disconnect the USBcable. camera.
-
Page 76: Using The Menus: Shooting Mode
Using the Menus: Shooting Mode The F-MODE and shooting menus contain Press the selector right to display settings for a wide range of shooting conditions. options for the highlighted item. Using the F-Mode Menu ® 1 press the F button to display F-MODE menu. -
Page 77: F-Mode Menu Options
Using the Menus: Shooting Mode F-Mode Menu Options Menu item Description Options Default POWER Optimize camera performance increased ot/1__--/Q MANAGEMENT battery life, quick focus, or display quality (pg. 63). AUTO/AUTO (1600)/AUTO (800)/AUTO (400)/6400/ Adjust ISO sensitivity (pg. 64). Choose higher [] iso 3200/1600/800/400/200/1O0 values when the subject is poorly lit. -
Page 78: [] Iso
Using the Menus: Shooting Mode Control the camera's sensitivity to light. Higher values can be used to reduce blur when lighting poor; note, however, that mottling may appear in pictures taken at high sensitivities. If AUTO, A UTO (1600}, AUTO (800}, or AUTO(400} is selected, the camera will adjust sensitivity automatically in response to shooting conditions. -
Page 79: [] Quality
Using the Menus: Shooting Mode QUALITY Choose the size and quality at which still pictures Pictures taken at an image quality setting of li_3:2 are recorded. Large pictures can be printed have an aspect ratio of 3:2,the same asa frame of 35- large sizes with no drop in quality;... -
Page 80: [] Finepix Color
Using the Menus: Shooting Mode FINEPIX COLOR Enhance contrast and color saturation or take pictures in black and white. Option Displayed in f-STANDARD Standard contrast and saturation. Recommended in most situations.... IVivid contrast and color. Choose for vivid shots of flowers or enhanced greens and L_rr -Lrlr_uIvl_ blues in landscapes.Not:available in SR_Ji'_ and SP modes. -
Page 81: Using The Shooting Menu
Using the Menus: Shooting Mode Using the Shooting Menu 3 Press the selector right to display options for the highlighted item. Press MENU/OK to display shooting menu. 4 Press the selector up or down highlight the desired option. ,__'_ qt- Note The options displayed in the shooting menu vary depending on the shooting mode. -
Page 82: Shooting Menu Options
Using the Menus: Shooting Mode Shooting Menu Options Menu item Description Options Default SHOOTING MODE Choose aperture-priority or shutter-priority AE for A/S mode (pg. 37). 0/_/,_/_/_/(_,._/-_/ SCENE POSITION Choose a scene for SP mode (pg. 34). *t_/_!/o*_/'_ / _ /I_ E®]/E,]/E] PHOTOMETRY Choose how exposure... -
Page 83: [] White Balance
Using the Menus: Shooting Mode ql- Notes WHITE BALANCE • This option is available in I_IMand MS modes only. For natural colors, choose a setting that matches • At settings other than _o,,auto white balance is used the light source (for an explanation of "white with the flash. -
Page 84: [] Continuous
Using t heMenus: Shooting Mode • _.: CustomWhiteBalance CONTINUOUS Choose ,o, to adjust white Capture motion in a series of pictures. balance for unusual lighting • - Notes conditions. The options • Continuous shooting is not available in _,_ or _M right will be displayed;frame mode. - Page 85 Using the Menus: Shooting Mode • [] CONTINUOUS: _,,.H FINAL12 • [] CONTINUOUS: _ FINAL 3 While the shutter button is pressed, the camera While the shutter button is pressed, the camera takes up to 40 pictures, but only the last 12 shots takes up to 40 pictures, but only the last 3 shots are recorded.
-
Page 86: M Af Mode
Using the Menus: Shooting Mode m AF MODE • m AFMODE: [ ] MULTI In I_M and A/S modes (pg. 37), this option When the shutter button is pressed halfway, the controls camera focuses when camera detects high-contrast subjects near the center of the monitor and selects the focus area Intelligent Face... - Page 87 Using the Menus: Shooting Mode • [] AFMODE: [ ] CONTINUOUS While tile shutter button continuously adjusts focus to pressed halfway, tile camera I_Eo_ + ISOAUT_6_I changes in distance from the main subject around the cross 2/s/20s0 0:00AM mark (note that continuous auto focus will be audible and will increase battery drain).
-
Page 88: Using The Menus: Playback Mode
Using the Menus: Playback Mode The F-MODE and playback menus are used to Press the selector right to display manage the pictures in internal memory or on the options for the highlighted item. memory card. Using the F-Mode Menu 1 Press the button enter playback mode (pg. -
Page 89: [] Slide Show
Using the Menus: Playback Mode SLIDE SHOW Option Displayedin View pictures Press selector left or right to go back or NORMAL automated slide show. skip ahead one frame. Select FADE-IN FADE-IN for fade transitions between frames. Choose the type of show and above, except that... -
Page 90: Using The Playback Menu
Using the Menus: Phyback Mode Using the Playback Menu 5 Press the selector up or down to F.'A_"_ 1 Press the[] button to enter highlight the desired option. playback mode (pg. 41 ). 6 Press MENU/OK to select 2 Press MENU/OK to display highlighted option. -
Page 91: [] Red Eye Removal
Using the Menus: Phyback Mode RED EYE REMOVAL Press MENU/OK The message shown This option is used with pictures taken using below at left will be displayed while Intelligent Face Detection to create copies that the camera analyses the image; if have been processed to remove red eye. -
Page 92: [] Image Rotate
Using the Menus: Phyback Mode IMAGE ROTATE 2 Pressthe selector down to rotate the /I',A_X, By default, pictures taken in tall orientation picture 90 ° clockwise, up to rotate displayed in wide orientation. Use this option to the picture 90 ° counterclockwise. display pictures in the correct orientation in the monitor. -
Page 93: [] Protect
Using the Menus: Phyback Mode • SET ALL PROTECT Protect pictures from accidental deletion. Press MENU/Of(to protect following options are available. pictures, or press DISP/BACI( to exit without changing picture • FRAME status. Protect selected pictures. • RESET ALL 1 Press the selector left or right to dJ"... -
Page 94: [] Copy
Using the Menus: Phyback Mode COPY 3 Press the selector up or down to /Ii.'A_'_ Copy pictures between internal memory and a highlight FRAME or ALL FRAMES. memory card. Press MENU/OK 1 Press the selector up or down to /A-_ highlight INTERNAL MEMORY -i_ 1_ CARD (copy pictures from... - Page 95 Using the Menus: PByback Mode • FRAME • ALL FRAMES Copy selected frames. Press MENU/OK to copy pictures, or press DISP/BACK t o I_E,_,'_T_E '_°°°_ exit without copying pictures. I_''''_ [M Cautions Press the selector left or right to • Copying ends when the destination is full.
-
Page 96: [] Voice Memo
Using the Menus: Phyback Mode VOICE MEMO 3 Press MENU/OK again To add a voice memo to a still recording. Recording ends picture, select VOICE automatically after 30 seconds. MEMO after displaying picture in playback mode. • - Note Voice memos carl not be added to movies or protected pictures. - Page 97 Using the Menus: Phyback Mode Pictures with voice memos are indicated by a _ icon during playback. in the monitor. play memo, press pause, press the voice tile selector down. tile selector down again; to end playback, press the selector up. Press the selector left to rewind, right to fast forward.
-
Page 98: Crop
Using the Menus: Phyback Mode 2 PressMENU/OK. A confirmation dialog TRIMMING will be displayed. To create a cropped copy of a picture, play the picture back and select []TRIMMING in the playback menu (pg. 76). 1 Use the zoom control to zoom in and out and use the selector to scroll the picture until the desired portion is displayed (to exit to single-... -
Page 99: The Setup Menu
The Setup Menu Using the Setup Menu Adjust settings. 3.1 Press the selector up or down Displaythe setup menu. to highlight a menu item. 1.1 Press MENU/OKto display the menu for the current mode. 3.2 Press the selector right 1.2 Press the selector up or down display options to highlight... -
Page 100: Af-Assistilluminator
The Setup Menu Setup Menu Options Default Menu item Description Options Choose how long pictures are displayed after shooting (pg. 3 SEC/1.SSEC/ 1.5 SEC IMAGEDISP. 87). ZOOM(CONTINUOUS) CONTINUOUS FRAME NO. Choose how files are named (pg. 88). CONTINUOUS/RENEW (ttil_ 1 CONTINUOUS/ ((_))I DUALISMODE Choose when image stabilization... -
Page 101: [] Image Disp
The Setup Menu Options I Default Menu item ..Description Reset settings except DATE/TIME, TIME DIFFERENCE, ,,08 I_ VIDEOSYSTEM (ihoose a video mode for connection to a TV (pg. S0). NTSC/PAL IBACKGROUND COLOR and VIDEO SYSTEMto default values. confirmation dialog will be displayed, pressthe selector left or RESET I right to highlight OKand press MENU/OK... -
Page 102: [] Frame No
The Setup Menu ql- Notes FRAME NO. • If the frame number reaches 999-9999, tile shutter New pictures releasewill be disabled (pg. 104). are stored in /_ mme number • Selecting _IJRESET (pg. 87) does not reset frame image files numbering. -
Page 103: [] Digital Zoom
The Setup Menu DIGITAL ZOOM PLAYBACK VOLUME If ON is selected, selecting [€] at the maximum Press the selector up or down to choose volume for movie optical zoom position will trigger digital zoom, further magnifying the image. To cancel digital and voice memo playback and zoom, zoom out to the digital zoom... -
Page 104: [] Format
The Setup Menu FORMAT AUTO POWER OFF Format internal memory or a Choose the length of time before the camera memory card. If a memory turns off automatically when no operations card is inserted in the camera, performed. Shorter times increase battery life; if OFF is selected, the camera must be turned off will be displayed in the... -
Page 105: [] Time Difference
The Setup Menu TIME DIFFERENCE Switch between local time and your home time zone. When travelling, use this option to switch the To set the camera clock to local time, camera clock instantly from your home time zone to the local time at your destination. highlight -_ LOCAL and press MENU/OK To set the clock to the time in your home time... -
Page 106: Optional Accessories
Optional Accessories The Fin?ix F6Ofd supports a wide range of accessories from FUJIFILM and other manufacturers. following accessories were available as of July 2008. • Audio/Visual • ComputerRelated 7_7 (availablefrom _hird-par:ysuppliers) _bmpu_er(available from _hird-par:ysuppliers) PC cardslot • Printing xD-Picture Card... -
Page 107: Accessories From Fujifilm
As of July 2008, the following optional accessories were available from FUJlFILM. Check with your local Fujifilm representative for information on the accessories available in your region. • xD-Picture C ards: C hoose from 256 MB,512 MB, 1 GB,and 2 GB cards. Type M, type M+- or type H xD-Picture Cards can be used;... - Page 108 ATA (PCMCIA 2.1) type II PC card. • DPC-CF CompactFlash card adapter: Allows an xD-P£ture Card to function as a CompactFlash card. The DPC-AD and DPC-CF can not be used with SD memory cards. For the latest information on accessories available from FUJIFILM, visit http://www.fuji#/m.com/ products/digitol_comeros/index.html.
-
Page 109: Caring For The Camera
Any remaining stains can be removed by wiping • subject to strong vibration gently with a piece of FUJIFILM lens-cleaning • exposed to strong magnetic fields, such as near paper to which a small amount of lens-cleaning fluid has been applied. Care should be taken to _"... -
Page 110: Troubleshooting
Troubleshooting Power and Battery Problem Possiblecause Solution Page The batteryis exhausted. Charge the battery or insert a fully-charged 5, 7 spare battery. The camera does The battery is not in the correct orientation. Re-insert the battery in the correct orientation. not turn on. - Page 111 TrouNeshooting Problem Possiblecause • Solution Page Charging does The battery is not correctly inserted. Rednsert the battery in the charger. not start. The battery is not in the correct orientation. Rednsert the battery in the correct orientation. Charging is slow. The temperature is low.
- Page 112 TrouMeshooting Problem Possiblecause • Solution Page Select macro mode. Choose an option other than _ QUICK AF The subject is close to the camera. The camera Focus for [] POWER MANAGEMENT. does not focus. Cancel macro mode. The subject is far away from the camera. Usefocus lock.
- Page 113 TrouMeshooting Problem Possiblecause • Solution Page ..oft, or _ mode is selected. Choose a different shooting mode. The flash does The battery is exhausted. Charge the battery or insert a fully-charged 5, 7 spare battery. not fire. The camera is in continuous mode.
- Page 114 TrouMeshooting Problem Possiblecause Solution Page IThe Tile camera selftimer is on in _..." F,NAL takes one Continuous FF_FINAL LONG PERIOD Turn the self-timer off. p_cture at a time modes. Playback Problem Possible cause Solution Page Pictures are The pictures were taken with a different grainy, make or model of camera.
- Page 115 Troubleshooting Connections Problem Possible cause Solution Page The camera is not properly connected. Connect the camera correctly. The supplied cable was connected Connect the camera once movie playback ended. 49, 50 during movie playback. No picture or Input on the television is set to "TV".
- Page 116 Remove and reinsert the battery or disconnect camera does and reconnect the AC adapter/DC coupler. function as expected. Temporary camera malfunction, the problem persists, contact your FUJIFILM 7, 114 dealer. No sound. The camera is in silent mode. Turn silent mode off.
-
Page 117: Warning Messages And Displays
FOCUS E RROR Turn the camera off and then on again, taking care ZOOM ERROR Camera malfunction. not to touch the lens. If the message persists, contact LENS CONTROL ERROR a FUJIFILM dealer. No memory card inserted when COPY NOCARD Insert a memory card. - Page 118 (pg. or the memory card is damaged. 90). If the message persists, replace the memory card. Camera malfunction. Contact a FUJIFILM dealer. MEMORY FULL 1_ MEMORY FULL The memory card or internal memory is full; Delete...
- Page 119 Warning Messages and Displays Warning Description Solution TOOMANY FRAMES Date for which more than 4,999 pictures exist Choose a different date. selected in sort-by-date view. An attempt was made to delete, rotate, or Remove protection before deleting, rotating, PROTECTED FRAME add a voice memo to a protected picture,...
- Page 120 Warning Messages and Displays Warning Description Solution RED EYE REMOVAL can not be used with CANNOT EXECUTE movies, pictures created with other devices, €_ CANNOTEXECUTE pictures that can not be viewed, or pictures _?! CANNOT EXECUTE created using RED EYEREMOVAL. PRESSAND H OLD An attempt was made to choose a flash Exit silent mode before choosing a flash mode or...
-
Page 121: Glossary
Glossary Digitalzoom: Unlikeoptical zoom, digital zoom does not increasethe amount of visible detail. Instead, details visible using optical zoom are simply enlarged, producing a slightly "grainy" image. DPOF (Digital Print Order Format):A standard that allows pictures to be printed from "print orders" stored retail[ _ in internal memory or on a memory card. -
Page 122: Flash Mode And Shooting Mode
Flash Mode and Shooting Mode The flash modes available depend on the shooting modes (pg. 32). Shooting m ode AUTO/_ s_./_... -
Page 123: Internal Memory/Memory Card Capacity
Internal Memory/Memory Card Capacity The following table shows the recording time or number of pictures available at different image qualities. All figures are approximate; file size varies with the scene recorded, producing wide variations in the number of files that can be stored. The number of exposures or length remaining may not diminish at an even rate. -
Page 124: Specifications
Specifications Model FinePix F60fd digital camera Effective pixels 12.0 million 1/16-in., Super CCD HR with primary color filter Storage media • Internal memory (approx. 25 MB) • xD-Picture Cards (16 MB, 32 MB, 64 MB, 128 MB, • SD/SDHC memory cards (see page 9) 256 MB, 512 MB, 1 GB, 2 GB) File system... - Page 125 Specifications Shutterspeed SR_T_, o_r, ql]), IF, _, Akk, 5L_,,-_:k_- _ , o_, '_' -,_, _1, I_IM, A/S:l/4sq/ZOOOs (Z :8s- 1/1,000s (@." "):4 s-]/2 s Combined mechanical and electronic shutter Continuous • TOP12: Up to 5fps; max. 12 frames • FINAL12: Up to 5fps; last 12 frames recorded (Image size;...
- Page 126 Specifications A/VOUT (audi0/vide0 output) NTSC or PAL with monaural sound Digital input/output USB 2.0 High Speed with MTP/PTP connection Power sources NP-50 rechargeable battery; optional AC-SVX AC adapter and CP-50 DC coupler Battery life (NP-SO) Approx. 230 frames, based on CIPA (Camera and Imaging Products Association) standard;...
- Page 127 Specifications Notes ontheBattery andBattery Charger • The battery and charger may become warm to tile touch during charging. This is normal and does not indicate a malfunction. If possible,charge tile battery in a wellwentilated location. • The battery charger may vibrate when in use.Tills is normal and does not indicate a malfunction. •...
-
Page 128: Fujifilm Digital Camera Worldwide Network
& repairs Importaciones EspacriCia. I.tda. Technical support & repairs TEL +593 783 5526 portiz@fujifi/mcomec Mexico Fujifilm de Mexico, S.A, de C.V. Technical support TEL (52 55) 5263 55000 eizquierdo@fujifilmcommx Repair service TEL (52 55) 5366 5150/56/57 cpdlmo@fujifilmcommx Paraguay ErreceS,R.L. - Page 129 TEL 0047 55393880 Repair service h ttp,¢/www.cdmem, no/mdilto:service@c_mem.no Poland Fujifilm Polska Distribution Sp,z o.o, Technical support TEL +48 22 517 66 O0 fujifilm@fujifilm,pl Repair service TEL +48 22 886 94 40 serwis@fujifi/m.p/ Portugal Fujifilm Portugal, Lda Technical support TEL (351 ) 226 194 237 finepix@fujifilm.pt Repair service TEL (351) 226 194 200 c_mems@fujifilm.pt...
- Page 130 FUJhFHLMDigital Camera Worldwide Network Swede n Fujifilm SverigeAB Tech n ical su pport TEL46 8 506 141 70 komerc_@fujifilm,se Repair service TEL46 8 506 513 54 komerc_verkstc_den@fujifilm,se Switzerland/ Fujifilm(Switzerland)AG Technical support & repairs TEL+41 44 855 5154 RepoirCenter@fujifilm,ch Liechtenstein The Netherlands...
- Page 131 & repairs TEL 65 6380 5557 service@fujifilmcomsg South Korea Korea Fujifilm Co., Ltd. Technical support TEL +82 2 3282 7363 photo@fujifilm,co, Yonsan ASCenter (Fujidigital) Repair service TEL +82 2 701 1472 lDowl@hdnmdiLnet Kangnam ASCenter (Digitalgallery) Repair service TEL +82 2 2203 1472 nurijifi@honmoi/n_t...
-
Page 132: Read Before Using The Software
I_V_l Ill] It 1;1 _I I fill I Ell ! 1 I!'tli I It'I _1_ ii[,i h11,'ITli_,,_f.! _;I All copyrights other proprietary rights to Software Documentation BEFORE OPENING THE CD-ROM PROVIDED BY FUJIFILM CORPORATION_ PLEASE READ THIS owned retained by FUJlFILM or the third pally suppliers as indicated on or END USER LICENSE AGREEMENT CAREFULLY.
Need help?
Do you have a question about the FINEPIX F60FD and is the answer not in the manual?
Questions and answers