Hitachi DZ-HS301E Instruction Manual
Hide thumbs
Also See for DZ-HS301E:
- Technical specifications (4 pages) ,
- Technical specifications (2 pages) ,
- Instruction manual (161 pages)
Table of Contents
Advertisement
Quick Links
DZ-HS303E/DZ-HS301E/DZ-HS300E
DZ-HS303E(UK)/DZ-HS301E(UK)/DZ-HS300E(UK)
DZ-HS303E
Instruction manual
To obtain the best performance and ensure years of
trouble-free use, please read this instruction
manual completely.
Mode d'emploi
Des performances optimales et un fonctionnement
à long terme seront assurés en appliquant les
présentes instructions après avoir entièrement lu
ce mode d'emploi.
DVDCAM PC Software Support Centre
URL http://dvdcam-pc.support.hitachi.ca/
Support Centre phone numbers for software provided:
Telefonnummern des Support-Centers für die mitgelieferte Software:
Numéros de téléphone de l'Assistance Clientèle pour le logiciel fourni :
PIXELA CORPORATION
UK, Germany, France and Spain: 800-1532-4865 (Toll-free)
Other countries: +44-1489-564-764
Languages available: English, French, German, Spanish
URL: http://www.pixela.co.jp/oem/hitachi/e/index.html
DZ-HS300E
Bedienungsanleitung
Bitte lesen Sie diese Bedienungsanleitung
aufmerksam durch, um durch richtige Bedienung
jahrelangen und störungsfreien Betrieb zu
gewährleisten.
DZ-HS301E
Advertisement
Table of Contents

Related Manuals for Hitachi DZ-HS301E


Summary of Contents for Hitachi DZ-HS301E
- Page 1 DVDCAM PC Software Support Centre URL http://dvdcam-pc.support.hitachi.ca/ Support Centre phone numbers for software provided: Telefonnummern des Support-Centers für die mitgelieferte Software: Numéros de téléphone de l’Assistance Clientèle pour le logiciel fourni :...
-
Page 2: Important Information
Important Information For Your Safety The power switch turns the DVD video camera/recorder on and off, leaving the date/time feature unaffected. If the camera/recorder is to be left unattended for a long period of time, turn it off. WARNING : TO PREVENT FIRE OR SHOCK HAZARD, DO NOT EXPOSE THIS UNIT TO RAIN OR MOISTURE. - Page 3 Information for users applicable in European Union countries This symbol on the product or on its packaging means that your electrical and electronic equipment should be disposed at the end of life separately from your household wastes. There are separate collection systems for recycling in EU. For more information, please contact the local authority or the dealer where you purchased the product.
- Page 4 Important for United Kingdom (for DZ-HS303E (UK) / DZ-HS301E (UK)/DZ-HS300E (UK)) The mains lead on this equipment is supplied with a moulded plug incorporating a fuse, the value of which is indicated on the pin face of the plug. Should the fuse need to be replaced, an ASTA or BSI approved BS 1362 fuse must be used of the same rating.
-
Page 5: Important Safety Instructions
IMPORTANT SAFETY INSTRUCTIONS In addition to the careful attention devoted to quality standards in the manufacture of your video product, safety is a major factor in the design of every instrument. But, safety is your responsibility too. This page lists important information that will help to assure your enjoyment and proper use of DVD video camera/ recorder and accessory equipment. -
Page 6: Cautions On Hdd
• If you so, recording, playback or dubbing may not be possible. Please note in advance that Hitachi will not accept any liability or make compensation for loss of data, or direct or indirect damage when recording or playback is not performed normally due to a fault in this DVD video camera/recorder. - Page 7 Liquid crystal display (LCD) and viewfinder: • The LCD screen and viewfinder are the products of highly precise technology. Among the total number of pixels (approx. 120,000 pixels for LCD monitor and equivalent to approx. 200,000 pixels for viewfinder), 0.01% or less pixels may be missing (black dots) or may remain lit as coloured dots (red, blue, green).
- Page 8 • Using 8 cm CD lens cleaner could cause this DVD video camera/recorder to be faulty. • If you have to clean the lens, use a Hitachi Maxell cleaner that is exclusively for 8 cm DVD discs. Be careful of moisture condensation: •...
- Page 9 Do not turn the DVD video camera/recorder off while the ACCESS/PC indicator or CARD ACCESS indicator is lit or blinking: • The ACCESS/PC or CARD ACCESS indicator is lit or ACCESS/PC blinking to show that data is being written to disc or card, indicator or being read from it.
-
Page 10: Cautions When Storing
Cautions When Storing Do not leave the DVD video camera/recorder in a place where the temperature is very high for a long period of time: • The temperature inside a closed vehicle or trunk can become very high in a hot season. If you leave the DVD video camera/recorder in such a place, it could malfunction or the case could be damaged. -
Page 11: Cleaning
CLEANING Be sure to set the power switch to “OFF” before cleaning this DVD video camera/recorder. ●Cleaning LCD screen and camera ●Cleaning DVD Video Camera/ lens Recorder Case Use dry, soft cloth to wipe dirt off. When Do not wipe the DVD video camera/recorder cleaning the LCD screen, be careful not to use case hard with any foreign object, such as grit, force, scratch it, or subject it to impact: Doing... -
Page 12: Disc Cleaning
(generally available) to completely delete the data on it. It is user’s responsibility to control the data on disc and memory card. • Hitachi will not accept any responsibility for leaking of personal data. Read This First To guide you, we have included following five chapters. -
Page 13: About This Manual
About This Manual ●Displays in this manual Understand that the displays are different from those you will actually see in the viewfinder or on the LCD screen. ●Notation of cancel button Press the STOP/EXIT button to stop your operation midway, or return the menu screen to the preceding one. -
Page 14: Introduction
Introduction ●Recording is possible on both HDD and DVD: In FINE mode, recording for up to 3 hours is possible on HDD; up to 30 minutes on DVD. (p. 44, 154) ●Dubbing to an 8 cm DVD can be performed on this DVD video camera/recorder using only one button: Simple dubbing without a DVD recorder or PC.(p. -
Page 15: Table Of Contents
Table of Contents Important Information .........2 Setting Date and Time........36 For Your Safety ..........2 CHANGING DISPLAY FORMAT OF DATE AND TIME ..............36 Precautions ............2 Initial Settings ..........37 IMPORTANT SAFETY INSTRUCTIONS ...5 SWITCHING OPERATING SOUND ON OR OFF Cautions on HDD ..........6 (BEEP) ..............37 Cautions When Using ........6 TURNING DVD VIDEO CAMERA/RECORDER... - Page 16 USING THE ELECTRONIC IMAGE STABILISER PLAYING BACK BY SKIPPING SCENES (EIS)..............64 (EFFECT – SKIP) ..........89 RECORDING SUBJECT USING LARGE CHANGING IMAGES FOR THUMBNAILS MAGNIFICATION (DIGITAL ZOOM) ....64 (EFFECT – THUMBNAIL)......... 90 REDUCING WIND NOISE DURING RECORDING COPYING STILLS ON DVD-RAM TO CARD (MIC.FILTER) ...........
- Page 17 SLIDE SHOW (CONTINUOUS PLAYBACK OF Be sure to read the following before opening the STILLS)............111 package of CD-ROM ........158 Viewing on TV Screen........112 CONNECTING TO A TV........112 VIEWING ON TV SCREEN ....... 113 Playback on DVD Recorder/Player ....114 PLAYING BACK DVD-RAM/DVD-RW (VR-MODE) ............
-
Page 18: Checking Provided Accessories
Checking Provided Accessories Make sure that you have all the following accessories in package: Battery (model DZ-BP14S): Battery (model DZ-BP07PW): AC adapter/charger For DZ-HS303E only. For DZ-HS301E/HS300E only. Portable (model DZ-ACS3 (E)): Portable power supply for this DVD video power supply for this DVD video camera/ Used to power the DVD video camera/ camera/recorder. -
Page 19: Names Of Parts
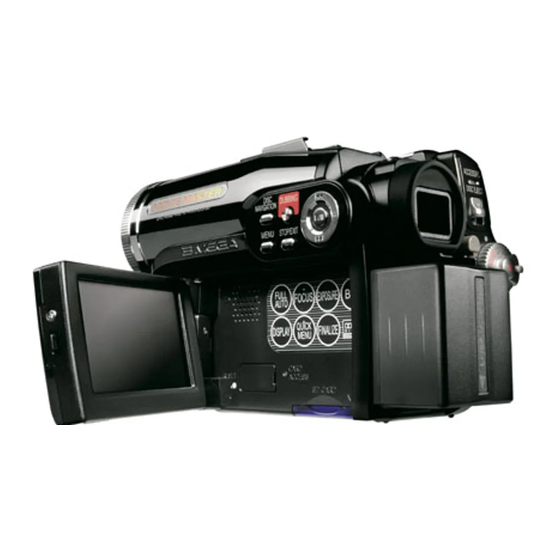
Names of Parts (Inside the cover) 1 Flash (for DZ-HS303E only) (p. 60) 8 Lens hood (for DZ-HS303E/HS300E only) (p. 55) 2 Light receiving sensor Always remove this lens hood when using (for DZ-HS303E only) the optional tele-conversion or wide- This sensor controls the amount of light to be conversion lens. - Page 20 15 Viewfinder (p. 35) 22 BATTERY EJECT button (p. 31) Press this button when removing the battery. 16 Dioptre control (p. 35) 23 Battery attachment platform (p. 31) To adjust the focus of image appearing in the viewfinder. (Pull out the viewfinder.) 24 Record button (REC) (p.
- Page 21 32 33 34 38 39 28 FULL AUTO button (p. 59) 37 DISPLAY (Screen display) button (p. 47, 78) Press this button to display the details of To switch the DVD video camera /recorder image being played back or camera setting to full automatic.
- Page 22 PHOTO DISPLAY DIGITAL ZOOM MENU ZOOM SELECT DELETE DISC NAVIGATION 45 PHOTO button (p. 45) 53 ZOOM T button (p. 54) 46 REC button (p. 44) 54 DIGITAL ZOOM button (p. 54) 47 MENU button (p. 36, 52, 86) 55 ZOOM W button (p. 54) 48 SELECT button (p.
-
Page 23: Setups
Setups This section explains preparations for recording – setting up the DVD video camera/recorder and battery. Demonstration Function This DVD video camera/recorder is equipped with a demonstration function. The default at purchase time is “Auto”, which will automatically start the demonstration approx. ten minutes after the DVD video camera/recorder, connected to the AC adapter/charger, is turned on and left unoperated. -
Page 24: Attaching Lens Cap
ATTACHING LENS CAP Attach the shorter end of lens cap string to the lens cap. Shorter end Attach the longer end of lens cap string to the attachment hole of DVD video camera/ recorder. Longer end Push the both sides of cap inward and attach it over the lens. -
Page 25: Removing Battery From Remote Control
• The DVD video camera/recorder uses the “VCR2” infrared receiver on DVD video camera/recorder is not remote control code of Hitachi VCRs. If you use a exposed to direct sunlight or any intense light. If the Hitachi VCR, etc. with remote control code set to infrared receiver is subject to light stronger than the “VCR2”, a VCR placed near the DVD video camera/... -
Page 26: Hdd/Dvd/Cards
HDD/DVD/Cards The following table lists the storage media (discs and cards) that can be used on this DVD video camera/recorder and the functions which are available with them: Media DVD-RW DVD-RW Function DVD- DVD-R memory mode) mode) card ● ● ●... -
Page 27: Hdd, Discs
• It is recommended that you use Hitachi Maxell HG type single-sided discs, since their compatibility with this DVD video camera/recorder has been confirmed. When using an HG type double-sided disc, take great care with handling it. -
Page 28: Examples Of Discs That Cannot Be Used On This Dvd Video Camera/Recorder
EXAMPLES OF DISCS THAT CANNOT BE USED ON THIS DVD VIDEO CAMERA/RECORDER: • CD • DVD-R DL (Dual Layer) • CD-R • DVD-RW DL (Dual Layer) • CD-RW • +R DL (Double Layer) • CD-ROM • +RW DL (Double Layer) •... -
Page 29: Preparations For Power Supply
Preparations for Power Supply USING DVD VIDEO CAMERA/RECORDER WITH AC ADAPTER/CHARGER It is recommended that you use the AC adapter/charger to power the DVD video camera/recorder from household AC outlet when you perform settings on it, play back or edit images, or use it indoors. -
Page 30: Setting Up The Battery
Setting Up the Battery The DZ-BP14S battery provided with DZ-HS303E or DZ-BP07PW battery provided with DZ-HS301E/ HS300E has not been charged at purchase time: Charge it before using the DVD video camera/ recorder. Note • Be sure to use the DZ-BP14S, DZ-BP07PW (unavailable for DZ-HS303E), DZ-BP14SW (optional) or DZ-BP7SW (optional, unavailable for DZ-HS303E) battery for the DVD video camera/recorder: Using other batteries could cause the DVD video camera/recorder to malfunction, or result in fire. -
Page 31: Attaching Battery To Dvd Video Camera/Recorder
●Battery charged status You can find out the charged status of battery by checking the CHARGE indicator on AC adapter/ charger: Charge status CHARGE indicator During charge Charge complete Goes out Note See “Troubleshooting” on page 144 when the CHARGE indicator blinks. ●Reference for time required to charge battery (at approx. - Page 32 ●Continuously recordable time with fully charged battery (with no zoom operation, etc.) See the following table as a reference for how long the DVD video camera/recorder can continuously be used with a fully charged battery: With DZ-BP14S (provided with DZ-HS303E)/DZ-BP14SW (optional) DZ-HS303E DZ-HS301E DZ-HS300E...
-
Page 33: Battery Remaining Level Indicator
BATTERY REMAINING LEVEL INDICATOR When the battery is used to power the DVD video camera/recorder, the battery remaining level appears in the viewfinder or on the LCD screen as follows: Fully charged Nearly empty White portion shows remaining level (Blinks) EFFICIENT USE OF BATTERY •... -
Page 34: Turning Dvd Video Camera/Recorder On And Off
Turning DVD Video Camera/Recorder On and While holding down the grey button at the right Note of power switch, set the switch according to • Once you turn the DVD video camera/recorder on to let it recognise the disc, you can immediately record each recording function: or play back by turning the DVD video camera/ Set to “OFF”:... -
Page 35: Viewing Images
Viewing Images VIEWING IMAGE ON LCD MONITOR VIEWING SUBJECT THROUGH SCREEN VIEWFINDER If you open the LCD monitor, you can monitor Pull out the viewfinder. subject image on the LCD screen. Open the LCD monitor. Turn the dioptre control knob to adjust the focus to suit your eyesight. -
Page 36: Setting Date And Time
1<>2/3 Setting Date and Time Set the current date and time so that the date and time you make a recording can be recorded correctly. The following procedure can also be used to correct the date and time you have already set. Use f / e / d / c buttons to select, and then press A to designate. -
Page 37: Initial Settings
1<>2/3 Initial Settings Press the MENU button, and then use f/e/d/c/A buttons to display the “Initial Setup” menu screen. See page 52 for detailed operation procedure. Press the MENU button again to exit setting. SWITCHING OPERATING SOUND ON OR OFF (BEEP) Select “On”... -
Page 38: Resetting Menu Settings To Defaults (Reset)
RESETTING MENU SETTINGS TO DEFAULTS (RESET) You can restore menu settings to defaults (initial settings at the factory (p. 151)). (Note, however, that the date/time will not be reset.) Choose “Reset” on the If you are sure that you I n i t i a l S e t u p Re s e t “Initial Setup”... -
Page 39: Lcd/Evf Setup
1<>2/3 LCD/EVF Setup ADJUSTING BRIGHTNESS OF LCD SCREEN (LCD BRIGHTNESS) AND VIEWFINDER (EVF BRIGHTNESS) Press the MENU button, use the f/e/ Press the A button to end the setting. d/c/A buttons to choose “LCD/EVF Adjust” on the “LCD/EVF Setup” menu Note screen, and then choose “LCD Brightness”or •... -
Page 40: Adjusting Colour Density (Colour Level)
ADJUSTING COLOUR DENSITY (COLOUR LEVEL) You can adjust the colour density of the LCD monitor screen and viewfinder. Press the A button to end the setting. Press the MENU LCD / EVF Se t u p button, use the f/ LCD/ EVF Ad j u s t Note EVF D i s p l a y... -
Page 41: Inserting And Removing Disc
1<>2/ Inserting and Removing Disc Set the power switch to “DVD” or “OFF” . When removing the disc: While pushing down the centre portion of When the power switch is set to “HDD” or turntable, pick up the disc, holding its edge, “SD”, the cover of disc insertion block will to remove it. - Page 42 Note • If the cover of disc insertion block is open, the ACCESS/PC indicator will blink when an image is displayed on the LCD monitor screen: In this case, the DVD video camera/recorder will not turn off even if the power switch is set to “OFF”. If the cover remains open after a while, the DVD video camera/recorder will automatically turn off.
-
Page 43: Inserting And Removing Card
Inserting and Removing Card Open the LCD monitor. Turn the DVD video camera/recorder off. Open the cover of card insertion block. Inserting Card: Insert card with its terminal inward until it locks. Removing Card: Push the centre of card edge. The card will come out so that it can be held by fingers. -
Page 44: Basic Techniques
DVD video camera/recorder on. approximately 3 seconds. After the ACCESS/PC indicator goes out, • Hitachi cannot be responsible for video and audio that perform the subsequent operation: cannot be recorded or edited because of any defect. • Each time the DVD video camera/recorder enters the... -
Page 45: Recording Stills
Recording Stills Press the PHOTO/SELECT button all the way Note (full pressing). Recording of still images is possible on card. The screen will be black, and then the PHOTO/SELECT recorded still will be displayed. When the button “m” mark appears, you can proceed with the next recording;... -
Page 46: Swift Restart Of Recording (Sleep/Restart Button)
1<>2/3 Swift Restart of Recording (SLEEP/RESTART button) If you press the SLEEP/RESTART button while in the recording pause status instead of turning the DVD video camera/recorder off, the status that recording is possible will be restored in approx. one second. Setting to the sleep/restart standby Note status:... -
Page 47: On-Screen Information
1<>2/3 On-Screen Information Various types of information will appear in the viewfinder or on the LCD screen during recording. DISPLAY INFORMATION DISPLAY DURING RECORDING See the next page for details. e 2. Programme AE p 7. Microphone filter 3. White balance n 4. - Page 48 1. Recording mode (p. 44, 45) 10. Recording status : Movie (HDD/DVD) : During recording : Still (Card) : During recording pause (lights in green) 2. Programme AE (only in movie recording When focus locks during photo mode) (p. 61) recording (lights in purple) No display No display : Auto...
- Page 49 : HDD Protection Off : DVD-R finalised on a device other than this DVD video camera/ 17. Remaining space on disc/card recorder (including a DVD-R recorded on a Hitachi DVD video REM XX : Remaining recordable minutes camera/recorder marketed before during movie recording...
-
Page 50: Switching The Information Display Mode
●Switching the information display mode You can switch the display mode of on-screen information: Press the DISPLAY button. The full and minimum display modes will alternate. • Full display mode: All types of information will DISPLAY appear. • Minimum display mode: The recording mode (see 1 on page 47) and recording status (see 10 on page 47) will appear. - Page 51 ●Interpreting symbols on LCD screen when recording with the screen facing the same direction as the lens: Screen display Description symbol • Status in which recording is not possible on HDD. • An attempt to record a photo on HDD was made. •...
-
Page 52: Checking Flow Of Menu
Checking Flow of Menu The following two on-screen menu modes are available with this DVD video camera/recorder: • Full Menu: To display all menu items for experts • Quick Menu: To display only the fundamental menu items for first timers ●Operating Menu The Full Menu will appear if you press the MENU button. - Page 53 ●Flow of Full Menu ■ The shaded menu item can also be set using the Quick Menu. Refer to page indicated for details of each function. Camera Functions Setup Date Setup Came r a F u n c t i o n s Se t up D a t e Se t u p P r o g r am AE A u t o...
-
Page 54: Zooming
1<>2/3 Zooming If you continue to hold the zoom lever on the Press the MENU button, choose “Dig. Zoom” “T” control side with Dig. Zoom specified, the on the “Camera Functions Setup” menu screen, and then press the A button. digital zoom will be activated midway (when optical 10-power is exceeded on DZ-HS303E, or optical 15-power is exceeded on DZ-HS301E or... -
Page 55: Recording Subjects For Stronger Wide-Angle Or Telephoto Effect
RECORDING SUBJECTS FOR STRONGER WIDE-ANGLE OR TELEPHOTO EFFECT Use the tele-conversion lens or wide-conversion lens with the following filter diameter and thread pitch to record subjects for stronger telephoto or wide-angle effect: Filter diameter: 37 mm for DZ-HS303E; 30.5 mm for DZ-HS301E; 34 mm for DZ-HS300E Thread pitch: 0.75 mm for DZ-HS303E;... -
Page 56: Manually Focusing Subject
1<>2/3 Manually Focusing Subject The DVD video camera/recorder usually focuses on a subject automatically (autofocus). You can also manually focus a subject depending on the recording conditions. FOCUSING DURING RECORDING Normally, the DVD video camera/recorder automatically focuses the subject (autofocus), but you can also manually focus a subject, depending on the recording conditions (manual focus). - Page 57 Manually focus the following objects, which may not be automatically focused (see page 56): Objects not in Objects with Objects that the centre of little variation are far and screen in brightness, near at the such as white same time wall Objects Objects lit by...
-
Page 58: Adjusting Brightness Of Image To Be Recorded (Exposure)
1<>2/3 Adjusting Brightness of Image to be recorded (Exposure) The DVD video camera/recorder usually adjusts the exposure automatically. You can also manually adjust the exposure depending on the recording conditions. Press the EXPOSURE button during recording. The exposure adjustment bar will appear on EXPOSURE the screen. -
Page 59: Using Full Auto Function
1<>2/3 Using Full Auto Function Pressing the FULL AUTO button will fully automate the camera functions. Press the FULL AUTO button. “FULL AUTO” will be displayed on the screen of DVD video camera/recorder for several seconds. The following settings will reset to defaults: When setting Reference Function... -
Page 60: Built-In Video Flash (For Dz-Hs303E Only)
Built-in Video Flash (for DZ-HS303E only) When recording photos in a dark place, or if the subject is lit from rear, the DZ-HS303E makes use of the built-in Video Flash for automatic brightening: The Video Flash can also be set to On where the light is always being emitted, or Off when you wish to record without using the flash even in a dark place. -
Page 61: Setting Up Camera Functions
1<>2/3 Setting Up Camera Functions Before You Begin • See page 52 for how to set. SELECTING SHOOTING MODE TO MATCH THE SUBJECT (SWITCHING PROGRAMME AE MODE) This DVD video camera/recorder automatically detects the status of subject and surrounding situation and records the optimum image: If you choose the shooting mode to match the recording conditions, clearer images will be recorded. -
Page 62: Recording Dark Subjects Using Lcd Monitor Light
RECORDING DARK SUBJECTS USING LCD MONITOR LIGHT When Programme AE is set to Low Light, you can use the light from LCD monitor to record a subject. Press the MENU button, use the f/e/ Note d/c buttons to choose “Program AE” on •... -
Page 63: Setting White Balance Manually
Press the MENU button, use the f/e/ Note d/c buttons to choose “White Bal.” on the • The white balance mode can be confirmed using the on-screen information. “Camera Functions Setup” menu screen, and • The white balance setting will be stored in memory then press the A button. -
Page 64: Using The Electronic Image Stabiliser (Eis)
USING THE ELECTRONIC IMAGE STABILISER (EIS) When you use zoom (see page 54) to record a magnified subject image, it will correct fuzziness in the recorded image. Press the MENU button, use the f/e/ • After recording with EIS set to “Off”, it is recommended that you return the setting to “On”... -
Page 65: Setting Up Record Functions
Setting Up Record Functions 1<>2/ SWITCHING MOVIE QUALITY (VIDEO MODE) Choose the movie quality from “XTRA”, “FINE”, “STD”. It is recommended that you record critical subjects in the “XTRA” or “FINE” mode. Press the MENU button, use the f/e/ Note d/c/A buttons to choose “VIDEO •... -
Page 66: Setting To Wide Tv Screen Mode (16:9 Mode)
1<>2/ SETTING TO WIDE TV SCREEN MODE (16:9 MODE) When viewing recorded images later on a wide-screen TV (aspect ratio 16:9), specify wide-screen (16:9) mode “On”: You can also record images with the aspect ratio changed (the aspect ratio with “Off”... - Page 67 An image recorded with “16:9 On” specified will appear as follows: Display on LCD monitor screen Display in viewfinder Images recorded with “16:9 Off” specified will appear as follows: Display on LCD monitor screen Display in viewfinder Note • The 16:9 setting will be kept even after the DVD video camera/recorder is turned off. •...
-
Page 68: Switching Quality Of Still Image (Quality)
SWITCHING QUALITY OF STILL IMAGE (QUALITY) You can switch the still recording quality. It is recommended that you use “FINE” when recording vital images (p. 155 “Size And Quality Of Photos”). Press the MENU button, use the f/e/ Press the MENU button to end the setting. d/c/A buttons to choose “Quality”... -
Page 69: Setting On-Screen Display Output On Or Off (Osd Output)
1<>2/3 SETTING ON-SCREEN DISPLAY OUTPUT ON OR OFF (OSD OUTPUT) If you connect this DVD video camera/recorder to a TV to view images on TV screen, you can switch off the on-screen information (displayed in the viewfinder or on the LCD screen) from the TV screen. -
Page 70: Using External Microphone
1<>2/ Using External Microphone Connect external microphone (generally available) to the external microphone jack of this DVD video camera/recorder. Clearer sound can be recorded. Turn on the switch on external microphone and start recording. For details on external microphone, see “Major Specifications” on page 152. To external microphone jack Note... -
Page 71: Disc Navigation
Disc Navigation 1<>2/3 Using Disc Navigation STARTING OR TERMINATING DISC NAVIGATION Disc Navigation is a tool for editing scenes recorded on this DVD video camera/recorder. Here is an explanation on “scene” and “programme”, so that you will be able to make most use of Disc Navigation function. - Page 72 PLAY PHOTO SELECT *1 Icon displayed on a photo recorded on a DVD-RAM using Hitachi DVD video camera/recorder marketed before DZ-HS303E/HS301E/HS300E. DZ-HS303E/HS301E/HS300E cannot record any photos on a DVD-RAM. *2 The operation guide will vary depending on the operation status of DVD video camera/recorder.
-
Page 73: Playing Back From Disc Navigation Screen
PLAYING BACK FROM DISC NAVIGATION SCREEN Press the A button. Press the DISC NAVIGATION button. Use the f/e/d/c buttons to select Playback will start from the selected scene. the desired scene. Note The selected scene will be framed: This is Pressing the d or c button will move the cursor to the preceding or following scene. -
Page 74: Playing Back Latest Recorded Scene
• Insert a disc or card recorded on this DVD video camera/recorder to play Before You Begin back scenes on it. (p. 44, 45). • Turn the DVD video camera/recorder on (p. 34). 1<>2/3 PLAYING BACK LATEST RECORDED SCENE Playing Back Note •... -
Page 75: Capturing Photo
1<>2/ CAPTURING PHOTO You can record an image displayed during playback of video as a photo on a card. Press the MENU button at a scene you wish Note to capture during playback. • You can also press PHOTO/SELECT button for the scene you wish to capture in step 1: The screen for verifying capture will appear. -
Page 76: Skip Playback Of Movie
1<>2/ SKIP PLAYBACK OF MOVIE During playback, press the f or e button to Portion being played back locate the start of desired scene. Press e once: Press f Press f Press e Press e To skip to the first image of the scene twice once once... -
Page 77: Jumping To Specified Point (Go To)
1<>2/3 JUMPING TO SPECIFIED POINT (GO TO) Press the MENU button Top: Go T o during playback. To go to the start, and enter playback pause. T o p En d S p e c i f y End: Choose the option To go to the end of last scene, and enter ENTER RETURN... -
Page 78: Information Display During Playback
1<>2/3 INFORMATION DISPLAY DURING PLAYBACK Various types of information on recording will be superimposed on playback image you are viewing. 9:27 1/10/2006 No display Playback information Recording date/time display ●Switching the information display Programme or Play List. mode Number of programme or play list being played back (not displayed when all Press the DISPLAY button: You can switch the programmes are being played back). -
Page 79: Selecting Multiple Scenes
SELECTING MULTIPLE SCENES Press the DISC NAVIGATION button. Repeat steps 2 and 3 to randomly select multiple scenes. Use the f/e/d/c buttons to select the desired scene. Press the PHOTO/SELECT button once: The selected scene will be framed in red and yellow. -
Page 80: Functions Available With Disc Navigation
FUNCTIONS AVAILABLE WITH DISC NAVIGATION The Disc Navigation mode will allow a variety of further operations. Functions Available with Disc Navigation Available Referenc Contents function e page Editing of scenes You can delete unnecessary scenes, 85 – 87 ● ● ● combine scenes, or divide one scene. -
Page 81: Understanding Flow Of Disc Navigation Menu
UNDERSTANDING FLOW OF DISC NAVIGATION MENU Press the MENU button on the Disc Navigation screen: The menu screens for Disc Navigation and menu screens for HDD/DVD/Card will appear. Shaded items will also appear in Quick Menu display mode (see page 52). Refer to pages indicated for details of settings. - Page 82 ●When using DVD-RW (VF-mode)/DVD-R/+RW Start → Current Scene Select (p. 93) (p. 93) Current → End Detail (p. 94) (p. 93) (p. 93) Program Select (p. 95) DVD Setting Finalize DVD (p. 108) Play (p. 96) Unfinalize DVD* (p. 109) Format DVD* (p.
-
Page 83: Dubbing On Dvd
Dubbing on DVD You can dub the images recorded on the HDD to a DVD. • Set the power switch to “HDD”. • Prepare a recordable disc. • The recording time for a scene that can be dubbed on one disc is approx. -
Page 84: Selecting Scenes Recorded On Hdd And Dubbing Them (Scene Select Dubbing)
To cancel dubbing, choose “NO” or press the display time on screen. (STOP/EXIT). • Please note in advance that Hitachi will not accept any responsibility for compensation or loss of data, or When dubbing is finished, check the “Delete direct or indirect damage when dubbing is not Scene”... -
Page 85: Scene
●List of dubbing possible/impossible Videos on HDD Disc to be VIDEO Modes Wide/normal modes VIDEO Mode "STD" and dubbed (XTRA/FINE/STD) mixed (16:9/4:3) mixed wide mode (16:9) ● ● ● DVD-RAM DVD-RW ● ● ● (VR-mode) DVD-RW — — — (VF-mode) DVD-R —... -
Page 86: Dividing Movies (Edit - Divide)
●Editing using submenu Press the MENU button before pressing the A button in step 5 (see page 85): The submenu will appear. Edit Delete ....To delete selected scenes Exit......To restore the Disc Navigation screen Start → Current..To select scenes from the start to the one that the cursor is on Select at the moment Current →... -
Page 87: Combining Multiple Scenes (Edit - Combine)
1< COMBINING MULTIPLE SCENES (EDIT – COMBINE) If you have recorded numerous short scenes, combining them will be facilitated by the use of Disc Navigation. Be sure to select consecutive multiple scenes. When using a DVD-RAM, combining scenes is possible only when “Category: All” is specified (p. 110). Stills cannot be combined. Press the DISC NAVIGATION button. -
Page 88: Directing Scenes Effectively (Effect - Fade)
1< DIRECTING SCENES EFFECTIVELY (EFFECT – FADE) You can add fading to the beginning and/or end of scene. There are three types of special effects: Fade Out Fade Out Fade Out Fade In Fade In Fade In White: Wipe: B/W: Fades in from white screen Fades in from black screen Fades in from Black and... -
Page 89: Playing Back By Skipping Scenes (Effect - Skip)
1< PLAYING BACK BY SKIPPING SCENES (EFFECT – SKIP) You can specify “Skip” for scenes you do not want to play back: The selected scenes will be skipped. Press the C button to quit. Press the DISC NAVIGATION button. Place the cursor on the scene to which skip is A skip icon “... -
Page 90: Changing Images For Thumbnails (Effect - Thumbnail)
1< CHANGING IMAGES FOR THUMBNAILS (EFFECT – THUMBNAIL) Normally, the first image of the recorded scene is displayed as a thumbnail: You can choose another image of the scene for thumbnail. If you set a vivid image to thumbnail, you can know what you recorded from a glance at the Disc Navigation screen. -
Page 91: Copying Stills On Dvd-Ram To Card (Copy)
COPYING STILLS ON DVD-RAM TO CARD (COPY) • Set a DVD-RAM (recorded on a Hitachi DVD video camera/recorder marketed before DZ-HS303E/HS301E/HS300E) that includes the Before You Begin photos you wish to copy, and a card with recordable space, in this DVD video camera/recorder. -
Page 92: Locking Scenes On Card (Lock)
LOCKING SCENES ON CARD (LOCK) You can lock each photo recorded on card so that it will not be deleted or edited by mistake. ●To unlock the scene: Set the power switch to “SD”. Select the locked scene, and then use the Press the DISC NAVIGATION button. -
Page 93: Selecting Scenes Using Menu Screen (Select)
1<>2/3 SELECTING SCENES USING MENU SCREEN (SELECT) You can use this “Select” function to select consecutive scenes at one time. This function is useful when there are numerous scenes. Press the DISC NAVIGATION button. Choose “Select” on the “Scene” menu screen. Choose “Start →... -
Page 94: Displaying Information Using Menu Screen (Detail)
1<>2/3 DISPLAYING INFORMATION USING MENU SCREEN (DETAIL) You can display various information for a scene: the recording mode, recording date/time and length, special effects and movie quality mode. Press the DISC NAVIGATION button. Note • If multiple scenes have been selected, the total recording time of the selected scenes (total number in Place the cursor on the scene whose case of stills) will appear. -
Page 95: Programme
Programme WHAT IS “PROGRAMME”? Programme refers to an assembly of scenes recorded on the same date regardless of whether they are movie or still. Scene No. 1 Scene No. 2 Scene No. 3 Scene No. 4 Scene No. 5 Scene No. 6 9:00 Movie 11:45... -
Page 96: Playing Back Programme (Play)
1<>2/ PLAYING BACK PROGRAMME (PLAY) You can play back only the selected programme. Press the DISC NAVIGATION button. Select the programme to be played back, and then press the A button. Press the MENU button. Playback will start from the first scene of the Use the f/e/d/c/A buttons to selected programme. - Page 97 ●Characters available for entering Note • If you wish to delete the letter for title, press the C title button once: The input letter will be deleted. Holding You can choose the title input mode: “capital down the C button will delete all letters in the TITLE letter”, “small letter”...
-
Page 98: Play List
1< Play List WHAT IS “PLAY LIST”? You can create a play list on this DVD video camera/recorder by gathering your favourites from the recorded scenes. Since the play list is not created by copying data, you will consume little of the HDD/DVD capacity by making a play list. -
Page 99: Switching To Display Of Each Play List (Select)
1< SWITCHING TO DISPLAY OF EACH PLAY LIST (SELECT) Select the desired one of multiple play lists: The Disc Navigation screen of the selected play list will appear. Press the DISC NAVIGATION button. Use the “Select Playlist” screen to select the play list you wish to display, and then press the A button. -
Page 100: Adding Scenes To Play List (Editing Play List)
1< ADDING SCENES TO PLAY LIST (EDITING PLAY LIST) Press the e button to move the cursor to the Press the DISC NAVIGATION button. lower row, and press the d or c button to Press the MENU button. select the point where the scene is to be inserted. -
Page 101: Deleting Scenes From Play List (Editing Play List)
1< DELETING SCENES FROM PLAY LIST (EDITING PLAY LIST) Press the A button. Press the DISC NAVIGATION button, and then press the MENU button. Repeat steps 3 and 4 to delete other scenes. Display the editing screen of the play list to Press the C button: The screen for verifying be edited. -
Page 102: Deleting Scenes Using Submenu For Editing (Editing Play List)
1< DELETING SCENES USING SUBMENU FOR EDITING (EDITING PLAY LIST) You can delete scenes from play list on the editing screen. Press the DISC NAVIGATION button, and Choose “Delete” on the “Edit” menu screen, and then press the A button. then press the MENU button. -
Page 103: Arranging Order Of Scenes (Move)
1< ARRANGING ORDER OF SCENES (MOVE) Press the DISC NAVIGATION button. Move the “ ” mark to S e l e c t I n s e r t P o i n t 0 0 6 / 0 1 9 the position where you Press the MENU button. -
Page 104: Changing Title Of Play List (Title)
1< CHANGING TITLE OF PLAY LIST (TITLE) The play lists have serial numbers in the order you have created them, along with the created dates/ times: You can change this title at any time. Press the DISC NAVIGATION button. After changing the title, the Disc Navigation screen on the play list whose title has been Press the MENU button. -
Page 105: Go To
1<>2/3 Go To From the Disc Navigation screen, you can jump to the first scene or last scene, and playback will start from that point. MOVING TO BEGINNING (END) OF HDD/DVD/CARD Use the f/e/d/c/A buttons to Press the DISC NAVIGATION button. choose “Top”... -
Page 106: Protection
1< PROTECTION You can protect the HDD and a DVD-RAM/DVD-RW (VR-mode) in order to prevent recorded images from being erased or edited by mistake. Further recording will not be possible on protected disc until the protection is released. Press the DISC NAVIGATION button. Note •... -
Page 107: Updating Control Information Of Hdd/ Dvd-Ram/Dvd-Rw (Vr-Mode) (Update Control Info.)
1< UPDATING CONTROL INFORMATION OF HDD/DVD-RAM/DVD-RW (VR- MODE) (UPDATE CONTROL INFO.) Disc Navigation in this DVD video camera/recorder handles information on scenes, such as thumbnail, skip, fade, in a particular manner. If you use another device to edit a disc recorded on this DVD video camera/recorder, and then use the data again with Disc Navigation in this DVD video camera/recorder, the Disc Navigation may not appear normally. -
Page 108: Finalising Dvd-Rw/Dvd-R/+Rw (Finalize Dvd)
<>2/ FINALISING DVD-RW/DVD-R/+RW (FINALIZE DVD) • Be sure to use the AC adapter/charger to power the DVD video camera/ recorder when finalising a DVD-RW/DVD-R/+RW. Finalisation cannot be Before You Begin executed using a battery. If the DVD video camera/recorder is turned off during finalisation and the finalisation is interrupted, incorrect finalisation will result, and at worst, the disc may be damaged. -
Page 109: Additionally Recording On Finalised Dvd-Rw (Vf-Mode)/+Rw (Unfinalize Dvd)
>/ ADDITIONALLY RECORDING ON FINALISED DVD-RW (VF-MODE)/+RW (UNFINALIZE DVD) You can unfinalise the DVD-RW (VF-mode)/+RW finalised on this DVD video camera/recorder so that additional recording can be done on it. Press the DISC NAVIGATION button. Press the MENU button. Use the f/e/d/c/A buttons to choose “Unfinalize DVD”... -
Page 110: Others
Others DISPLAYING MOVIES OR STILLS INDEPENDENTLY (CATEGORY) If you insert a DVD-RAM that includes photos recorded on a DVD video camera/recorder other than DZ-HS303E/HS301E/HS300E, the scenes on the disc will be displayed in the order of recording, regardless of whether they are movies or stills. Scenes recorded on this DVD video camera/recorder will be displayed in the order of recording regardless of whether they are movies or stills. -
Page 111: Playing Back Wide-Mode Images On 4:3 Display Tv (Tv Type)
1<>2/ PLAYING BACK WIDE-MODE IMAGES ON 4:3 DISPLAY TV (TV TYPE) If you connect the DVD video camera/recorder with a disc recorded in wide mode to a TV with 4:3 display only and play it back, vertically long images will appear. You can specify “TV type: 4:3” to display 4:3 images on the TV. -
Page 112: Viewing On Tv Screen
1<>2/3 Viewing on TV Screen Connecting to a TV CONNECTING TO A TV Use the provided AV/S output cable to connect the DVD video camera/recorder to a TV as follows: To S-VIDEO To video/audio input jack* input jacks To AV output jack AV/S output cable White (provided) -
Page 113: Viewing On Tv Screen
• The infrared remote control is useful when operating the DVD video camera/recorder while viewing an Refer to the TV instruction manual for how to image on TV screen. However, if you use a Hitachi switch the TV input. VCR, the remote control may inadvertently operate the VCR if it is near the DVD video camera/recorder. -
Page 114: Playback On Dvd Recorder/Player
1<>2/ Playback on DVD Recorder/Player PLAYING BACK DVD-RAM/DVD-RW (VR-MODE) You can use a DVD recorder or DVD player that conforms to DVD-RAM/DVD-RW (VR-mode) to play back 8 cm DVD-RAM/DVD-RW (VR-mode) recorded on this DVD video camera/recorder. Insert the disc into the DVD recorder/player Note and play it back. -
Page 115: Recording (Dubbing) Images On Other Video Devices
AC outlet using the AC adapter/charger. • If you use a Hitachi VCR, it will be operated by the remote control* provided with the DVD video camera/recorder. When recording an image from a Hitachi VCR, change the remote control code of the VCR to other than “VCR2”. -
Page 116: Connecting To Pc
1<>2/3 Connecting to PC Connecting to PC Software Provided You can utilise on PC the videos and photos recorded on this DVD video camera/recorder, using the PC connection cable and software CD-ROM provided, or generally available software. The provided CD-ROM contains the following software for Windows and Macintosh: Windows ImageMixer 3 This allows you to import the images recorded on the DVD video camera/recorder into PC. -
Page 117: Requirements Of Available Pc
Before unpacking the provided software CD-ROM, read the Licence Agreement on page 158. Requirements of available PC [When using Windows] ® • OS: Windows 2000 Professional SP3 or higher, XP Home Edition/XP Professional ® ® * The provided software cannot be used on Windows 98 or Windows •... -
Page 118: Installing Software
Installing Software [When using Windows] Turn the PC on. Checking licence agreement: If you have been using the PC, terminate all Carefully read the licence agreement: If you running software programmes. accept the contents, choose “I accept the terms of the licence agreement”, and then Insert the provided CD-ROM into the CD- click “Next”. - Page 119 Choosing video system: After installation is finished, the screen for The screen for setting the video system will prompting restart will appear: Click “Finish” appear, and then click “Next”. to restart the PC. After restart, remove the CD-ROM from the Installing the software is now complete.
-
Page 120: When Using Macintosh
[When using Macintosh] Turn the Macintosh on, and insert the Choosing the installation destination and provided CD-ROM into the CD-ROM drive of type of installation: Macintosh. Follow the instructions on screen for operation: Installation will start. Double-click the DVDCAM3HS icon displayed on desktop. -
Page 121: Connecting To Pc Via Pc Connection Cable
Connecting to PC via PC Connection Cable Use the provided PC connection cable to connect the DVD video camera/recorder to PC as shown below. To USB connection terminal To PC connection terminal PC connection cable (provided) Note • No data can be written to the HDD, disc or SD memory card in this DVD video camera/recorder when it is connected to PC. - Page 122 When connecting the DVD video camera/recorder to PC, the DVD video camera/recorder will be recognised as a drive. The drive will appear on screen as follows: [When using Windows] If the DVD video camera/recorder is connected to PC with its power switch set to “HDD” or “DVD”, it will be recognised as an optical disc drive, and a disc set in the DVD video camera/ recorder can be accessed.
-
Page 123: Using Disc In Dvd Drive Built Into Pc
●When removing disc [When using Windows] Use Windows Explorer or My Computer to choose the drive icon of DVD video camera/recorder. → Right-click the mouse. → Choose “Eject”. → The cover of disc insertion block on DVD video camera/recorder will open. Insert another disc and close the cover: The disc will be recognised. -
Page 124: Before Terminating Pc Connection (Unplugging Pc Connection Cable)/Changing Over Power Switch
BEFORE TERMINATING PC CONNECTION (UNPLUGGING PC CONNECTION CABLE)/CHANGING OVER POWER SWITCH [When using Windows] Choose “USB mass storage device”. The drive Before unplugging the PC connection cable name (E:, etc.) will depend on the PC used. from PC, terminate the application and then click the “Hardware Removal”... -
Page 125: Using Software
Using Software See page 130 when using Macintosh. [When using Windows] USING IMAGEMIXER 3 ImageMixer 3 allows you to capture the images recorded on the DVD video camera/recorder into PC, edit the video file, and create a DVD-Video or DVD-VR using the video file. The following shows the basic operation of ImageMixer 3. - Page 126 USB1.1 port of PC, the data transfer speed will be DVDCAM (HDD)” when the power switch is insufficient, which could result in lost frames. set to “HDD”, “Hitachi DVDCAM” when it is set to “DVD”, and then click “Import”. If you wish to change the import device, and...
-
Page 127: Creating Dvd-Video Using Images Recorded On Hdd/Disc
CREATING DVD-VIDEO USING IMAGES RECORDED ON HDD/DISC You can use the images recorded on the DVD video camera/recorder to create a disc that can be viewed on DVD recorders/players. * A DVD-RW/DVD-R/+RW recorded on this DVD video camera/recorder must be finalised on this DVD video camera/recorder (see page 108). - Page 128 Select the images from which you wish to “Hitachi DVDCAM (HDD)” when the power create a DVD-Video, and then click “Import”. switch is set to “HDD”; and “Hitachi The image recorded on HDD, disc will DVDCAM” when the power switch is set to appear.
- Page 129 Click “Authoring” and create a DVD-Video Click the “Write” button: The screen for menu. setting write will appear. After checking the Clicking “Authoring” will display the editing settings, click “OK”: Writing will start. screen of DVD-Video menu. The video file previously imported into PC will appear in When write is complete, the drive will open “Source”.
-
Page 130: [When Using Macintosh] Using Pixe Vrf Browser Ex And Imagemixer Vcd/Dvd2
Clicking the “Drive” icon will display the To save images recorded on a disc, first insert drive select screen. Choose “HITACHI DZ- the disc you wish to save into the DVD video USBHDD” when the power switch is set to camera/recorder, and then connect the DVD “HDD”, “Hitachi DVD-RAM DZ-GBX3”... - Page 131 Select the video file to be imported and save Start ImageMixer VCD/DVD2, and set up the files to be registered. The scenes recorded on HDD, disc will Start ImageMixer VCD/DVD2 and click the appear. Select the scene to be imported into “DVD-Video”...
- Page 132 Creating a DVD-Video menu: Writing to disc: Then edit the DVD-Video menu: You can set The screen for writing to disc will appear. up the menu style, change the thumbnail to Check “Create disc”, perform setting for be displayed, and add a menu BGM. write, e.g., choosing DVD write drive.
-
Page 133: Viewing Images Recorded On Disc Using Pc
Viewing Images recorded on Disc using PC ●Playing back DVD-RW (VF-mode)/DVD-R/+RW You can use the DVD playback software on your PC/Macintosh to play back a DVD-RW (VF- mode)/DVD-R/+RW recorded and finalised on this DVD video camera/recorder. 1. Load the DVD-RW (VF-mode)/DVD-R/+RW to be played back in the DVD video camera/ recorder. -
Page 134: Uninstalling Software
• Administrator authority is required for uninstallation. Please contact the following for inquiries on provided CD-ROM PC Software Support Centre number PIXELA CORPORATION UK, Germany, France and Spain 800-1532-4865 (Toll-free) Other countries +44-1489-564-764 Languages available : English, French, German, Spanish URL:http://www.pixela.co.jp/oem/hitachi/e/index.html... -
Page 135: Cautions When Connecting Dvd Video Camera/ Recorder To Pc
Doing so will make the disc unusable. The disc will become unusable. Data may be readable or writable from/to the DVD video camera/recorder using software other than that provided with the DVD video camera/recorder, but Hitachi does not guarantee the operation. -
Page 136: Subsidiary Information
Subsidiary Information Introduction to Optional Accessories CAMERA ACCESSORIES Video flash (DZ-FLH3)* (p. 60) Wide conversion lens (DZ-WL1)* (p. 55) Tele-conversion lens (DZ-TL1)* (p. 55) Step-up ring (DZ-SR3037 for DZ-HS301E, DZ-SR3437 for DZ-HS300E) (p. 55) • When using camera accessories, be sure to read the instruction manuals for each accessory. Unavailable for DZ-HS301E/HS300E. -
Page 137: Trouble Messages
Trouble Messages A message may appear while you are operating the DVD video camera/recorder. If a message appears, refer to the following table and take appropriate corrective action. Messages are arranged in alphabetical order. Reference Message Cause & Troubleshooting page (1) Data error in a part It is possible that the system cannot normally complete writing of of image file. - Page 138 Reference Message Cause & Troubleshooting page Cannot combine scene Scenes in different programmes (different recording dates) of multiple programs. cannot be combined. Create a Playlist first, and then combine Create PlayList first, such scenes on the playlist. and then combine scenes.
- Page 139 Reference Message Cause & Troubleshooting page Card error has • The card terminals may be dirty: Wipe off dirt, and try the card occurred. again, or use another card. • Data other than still image may be included: Use another card. Card error has Was the card formatted on PC? Was formatting interrupted occurred.
- Page 140 Reference Message Cause & Troubleshooting page DVD error has occurred. This message will appear if disc error has occurred during dubbing. Connect the AC adapter/charger to DVD video camera/ Please keep DVD inside recorder, and set the power switch to “DVD”: Video file will be and set power switch to repaired.
- Page 141 Reference Message Cause & Troubleshooting page Error occurred. Please An error occurred with the HDD for which repair is being tried. format HDD. Initialise the HDD: But note that initialising the HDD will delete all data stored on the HDD. Error occurred.
- Page 142 Reference Message Cause & Troubleshooting page NO DVD This message may appear when the DVD video camera/recorder or disc is moved from a cold place to a warm place. Condensation has occurred on the camera/recorder lens or HDD/ DVD drive. Do not remove the disc; leave the DVD video camera/ recorder turned off in a place as dry as possible for 1 –...
- Page 143 Reference Message Cause & Troubleshooting page This DVD is recorded by This DVD video camera/recorder can use only discs recorded on the NTSC system. the PAL system. A disc recorded on the NTSC system cannot be — Please replace DVD. used on this DVD video camera/recorder.
-
Page 144: Troubleshooting
Troubleshooting Check to see the following before asking for a repair. If the suggested solution still cannot restore the DVD video camera/recorder to normal, do not attempt to repair it yourself, but consult your dealer. Power supplies Reference Symptom Cause and Correction page Battery cannot be Is the ambient temperature too low or too high? - Page 145 Reference Symptom Cause and Correction page Power cannot be turned Detach the battery or AC adapter/charger once, and then press the off. RESET button of DVD video camera/recorder: Reattach a power 29, 31, 151 supply to DVD video camera/recorder before turning it on again. Even if the DVD video The DVD video camera/recorder will automatically turn on to camera/recorder is off,...
- Page 146 During playback Reference Symptom Cause and Correction page Recognition of disc is Is disc dirty? not complete. Use the provided disc cleaning cloth to clean it. Pressing the playback Has the image been recorded by devices other than this DVD button will not start video camera/recorder? playback.
- Page 147 When the DVD video camera/recorder is connected to PC: Reference Symptom Cause and Correction page No drive icon appears The DVD video camera/recorder is not turned on. on PC. Check the power supply. Turn PC off and then disconnect the PC connection cable. Turn PC on again, and then use the PC connection cable to connect —...
- Page 148 Reference Symptom Cause and Correction page It will take some time to If you are editing a video file whose contents are different from save a video edited on those of project setting, it may take some time, since the entire —...
- Page 149 Miscellaneous Reference Symptom Cause and Correction page No DVD video camera/ Is a fully charged battery attached? recorder operation. Is the DVD video camera/recorder powered from AC outlet? 29, 30 Power does not come Execute system reset (press the RESET button). on, or no operation Has the DVD video camera/recorder been subjected to impact? occurs by pressing...
- Page 150 Reference Symptom Cause and Correction page Disc cover cannot be Is disc correctly inserted? closed. Was disc inserted from wrong direction? Remove the disc and then reinsert it. Connect a fully charged battery or AC adapter/charger, and then 29, 31 turn the DVD video camera/recorder on.
-
Page 151: System Reset
System Reset If the DVD video camera/recorder does not operate normally, perform “System Reset”: The DVD video camera/recorder may recover to normal. “System Reset” will reset all settings to factory defaults. The date and time will also be reset: Set the date and time again before using the DVD video camera/recorder. Set the power switch to “OFF”... -
Page 152: Major Specifications
*1 “60x” will appear on DZ-HS301E; “100x” on DZ-HS300E. *2 Not displayed on DZ-HS301E/HS300E. • Some items will not appear depending on the disc or card inserted. Major Specifications DZ-HS303E : 1/3-inch interlaced DZ-HS301E : 1/5-inch interlaced DZ-HS300E : 1/6-inch interlaced Total number of pixels DZ-HS303E approx. - Page 153 External microphone jack ø3.5 mm stereo mini-jack (a plug-in power type microphone cannot be (Not equipped with DZ-HS300E) used) Capacity of built-in HDD approx. 8 GB Recording mode Movie (with sound) Still (with SD memory card) Maximum approx. 110 minutes (XTRA) recordable approx.
-
Page 154: Storage Capacity Of Hdd/Dvd/Card
Storage temperature -20 – 60ºC Allowable operating altitude (when 3000 m or less using HDD) Weight DZ-HS303E approx. 485 g (without battery or disc) DZ-HS301E approx. 435 g (without battery or disc) DZ-HS300E approx. 435 g (without battery or disc) Total weight when recording DZ-HS303E approx. -
Page 155: Recordable Stills (Photos) On Card
Maximum Number of Scenes that an Be Recorded/Dubbed on One Disc Maximum number of scenes DVD-RAM/DVD-RW DVD-R Maximum Number of Programmes that Can Be Recorded/Dubbed on One Disc Maximum number of programmes DVD-RAM/DVD-RW RECORDABLE STILLS (PHOTOS) ON CARD For DZ-HS303E Capacity Recording quality... -
Page 156: Index
Index .........107 Update Control Info. Numerics ...........41 DISC EJECT button ..............66 16:9 Display ..........27 8 cm bare disc ........47 Information LCD ........94 Scenes information ..........35 Viewfinder ..............86 Divide ...........29 AC adapter/charger Dubbing ........44 ACCESS/PC indicator ......83 Dubbing from HDD to disc ............101 Add (edit) ....115... - Page 157 ........ 62 ............88 Low Light (Programme AE) Fade ..........87, 103 Move ............93 Select ............89 Skip ........... 56 Manual Focus .......... 75 Searching for image ........... 52 MENU button ..........99 Select (play list) ............64 MIC.Filter ...........
- Page 158 Licence Agreement ■ Grant of Licence • Hitachi, Ltd. nonexclusively grants you the right to install this programme in one computer and use it, but this right cannot be transferred to a third party. • You can duplicate one copy of this programme in a form readable on computer, but only for the purpose of backup, and under the condition that the display concerning the copyright remains in the original status.
- Page 159 SOME DO’S AND DON’TS ON THE SAFE USE OF EQUIPMENT This equipment has been designed and manufactured to meet international safety standards but, like any electrical equipment, care must be taken if you are to obtain the best results and safety is to be assured. ★★★★★★★★★★...
- Page 160 PLEASE PHOTOCOPY AND DISPLAY Used correctly, domestic batteries are a safe and dependable source of portable power. Problems can occur if they are misused or abused — resulting in leakage or, in extreme cases, fire or explosion. Here are some simple guidelines to safe battery use designed to eliminate any such problems.
- Page 161 Hitachi, Ltd. Japan HITACHI EUROPE LTD. HITACHI EUROPE S.A. Consumer Affairs Department 364, Kifissias Ave. & 1, Delfon Str. PO Box 3007 152 33 Chalandri Maidenhead Athens SL6 8ZE GREECE Tel: 1-6837200 UNITED KINGDOM Fax: 1-6835694 Tel: 0870 405 4405 Email: service.hellas@hitachi-eu.com...
Need help?
Do you have a question about the DZ-HS301E and is the answer not in the manual?
Questions and answers