Table of Contents
Advertisement
Available languages
Available languages
Advertisement
Table of Contents

Subscribe to Our Youtube Channel
Related Manuals for Craftsman 917.387370


Summary of Contents for Craftsman 917.387370
- Page 1 Owner's Manual IcRnmMnw, ROTARY LAWN MOWER 6.0 Horsepower 22" Side Discharge Model No. 917.387370 CAUTION: Read and follow all Safety Rules and Instructions before operating this equipment Sears, Roebuck and Co., Hoffman Estates, IL 60179 U.S.A. Visit our Craftsman website: www,sears.com/craffsman...
- Page 2 Maintenance ........10-13 LIMITED TWO YEAR WARRANTY ON CRAFTSMAN POWER MOWER For two years from date of purchase, when this Craftsman Lawn Mower is maintained, lubricated, and tuned up according to the operating and maintenance instructions in the owner's manual, Sears will repair free of charge any defect in material or workmanship.
- Page 3 I. GENERAL OPERATION II. SLOPE OPERATION • Read,understand, a nd follow all Slopes are a major factor related to slip instructions on the machine and in the and fall accidents which can result in manual(s) before starting. Be thoroughly severe injury. All slopes require extra cau- familiar with the controls and the proper tion.
- Page 4 • Never make adjustments or repairs with • Never attempt to make wheel height the engine (motor) running. Disconnect adjustments while the engine (motor) is the spark plug wire, and keep the wire running. away from the plug to prevent accidental •...
- Page 5 Read these instructions and this manual 1. Raise handles until lower handle sec- its entirety before you attempt to assemble tion locks into place in mowing position. or operate your new lawn mower. Remove protective padding, raise up- IMPORTANT: This lawn mower is shipped per handle section into place on lower handle and tighten both handle knobs.
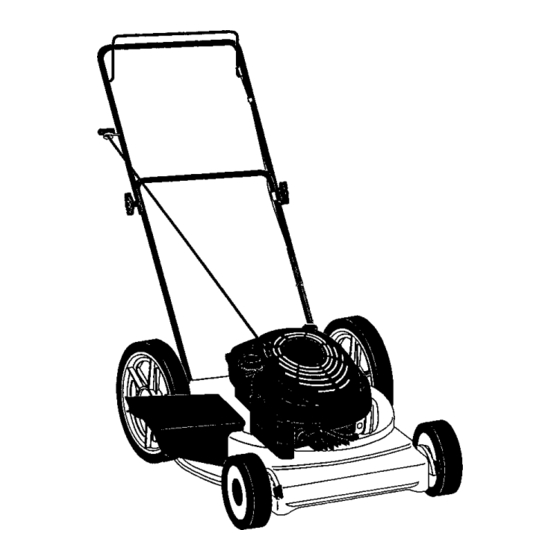
- Page 6 KNOW YOUR LAWN MOWER READ THIS OWNER'S MANUAL AND ALL SAFETY RULES BEFORE OPERATING YOUR LAWN MOWER, Compare the illustrations with your lawn mower to familiarize yourself with the location of various controls and adjustments. Save this manual for future reference, These symbols may appear on your lawn mower or in literature...
- Page 7 TO CONVERT MOWER mower can result in foreign Your mower is shipped ready to be used objects thrown into the as a mulcher. To convert to bagging or The operation of any lawn eyes, which can result in discharging: severe eye damage. Always •...
- Page 8 BEFORE STARTING ENGINE ADD OIL oil cap Your lawnmower is shipped without oil in the engine. For type and grade of oil to use, see "ENGINE" in the Maintenance section of this manual. • t, CAUTION: DO NOT overfill engine with oil, or it will smoke on startup.
- Page 9 MULCHING MOWING TIPS MOWING TIPS CAUTION: Do not use de-thatcher IMPORTANT: For best performance, keep mower housing free of built-up blade attachments on your mower, Such grass and trash. See "CLEANING" in the attachments are hazardous, will damage Maintenance section of this manual. your mower and could void your warranty.
- Page 10 MAINTENANCE SCHEDULE REGULAR SERVICE /'_-/_, ,//_(_" _'_(7" f¢,_r_/" _ UP_I I=_ Check for Loose Fasteners Cleardlnspect Grass Catcher MO Clean Lawn Mower Clean Under Drive Cover Check drive belt/pulleys (PowerOropelled Mowers) (Power-Propalled Mowers) Check/Sl_q_en/Replace Blade Lubdc, atlon Chart CleanBattery/Recharge NE Check Engine Oil Level Change Engine C a I/t.= G CleanAirFilter...
-
Page 11: Specifications
PRODUCT SPECIFICATIONS Serial number: Date of purchase: Gasoline capacity / type: 1.6 Quarts (Unleaded Regular) Oil type (API-SF-SJ): SAE 30 (above 32°F); SAE 5W-30 (below 32°F) Oil capacity: 20 Ounces Spark plug (gap: .030") Champion RJ19LM Blade bolt torque: 35-40 ft, Ibs. The model and serial numbers will be found on a decal on the rear of the lawn mower housing. - Page 12 GRASS CATCHER 6. Wait one minute to allow oil to settle. (If purchased as an accessory) Insert and tighten dipstick, then re- move it to check oil level. • The grass catcher may be hosed with 7. Continue adding small amounts water, but must be dry when used.
- Page 13 MUFFLER • I, C AUTION: Disconnect spark plug wire Inspect and replace corroded muffler as it from spark plug and place wire where could create a fire hazard and/or damage. cannot come in contact with the spark plug. SPARK PLUG •...
- Page 14 ENGINE pected carburetor problems, take your lawn mower to a Sears or other qualified service ENGINE SPEED center for repair and/or adjustment. Your engine speed has been factory set. IMPORTANT: Never tamper with the Do not attempt to increase engine speed engine governor, which is factory set or it may result in personal injury.
- Page 15 1. Drain the fuel tank. Pour one ounce (29 ml) of oil through Start the engine and let it run until the spark plug hole into cylinder. fuel lines and carburetor are empty. Pull starter handle slowly a few times to distribute oil.
- Page 16 TROUBLESHOOTING - See appropriate section in manual unless directed to a Sears Service Center. PROBLEM CAUSE CORRECTION Loss of power 1. Rear of lawn mower 1, Set to "Higher Cut" position. housing or cutting blade dragging in heavy grass. Cutting too much grass. 2.
- Page 17 GARANTiA LIMITADA DE DOS AltOS PARA LA SEGADORA A MOTOR CRAFTSMAN Por dos (2) aSos, a partir de la fecha de compra, cuando esta Segadora Craftsman se msntenga, lubrique y aline seg_n las Instrucciones para la operaci6n y el mantenimiento en el manual del dueSo, Sears reparar&...
- Page 18 II. OPERACION SOBRE LAS CUESTAS I. OPERACION Los accidentes ocurren con rods frecuencia en • Antes de empezar, debe lamiliarizarae las coestas, Estos accidentes ocurren debido a completamente con los controles y el uso resbaladas o cal'das, las cuales pueden resulta_ correcto de la maquina.
- Page 19 • Nunca haga funcionar una m&quina dentro • Pare e inspeccione el equipo si le pega a un de un &rea cerrada. objeto. RepSrelo, si es necesario, antes de hacerlo arrancar. • Nunca haga ajustes o reparaciones mientras el motor est6 en marcha. Desconecte el •...
- Page 20 1. Levante los mangos hasta que la secci6n Lea estes instruccionesy este manual comple- tamente antes de tratar de montar u operar su del man9o interior se asegure en su luger, en la poslci6n para segar. segadora nueva. Remueva la curia protectore, levante la sec IMPORTANTE: Este cortacdsped viene SIN cidn del mango superior hasta su lugar an ACEITE O GASOLINA en el motor,...
- Page 21 FAMILIARICESE CON SU SEGADORA LEA ESTE MANUAL DEL DUENO Y LAS REGLAS DE SEGURIDAD ANTES DE OPAF:_R SU SEGADORA. Compare las ilustraciones con su segadora para familiarizarse con la ubicaci6nde los diversos contmles y ajustes. Guarde este manual para referencia en el futuro. Estos sfmbolos pueden apareser sobre su segadora o en la literatura proporcionada con el producto.
- Page 22 PARA CONVERTIR LA SEGADORA Su segadora es envJadapara usarse como segadora puede hacer que acolchadora. Para convertirla a una operaci6n salten objetos extrar3os dentro de operaci6n de cualquier de ensacado o de descarga: sus ojos, Io que puede producir • Levante la protecci6n contra la descarga y daSos graves en dstos, Siempre remueva la plancha acolchadora, use anteojos de seguridad o protecci6n para...
- Page 23 ANTES DE HACER ARRANCAR _RECAUCI(_N: Los combustibles MOTOR mezclados con alcohol (conocidos como AGREGUE ACEITE gasohol, o el uso de etanol o metanol) pueden Su segadora rue enviada sin aoeite en el motor. atraer la humedad, la que conduce a la Para el tipo y el grado del aceite a utilizar, vea separaci6n y formaci6n de &cidos durante el el "MOTOR"...
- Page 24 CONSEJOS PARA SEGAR Y ACOLCHAR _ONSEJOS .PARA SEGAR PRECAUCION: No utilizar dispositivosantE- IMPORTANTE: Para obtener el mejor paja de la hoja en la segadora ya qua estos rendimiento mantenga la caja de la segadora acsesorioa son peligmsos, pueden daSar su sin acumulacion de cesp_l y basura.
- Page 25 PROGRAMA DE MANTEN|MIENTO ____ ouE co.P, su s vlc .EQU F C.AS ffY J Y#o F YfJ oE,'E ; o Revls_slhaysujetadores su_os UmpiarAnspecclonar el reoogedor de Limpiar hisegadora LImp._'.deba_, delacublerta dela trans- mismn t segaaoms conI_Xler p ropu_or) Re_sar lascorreas y las pok)e.simpul- sadas (segaderu con poder p ropulsor) Rev{sar o/aflJarlcamblarla cuchilla...
- Page 26 ESPECIFICACIONES DEL PRODUCTO N_mero de Serie: Fecha de Compra: Capacidad y Tipo de Gasolina: 1.6 Cuartos (Regular sin Plomo) Tipo de Aceite (API-SF-SJ): SAE 30 (Sobre 32°F); SAE 5W-30 (Debajo 32°F) Capacidad de Aceite: 20 Onzas Bujfa (Abertura: .030") Champion RJ19LM Torsi6n del Perno de la Cuchilla: 35-40 ft.
- Page 27 Permita que et aceite se asiente. Inserte RECOGEDOR DE ClaSPED y apriete la varilla medidora de aceite, (Si comprado como accesorio) despu_s remuevala para leer el nivel de • El recogedor de c_sped puede ser rociado aceite. con el agua de la manguera pero tiene que 7.
- Page 28 SILENCIADOR _:_RECAUCI(_N: Desconecte el alambre de Inspeccione y cambie el silenciador si est_ la bujia y p6ngalo en donde no pueda entrar en corrofdo puede produeir un peligro de incendio contacto con esta. y/o da_o. • Haga descansar la segadora en su lado. Aseg0rese que el firm de aire y que el carbu- BUJIA rador queden mirando hacia arriba.
- Page 29 MOTOR a problemas que se sospecha vienen det carbu- rador, Ileve su segadora a contacto con su centro VELOCIDAD DEL MOTOR de servicio Sears o con un otro centro de servicio La velocidad del motor ha sido ajustada en la f_,- brica.
- Page 30 MOTOR ACEITE DEL MOTOR SlSTEMA DE COMBUSTIBLE Drone el acelte (con el motorcaliente) y cdmbielo IMPORTANTE: Es importante evitar que con acelte de motor limplo.(Vea =MOTOR" en la se formen depositos de coma en partes secci6n de Mantenimento de este manual.) fundamentales del sistemade combustible tales como el carburador, el filtm del combustible, ClLINDRO...
- Page 31 SOLUCION DE PROBLEMAS -Vea la secci6n apropiada en el manual amenos estd dirigido a un centro de servico Sears. CORRECCI6N PROBLEMA CAUSA Faltade 1. Cuchilla desgastada, dobtada 1. Ajuste a la posici6n de _e_a o suel_. "Corte mds alto." 2. Altum delasruedasdispa_ja. 2.
- Page 32 CRAFTSMAN ROTARY LAWN MOWER - - MODEL NUMBER 917.387370...
-
Page 33: Parts
CRAFTSMAN ROTARY LAWN MOWER - - MODEL NUMBER 917.387370 PART PART DESCRIPTION DESCRIPTION 86902 Control Bar 150406 Hex Head Thread RollingScrew 3/8-16 x 1 179585 Rope Guide 85463 Danger Decal 169709X479 Upper Handle 161345 Lawn Mower Housing ( Incl. Key No. 55) - Page 34 BRIGGS & STRATTON 4-CYCLE ENGINE MODEL NUMBER 12Q802-0249-B1 I 1019 LABEL KI'I] oo<_ 43 €...
- Page 35 BRIGGS & STRATTON 4-CYCLE ENGINE MODEL NUMBER 12Q802-0249-B1 188_ ,°8_ 443_* 96.-E6 _ lse_ 163_ 977 CARBURETOR GASKET SET 633 _ 276_ 276_==_ 127_ 121 CARBURETOR OVERHAUL KIT 633_ 276_ ,76_ 127 C5...
- Page 36 BRIGGS & STRATTON 4-CYCLE ENGINE MODEL NUMBER 12Q802-0249-B1 969 |...
- Page 37 BRIGGS & STRATTON 4-CYCLE ENGINE MODEL NUMBER 12Q802-0249-B1 358 ENGINE GASKET SET 842_...
- Page 38 BRIGGS & STRATTON 4-CYCLE ENGINE MODEL NUMBER 12Q802-0249-E KEY PART PART DESCRIPTION DESCRIPTION 498826 Short Block (Replacement 697322 Cylinder Assembly Engine 123KO2-0015-E1) 399269 Kil-Bushing/Sest 497465 Manifold-intake 299819 • Seal-Oil (Magneto Side) 272199 • Gasket-Intake 493279 Sump-Eng{ne 691650 Screw (Intake Manifold) 691160 Head-Cylinder 691421...
- Page 39 BRIGGS & STRATTON 4-CYCLE ENGINE MODEL NUMBER 12Q802-0249-B1 PART PART DESCRIPTION DESCRIPTION 695161 Cup/Screen Assembly 690959 Pin-Locating 690662 Nut (Flywheel) 691830 Gear-T_ming 802574 Armature-Magneto 691648 Screw (Broke) 691061 Screw (Armature Magneto) 691031 " SeaI-O Ring (DipstickTube) 602592 Spark Plug 692017 Assem bly-Dipstick, Ku be 692390 Wire-Stop...
- Page 40 Your Home For repair - in your home - of all major brand appliances, i!iiiiiiiiii_ ¸ lawn and garden equipment, or heating and cooling systems, ii_iliiiiiii no matter who made it, no matter who sold itl For the replacement parts, accessories and i:iii_i!i_i!iii owner's manuals that you need to do-it-yourself.
Need help?
Do you have a question about the 917.387370 and is the answer not in the manual?
Questions and answers