Table of Contents
Advertisement
Available languages
Available languages
972000-320
Manual
®
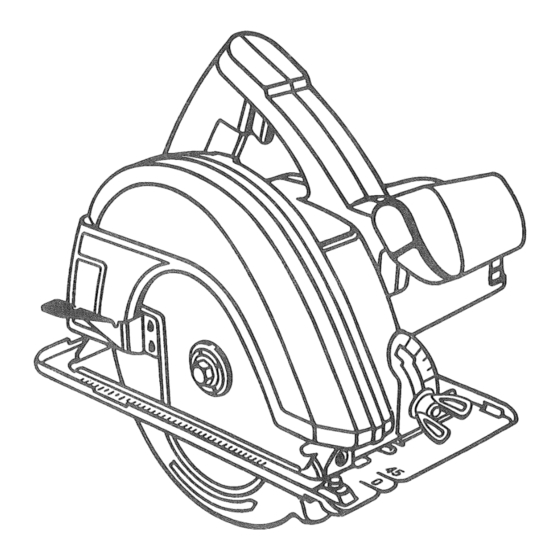
7-1/4 in. Cl
Double insulated
saw
•
ii
<: i. t
i:
.
Model No.
315.108320
Save this manual
for
future reference
®
• •
<
CAUTION:
Read and follow
all Safety Rules and Operat-
ing Instructions before first
use of this product.
NRTL
Sears,
Roebuck
and Co., Hoffman
Estates,
IL 60179
USA
972000°320
1-97
Advertisement
Table of Contents

Related Manuals for Craftsman 315.108320


Summary of Contents for Craftsman 315.108320
- Page 1 972000-320 Manual ® 7-1/4 in. Cl Double insulated Model No. 315.108320 • ® <: i. t Save this manual future reference CAUTION: Read and follow • • < all Safety Rules and Operat- ing Instructions before first NRTL use of this product. Sears, Roebuck and Co., Hoffman...
- Page 2 18-19 Parts Ordering / Service ..........................FULL ONE YEAR WARRANTY ON CRAFTSMAN CIRCULAR SAW If this CRRFTSMRN Circular Saw fails to give complete satisfaction within one year from the date of purchase, RETURN IT TO THE NEAREST SEARS STORE IN THE UNITED STATES, and Sears will replace it, free of charge.
- Page 3 The purpose of safety symbols is to attract your attention to possible dangers. The safety symbols, and the explanations with them, deserve your careful attention and understanding. The safety warnings do • i _ i_!! not by themselves eliminate any danger. The instructions or warnings they give are not substitutes for proper accident prevention measures.
- Page 4 RULES FOR SAFE OPERATION (Continued) WEAR PROPER APPAREL. Do not wear loose OUTDOOR USE EXTENSION CORDS. When clothing or jewelry that can get caught in tool's tool is used outdoors, use only extension cords moving parts and cause personal injury. Rubber suitable for use outdoors.
- Page 5 TIGHT. WHEN SERVICING USE ONLY IDENTICAL USE ONLY CORRECT BLADES. Do not use CRAFTSMAN REPLACEMENT PARTS. blades with incorrect size holes. Never use blade washers or bolts that are defective or incorrect. SAVE THESE INSTRUCTIONS. Refer to them...
- Page 6 Horsepower 2-1/8 Cutting Depthat45° Bevel C ut 1-13/16 in. (46mm) Input 10 Amperes Cutting Depthat51.5 ° Bevel C ut 1-5/8in. (41mm) BladeDiameter 7-1/4 in.(184mm) Rating 120volts,60 Hz,AC Blade Arbor 5/8 in.(16mm) NoLoadSpeed 5,000RPM Cutting Depth at 0° Bevel C ut 2-3/8in.
- Page 7 KNOW YOUR CIRCULAR APPLICATIONS See Figure 1. (Use only for the purpose listed below) Before attempting to use any tool, familiarize yourself Cutting all types of wood products (lumber, with all operating features and safety requirements. plywood, paneling). Features include easily operated bevel cut and depth ELECTRICAL CONNECTION of cut adjustment mechanisms;...
- Page 8 [] Fit saw blade inside lower blade guard and onto WARNING: Your saw should never be • !ii • connected to power supply when you are spindle. NOTE: The saw teeth point upward at the assembling parts, making adjustments, front of saw as shown in figure 2. •...
- Page 9 KICKBACK SAW BLADES See Figure 6. The best of saw blades will not cut efficiently if they are not kept clean, sharp, and properly set. Using a dull blade will place a heavy load on your saw and increase the danger of kickback. Keep extra blades on hand, so that sharp blades are always available.
- Page 10 TO LESSEN THE CHANCE OF KICKBACK: [] When making a cut use steady, even pressure. Never force cuts. [] Always keep the correct blade depth setting - the correct blade depth setting for all cuts should not [] Do not cut warped or wet lumber. exceed 1/4 inch below the material to be cut.
- Page 11 STARTING A CUT TO HELP MAINTAIN CONTROL: Know the right way to use your saw. M Always support your workpiece near the cut. See Figure 11. [] Support your workpiece so the cut will be on your right. [] Clamp your workpiece so it will not move during the cut.
- Page 12 Hold your saw firmly with both hands. See Figure TOPVIEW OFSAW FRONT OF SAW BLADE GUIDENOTCH i_ _ _i _ ALIGN OUTERBLADEGUIDENOTCHON GUIDELINE SAW BASEWITH LINE OFCUTAS SHOWN WHENMAKINGCROSSCUTSORRIP CUTS Fig. 15 Since blade thicknesses vary, always make a trial cut RIGHT in scrap material along a guideline to determine how :: ::...
- Page 13 i_ii _ iiii_i_ [] Adjust rip guide to the length needed for the cut. When making a bevel cut hold your saw firmly with _ii _ i_i both hands as shown in figure 18. [] Tighten edge guide screw securely. When using a rip guide, position the face of the rip _guide firmly against the edge of workpiece.
- Page 14 POSITIVE 0 ° BEVEL STOP TO ADJUST !:iili See Figure 19. [] Unplug your saw. BEVEL ADJUSTMENT ADJUSTMENT SCREW WARNING: Failure to unplug your saw could WINGNUT result in accidental starting causing possible serious personal injury. [] Loosen wing nut. [] Loosen hex nut securing adjustment screw.
- Page 15 i_i_ __!i<!< TO POCKET Squeeze the switch trigger to start your saw. Always See Figure 21. let the blade reach full speed then slowly lower blade into the workpiece until base is flat against workpiece. WARNING: Always adjust bevel setting to zero <...
- Page 16 ..':; • :d;: Page 16...
- Page 17 LUBRHCATION WARNNNG: When servicing, use only identical Craftsman replacement parts. Use of any other All of the bearings in this tool are lubricated with a part may create a hazard or cause product sufficient amount of high grade lubricant for the life of damage.
- Page 18 CRAFTSMAN CIRCULAR SAW = MODEL NUMBER 315.108320 SEE NOTE "A" PAGE l g...
- Page 19 CRAFTSMAN CmRCULAR SAW = MODEL NUMBER 315.108320 he model number will be found on a plate attached to the motor housing. Always mention the model number in all correspondence regarding your CIRCULAR SAW or when ordering repair parts. SEE BACK PAGE FOR PARTS ORDERING...
- Page 20 Forthe repair or repJacement partsyouneed deJivereddirectly to yourhome Oall7 am- 7 pro,-7daysa week II°SOO°3BB° 8) _ki :: Forrepairservice Call24 hours a day,7 daysa week (1o880o473o7247) Forthemecation e f a Sears PartsandRepair Center inyeararea Call24 hours a day,7 daysa week The modelnumberof thistoolwill be found on a serial plate attachedto the motorhousing.When requesting service or ordering parts, always providethe folnowing information"...
- Page 21 8nu_ ® • 7-1/4 pU_go Aislamiento Dob :: .L!_ii{ Modelo N° 315.108320 • : :[- Conserve este manual para referencia futura .iii !}i 7: ATENCION: Lea cuidadosamente todas las Reglas de Seguridad y las Instrucciones antes de usar esta herramienta. NRTL Sears, Roebuck...
- Page 22 18-19 [] Pedidos d e Repuestos/Servicio ........................GARANTIA COMPLETA D E UN AI_O DE LA SIERRA CIRCULAR CRAFTSMAN Siesta Sierra Circular CRRFTSMRN no le proporciona completa satisfacci6n a partir de un aSo desde la fecha de compra, DEVUELVALA AL ALMACEN...
- Page 23 Estos sfmbolos de seguridad se utilizan para advertirie sobre ciertos riesgos posibles. Los simbolos de seguridad y las explicaciones que acompa_an estos sirnbolos merecen cuidadosa atenci6n y ¢omprensi6n. Las advertencias por si mismas no eliminan ning_n peligro. Las instrucciones o las advertencias que se proporcionan no reernplazan alas medidas adecuadas de prevenci6n de accidentes.
- Page 24 REGLAS PARA FUNCIONAMIENTO SEGURO (Continuaci6n) MANTENGA A LOS NII/OS Y A LOS SAQUE LAS LLAVES DE AJUSTE Y LLAVES ESPECTADORES ALEJADOS. Todos los INGLESAS. Acostembrese a verificar si se han sacado todas las Ilaves de la herramienta antes de espectadores deben usar lentes de seguridad y ser mantenidos...
- Page 25 REGLAS PARA FUNCIONAMBENTO SEGURO (Continuaci6n) MANTENGASE ALERTA CONTROL. Ponga ANTES DE HACER UN CORTE, ASEGURESE QUE LOS AJUSTES DE PROFUNDIDAD Y DE atenci6n a Io que ester haciendo y use sentido INGLETE ESTEN 81EN APRETADOS. comQn. No haga funcionar la herramienta cuando este cansado.
- Page 26 2-1/8 Profundidad del Corte en Bisel 45 ° 1o13/16 pulg. (46 mm) Alimentaci6n 10 Amperios Profundidad del Diametro de la Hoja 7-1/4 pulg. (184 mm) Corte en Bisel 51,5 ° 1-5/8 pulg. (41 mm) Eje de la Hoja 5/8 pulg. (16 ram) Potencia Nominal 120 voltios, 60 Hz, CA Profundidad del...
- Page 27 CONOZCASU SIERRACIRCULAR USOS Ver Figura 1. (Usar solamente para los prop6sitos indicados continuaci6n) Antes de intentar usar su herramienta, familiarfcese con todas las caracter[sticas de funcionamiento y con [] Para cortar todo tipo de productos de madera los requerimientos de seguridad. (madera elaborada, madera laminada y paneles).
- Page 28 ADVERTENCBA: Su sierra no debe estar Coloque la hoja de la sierra en el husillo, dentro del enchufada en la fuente de alimentaci6n cuando protector inferior de la hoja. NOTA: Los dientes de la est_ instalando piezas, haciendo ajustes, hoja deben quedar dirigidos hacia arriba en la parte delantera de la sierra como se muestra en la Figura 2.
- Page 29 LAS HOJAS DE LA SIERRA RE'rROCESO Las mejores hojas de sierra no cortar_.n Ver Figura 6. eficientemente si no se mantienen limpias, afiladas y debidamente ajustadas. Si se usa una hoja desafilada, su sierra ser_t sometida a una carga pesada y aumentara el peligro de retroceso. Mantenga hojas adicionales a la mane, de manera que siempre tenga hojas afiladas disponibles.
- Page 30 PARA DOSMINUIR LA POSIBILIDAD [] AI hacer el corte use una presi6n firme e uniforme. Nunca fuerce los cortes. RETROCESO: [] No corte madera que est6 combada o ht_meda. [] Siempre mantenga un ajuste de altura correcto de [] Siempre sujete firmemente con ambas manos la ta hoja- el ajuste de altura correcto de la hoja para sierra y mantenga su cuerpo en posici6n todos los cortes no debe ser superior a 1/4 de...
- Page 31 PARA COMENZAR UN CORTE PARA AYUDAR A IVlANTENER EL CONTROL: Aprenda a usar correetarnente su sierra. [] Siempre apoye la pieza de trabajo cerca del corte. Ver Figura 11. [] Apoye la pieza de trabajo de modo que el corte quede a su derecha.
- Page 32 Sujetefirmemente la sierracon arnbasrnanos. VISTA SUPERIOR DE LA SIEP_A Figura 14. FRENTEDE LA SIERRA ENTALLADURA DEGUIADELA HOJA ALINEE LAENTALLADURAEXTERIORDE GUIA DE LA HOJASITUADAEN LA BASEDE LA SIERRACON LA LINEA DE CORTECOMO SE MUESTRACUANDO HAGACORTESTRANSVERSALES 0 CORTESAL HILO Fig. 15 ii!_ :!!i! Debido a que los grosores de las hojas varfan, siempre CORRECTO Fig.
- Page 33 [] Ajuste la gufa de corte al hilo al largo que sea Cuando haga un corte en bisel sostenga su sierra necesario para el code. firmemente con ambas manos como se muestra en la Figura 18. [] Apriete firmemente el tornillo de gufa de borde. Cuando use una gufa de corte al hilo, coloque la cara de la gufa de corte al hilo firmemente contra el borde de la pieza de trabajo.
- Page 34 TOPE POSITIVO DE BISEL DE 0 ° PARA AJUSTAR Ver Figura 19. [] Desenchufe su sierra. TUERCADE TORNILLO MARIPOSA DEAJUSTE DVERTENCfA: Si no se desenchufa la sierra, DEAJUSTE se puede producir la puesta en marcha DEBISEL accidental causando una lesi6n personal grave. [] Afloje la tuerca de mariposa.
- Page 35 PARA HACER CORTES DE CAVIDADES Apriete el gatillo para poner en marcha la sierra. Ver Figura 21. Siempre deje que la hoja alcance la velocidad plena y entonces lentarnente baje la hoja hacia la pieza de trabajo hasta que la base quede plana ADVERTENCIA: Siempre regule el ajuste de corte en bisel a cero antes de hacer un corte de...
- Page 36 i ¸ _ _ i_ _ii_!i i ¸ i :i_i : ii:ili} !_ _ii ¸ i: I PAgina 16...
- Page 37 LUBRICAClON ADVERTENClA: Cuando repare la herramienta use solamente repuestos autenticos Craftsman. Todos los cojinetes en esta herramienta han sido El uso de cualquier otro repuesto puede crear un lubricados con suficiente cantidad de lubricante de alta riesgo o dafiar el producto.
- Page 38 ..S mERRA CmF{CULAR CRAFTSMAN = MODELO N_-315.108320 VER NOTA "A" PAGINA l g 2_ 22 "_...
- Page 39 l EI nOmero de una placa situada m%tor.--_S-ie-mP_ie-m-encioneei-nQmero d el mode[o en toda la correspondenci referente a su S_ERRA CnRCULAR o cuando haga pedidos de repuestos....VER LA ULTmMAPAGmNAPARA LAS mNSTRUCCmONES COMO PEDNR REPUESTO$ LmSTADE REPUESTOS N_ de NQmero de N_ de NQmero de Ref.
- Page 40 Sears se co_pJace en ofrecer a sus cllente$ se_lclO de reparation de aparato$ eiectrodomestl¢o$ electron_cos de toda$ la$ margaso En Nears, usted puede contar operadores en espanol, a 1o$ que puede llamar sin cargo alguno° ii _ Para pedir servkio de reparad6n a domkiHo, Llame...
- Page 41 972000-320 Manual ® 7-1/4 in. Cl Double insulated Model No. 315.108320 • ® <: i. t Save this manual future reference CAUTION: Read and follow • • < all Safety Rules and Operat- ing Instructions before first NRTL use of this product. Sears, Roebuck and Co., Hoffman...
- Page 42 18-19 Parts Ordering / Service ..........................FULL ONE YEAR WARRANTY ON CRAFTSMAN CIRCULAR SAW If this CRRFTSMRN Circular Saw fails to give complete satisfaction within one year from the date of purchase, RETURN IT TO THE NEAREST SEARS STORE IN THE UNITED STATES, and Sears will replace it, free of charge.
- Page 43 The purpose of safety symbols is to attract your attention to possible dangers. The safety symbols, and the explanations with them, deserve your careful attention and understanding. The safety warnings do • i _ i_!! not by themselves eliminate any danger. The instructions or warnings they give are not substitutes for proper accident prevention measures.
- Page 44 RULES FOR SAFE OPERATION (Continued) WEAR PROPER APPAREL. Do not wear loose OUTDOOR USE EXTENSION CORDS. When clothing or jewelry that can get caught in tool's tool is used outdoors, use only extension cords moving parts and cause personal injury. Rubber suitable for use outdoors.
- Page 45 TIGHT. WHEN SERVICING USE ONLY IDENTICAL USE ONLY CORRECT BLADES. Do not use CRAFTSMAN REPLACEMENT PARTS. blades with incorrect size holes. Never use blade washers or bolts that are defective or incorrect. SAVE THESE INSTRUCTIONS. Refer to them...
- Page 46 Horsepower 2-1/8 Cutting Depthat45° Bevel C ut 1-13/16 in. (46mm) Input 10 Amperes Cutting Depthat51.5 ° Bevel C ut 1-5/8in. (41mm) BladeDiameter 7-1/4 in.(184mm) Rating 120volts,60 Hz,AC Blade Arbor 5/8 in.(16mm) NoLoadSpeed 5,000RPM Cutting Depth at 0° Bevel C ut 2-3/8in.
- Page 47 KNOW YOUR CIRCULAR APPLICATIONS See Figure 1. (Use only for the purpose listed below) Before attempting to use any tool, familiarize yourself Cutting all types of wood products (lumber, with all operating features and safety requirements. plywood, paneling). Features include easily operated bevel cut and depth ELECTRICAL CONNECTION of cut adjustment mechanisms;...
- Page 48 [] Fit saw blade inside lower blade guard and onto WARNING: Your saw should never be • !ii • connected to power supply when you are spindle. NOTE: The saw teeth point upward at the assembling parts, making adjustments, front of saw as shown in figure 2. •...
- Page 49 KICKBACK SAW BLADES See Figure 6. The best of saw blades will not cut efficiently if they are not kept clean, sharp, and properly set. Using a dull blade will place a heavy load on your saw and increase the danger of kickback. Keep extra blades on hand, so that sharp blades are always available.
- Page 50 TO LESSEN THE CHANCE OF KICKBACK: [] When making a cut use steady, even pressure. Never force cuts. [] Always keep the correct blade depth setting - the correct blade depth setting for all cuts should not [] Do not cut warped or wet lumber. exceed 1/4 inch below the material to be cut.
- Page 51 STARTING A CUT TO HELP MAINTAIN CONTROL: Know the right way to use your saw. M Always support your workpiece near the cut. See Figure 11. [] Support your workpiece so the cut will be on your right. [] Clamp your workpiece so it will not move during the cut.
- Page 52 Hold your saw firmly with both hands. See Figure TOPVIEW OFSAW FRONT OF SAW BLADE GUIDENOTCH i_ _ _i _ ALIGN OUTERBLADEGUIDENOTCHON GUIDELINE SAW BASEWITH LINE OFCUTAS SHOWN WHENMAKINGCROSSCUTSORRIP CUTS Fig. 15 Since blade thicknesses vary, always make a trial cut RIGHT in scrap material along a guideline to determine how :: ::...
- Page 53 i_ii _ iiii_i_ [] Adjust rip guide to the length needed for the cut. When making a bevel cut hold your saw firmly with _ii _ i_i both hands as shown in figure 18. [] Tighten edge guide screw securely. When using a rip guide, position the face of the rip _guide firmly against the edge of workpiece.
- Page 54 POSITIVE 0 ° BEVEL STOP TO ADJUST !:iili See Figure 19. [] Unplug your saw. BEVEL ADJUSTMENT ADJUSTMENT SCREW WARNING: Failure to unplug your saw could WINGNUT result in accidental starting causing possible serious personal injury. [] Loosen wing nut. [] Loosen hex nut securing adjustment screw.
- Page 55 i_i_ __!i<!< TO POCKET Squeeze the switch trigger to start your saw. Always See Figure 21. let the blade reach full speed then slowly lower blade into the workpiece until base is flat against workpiece. WARNING: Always adjust bevel setting to zero <...
- Page 56 ..':; • :d;: Page 16...
- Page 57 LUBRHCATION WARNNNG: When servicing, use only identical Craftsman replacement parts. Use of any other All of the bearings in this tool are lubricated with a part may create a hazard or cause product sufficient amount of high grade lubricant for the life of damage.
- Page 58 CRAFTSMAN CIRCULAR SAW = MODEL NUMBER 315.108320 SEE NOTE "A" PAGE l g...
- Page 59 CRAFTSMAN CmRCULAR SAW = MODEL NUMBER 315.108320 he model number will be found on a plate attached to the motor housing. Always mention the model number in all correspondence regarding your CIRCULAR SAW or when ordering repair parts. SEE BACK PAGE FOR PARTS ORDERING...
- Page 60 Forthe repair or repJacement partsyouneed deJivereddirectly to yourhome Oall7 am- 7 pro,-7daysa week II°SOO°3BB° 8) _ki :: Forrepairservice Call24 hours a day,7 daysa week (1o880o473o7247) Forthemecation e f a Sears PartsandRepair Center inyeararea Call24 hours a day,7 daysa week The modelnumberof thistoolwill be found on a serial plate attachedto the motorhousing.When requesting service or ordering parts, always providethe folnowing information"...
- Page 61 8nu_ ® • 7-1/4 pU_go Aislamiento Dob :: .L!_ii{ Modelo N° 315.108320 • : :[- Conserve este manual para referencia futura .iii !}i 7: ATENCION: Lea cuidadosamente todas las Reglas de Seguridad y las Instrucciones antes de usar esta herramienta. NRTL Sears, Roebuck...
- Page 62 18-19 [] Pedidos d e Repuestos/Servicio ........................GARANTIA COMPLETA D E UN AI_O DE LA SIERRA CIRCULAR CRAFTSMAN Siesta Sierra Circular CRRFTSMRN no le proporciona completa satisfacci6n a partir de un aSo desde la fecha de compra, DEVUELVALA AL ALMACEN...
- Page 63 Estos sfmbolos de seguridad se utilizan para advertirie sobre ciertos riesgos posibles. Los simbolos de seguridad y las explicaciones que acompa_an estos sirnbolos merecen cuidadosa atenci6n y ¢omprensi6n. Las advertencias por si mismas no eliminan ning_n peligro. Las instrucciones o las advertencias que se proporcionan no reernplazan alas medidas adecuadas de prevenci6n de accidentes.
- Page 64 REGLAS PARA FUNCIONAMIENTO SEGURO (Continuaci6n) MANTENGA A LOS NII/OS Y A LOS SAQUE LAS LLAVES DE AJUSTE Y LLAVES ESPECTADORES ALEJADOS. Todos los INGLESAS. Acostembrese a verificar si se han sacado todas las Ilaves de la herramienta antes de espectadores deben usar lentes de seguridad y ser mantenidos...
- Page 65 REGLAS PARA FUNCIONAMBENTO SEGURO (Continuaci6n) MANTENGASE ALERTA CONTROL. Ponga ANTES DE HACER UN CORTE, ASEGURESE QUE LOS AJUSTES DE PROFUNDIDAD Y DE atenci6n a Io que ester haciendo y use sentido INGLETE ESTEN 81EN APRETADOS. comQn. No haga funcionar la herramienta cuando este cansado.
- Page 66 2-1/8 Profundidad del Corte en Bisel 45 ° 1o13/16 pulg. (46 mm) Alimentaci6n 10 Amperios Profundidad del Diametro de la Hoja 7-1/4 pulg. (184 mm) Corte en Bisel 51,5 ° 1-5/8 pulg. (41 mm) Eje de la Hoja 5/8 pulg. (16 ram) Potencia Nominal 120 voltios, 60 Hz, CA Profundidad del...
- Page 67 CONOZCASU SIERRACIRCULAR USOS Ver Figura 1. (Usar solamente para los prop6sitos indicados continuaci6n) Antes de intentar usar su herramienta, familiarfcese con todas las caracter[sticas de funcionamiento y con [] Para cortar todo tipo de productos de madera los requerimientos de seguridad. (madera elaborada, madera laminada y paneles).
- Page 68 ADVERTENCBA: Su sierra no debe estar Coloque la hoja de la sierra en el husillo, dentro del enchufada en la fuente de alimentaci6n cuando protector inferior de la hoja. NOTA: Los dientes de la est_ instalando piezas, haciendo ajustes, hoja deben quedar dirigidos hacia arriba en la parte delantera de la sierra como se muestra en la Figura 2.
- Page 69 LAS HOJAS DE LA SIERRA RE'rROCESO Las mejores hojas de sierra no cortar_.n Ver Figura 6. eficientemente si no se mantienen limpias, afiladas y debidamente ajustadas. Si se usa una hoja desafilada, su sierra ser_t sometida a una carga pesada y aumentara el peligro de retroceso. Mantenga hojas adicionales a la mane, de manera que siempre tenga hojas afiladas disponibles.
- Page 70 PARA DOSMINUIR LA POSIBILIDAD [] AI hacer el corte use una presi6n firme e uniforme. Nunca fuerce los cortes. RETROCESO: [] No corte madera que est6 combada o ht_meda. [] Siempre mantenga un ajuste de altura correcto de [] Siempre sujete firmemente con ambas manos la ta hoja- el ajuste de altura correcto de la hoja para sierra y mantenga su cuerpo en posici6n todos los cortes no debe ser superior a 1/4 de...
- Page 71 PARA COMENZAR UN CORTE PARA AYUDAR A IVlANTENER EL CONTROL: Aprenda a usar correetarnente su sierra. [] Siempre apoye la pieza de trabajo cerca del corte. Ver Figura 11. [] Apoye la pieza de trabajo de modo que el corte quede a su derecha.
- Page 72 Sujetefirmemente la sierracon arnbasrnanos. VISTA SUPERIOR DE LA SIEP_A Figura 14. FRENTEDE LA SIERRA ENTALLADURA DEGUIADELA HOJA ALINEE LAENTALLADURAEXTERIORDE GUIA DE LA HOJASITUADAEN LA BASEDE LA SIERRACON LA LINEA DE CORTECOMO SE MUESTRACUANDO HAGACORTESTRANSVERSALES 0 CORTESAL HILO Fig. 15 ii!_ :!!i! Debido a que los grosores de las hojas varfan, siempre CORRECTO Fig.
- Page 73 [] Ajuste la gufa de corte al hilo al largo que sea Cuando haga un corte en bisel sostenga su sierra necesario para el code. firmemente con ambas manos como se muestra en la Figura 18. [] Apriete firmemente el tornillo de gufa de borde. Cuando use una gufa de corte al hilo, coloque la cara de la gufa de corte al hilo firmemente contra el borde de la pieza de trabajo.
- Page 74 TOPE POSITIVO DE BISEL DE 0 ° PARA AJUSTAR Ver Figura 19. [] Desenchufe su sierra. TUERCADE TORNILLO MARIPOSA DEAJUSTE DVERTENCfA: Si no se desenchufa la sierra, DEAJUSTE se puede producir la puesta en marcha DEBISEL accidental causando una lesi6n personal grave. [] Afloje la tuerca de mariposa.
- Page 75 PARA HACER CORTES DE CAVIDADES Apriete el gatillo para poner en marcha la sierra. Ver Figura 21. Siempre deje que la hoja alcance la velocidad plena y entonces lentarnente baje la hoja hacia la pieza de trabajo hasta que la base quede plana ADVERTENCIA: Siempre regule el ajuste de corte en bisel a cero antes de hacer un corte de...
- Page 76 i ¸ _ _ i_ _ii_!i i ¸ i :i_i : ii:ili} !_ _ii ¸ i: I PAgina 16...
- Page 77 LUBRICAClON ADVERTENClA: Cuando repare la herramienta use solamente repuestos autenticos Craftsman. Todos los cojinetes en esta herramienta han sido El uso de cualquier otro repuesto puede crear un lubricados con suficiente cantidad de lubricante de alta riesgo o dafiar el producto.
- Page 78 ..S mERRA CmF{CULAR CRAFTSMAN = MODELO N_-315.108320 VER NOTA "A" PAGINA l g 2_ 22 "_...
- Page 79 l EI nOmero de una placa situada m%tor.--_S-ie-mP_ie-m-encioneei-nQmero d el mode[o en toda la correspondenci referente a su S_ERRA CnRCULAR o cuando haga pedidos de repuestos....VER LA ULTmMAPAGmNAPARA LAS mNSTRUCCmONES COMO PEDNR REPUESTO$ LmSTADE REPUESTOS N_ de NQmero de N_ de NQmero de Ref.
- Page 80 Sears se co_pJace en ofrecer a sus cllente$ se_lclO de reparation de aparato$ eiectrodomestl¢o$ electron_cos de toda$ la$ margaso En Nears, usted puede contar operadores en espanol, a 1o$ que puede llamar sin cargo alguno° ii _ Para pedir servkio de reparad6n a domkiHo, Llame...
- Page 81 972000-320 Manual ® 7-1/4 in. Cl Double insulated Model No. 315.108320 • ® <: i. t Save this manual future reference CAUTION: Read and follow • • < all Safety Rules and Operat- ing Instructions before first NRTL use of this product. Sears, Roebuck and Co., Hoffman...
- Page 82 18-19 Parts Ordering / Service ..........................FULL ONE YEAR WARRANTY ON CRAFTSMAN CIRCULAR SAW If this CRRFTSMRN Circular Saw fails to give complete satisfaction within one year from the date of purchase, RETURN IT TO THE NEAREST SEARS STORE IN THE UNITED STATES, and Sears will replace it, free of charge.
- Page 83 The purpose of safety symbols is to attract your attention to possible dangers. The safety symbols, and the explanations with them, deserve your careful attention and understanding. The safety warnings do • i _ i_!! not by themselves eliminate any danger. The instructions or warnings they give are not substitutes for proper accident prevention measures.
- Page 84 RULES FOR SAFE OPERATION (Continued) WEAR PROPER APPAREL. Do not wear loose OUTDOOR USE EXTENSION CORDS. When clothing or jewelry that can get caught in tool's tool is used outdoors, use only extension cords moving parts and cause personal injury. Rubber suitable for use outdoors.
- Page 85 TIGHT. WHEN SERVICING USE ONLY IDENTICAL USE ONLY CORRECT BLADES. Do not use CRAFTSMAN REPLACEMENT PARTS. blades with incorrect size holes. Never use blade washers or bolts that are defective or incorrect. SAVE THESE INSTRUCTIONS. Refer to them...
- Page 86 Horsepower 2-1/8 Cutting Depthat45° Bevel C ut 1-13/16 in. (46mm) Input 10 Amperes Cutting Depthat51.5 ° Bevel C ut 1-5/8in. (41mm) BladeDiameter 7-1/4 in.(184mm) Rating 120volts,60 Hz,AC Blade Arbor 5/8 in.(16mm) NoLoadSpeed 5,000RPM Cutting Depth at 0° Bevel C ut 2-3/8in.
- Page 87 KNOW YOUR CIRCULAR APPLICATIONS See Figure 1. (Use only for the purpose listed below) Before attempting to use any tool, familiarize yourself Cutting all types of wood products (lumber, with all operating features and safety requirements. plywood, paneling). Features include easily operated bevel cut and depth ELECTRICAL CONNECTION of cut adjustment mechanisms;...
- Page 88 [] Fit saw blade inside lower blade guard and onto WARNING: Your saw should never be • !ii • connected to power supply when you are spindle. NOTE: The saw teeth point upward at the assembling parts, making adjustments, front of saw as shown in figure 2. •...
- Page 89 KICKBACK SAW BLADES See Figure 6. The best of saw blades will not cut efficiently if they are not kept clean, sharp, and properly set. Using a dull blade will place a heavy load on your saw and increase the danger of kickback. Keep extra blades on hand, so that sharp blades are always available.
- Page 90 TO LESSEN THE CHANCE OF KICKBACK: [] When making a cut use steady, even pressure. Never force cuts. [] Always keep the correct blade depth setting - the correct blade depth setting for all cuts should not [] Do not cut warped or wet lumber. exceed 1/4 inch below the material to be cut.
- Page 91 STARTING A CUT TO HELP MAINTAIN CONTROL: Know the right way to use your saw. M Always support your workpiece near the cut. See Figure 11. [] Support your workpiece so the cut will be on your right. [] Clamp your workpiece so it will not move during the cut.
- Page 92 Hold your saw firmly with both hands. See Figure TOPVIEW OFSAW FRONT OF SAW BLADE GUIDENOTCH i_ _ _i _ ALIGN OUTERBLADEGUIDENOTCHON GUIDELINE SAW BASEWITH LINE OFCUTAS SHOWN WHENMAKINGCROSSCUTSORRIP CUTS Fig. 15 Since blade thicknesses vary, always make a trial cut RIGHT in scrap material along a guideline to determine how :: ::...
- Page 93 i_ii _ iiii_i_ [] Adjust rip guide to the length needed for the cut. When making a bevel cut hold your saw firmly with _ii _ i_i both hands as shown in figure 18. [] Tighten edge guide screw securely. When using a rip guide, position the face of the rip _guide firmly against the edge of workpiece.
- Page 94 POSITIVE 0 ° BEVEL STOP TO ADJUST !:iili See Figure 19. [] Unplug your saw. BEVEL ADJUSTMENT ADJUSTMENT SCREW WARNING: Failure to unplug your saw could WINGNUT result in accidental starting causing possible serious personal injury. [] Loosen wing nut. [] Loosen hex nut securing adjustment screw.
- Page 95 i_i_ __!i<!< TO POCKET Squeeze the switch trigger to start your saw. Always See Figure 21. let the blade reach full speed then slowly lower blade into the workpiece until base is flat against workpiece. WARNING: Always adjust bevel setting to zero <...
- Page 96 ..':; • :d;: Page 16...
- Page 97 LUBRHCATION WARNNNG: When servicing, use only identical Craftsman replacement parts. Use of any other All of the bearings in this tool are lubricated with a part may create a hazard or cause product sufficient amount of high grade lubricant for the life of damage.
- Page 98 CRAFTSMAN CIRCULAR SAW = MODEL NUMBER 315.108320 SEE NOTE "A" PAGE l g...
- Page 99 CRAFTSMAN CmRCULAR SAW = MODEL NUMBER 315.108320 he model number will be found on a plate attached to the motor housing. Always mention the model number in all correspondence regarding your CIRCULAR SAW or when ordering repair parts. SEE BACK PAGE FOR PARTS ORDERING...
- Page 100 Forthe repair or repJacement partsyouneed deJivereddirectly to yourhome Oall7 am- 7 pro,-7daysa week II°SOO°3BB° 8) _ki :: Forrepairservice Call24 hours a day,7 daysa week (1o880o473o7247) Forthemecation e f a Sears PartsandRepair Center inyeararea Call24 hours a day,7 daysa week The modelnumberof thistoolwill be found on a serial plate attachedto the motorhousing.When requesting service or ordering parts, always providethe folnowing information"...
- Page 101 8nu_ ® • 7-1/4 pU_go Aislamiento Dob :: .L!_ii{ Modelo N° 315.108320 • : :[- Conserve este manual para referencia futura .iii !}i 7: ATENCION: Lea cuidadosamente todas las Reglas de Seguridad y las Instrucciones antes de usar esta herramienta. NRTL Sears, Roebuck...
- Page 102 [] Pedidos d e Repuestos/Servicio ........................GARANTIA COMPLETA D E UN AI_O DE LA SIERRA CIRCULAR CRAFTSMAN Si esta Sierra Circular CRRFTSMRN no le proporciona completa satisfacci6n a partir de un aSo desde la fecha de compra, DEVUELVALA AL ALMACEN...
- Page 103 Estos sfmbolos de seguridad se utilizan para advertirie sobre ciertos riesgos posibles. Los simbolos de seguridad y las explicaciones que acompa_an estos sirnbolos merecen cuidadosa atenci6n y ¢omprensi6n. Las advertencias por si mismas no eliminan ning_n peligro. Las instrucciones o las advertencias que se proporcionan no reernplazan alas medidas adecuadas de prevenci6n de accidentes.
- Page 104 REGLAS PARA FUNCIONAMIENTO SEGURO (Continuaci6n) MANTENGA A LOS NII/OS Y A LOS SAQUE LAS LLAVES DE AJUSTE Y LLAVES ESPECTADORES ALEJADOS. Todos los INGLESAS. Acostembrese a verificar si se han sacado todas las Ilaves de la herramienta antes de espectadores deben usar lentes de seguridad y ser mantenidos...
- Page 105 REGLAS PARA FUNCIONAMBENTO SEGURO (Continuaci6n) MANTENGASE ALERTA CONTROL. Ponga ANTES DE HACER UN CORTE, ASEGURESE QUE LOS AJUSTES DE PROFUNDIDAD Y DE atenci6n a Io que ester haciendo y use sentido INGLETE ESTEN 81EN APRETADOS. comQn. No haga funcionar la herramienta cuando este cansado.
- Page 106 2-1/8 Profundidad del Corte en Bisel 45 ° 1o13/16 pulg. (46 mm) Alimentaci6n 10 Amperios Profundidad del Diametro de la Hoja 7-1/4 pulg. (184 mm) Corte en Bisel 51,5 ° 1-5/8 pulg. (41 mm) Eje de la Hoja 5/8 pulg. (16 ram) Potencia Nominal 120 voltios, 60 Hz, CA Profundidad del...
- Page 107 CONOZCASU SIERRACIRCULAR USOS Ver Figura 1. (Usar solamente para los prop6sitos indicados continuaci6n) Antes de intentar usar su herramienta, familiarfcese con todas las caracter[sticas de funcionamiento y con [] Para cortar todo tipo de productos de madera los requerimientos de seguridad. (madera elaborada, madera laminada y paneles).
- Page 108 ADVERTENCBA: Su sierra no debe estar Coloque la hoja de la sierra en el husillo, dentro del enchufada en la fuente de alimentaci6n cuando protector inferior de la hoja. NOTA: Los dientes de la est_ instalando piezas, haciendo ajustes, hoja deben quedar dirigidos hacia arriba en la parte delantera de la sierra como se muestra en la Figura 2.
- Page 109 LAS HOJAS DE LA SIERRA RE'rROCESO Las mejores hojas de sierra no cortar_.n Ver Figura 6. eficientemente si no se mantienen limpias, afiladas y debidamente ajustadas. Si se usa una hoja desafilada, su sierra ser_t sometida a una carga pesada y aumentara el peligro de retroceso. Mantenga hojas adicionales a la mane, de manera que siempre tenga hojas afiladas disponibles.
- Page 110 PARA DOSMINUIR LA POSIBILIDAD [] AI hacer el corte use una presi6n firme e uniforme. Nunca fuerce los cortes. RETROCESO: [] No corte madera que est6 combada o ht_meda. [] Siempre mantenga un ajuste de altura correcto de [] Siempre sujete firmemente con ambas manos la ta hoja- el ajuste de altura correcto de la hoja para sierra y mantenga su cuerpo en posici6n todos los cortes no debe ser superior a 1/4 de...
- Page 111 PARA COMENZAR UN CORTE PARA AYUDAR A IVlANTENER EL CONTROL: Aprenda a usar correetarnente su sierra. [] Siempre apoye la pieza de trabajo cerca del corte. Ver Figura 11. [] Apoye la pieza de trabajo de modo que el corte quede a su derecha.
- Page 112 Sujetefirmemente la sierracon arnbasrnanos. VISTA SUPERIOR DE LA SIEP_A Figura 14. FRENTEDE LA SIERRA ENTALLADURA DEGUIADELA HOJA ALINEE LAENTALLADURAEXTERIORDE GUIA DE LA HOJASITUADAEN LA BASEDE LA SIERRACON LA LINEA DE CORTECOMO SE MUESTRACUANDO HAGACORTESTRANSVERSALES 0 CORTESAL HILO Fig. 15 ii!_ :!!i! Debido a que los grosores de las hojas varfan, siempre CORRECTO Fig.
- Page 113 [] Ajuste la gufa de corte al hilo al largo que sea Cuando haga un corte en bisel sostenga su sierra necesario para el code. firmemente con ambas manos como se muestra en la Figura 18. [] Apriete firmemente el tornillo de gufa de borde. Cuando use una gufa de corte al hilo, coloque la cara de la gufa de corte al hilo firmemente contra el borde de la pieza de trabajo.
- Page 114 TOPE POSITIVO DE BISEL DE 0 ° PARA AJUSTAR Ver Figura 19. [] Desenchufe su sierra. TUERCADE TORNILLO MARIPOSA DEAJUSTE DVERTENCfA: Si no se desenchufa la sierra, DEAJUSTE se puede producir la puesta en marcha DEBISEL accidental causando una lesi6n personal grave. [] Afloje la tuerca de mariposa.
- Page 115 PARA HACER CORTES DE CAVIDADES Apriete el gatillo para poner en marcha la sierra. Ver Figura 21. Siempre deje que la hoja alcance la velocidad plena y entonces lentarnente baje la hoja hacia la pieza de trabajo hasta que la base quede plana ADVERTENCIA: Siempre regule el ajuste de corte en bisel a cero antes de hacer un corte de...
- Page 116 i ¸ _ _ i_ _ii_!i i ¸ i :i_i : ii:ili} !_ _ii ¸ i: I PAgina 16...
- Page 117 LUBRICAClON ADVERTENClA: Cuando repare la herramienta use solamente repuestos autenticos Craftsman. Todos los cojinetes en esta herramienta han sido El uso de cualquier otro repuesto puede crear un lubricados con suficiente cantidad de lubricante de alta riesgo o dafiar el producto.
- Page 118 ..S mERRA CmF{CULAR CRAFTSMAN = MODELO N_-315.108320 VER NOTA "A" PAGINA l g 2_ 22 "_...
- Page 119 l EI nOmero de una placa situada m%tor.--_S-ie-mP_ie-m-encioneei-nQmero d el mode[o en toda la correspondenci referente a su S_ERRA CnRCULAR o cuando haga pedidos de repuestos....VER LA ULTmMAPAGmNAPARA LAS mNSTRUCCmONES COMO PEDNR REPUESTO$ LmSTADE REPUESTOS N_ de NQmero de N_ de NQmero de Ref.
- Page 120 Sears se co_pJace en ofrecer a sus cllente$ se_lclO de reparation de aparato$ eiectrodomestl¢o$ electron_cos de toda$ la$ margaso En Nears, usted puede contar operadores en espanol, a 1o$ que puede llamar sin cargo alguno° ii _ Para pedir servkio de reparad6n a domkiHo, Llame...
- Page 121 972000-320 Manual ® 7-1/4 in. Cl Double insulated Model No. 315.108320 • ® <: i. t Save this manual future reference CAUTION: Read and follow • • < all Safety Rules and Operat- ing Instructions before first NRTL use of this product. Sears, Roebuck and Co., Hoffman...
- Page 122 18-19 Parts Ordering / Service ..........................FULL ONE YEAR WARRANTY ON CRAFTSMAN CIRCULAR SAW If this CRRFTSMRN Circular Saw fails to give complete satisfaction within one year from the date of purchase, RETURN IT TO THE NEAREST SEARS STORE IN THE UNITED STATES, and Sears will replace it, free of charge.
- Page 123 The purpose of safety symbols is to attract your attention to possible dangers. The safety symbols, and the explanations with them, deserve your careful attention and understanding. The safety warnings do • i _ i_!! not by themselves eliminate any danger. The instructions or warnings they give are not substitutes for proper accident prevention measures.
- Page 124 RULES FOR SAFE OPERATION (Continued) WEAR PROPER APPAREL. Do not wear loose OUTDOOR USE EXTENSION CORDS. When clothing or jewelry that can get caught in tool's tool is used outdoors, use only extension cords moving parts and cause personal injury. Rubber suitable for use outdoors.
- Page 125 TIGHT. WHEN SERVICING USE ONLY IDENTICAL USE ONLY CORRECT BLADES. Do not use CRAFTSMAN REPLACEMENT PARTS. blades with incorrect size holes. Never use blade washers or bolts that are defective or incorrect. SAVE THESE INSTRUCTIONS. Refer to them...
- Page 126 Horsepower 2-1/8 Cutting Depthat45° Bevel C ut 1-13/16 in. (46mm) Input 10 Amperes Cutting Depthat51.5 ° Bevel C ut 1-5/8in. (41mm) BladeDiameter 7-1/4 in.(184mm) Rating 120volts,60 Hz,AC Blade Arbor 5/8 in.(16mm) NoLoadSpeed 5,000RPM Cutting Depth at 0° Bevel C ut 2-3/8in.
- Page 127 KNOW YOUR CIRCULAR APPLICATIONS See Figure 1. (Use only for the purpose listed below) Before attempting to use any tool, familiarize yourself Cutting all types of wood products (lumber, with all operating features and safety requirements. plywood, paneling). Features include easily operated bevel cut and depth ELECTRICAL CONNECTION of cut adjustment mechanisms;...
- Page 128 [] Fit saw blade inside lower blade guard and onto WARNING: Your saw should never be • !ii • connected to power supply when you are spindle. NOTE: The saw teeth point upward at the assembling parts, making adjustments, front of saw as shown in figure 2. •...
- Page 129 KICKBACK SAW BLADES See Figure 6. The best of saw blades will not cut efficiently if they are not kept clean, sharp, and properly set. Using a dull blade will place a heavy load on your saw and increase the danger of kickback. Keep extra blades on hand, so that sharp blades are always available.
- Page 130 TO LESSEN THE CHANCE OF KICKBACK: [] When making a cut use steady, even pressure. Never force cuts. [] Always keep the correct blade depth setting - the correct blade depth setting for all cuts should not [] Do not cut warped or wet lumber. exceed 1/4 inch below the material to be cut.
- Page 131 STARTING A CUT TO HELP MAINTAIN CONTROL: Know the right way to use your saw. M Always support your workpiece near the cut. See Figure 11. [] Support your workpiece so the cut will be on your right. [] Clamp your workpiece so it will not move during the cut.
- Page 132 Hold your saw firmly with both hands. See Figure TOPVIEW OFSAW FRONT OF SAW BLADE GUIDENOTCH i_ _ _i _ ALIGN OUTERBLADEGUIDENOTCHON GUIDELINE SAW BASEWITH LINE OFCUTAS SHOWN WHENMAKINGCROSSCUTSORRIP CUTS Fig. 15 Since blade thicknesses vary, always make a trial cut RIGHT in scrap material along a guideline to determine how :: ::...
- Page 133 i_ii _ iiii_i_ [] Adjust rip guide to the length needed for the cut. When making a bevel cut hold your saw firmly with _ii _ i_i both hands as shown in figure 18. [] Tighten edge guide screw securely. When using a rip guide, position the face of the rip _guide firmly against the edge of workpiece.
- Page 134 POSITIVE 0 ° BEVEL STOP TO ADJUST !:iili See Figure 19. [] Unplug your saw. BEVEL ADJUSTMENT ADJUSTMENT SCREW WARNING: Failure to unplug your saw could WINGNUT result in accidental starting causing possible serious personal injury. [] Loosen wing nut. [] Loosen hex nut securing adjustment screw.
- Page 135 i_i_ __!i<!< TO POCKET Squeeze the switch trigger to start your saw. Always See Figure 21. let the blade reach full speed then slowly lower blade into the workpiece until base is flat against workpiece. WARNING: Always adjust bevel setting to zero <...
- Page 136 ..':; • :d;: Page 16...
- Page 137 LUBRHCATION WARNNNG: When servicing, use only identical Craftsman replacement parts. Use of any other All of the bearings in this tool are lubricated with a part may create a hazard or cause product sufficient amount of high grade lubricant for the life of damage.
- Page 138 CRAFTSMAN CIRCULAR SAW = MODEL NUMBER 315.108320 SEE NOTE "A" PAGE l g...
- Page 139 CRAFTSMAN CmRCULAR SAW = MODEL NUMBER 315.108320 he model number will be found on a plate attached to the motor housing. Always mention the model number in all correspondence regarding your CIRCULAR SAW or when ordering repair parts. SEE BACK PAGE FOR PARTS ORDERING...
- Page 140 Forthe repair or repJacement partsyouneed deJivereddirectly to yourhome Oall7 am- 7 pro,-7daysa week II°SOO°3BB° 8) _ki :: Forrepairservice Call24 hours a day,7 daysa week (1o880o473o7247) Forthemecation e f a Sears PartsandRepair Center inyeararea Call24 hours a day,7 daysa week The modelnumberof thistoolwill be found on a serial plate attachedto the motorhousing.When requesting service or ordering parts, always providethe folnowing information"...
- Page 141 8nu_ ® • 7-1/4 pU_go Aislamiento Dob :: .L!_ii{ Modelo N° 315.108320 • : :[- Conserve este manual para referencia futura .iii !}i 7: ATENCION: Lea cuidadosamente todas las Reglas de Seguridad y las Instrucciones antes de usar esta herramienta. NRTL Sears, Roebuck...
- Page 142 18-19 [] Pedidos d e Repuestos/Servicio ........................GARANTIA COMPLETA D E UN AI_O DE LA SIERRA CIRCULAR CRAFTSMAN Siesta Sierra Circular CRRFTSMRN no le proporciona completa satisfacci6n a partir de un aSo desde la fecha de compra, DEVUELVALA AL ALMACEN...
- Page 143 Estos sfmbolos de seguridad se utilizan para advertirie sobre ciertos riesgos posibles. Los simbolos de seguridad y las explicaciones que acompa_an estos sirnbolos merecen cuidadosa atenci6n y ¢omprensi6n. Las advertencias por si mismas no eliminan ning_n peligro. Las instrucciones o las advertencias que se proporcionan no reernplazan alas medidas adecuadas de prevenci6n de accidentes.
- Page 144 REGLAS PARA FUNCIONAMIENTO SEGURO (Continuaci6n) MANTENGA A LOS NII/OS Y A LOS SAQUE LAS LLAVES DE AJUSTE Y LLAVES ESPECTADORES ALEJADOS. Todos los INGLESAS. Acostembrese a verificar si se han sacado todas las Ilaves de la herramienta antes de espectadores deben usar lentes de seguridad y ser mantenidos...
- Page 145 REGLAS PARA FUNCIONAMBENTO SEGURO (Continuaci6n) MANTENGASE ALERTA CONTROL. Ponga ANTES DE HACER UN CORTE, ASEGURESE QUE LOS AJUSTES DE PROFUNDIDAD Y DE atenci6n a Io que ester haciendo y use sentido INGLETE ESTEN 81EN APRETADOS. comQn. No haga funcionar la herramienta cuando este cansado.
- Page 146 2-1/8 Profundidad del Corte en Bisel 45 ° 1o13/16 pulg. (46 mm) Alimentaci6n 10 Amperios Profundidad del Diametro de la Hoja 7-1/4 pulg. (184 mm) Corte en Bisel 51,5 ° 1-5/8 pulg. (41 mm) Eje de la Hoja 5/8 pulg. (16 ram) Potencia Nominal 120 voltios, 60 Hz, CA Profundidad del...
- Page 147 CONOZCASU SIERRACIRCULAR USOS Ver Figura 1. (Usar solamente para los prop6sitos indicados continuaci6n) Antes de intentar usar su herramienta, familiarfcese con todas las caracter[sticas de funcionamiento y con [] Para cortar todo tipo de productos de madera los requerimientos de seguridad. (madera elaborada, madera laminada y paneles).
- Page 148 ADVERTENCBA: Su sierra no debe estar Coloque la hoja de la sierra en el husillo, dentro del enchufada en la fuente de alimentaci6n cuando protector inferior de la hoja. NOTA: Los dientes de la est_ instalando piezas, haciendo ajustes, hoja deben quedar dirigidos hacia arriba en la parte delantera de la sierra como se muestra en la Figura 2.
- Page 149 LAS HOJAS DE LA SIERRA RE'rROCESO Las mejores hojas de sierra no cortar_.n Ver Figura 6. eficientemente si no se mantienen limpias, afiladas y debidamente ajustadas. Si se usa una hoja desafilada, su sierra ser_t sometida a una carga pesada y aumentara el peligro de retroceso. Mantenga hojas adicionales a la mane, de manera que siempre tenga hojas afiladas disponibles.
- Page 150 PARA DOSMINUIR LA POSIBILIDAD [] AI hacer el corte use una presi6n firme e uniforme. Nunca fuerce los cortes. RETROCESO: [] No corte madera que est6 combada o ht_meda. [] Siempre mantenga un ajuste de altura correcto de [] Siempre sujete firmemente con ambas manos la ta hoja- el ajuste de altura correcto de la hoja para sierra y mantenga su cuerpo en posici6n todos los cortes no debe ser superior a 1/4 de...
- Page 151 PARA COMENZAR UN CORTE PARA AYUDAR A IVlANTENER EL CONTROL: Aprenda a usar correetarnente su sierra. [] Siempre apoye la pieza de trabajo cerca del corte. Ver Figura 11. [] Apoye la pieza de trabajo de modo que el corte quede a su derecha.
- Page 152 Sujetefirmemente la sierracon arnbasrnanos. VISTA SUPERIOR DE LA SIEP_A Figura 14. FRENTEDE LA SIERRA ENTALLADURA DEGUIADELA HOJA ALINEE LAENTALLADURAEXTERIORDE GUIA DE LA HOJASITUADAEN LA BASEDE LA SIERRACON LA LINEA DE CORTECOMO SE MUESTRACUANDO HAGACORTESTRANSVERSALES 0 CORTESAL HILO Fig. 15 ii!_ :!!i! Debido a que los grosores de las hojas varfan, siempre CORRECTO Fig.
- Page 153 [] Ajuste la gufa de corte al hilo al largo que sea Cuando haga un corte en bisel sostenga su sierra necesario para el code. firmemente con ambas manos como se muestra en la Figura 18. [] Apriete firmemente el tornillo de gufa de borde. Cuando use una gufa de corte al hilo, coloque la cara de la gufa de corte al hilo firmemente contra el borde de la pieza de trabajo.
- Page 154 TOPE POSITIVO DE BISEL DE 0 ° PARA AJUSTAR Ver Figura 19. [] Desenchufe su sierra. TUERCADE TORNILLO MARIPOSA DEAJUSTE DVERTENCfA: Si no se desenchufa la sierra, DEAJUSTE se puede producir la puesta en marcha DEBISEL accidental causando una lesi6n personal grave. [] Afloje la tuerca de mariposa.
- Page 155 PARA HACER CORTES DE CAVIDADES Apriete el gatillo para poner en marcha la sierra. Ver Figura 21. Siempre deje que la hoja alcance la velocidad plena y entonces lentarnente baje la hoja hacia la pieza de trabajo hasta que la base quede plana ADVERTENCIA: Siempre regule el ajuste de corte en bisel a cero antes de hacer un corte de...
- Page 156 i ¸ _ _ i_ _ii_!i i ¸ i :i_i : ii:ili} !_ _ii ¸ i: I PAgina 16...
- Page 157 LUBRICAClON ADVERTENClA: Cuando repare la herramienta use solamente repuestos autenticos Craftsman. Todos los cojinetes en esta herramienta han sido El uso de cualquier otro repuesto puede crear un lubricados con suficiente cantidad de lubricante de alta riesgo o dafiar el producto.
- Page 158 ..S mERRA CmF{CULAR CRAFTSMAN = MODELO N_-315.108320 VER NOTA "A" PAGINA l g 2_ 22 "_...
- Page 159 l EI nOmero de una placa situada m%tor.--_S-ie-mP_ie-m-encioneei-nQmero d el mode[o en toda la correspondenci referente a su S_ERRA CnRCULAR o cuando haga pedidos de repuestos....VER LA ULTmMAPAGmNAPARA LAS mNSTRUCCmONES COMO PEDNR REPUESTO$ LmSTADE REPUESTOS N_ de NQmero de N_ de NQmero de Ref.
- Page 160 Sears se co_pJace en ofrecer a sus cllente$ se_lclO de reparation de aparato$ eiectrodomestl¢o$ electron_cos de toda$ la$ margaso En Nears, usted puede contar operadores en espanol, a 1o$ que puede llamar sin cargo alguno° ii _ Para pedir servkio de reparad6n a domkiHo, Llame...
Need help?
Do you have a question about the 315.108320 and is the answer not in the manual?
Questions and answers