Table of Contents
Advertisement
Available languages
Available languages
Owner's Manual
ICRRFTSMRN'I
ROTARY LAWN MOWER
7.0 Horsepower
Power-propelled
21" Rear discharge
Model No.
917.378770
CAUTION:
Read and follow all
Safety Rules and Instructions
before operatingthis equipment
Sears, Roebuck and Co., Hoffman Estates, IL 60179 U.S.A.
Visit our Craftsman
website:www.sears.com/craftsman
Advertisement
Table of Contents

Subscribe to Our Youtube Channel
Related Manuals for Craftsman 917.378770


Summary of Contents for Craftsman 917.378770
- Page 1 Owner's Manual ICRRFTSMRN'I ROTARY LAWN MOWER 7.0 Horsepower Power-propelled 21" Rear discharge Model No. 917.378770 CAUTION: Read and follow all Safety Rules and Instructions before operatingthis equipment Sears, Roebuck and Co., Hoffman Estates, IL 60179 U.S.A. Visit our Craftsman website:www.sears.com/craftsman...
- Page 2 Warranty service is available by returning the Craftsman power mower to the nearest Sears Service Center/Department in the United States. This warranty applies only while this product is used in the United States.
-
Page 3: General Operation
I.GENERAL OPERATION • Always wear safety goggles or safety glasses with side shields when • Read, understand, and follow all instructions on the machine and in the operating mower. II. SLOPE OPERATION manual(s) before starting. Be thor- oughly familiar with the controls and Slopes are a major factor related to slip and fall accidents which can result in the proper use of the machine before... -
Page 4: Maintenance
• Never run a machine inside a closed • Stop and inspect the equipment if you area. strike an object. Repair, if necessary, • Never make adjustments or repairs before restarting. with the engine (motor) running. • Never attempt to make wheel height Disconnect the spark plug wire, and adjustments while the engine (motor) is keep the wire away from the plug to... -
Page 5: How To Set Up Your Lawn Mower
HOW TO SET UP YOUR LAWN Read these instructions and this manual MOWER in its entirety before you attempt to assemble or operate your new lawn TO UNFOLD HANDLE mower. IMPORTANT: Unfold handle carefully so IMPORTANT: This lawn mower is as not to pinch or damage control cables. -
Page 6: Know Your Lawn Mower
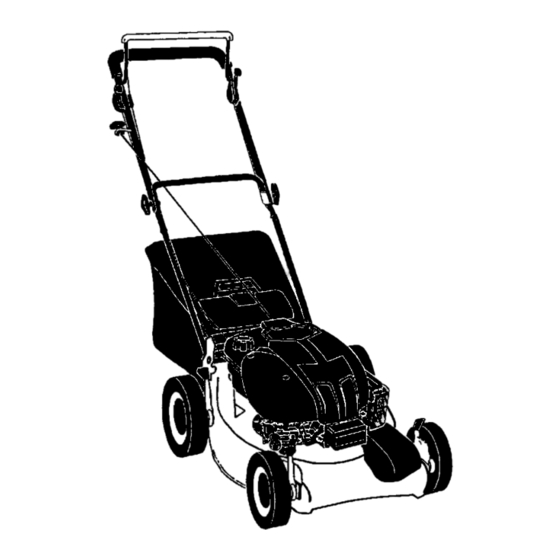
KNOWYOUR LAWN MOWER READ THIS OWNER'S MANUAL AND ALL SAFETY RULES BEFORE OPERATING YOUR LAWN MOWER. Compare the illustrations with your lawn mower to familiarize yourself with the location of various controls and adjustments. Save this manual for future reference. These symbols may appear on your lawn mower or in literature... -
Page 7: Drive Control
DRIVE CONTROL The operation of any lawn mower can result in foreign • Self-propelling is controlled by holding objects thrown into the the operator presence control bar down eyes, which can result in to the handle and pushing the drive severe eye damage. -
Page 8: To Convert Mower
TO CONVERT MOWER 2. Remove oil dipstick from oil fill spout. Make sure that rim of spout is clean. Your lawn mower was shipped ready to be 3. You receive a container of oil with the used as a mulcher. To convert to bagging: unit. - Page 9 MULCHING MOWING TIPS TO START ENGINE IMPORTANT: For best performance, NOTE: Due to protective coatings on the keep mower housing free of built-up engine, a small amount of smoke may be grass and trash. See "CLEANING" in the present during the initial use of the Maintenance section of this manual.
-
Page 10: Lubrication Chart
MAINTENANCE SCHEDULE .___o_._o_'_" F,LL 'N OATES " AS OUOOMPLETE SERVICE REGULAR SERVICE f_(¢. _r_--7_,_y_£'_#_s" DATES Check for Loose Fasteners Clean/Inspect Grass Catcher (If Equipped) clean Lawn Mower Clean Under Drive Cover (Power-Propelled Mowers) Check drive belt/pulleys (Power-Propelled Mowers) Check]Sharpen/Replaca Blade _,/3 LubricationChart Clean Battery/Recharge... -
Page 11: Specifications
PRODUCT SPECIFICATIONS Serial number: Date of purchase: Gasoline capacity/type: 1.6 quarts (unleaded regular) Oil type (API-SF-SJ): SAE 30 (above 32°F); SAE 5W-30 (below 32°F) Oil capacity: 20 ounces Spark plug (gap: .020") Champion RC12YC Blade bolt torque: 35-40 ft. Ibs. •... - Page 12 GRASS CATCHER SAE VISCOSITY GRADES • The grass catcher may be hosed with water, but must be dry when used. • Check your grass catcher often for damage or deterioration. Through normal use it will wear. If catcher needs TEMPERATURE RANGE ANTICIPATED BEFORE NEXT OIL CHANGE replacing,...
-
Page 13: Spark Plug
MUFFLER AIR FILTER Inspect and replace corroded muffler as it Your engine will not run properly using a could create a fire hazard and/or dam- dirty air filter. Clean the foam pre-cleaner age. after every 25 hours of operation or every SPARK PLUG season. - Page 14 TO REMOVE DRIVE BELT 1. Remove drive cover. Remove belt from gearcase pulley by pushing down on pulley and rolling belt off it. 2. Turn lawn mower on its side with air filter and carburetor 3. Remove blade. Remove debris shield. 5.
- Page 15 ENGINE IMPORTANT: Never tamper with the engine governor, which is factory set for ENGINE SPEED proper engine speed. Overspeeding the Your engine speed has been factory set. engine above the factory high speed Do not attempt to increase engine speed setting can be dangerous.
-
Page 16: Troubleshooting
ENGINE ENGINE OIL FUEL SYSTEM Drain oil (with engine warm) and replace with clean engine oil (See "ENGINE" in IMPORTANT: It is important to prevent the Maintenance section of this manual). gum deposits from forming in essential CYLINDER fuel system parts such as carburetor, fuel 1. - Page 17 TROUBLESHOOTING - See appropriate section in manual unless directed to a Sears Service Center. PROBLEM CAUSE CORREC'RON 1. Rear of lawn mower Loss of power 1. Set to "Higher Cut" housing or cutting blade position. dragging in heavy grass. 2. Cutting too much grass. 2.
- Page 18 GARANT[A LIMITADA DE DOS AI_IOS PARA LA SEGADORA A MOTOR CRAFTSMAN Por dos (2) afios, a partir de la fecha de compra, cuando esta Segadora Craftsman se mantenga, lubrique y afine seglJn las instrucciones para la operaci6n y el mantenimiento en el manual del dueSo, Sears reparar&...
- Page 19 I1o OPERAClON SOBRE LAS CUESTAS I. OPERACION Los accidentes ocurren con m_s frecuencia • Antes de empezar, debe familiadzarse en las cuestas. Estos accidentes ocurren completamente con los controles y el uso debido a resbaladas o cafdas, las cuales correcto de la maquina. Para esto, debe leer pueden resultar en graves lesiones.
-
Page 20: Mantenimiento
• Pare e inspeccione el equipo si le pega a un • Nunca haga funcionar una mdquina dentro de un _rea cerrada. obJeto. Repdrelo, si es necesario, antes de hacerlo arrancar. • Nunca haga ajustes o reparaciones mientras el motor estd en marcha, •... - Page 21 COMO PREPARAR SU SEGADORA Lea estas instrucciones y el manual completamente antes de tratar de montar u .PARA DESDOBLAR EL MANGO operar su segadora nueva. IMPORTANTE: Despliegue el mango con IMPORTANTE: Este cortacesped viene SIN mucho cuidado para no pellizcar o da_ar los ACEITE O GASOLINA en el motor.
- Page 22 FAMILIARICESE CON SU SEGADORA LEA ESTE MANUAL DEL DUEI_IO Y I_AS REGLAS DE SEGURIDAD ANTES DE OPERAR SU SEGADORA. Compare las ilustraciones con su segadora para familiarizarse con la ubicaci6n de los diversos contreles y ajustes. Guarde este manual para referencia en el future. Estos s{mbolos pueden apareser sobre su segadora o en la literatura proporcionada con el producto.
- Page 23 • El movimiento hacia adelante parard cuando La operaci6n de cualquler la barra de control que exige la presencia segadora puede hacer que del operador se suelta. Para parar el salten objetos extrafios dentro movimiento hacia adelante sin parar el de sus ojos, Io que puede motor, suelte la barra de control que exige la producir dafios graves en _stos.
- Page 24 _PRECAUCI6N: No haga funcionar su Usted recibe un envase de aceite con la segadora sin puerta trasera cerrada o el unidad. Vierta lentamente 3/4 (15 onzas) de aceite en el tubo de relleno del motor. desviador de recortes o sin el recogedor de c6sped, aprobados, en su lugar.
- Page 25 CONSEJOS PARA SEGAR Y PARA HACER ARRANCAR EL MOTOR ACOLCHAR AVISO: Debido alas capas protectoras del motor, una cantidad pequeSa de humo puede IMPORTANTE: Para obtener el mejor estar presente durante el uso inicial del rendimiento mantenga la caja de la segadora producto y se debe considerar normal.
- Page 26 Revisar si hay sujetadores sueltos Limpiar/inspeccionar el recogedor de ES c_sped (si viene equipado) Lirnpiar la segadora misiSn (segadoras con poder propulsor) Limpiar debajo de la cubierta de la trans- sadas (se_adoras con poder propulsor) Revisar las correas y las poleas irnpul- Revisar o/aflladcambiar la cuchilla I_ 3 Tabla de lubricacibn...
-
Page 27: Del Producto
ESPECIFICAClONES DEL PRODUCTO Ndmero de serie: Fecha de compra: Capacidad y tipo de gasolina: 1.6 cuartos (regular sin plomo) Tipo de aceite (API-SF-SJ): SAE 30 (sobre 32°F);SAE 5W-30 (debajo 32°F) Capacidad de aceite: 20 onzas Bujfa (abertura: .020") Champion RC12YC Torsi6n del pemo de la cuchilla: 35-40 FT. - Page 28 RECOGEDOR DE C_SPED CAUDADES DE VISCOSIDAD DE SAE • El recogedor de c6sped puede ser rociado con el agua de la manguem pero tiene que estar seco cuando se vaya a usar. • Revise su recogador de c6sped a menudo para verificar si estd dafiado o deteriorado.
- Page 29 SILENCIADOR FILTRO DE AIRE Su motor no va a funcionar en forma Inspeccione y cambie el silenciador si estd adecuada si usa un filtro sucio. Limpie el correfdo puede producir un peligro de incendio elemento del prefiltre de espuma despues de y/o da_o.
- Page 30 PARA REMOVER LA CORREA DE IMPULSI6N 1. Remueva la cubierta de la impulsi6n. Remueva la correa empujando hacia abajo en la polea de la caja de engranajes. Haga descansar la segadora en su lado con el filtro de aire y el carburador mirando hacia arriba.
- Page 31 CARBURADOR IMPORTANTE: Nunca manipule el regulador del motor, el que ha sido ajustado en la fdbdca Su carburador no es ajustable. Si su motor no estd fun¢ionando en forma adecuada debido a para la velocidad del motor adecuada. Puede ser peligroso hacer funcionar el motor a una problemas que se sospecha vienen del velocidad por sobre el ajuste de alta velocidad carburador, Ileve su segadora a contacto con...
- Page 32 • Nunca use los productos para limpieza del Tire la manilla de arranque lentamente carburador o del motor en el estanque de unas cuantas veces para distribuir el aceite. combustible pues se pueden producir dabos permanentes. Cambie por una bujfa nueva. •...
-
Page 33: Solucion De Problemas
SOLUCION DE PROBLEMAS - Vea la secci6n apropiada en el manual amenos que estd dirigido a un centro de servico Sears. CORRECCI(_N PROBLEMA CAUSA Mal corte- 1. Cuchilla desgastada, doblada 1. Cambie la cuchilla. Apriete el disparejo o suelta. pemo de la cuchilla. 2. - Page 34 SERVICE NOTES...
- Page 35 CRAFTSMAN ROTARYLAWN MOWER - - MODEL NUMBER 917.378770 GEAR CASE ASSEMBLY - - PART NUMBER 175258 KEY PART DESCRIPTION 17490416 Tapping Screw 1/4-20 x 1-1/4 175248X[]04 Engagement Bracket 137053 Shifter 57072 Seal 48373 Gear Case Halves Kit (Includes Key Numbers 4 and 7)
- Page 36 CRAFTSMAN ROTARYLAWN MOWER - - MODEL NUMBER 917.378770 10_,i...
- Page 37 CRAFTSMAN ROTARY LAWN MOWER - - MODEL NUMBER 917.378770 PART KEY PART DESCRIPTION DESCRIPTION 181472 Upper Handle, with Grip 175060X004 Selector Spring 151721X479 Lower Handle 165762X004 Axle Arrn Assembly LR 180955 Control Bar 18062.5 Hubcap 133107 165912 Bolt Engine Zone Control Cable...
- Page 38 CRAFTSMAN ROTARY LAWN MOWER - - MODEL NUMBER 917.378770...
- Page 39 CRAFTSMAN ROTARY LAWN MOWER - - MODEL NUMBER 917.378770 KEY PART KEY PART DESCRIPTION DESCRIPTION 179681 DriveCover Control Cable Assembly 175065 751152 Locknut #10-24 132010 Hex Flange Nut 158755 Hex Washer Head Screw 1/4-20 x 2.12 137052 Drive Pulley 175436...
-
Page 40: Briggs & Stratton
BRIGGS & STRATTON 4-CYCLE ENGINE MODEL NUMBER 128602-0215-E1 lO" 914_' 718 0 I 1058 OWNER'S MANUAL I 46 _ 1095 VALVE OVERHAUL KIT 868_ 15_ 2o_... - Page 41 BRIGGS& STRATTON 4-CYCLEENGINE MODEL NUMBER 128602-0215-E1 425 I 163 _=_ 51AJo_J_ ! I "'-=J 443% 259_ 1631 190_ 670 _) 121 CARBURETOR OVERHAUL KIT 524_ 633_ 104<:_ 127(_ 134_ 163_ 977 CARBURETOR GASKET SET 633_ 137("'_ 276 _ 163d...
- Page 42 MODEL NUMBER 128602-0215-E1 MODEL NUMBER 128602-0212-E1 597 _' 334_' I 1036 LABEL-EMISSION 1019 KIT-LABEL 358 ENGINE GASKET SET 1005 KEY PART PART DESCRIPTION DESCRIPTION 691137 Screw (Cylinder Head) 692670 Cylinder Assembly 399269 Kit-Bushing/Seal 691680 Plug-Oil Drain 691457 Crankshaft 299819 • SeaI-Oil(MagnetoSide) 499619 Sump-Engine 399781...
- Page 43 BRIGGS & STRATrON 4-CYCLE ENGINE MODEL NUMBER 128602-0215-E1 PART PART DESCRIPTION DESCRIPTION 695161 Cup.Flywbeel 499631 RingSet-Piston (Standard) 692299 Plate-PawlFdction 692785 Ring Set-Piston (.010" O.S.) 281505 Pawt-Ratchet 692786 Ring Set-Piston (.020"O.S.) 231082 Nut (Governor ControlLever) 692787 Ring Bet-Piston (.030" O.S.) 499621 Dipstick 691866 Lock-Piston Pin...
- Page 44 Forrepairof majorbrandappliancesin your own home... no matterwho madeit, no matterwhosold itJ Arvane, day orni_t (U.SA andCanada) For repairof carry-inproductslike vacuums, lawnequipment,and electronics, callfor the nearestSears Parts and Repair Center. 1-800-488-1222 Any'm_, d ay orn_nt ( U.SAu_y) www,sealP&com For the replacementparts,accessoriesand owner'smanuals that you need to do-it-yourself, call Sears PartsDirectS=! 1-800-366-PART 6a.m.-11 p.m., 7daysaweek...
Need help?
Do you have a question about the 917.378770 and is the answer not in the manual?
Questions and answers
**** que otro nombre se conoce 917.378770 carburador
Another name for the Craftsman 917.378770 carburetor is part number 496115.
This answer is automatically generated