Table of Contents
Advertisement
Available languages
Available languages
Advertisement
Table of Contents

Related Manuals for Craftsman 917.378870


Summary of Contents for Craftsman 917.378870
- Page 1 Manual CRAFTSMAN° 6.75 Horsepower 21" Rear Discharge Model No. 917.378870 Espa_o[, p. 18 CAUTION: Read and follow a[[ Safety Rules and Instructions before operating this equipment U.S.A. Sears, Roebuck and Co., Hoffman Estates, IL 60179 Visit our Craftsman website: www.sears.com/craftsman...
- Page 2 Sears Service ......Back Cover LIMITED TWO YEAR WARRANTY ON CRAFTSMAN POWER MOWER For two years from date of purchase, when this Craftsman Lawn Mower is maintained, lubricated, and tuned up according to the operating and maintenance instructions in the...
- Page 3 L GENERAL OPERATION Always wear safety goggles or safety glasses with side shields when operating * Read, understand, and follow all mower. instructions on the machine and in the manual(s) before starting. Be thoroughly H. SLOPE OPERATION familiar with the controls and the proper Slopes are a major factor...
- Page 4 Neverfill containers insidea vehicle, on Keepnuts and bolts,especially blade a truck or trailer bed with a plastic liner. attachmentbolts, tight and keep equip- Always place containerson the ground ment in good condition. awayfrom your vehicle beforefilling. Nevertamperwith safetydevices.Check Removegas-poweredequipmentfrom their proper operationregularly. the truck or trailer and refuel it on the Keepmachinefree of grass, leaves,or ground.
- Page 5 Repair Protection Agreements Congratulations on making a smart pur= Fast help by phone = phone support chase. Your new Craftsman® product from a Sears technician on products designed and manufactured for years requiring in=home repair, plus conve- dependable operation. But like all prod- nient repair scheduling.
- Page 6 Read these instructions and this manual Operator presence controU bar its entirety before you attempt to assemble or operate your new lawn mower. mMPORTANT: This lawn mower is shipped WITHOUT OIL OR GASOLINE in the engine. Your new lawn mower has been as= sembled at the factory...
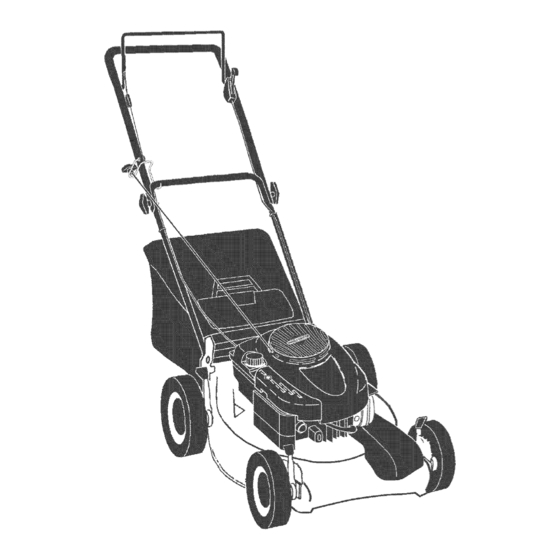
- Page 7 KNOWYOUR LAWN MOWER READ THIS OWNER'S MANUAL AND ALL SAFETY RULES BEFORE OPERATING YOUR LAWN MOWER. Compare the illustrations with your lawn mower to familiarize yourself with the location of various controls and adjustments. Save this manual future reference. These symbols may appear on your...
- Page 8 TO ADJUST CUTTmNG HEmGHT The operationof any lawn Raise wheels for low cut and lower wheels SA_ETYGLASSES mowercan result in foreign for high cut, adjust cutting height to suit objects thrown into the your requirements. Medium position eyes, which can result in best for most lawns.
- Page 9 CAUTmON: Alcohol blended fuels (called gasohol or using ethanol or metha- nol) can attract moisture which leads to separation and formation of acids during storage. Acidic gas can damage the fuel Grass system of an engine while in storage. catcher avoid engine problems, the fuel system...
- Page 10 MOWING TiPS MULCHING MOWING TiPS A CAUTION: Do not use de-thatcher iMPORTANT: For best performance, bladeattachmentson your mower.Such keepmowerhousingfree of built-up attachmentsare hazardous,will damage grass and trash.See "CLEANING"in the Maintenancesection of this manual. your mowerand could void your warranty. ,_ Under certain conditions,such as very ,_The special muJchingbladewill recut tall grass, it may be necessaryto raise the grassclippings many times and...
- Page 11 MAINTENANCE BEFORE AFTER EVERY EVERY EVERY BEFORE EACH EACH 25HOURS SCHEDULE HOURS OR SEASON HOURS STORAGE Check for Loose Fasteners Clean / Inspect Grass Catcher Check Tires Check Drive Wheels Clean Lawn Mower ..Clean under Drive Cover *** Check Drive Belt / Putleys *** Check / Sharpen / Replace Blade...
- Page 12 LAWN MOWER mMPORTANT: Blade bolt is heat treated. If bolt needs replacing, replace only with Always observe safety rules when per- approved bolt shown in the Repair Parts forming any maintenance. section of this manual. TmRES * Keep tires free of gasoline, oil, or insect Crankshaft Blade adapter.
- Page 13 Stop adding oil when you reach FULL mark on the dipstick. Wait a LUBRmCATmON minute to allow oil to settle. Use only high quality detergent oil rated with Continue adding small amounts of oil, API service classification SG-SL. Select the rechecking the dipstick until oil level...
- Page 14 Keep finished surfaces and wheels free mMPORTANT: For best performance, keep of all gasoline, oil, etc. mower housing free of built-grass We do not recommend using a garden trash. Clean the underside of your mower hose to clean lawn mower unless after each use.
- Page 15 or it may result in personal injury. If you believe that engine is running too fast or too slow, take your mower to a Sears other qualified service center for repair and adjustment. CARBURETOR Your carburetor is not adjustable. If your engine does not operate properly due to sus-...
- Page 16 ENG(NE Drain oil (with engine warm) and replace FUEL SYSTEI_,! with clean engine oil. (See "ENGINE" (MPORTANT: It is important to prevent the Maintenance section of this manual). gum deposits from forming in essentia( CYUNDER fuel system parts such as carburetor, fuel Remove spark plug.
- Page 17 TROUBLESHOOTmNG o See appropriate section in manuam unmess directed to a Sears Parts & Repair Center. PROBLEM CAUSE CORRECTmON Loss of power 1. Raise cutting height. Rear of mower housing blade dragging in grass. Cutting too much grass. Raise cutting height.
- Page 18 Programa de Mantenimiento ......27 GARANTiA LUMUTADADE DOS ANOS PARA LA SEGADORA A MOTOR CRAFTSMAN Por dos (2) a_os, a partir de Uafecha de compra, cuando esta Segadora Craftsman se mantenga, Uubrique y afine segun Uasinstrucciones para Uaoperaci6n y eUmantenimbnto en eUmanuaU deU due_o, Soars reparara"...
- Page 19 L OPERACION Siempre use gafas de seguridad o anteojos con protecci6n lateral cuando opere la sega- ° Antes de empezar, debe famHiarizarse dora. compUetamente con UoscontroUes y eUuso correcto de Uamaquina. Para esto, debe Ueer y comprender todas Uasinstrucciones HoOPERAClON SOBRE LAS CUESTAS aparecen en ]a maqu[na yen ]os manuaUes Los accidentes ocurren con mas frecuencia en...
- Page 20 o Nunca repostar la maquina al interior de un o Mantenga las tuercas y los pernos, espeo local. cialmente los pernos del accesorio de la Nunca guardar la maquina o el contenedor cuchilla, apretados y mantenga el equipo en buenas condicione& de gasolina donde hay una llama abierta, chispa o luz piloto como una caldera u otros Nunca manipule de forma indebida los...
- Page 21 Ayuda r_pida pot tei6fono - soporte te[e= nuevo producto Craftsman® est,. disefiado fan[co per parte de un t6cn[co Sears sobre y fabricado para funcionar de mode fiabUe per productos que requieren un arreglo en casa, muchos aSos.
- Page 22 Lea estas instrucciones y este manuaH compHeo Barra de control que sxig _resencia del operador tamente antes de tratar de montar u operar su segadora nueva. Mango superior iiVlPORTANTE: Este cortac6sped viene SiN ACEHTE O GASOLHNA en el motor. Mango inferior Su segadora nueva ha sido montada en Ha LEVANTAR fabrica con Haexcepci6n de aquellas partes que...
- Page 23 FAMmUARICESE CON SU SEGADORA LEA ESTE MANUAL DEL DUENOY LAS REGLAS DE SEGURIDAD ANTES DE OPARAR SU SEGADORA. Compare las ilustraciones con su segadora para familiarizarse con la ubicaci6n de los diversos controles y ajustes. Guarde este manual para referencia en el futuro. Estos s_mbolos pueden apareser sobre su segadora o en la literatura proporcionada...
- Page 24 PARA AJUSTAR LA ALTURA DE CORTE La operaci6n de cuaUquier Levante las ruedas para el corte bajo y baje las segadora puede hacer que ruedas para el corte alto., ajuste la altura de saUten objetos extra_os dentro de corte para que se acomode a sus requisitos. La sus ojos, Uoque puede producir posici6n del medic es la mejor para la mayoria da_os graves en 6stos.
- Page 25 3. VacieHos r ecortes deHa boHsa u sando tanto _PRECAUCKSN: Los combustibHes eH mango dell b astidor c omo6H deHa boHsa. mezcHados con aHcohoH(conocidos como AVlSO:Noarrastre Ha boHsa c uando Ha vacie; gasohoH, o eHuso de etanoH o metanoH) pueden se producira"...
- Page 26 _ONSEJOS PARA SEGAR CONSEJOS PARA SEGAR Y ACOL= PRECAUCI6N: No utHizar dispositivos anti° CHAR paja de Uahoja en Uasegadora ya que estos mMPORTANTE: Para obtener eUmejor accesorios son peHgrosos, pueden daSar su rendimiento mantenga la caja de la segadora segadora y anuUar su garantia. sin acumulacion de cesped y basura.
- Page 27 PROGRAMA ANTES DESPUES CADA CADA CADA ANTES DEL DE ¢ADA DE CADA 25HORAS ALMACE- MANTENIMIENTO HORAS TEMPORADA HORAS NAMmENTO Revisar si hay Sujetadores Sueltos Limpiar/Inspeccionar el Recogedor de C6sped * Controlar los Neumaticos Controlar las Ruedas Motrices *** Limpiar la Segadora ..
- Page 28 SEGADORA Ponga la cuchilla en el adaptador de 6sta alineando los dos (2) agujeros en la cuchilla Siempre observe UasregUas de seguridad cuo con las salientes elevadas en el adaptador. ando haga eUmantenimiento. Asegurese de que el borde de salida de LLANTAS la cuchilla (opuesto al borde afilado) est6 o Mantenga UasHantas sin gasoHna, aceite o...
- Page 29 CAJADEENGRANAJES Parar de afadir aceite cuando se alcanza la o Paramantener e [sistema de[mpuUsi6n seffal de Ileno (FULL) en lavarilla. Esperar un funcionando e nformaadecuada, [acaja minuto para dejar que el aceite se arregle. deengranajes y e[AreaaUrededor de[a Continue agregando cantidades pequeas [mpuUsi6n tienenquemantenerse H mpias y de aceite y vuelva a inspeccionar...
- Page 30 SILENCIADOR o Haga descansar [a segadora en su [ado. [nspeccione y cambie e[ sHenciador s[ esta Asegurese que e[ fHtro de a[re y que e[ carbuo corroido puede producir un peHgro de [ncend[o rador queden mirando hacia arriba. Limpie la y/o daSo.
- Page 31 3. Apreite elmango inferior haciadentropara I_IOTOR removerlo d elasclavijas demontaje. VELOCIDAD DEL MOTOR 4. Gireelmango inferior potencima para La velocidad del motor ha sido ajustada en levantar o bajarel mango. la fabrica. No trate de aumentar la velocidad 5. Vuelva a montar l asclavijas dehorquilla pot del motor pues se pueden producir lesiones encima delasclavijas demontaje.
- Page 32 AVlSO: El estabilizador de combustible es una Suelte los pernos de montaje del mango superior Io suficiente como para permitir alternativa aceptable para reducir a un minimo que el mango superior se pueda doblar la formaci6n de dep6sitos de goma en el como hacia atras.
- Page 33 SOLUCI6N DE PROBLEmVIAS =Vea ia secci6n apropiada en ei manual amenes est_ dirigido a un centre de service Sears. PROBLEm_IA CAUSA No arranca FHtro de aire sucio. Limpie/cambie eHfiHtrode aire. Sin combustibHe. LHeneeHestanque de combustibHe. CombustibHe rancio. Drene eHestanque de combustibHe y vueHva a HHenar e Hestanque con gasoHina nueva.
- Page 34 SOLUCI6N DE PROBLEMAS oVea la secci6n apropiada en el manual amenos est_ dirigido a un centro de servico Sears. CORRECCI6N PROBLEMA CAUSA _lai corte- CuchHUadesgastada, doMada 1_ Cambie la cuchilla, Apdete el pemo o sueUta. de la cuchilla. disparejo AUtura de Uasruedas dispareja. 2_ Ajuste todas las ruedas a la misma altura.
- Page 35 CRAFTSMAN ROTARY LAWN MOWER ° ° MODEL NUMBER 917.378870 GEAR CASE ASSEMBLY o o PART NUMBER 180184 PART PART DESCRmPTION DESCRIPTION 183509 Washer 183497 Case, Lower 183498 Case, Upper 183510 Seal, Case 183499 Gear, 27Teeth 183511 Bushing 183500 Lever, Clutch...
- Page 36 CRAFTSMAN ROTARY LAWN MOWER o - MODEL NUMBER 917.378870...
- Page 37 CRAFTSMAN ROTARY LAWN MOWER ° o MODEL NUMBER 917.378870 PART PART DESCRIPTION DESCRIPTION 183496X479 Upper Handle 175060X004 Selector Spring 151721X479 Lower Handle 186576X004 Axle Arm Assembly, Rear, LH 146771 Control Bar 77400 Hubcap 182755 Bolt Engine Zone Control Cable 184193...
- Page 38 CRAFTSMAN ROTARY LAWN MOWER - - MODEL NUMBER 917.378870 <...
- Page 39 CRAFTSMAN ROTARY LAWN MOWER ° - MODEL NUMBER 917.378870 PART PART DESCRIPTION DESCRIPTION 184588 Drive Cover Control Cable Assembly 191890X428 167387 Bearing, Wheel Adjuster 132010 Hex Nut, Flanged 175262 Pan Head Tapping Screw #1G24 x 2_3/4 189407 Drive Pulley 158755 Hex Washer Head Screw 1/4-20 x 2.12...
- Page 40 BRmGG$ & $TRATTON 4=CYCLE ENGmNE MODEL NUMBER 125K02-0317-E1 8471 I 1019 LABEL KI'I] 718_ 868 40 307_ 27 _...
- Page 41 BRJGG$ & $TRATTON 4=CYCLE ENGINE MODEL NUMBER 125K02-0317-E1 2221 © 443_ 334_ 615 0 19231 616 I_ 977 CARBURETOR GASKET SET 633 0 276_ 127_...
- Page 42 BRJGGS & STRATTON 4=CYCLE ENGINE MODEL NUMBER 125K02-0317-E1 358 ENGINE GASKET © 3001 1036 EMISSIONS LABEL _190 670 1058 OWNER'S MANUAL 1329 REPLACE- MENT ENGINE 1330 I REPAIR [MANUAL PART PART DESCRiPTiON DESCRmPTmON 697322 CyIinder Assembly 691092 Screw (Engine Sump) 399269 Kit-Bushing/Seal 692315...
- Page 43 BRmGGS & STRATTON 4=CYCLE ENGmNE MODEL NUMBER 125K02-0317-E1 PART PART DESCRiPTiON DESCRmPTmON 691270 Spring-Valve (Exhaust) 692296 • SeaI-DipstickTube 694086 Guard-FIywheel 495265 Tube-Dipstick Retainer-Valve 691923 Grommet 692194 691997 Slinger-Governor/Oil 92613 Bolt (Governor Contro! Lever) 690548 Tappet-Valve 698589 Screw (ControI Cover) 691449 Camshaft 697734 Cover-Breather Passage...
- Page 44 Your Home For repair - in your home - of all major brand appliances, lawn and garden equipment, or heating and cooling systems, no matter who made it, no matter who sold it! For the replacement parts, accessories owner's manuals that you need to do-it-yourself. For Sears professional installation of home appliances...
Need help?
Do you have a question about the 917.378870 and is the answer not in the manual?
Questions and answers