Table of Contents
Advertisement
Available languages
Available languages
Operator's
Manual
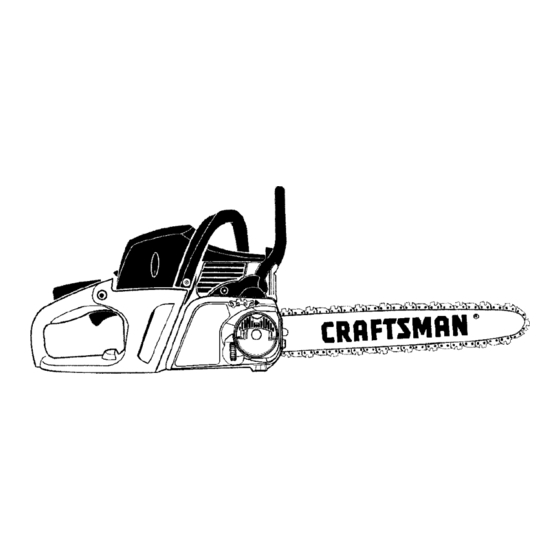
I CRRFTSMRN°I
2.6 cu.in./42cc 2-Cycle
GASOLINE
CHAIN
SAW
Model No.
358.350991
- 18 in. Bar
•
Safety
• Assembly
•
Operation
•
Maintenance
•
Parts List
•
Espa_ol,
p. 28
WARNING:
Read and follow all Safety
Rules and Operating
Instructions
before first use of this product.
For answers
to your questions
about this product:
Call 7 am-7
pm, Mon-Sat;
Sun, 10 am-7
pm
1-800-235-5878
(Hours listed are Central Time)
Sears, Roebuck
and Co., Hoffman
Estates,
IL 60179 U.S.A.
115350026
Rev. 1 4/1/10
BRW
Advertisement
Table of Contents

Related Manuals for Craftsman 358.350991


Summary of Contents for Craftsman 358.350991
- Page 1 Operator's Manual I CRRFTSMRN°I 2.6 cu.in./42cc 2-Cycle GASOLINE CHAIN Model No. 358.350991 - 18 in. Bar • Safety • Assembly • Operation • Maintenance • Parts List • Espa_ol, p. 28 WARNING: Read and follow all Safety Rules and Operating Instructions before first use of this product.
- Page 2 (2) years from the date of pur- chase, return it to any Sears store, Sears Service Center, or other Craftsman outlet in the United States for free repair (or replacement if repair proves impossible).
-
Page 3: Carburetor Adjustment
Sears Installation Service For Sears professional installation of home appliances, garage door openers, water heaters, and other major home items, in the U.S.A. or Canada call 1-800-4-MY-HOME®. you have any condition that might be WARNING: Always disconnect aggravated by strenuous work, check spark plug wire when making repairs ex- with doctor before operating. -
Page 4: Guard Against Kickback
"_, _,. ':, Kickback Path standers. Use only Craftsman acces- sories and replacement parts asrec- ommended. Never modify your saw. • Maintain chain s aw with care. • Keep u nit s harp a nd clean f orbetter Avoid Obstructions and safer performance. - Page 5 REDUCE THE CHANCE MAINTAIN CONTROL KICKBACK Stand to the left of the saw • Recognize that k ickback canhap- pen. With abasic u nderstanding underside Thumb on kickback, you can reduce the ele- ment ofsurprise which c ontributes "1 accidents. •...
- Page 6 • Reduced-Kickback Guide B ar, de- be made by an authorized Sears Ser- signed with asmall radius tipwhich vice Center. Take your unit to the place reduces the size ofthe kickback of purchase if purchased from a servic- danger zone onthe bar t ip.This type ing dealer, or to your nearest Sears Ser- ofbarhas been d emonstrated tosig-...
-
Page 7: Carton Contents
STANDARDS: This chain s aw islisted responsible formaintaining the operat- ing condition ofthese p arts. Failure to byUnderwriters Laboratories, Inc. i nac- dosoisaviolation ofthe law. R efer to cordance with American National Stan- dards for G asoline-Powered Chain the Customer Responsibilities chart in theMAINTENANCE... - Page 8 Craftsman CAUTION: Never use straight gasoline chain saw bar oil. If Craftsman bar oil in your unit. This will cause permanent is not available, you may use a good engine damage and void the limited grade SAE 30 oil until you are able to warranty.
-
Page 9: Fuel Requirements
FUEL R EQUIREMENTS This engine requires the use of _WARNING: Do not attemptto minimum 87octane [R+M]/2 clean throw or drop-start the chain saw. gasoline. Doing so will put the operator at risk of IMPORTANT serious injury due to loss of control of the chain saw. -
Page 10: Starting A Warm Engine
CHOKE IDLE LEVER than 0.020" (0.5 mm) thick. Repairs on a chain brake should be made by your Sears Service Center. Take your unit to the place of purchase or to the near- HALF est Sears Service Center. FULL • This saw is equipped with a chain brake. -
Page 11: Operating Tips
OPERATING TIPS cut at night since you will not be ale to • Check chain t ension before first u se, see well, nor during bad weather such after 1 minute ofoperation, and each as rain, snow, or strong winds, etc. time before you start the chain s aw. - Page 12 NOTE: If the tree has large buttress • As tree starts to fall, stop saw, put it roots, remove them before making the down, and get away quickly on your notch. If using saw to remove buttress planned retreat path. roots, keep saw chain from contacting •...
- Page 13 Using a log for support Ov°,co,t, 2 nd Cut Undercutting'_ - : _-- . _ Undercutting involves cutting on the underside of the log with top of saw against the log. When undercutting use light upward pressure. Hold saw firmly and maintain control. The saw will tend to push back toward you.
- Page 14 • Be alert for springback. Watch out for could cause limbs to fall and pinch the branches that are bent or under saw. pressure. Avoid being struck by the PRUNING branch or the saw when the tension in the wood fibers is released. _ILWARNING: Limit pruning to limbs •...
-
Page 15: General Recommendations
GENERAL RECOMMENDATIONS The warranty on this unit does not cov- Guide er items that have been subjected operator abuse or negligence. To re- ceive full value from the warranty, the operator must maintain unit as instructed in this manual. Various ad- Adjusting Screwdriver justments... - Page 16 Check the condition of guide bar each time chain is sharpened. A worn guide bar will damage the chain and make cutting difficult. After each use, ensure ON/STOP switch is in the STOP position, then clean all sawdust from the guide bar and sprocket hole.
- Page 17 INSPECT AND CLEAN UNIT AND Cylinder DECALS Air Filter Cover Cover • After each use, inspect complete unit for loose or damaged parts. Clean the unit and decals using a damp cloth with a mild detergent. • Wipe off unit with a clean dry cloth. COOLING SYSTEM To keep the working temperature...
-
Page 18: Replace Spark Plug
REPLACE SPARK PLUG The spark plug should be replaced each year to ensure the engine starts easier and runs better. Ignition timing is fixed and nonadjustable. 1. Loosen 3 screws on cylinder cover. Remove the cylinder cover. Pull off the spark plug boot. Remove spark plug from cylinder and discard. -
Page 19: Chain Replacement
• File on the forward stroke only. contact your Sears Service Center or Use 2 or 3 strokes per cutting call our customer assistance help line at edge. 1-800-235-5878. • Keep all cutters the same length CHAIN REPLACEMENT when filing. •... - Page 20 Slide guide bar on bar bolts until CAUTION: It is very important when guide bar stops against clutch installing the clutch cover that the adjust- drum sprocket. ing pin aligns into the adjusting pin hole in the bar. Failure to install the clutch cover correctly may result in permanent damage to your chain saw.
-
Page 21: Seasonal Storage
Run engine at cannot reach sparks or open flames least 3 minutes after adding stabilizer. from water heaters, electric motors or Craftsman 40:1,2-cycle engine oil (air switches, furnaces, etc. cooled) is blended with fuel stabilizer. • Store chain saw with all guards in... - Page 22 TROUBLESHOOTING TABLE WARNING: Always stop unit and disconnect spark plug before perform- ing all of the recommended remedies below except remedies that require operation of the unit. TROUBLE CAUSE REMEDY Engine will not 1. Move ON/STOP switch to ON. 1. ON/STOP switch in start or will run STOP position.
-
Page 23: Troubleshooting
TROUBLESHOOTING TABLE - Continued TROUBLE CAUSE REMEDY 1. Chain tension too 1. See "Check Chain Tension" in the Chain does not move when en- Maintenance Section. tight. gine is acceler- 2. Carburetor requires 2. Contact Sears Service (see back cover). ated. - Page 24 YOUR WARRANTY RIGHTS authorized repair center as soon as a OBLIGATIONS: The U.S. Environ- problem exists. Warranty repairs mental Protection Agency/California should be completed in a reasonable Air Resources Board and Sears, Roe- amount of time, not to exceed 30 days. buck and Co., U.S.A., are pleased to If you have any questions regarding...
- Page 25 ADD-ON O R MODIFIED PARTS: The MAINTENANCE, REPLACEMENT use ofadd-on o rmodified parts c an AND REPAIR OF EMISSION begrounds fordisallowing awarranty LATED PARTS: Any Sears approved claim. Sears i snot l iable t ocover fail- replacement part used in the perfor- ures o fwarranted parts c aused by the mance of any warranty maintenance...
- Page 26 Sears, Centro de Servi- cios Sears u otra tienda Craftsman en los Estados Unidos para su reparaci6n gra- tuita (o reemplazo si no es posible repararlo).
- Page 27 Aplican algunas limitaciones y exclusiones. Para conocer los precios e in- formacion adicional en EE.UU, Ilame al 1-800-827-6655.*La cobertura Canada varia en algunos articulos. Para obtener los detalles completos, Ilame a Sears Canada al 1-800-361-6665. Servicio de instalacion de Sears Para la instalaci6n profesional de Sears de electrodomesticos,...
- Page 28 Retire la tapa len- dores. Use exclusivamente los acce- tamente y reabastezca el aparato. sorios y repuestos Craftsman recom- • Antes de guarder el aparato, vacie el endados. Nunca modifique la sierra. dep6sito de combustible. Arranque •...
- Page 29 PROTEJASE CONTRA objeto extraSo a la madera en el RECULADAS corte a Io largo de la parte inferior de Ud. debe seguir todas las precau- la barra gufa y la cadena se detiene ciones e instrucciones de seguridad repentinamente. Esta detenci6n para ayudar e evitar las reculadas pentina de la cadena tira de la sierra las dem&s fuerzas que pueden causar...
- Page 30 • Use la barra Guia Reducidora ud. puede perder el equilibrio y el con- trol de la sierra. Reculadas y la Cadena Minimizado- ra de Reculadas recomendadas • No corte arriba del nival de los horn- bros. Es dificil mantener el control de para su sierra.
- Page 31 • Las Cadenas Minimizadoras de Re- sa la espada hacia arriba y hacia culadas han satisfecho los requisitos atr&s, en direcci6n al operador. de rendimiento del ANSI B175.1 (Re- • Si la cadena queda atrapada por la quisitos de Seguridad para las Sier- parte superior de la espada, esta...
-
Page 32: Mantenimiento
Manija Delantera de Mano Cuerda de Arranque Delantera _, Interruptor O N/STO P Palanca del Cadena Silenciador cebador/ marcha lenta r&pida CRAFTSMAN° Orificio del Tapa del Tanque de_ Engranaje Lubricante de Barra Bombeador Caja del Arranque Tapa del Tanque de Combustible... - Page 33 Tapa del Cilindro Cuchillas Marcador de profundidad Fren° de (_) Direcci6n de Traba del Cadena Acelerador _'\ 1' 4 • Rotacidn de la Cadena Manija Estabones Funcionamiento Trasera Barra Guia Captador Gatillo Rueda de Perilla de de Cadena Acelerador Cubierta del Embrague Ajuste la Barra...
- Page 34 2 tiempos enfriados a mire. Recomendamos el aceite de sintetico Aseg0rese el freno de cadena se dis- de la marca Craftsman. Mezcle la activa tirando el protector de mano de- lantero hacia atr&s, acerc&ndolo a la gasolina con el aceite en la proporci6n...
- Page 35 miento controlado y constante; lue- ,_ADVERTENClA: No intente go, proceda al siguiente paso. hacer arrancar la sierra de cadena AVlSO: Si el motor parece que este arroj&ndola o dej&ndola caer. Esto intentando arrancar antes del quinto pondr& al operador en riesgo de sufrir tir6n, pare de tirar y proceda inmediata- lesiones graves debidas a la p@dida mente al siguiente paso.
-
Page 36: Freno De Cadena
laposici6n OFF C HOKE) yluego s iguien- Coloque la sierra en suelo firme. Sos- doelprocedimiento depuesta enmar- tenga la manija trasera con la mano cha para m otores calientes que sehas derecha y la manija delantera con la indicado anteriormente. Asegt3rese mano izquierda. - Page 37 • Corte varios troncos pequeffos como • Estudie las condiciones naturales que pr&ctica, usando la siguiente tecnica, puedan causar que el &rbol caiga en una direcci6n determinada. para acostumbrarse al manejo de la sierra, antes de empezar un proyec- Entre las condiciones naturales que to de grandes dimensiones.
- Page 38 CORTE DE MUESCA Y TUMBADO • Este alerta a los indicios de que el DEL ARBOL &rbol est& por caer: los crujidos, ensanchamiento del corte de tumba- • Haga el corte de muesca cortando primero la base de la muesca. Haga do y los movimientos de las ramas que el corte atraviese un tercio del an-...
- Page 39 cuidadosamente de nuevo en el corte. • Tenga cuidado con los troncos presio- nados de un lado. Yea la ilustraciones No intente poner en marcha la sierra de nuevo cuando est,. apretada o atascada anterior pars seccionar un tronco en un tronco. presionado.
-
Page 40: Puntos Importantes
PUNTOS IMPORTANTES • Retire las ramas m_.s grandes ylas • Trabaje lentamente, con las dos man- ramas deapoyo c on latecnica deun ossujetando firmemente lasierra. tercio y dos tercios descirta enlasec- ci6n SECCIONAMIENTO SIN APOYO. Mantenga elequilibrio, con los pies e n una superficie estable. - Page 41 RESPONSABILIDADES DEL USUARIO ADVERTENClA: Desconecte la bujia antes de hacer cualquier mantenimiento, con la excepci6n de los ajustes al carburador. c+_+i Antes i Despu6s i Cada Fechas Anote las fechas al completar ;; de i Anuat- el servicio de rutina i horas horas i mente...
- Page 42 VERIFIQUE QUE NO HAYA FIJA- DORES O PIEZAS SUELTAS Apriete la Afloje la cadena cadena • Tuercas de la barra • Cadena • Silenciador • Protector del Cilindro • Filtro de Aire • Tornillos de las Manijas • Fijadores Anti-Vibraci6n •...
- Page 43 AVISO: La tensi6n de la cadena es Retire el Aserrin de la _t correcta cuando el peso de la cadena no causa una comba por debajo de la barra guia (con la sierra de cadena Ranura de la_a__,_ apoyada en posici6n vertical), pero la cadena se mueve igualmente con lib-...
- Page 44 • Toma de aire en el mecanismo de ar- Cubierta Tapa del del Filtro Cilindro ranque de Aire • Deflector de aire • Palas de ventilador en el volante • Aletas de enfriamiento en el cilindro • Cubierta del cilindro (dirige el aire re- frigerante hacia el cilindro) Aire Limpie el sistema refrigerante...
- Page 45 6. Reinstale la rejilla antichispas, Tapa del cubierta del difusor del silenciador, cilindro y tuerca. Apriete firmemente. BUJIA Deber& cambiarse la bujia anualmente para asegurar que el motor arranque Cubie m&s f&cilmente y marche mejor. La de la buji_ cronometrizaci6n del encendido es fija e inalterable.
- Page 46 • Alinee las marcas de 30 ° del de la cadena que usa. Si el &ngulo del soporte para lima, paralelas a la gancho es incorrecto, aumentan probabilidades de reculadas, que pue- barra y al centro de la cadena. den producir lesiones graves.
- Page 47 PARA REEMPLAZAR LA CADENA: 1. Mueva el interruptor ON/STOP a la Punta de la Barra posici6n STOP. 2. Afloje y remueva por completo la perilla de la barra; para ello levante la palanca y girela hacia la izquierda. LAS CUCHILLAS DEBERAN APUNTAR EN DIRECCION A LA ROTACION Marcador de Profundidad ,,L-- Cuchillas...
- Page 48 AJUSTE ALCARBURADOR Ajuste las revoluciones hasta que el motor se mantenga en marcha sin que _ILADVERTENClA: Lacadena es- la cadena se mueva (la marcha lenta tar& enmovimiento durante lamayor es demasiado) o que el motor se aho- parte d eeste prodecimiento Use el gue (la marcha lenta es demasiado...
-
Page 49: Sistema De Combustible
3 minutos des- ques, los motores o interruptores elec- pues de ponerle estabilizador. tricos, calefactores centrales, etc. El aceite Craftsman 40:1 para motores • Guarde el aparato con todos los pro- de 2 tiempos (enfriados... - Page 50 TABLA DIAGNOSTICA ADVERTENCIA: Siempre apague el aparato y desconecte la bujia antes de hacer cualquiera de las reparaciones recomendadas a continuaci6n cepto reparaciones que requieran que el aparato este en operaci6n. CAUSA SOLUClON PROBLEMA 1. El interruptor est& en 1. Coloque el interruptoren ON. El motor no posici6n STOP.
- Page 51 (continuado) TABLA DIAGNOSTICA PROBLEMA CAUSA SOLUClON El motor 1. La mezcla de combus- 1. Vea"Abastecimiento marcha con tible se ha hecho Aparato" en la secci6n Uso. 2. Se ha instalado la bujia 2, Cb.mbiela por la bujia correcta, temperatura 3. Entre en contacto con el Servicio vada.
- Page 52 TABLA DIAGNOSTICA (continuado) PROMBLEMA CAUSA SOLUCION Parada del 1. La parte de arriba de 1. Vea "Afilaci6n de la Cadena" en cadena dentro las cuchillas no est_tn la secci6n Servicio y Ajustes. del corte, planas. 2. La barra tiene 2. Repara o reemplace protuberancias o est&...
- Page 53 m&quina demotor pequefio para u so de diagn6stico ha sido desempefiado fuera d ecarretera auncentro derepa- por un Centro de Servicio Sears. raci6n autorizado Sears tan pronto DANOS POR CONSECUEOIA: Sears como s epresente elproblema. Las re- podr& ser responsable de dafios ocurri- paraciones bajo g arantia deber&n dos a otras piezas del motor causados...
- Page 54 La informaciCn en la etiqueta del producto indica los normas de certificaciCn de su motor. Ejemplo: (Aho) EPA y/o CALIFORNIA. Informacion Importante en relaciCn al motor. Este motor satisface ..regulaciones de emision para mo- EMISSION CONTROL INFORMATION THIS ENGINE tores pequehos operados fuera de...
Need help?
Do you have a question about the 358.350991 and is the answer not in the manual?
Questions and answers