Table of Contents
Advertisement
Available languages
Available languages
Owner's Manual
JCRRFTSMnN'I
ROTARY LAWN MOWER
5.5 Horsepower
Power-Propelled
21" Multi-Cut
Model No.
917.378521
CAUTION:
Read and follow all
Safety Rules and Instructions
beforeoperatingthisequipment
Sears, Roebuck and Co., Hoffman Estates, IL 60179 U.S.A.
Visit our Craftsman website:www.sears.com/craltsman
Advertisement
Table of Contents

Related Manuals for Craftsman 917.378521


Summary of Contents for Craftsman 917.378521
- Page 1 Owner's Manual JCRRFTSMnN'I ROTARY LAWN MOWER 5.5 Horsepower Power-Propelled 21" Multi-Cut Model No. 917.378521 CAUTION: Read and follow all Safety Rules and Instructions beforeoperatingthisequipment Sears, Roebuck and Co., Hoffman Estates, IL 60179 U.S.A. Visit our Craftsman website:www.sears.com/craltsman...
- Page 2 Sears will repair free of charge any defect in material or workman- ship. If this Craftsman Lawn Mower is used for commercial or rental purposes, this warranty applies for only 90 days from the date of purchase. This Warranty does not cover: • Expendable...
- Page 3 I.GENERAL OPERATION • Always wear safety goggles or safety glasses with side shields when • Read, understand, and follow all operating mower. instructions on the machine and in the II. SLOPE OPERATION manual(s) before starting. Be thor- oughly familiar with the controls Slopes are a major factor related to slip and fall accidents which can result in the proper...
-
Page 4: Lawn Mower Maintenance
• Never run a machine inside a closed • Stop and inspect the equipment if you area. strike an object. Repair, if necessary, • Never make adjustments or repairs before restarting. with the engine (motor) running. • Never attempt to make wheel height Disconnect the spark plug wire, and adjustments while the engine (motor) is... -
Page 5: How To Set Up Your Lawn Mower
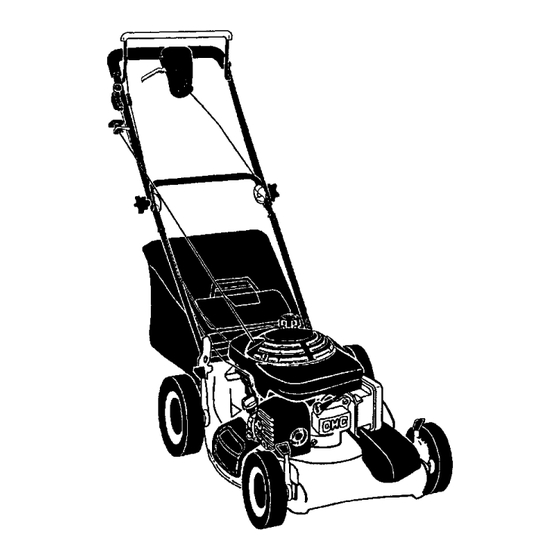
Read these instructions and this manual HOW TO SET UP YOUR LAWN in its entirety before you attempt to MOWER assemble or operate your new lawn TO UNFOLD HANDLE mower. IMPORTANT: Unfold handle carefully so IMPORTANT: This lawn mower is as not to pinch or damage control cables. - Page 6 KNOW YOUR LAWN MOWER READ THIS OWNER'S MANUAL AND ALL SAFETY RULES BEFORE OPERATING YOUR LAWN MOWER. Compare the illustrations with your lawn mower to familiarize yourself with the location of various controls and adjustments, Save this manual for future reference.
-
Page 7: Drive Control
NOTE: If after releasing the drive control The operation of any lawn the mower will not roll backwards, push mower can result in foreign the mower forward slightly to disengage objects thrown into the drive wheels. eyes, which can result in •... - Page 8 ACAUTION: Do not run your lawn LOWER WHEELS FOR HIGH CUT mower without rear door closed, clipping deflector or approved grass catcher in place. Never attempt to operate the lawn mower with the rear door removed or propped open. Lever RAISE WHEELS FOR LOW CUT TO CONVERT MOWER...
-
Page 9: Before Starting
TO EMPTY GRASS CATCHER ADD GASOLINE • Fill fuel tank to bottom of tank filler Lift up on grass catcher using the frame handle. neck. Do not overfill. Use fresh, clean, Remove grass catcher with clippings regular unleaded gasoline with a from under lawn mower handle. -
Page 10: To Stop Engine
• Pores in cloth grass catchers can TO START ENGINE become filled with dirt and dust with NOTE: Due to protective coatings on the use and catchers will collect less grass. engine, a small amount of smoke may be To prevent this, regularly hose catcher present during the initial use of the off with water and let dry before using. -
Page 11: Maintenance
MAINTENANCE SCHEDULE _,,,____,,I AsYou COMP'ETE S RV'CE REGULARSERVICE J__. _?'.._'_.._ f" DATES mill /lab Check for Loose Fasteners Clean'Inspect Grass Catcher (If Equipped) Clean Lawn Mower Clean Under Drive Cover (Power-Propelled Mowers) Check drive belVpulleys RE (Power-Propelled Mowers) ChecldSharpen/Replace Blade LubncationChart Clean Baffe,'y/Recharge ElectricStart MowersI... -
Page 12: Specifications
PRODUCT SPECIFICATIONS Serial Number: Date of Purchase: Gasoline Capacity / Type: 1.0 Quarts (Unleaded Regular) Oil Type (API-SFoSJ): SAE 10W30 Oil Capacity: 18.5 Ounces Spark Plug (Gap: .030") NGK BPR6ES Blade Bolt Torque: 35-40 ft. Ibs. The model and serial numbers will be found on a decal on the rear of the mower housing. - Page 13 GRASS CATCHER SAE VISCOSFrY GRADES • The grass catcher may be hosed with water, but must be dry when used. • Check your grass catcher often for damage or deterioration. Through normal use it will wear. If catcher needs _-MPIE_RE RA_E ANTIC_ATED B_ORE...
-
Page 14: Lawn Mower
SPARK PLUG AIR FILTER Replace spark plug at the beginning of Your engine will not run properly and may each mowing season or after every 100 be damaged by using a dirty air filter. hours of operation, whichever occurs first. Replace the air filter every 100 hours of Spark plug type and gap setting are... - Page 15 TO ASSEMBLE GRASS CATCHER TO REMOVE DRIVE BELT 1. Remove drive cover. Remove belt 1. Put grass catcher frame into grass bag from gearcase pulley by pushing with rigid part of bag on the bottom. down on pulley and rolling belt off it. Make sure the frame handle is outside 2.
- Page 16 Immediately prepare your lawn mower for Operator p control bar storage at the end of the season or if the unit will not be used for 30 days or more. Upper LAWN MOWER When lawn mower is to be stored for a Lower period of time, clean it thoroughly, remove all dirt, grease, leaves, etc.
-
Page 17: Troubleshooting
CYLINDER • If possible, store your unit indoors and cover it to protect it from dust and dirt. 1. Remove spark plug. • Cover your unit with a suitable protec- Pour one ounce (29 ml) of oil through tive cover that does not retain moisture. spark plug hole into cylinder. - Page 18 TROUBLESHOOTING- See appropriate section in manual unless directed to a Sears Service Center. PROBLEM CAUSE CORRECTION Poor cut- 1. Worn, bent or loose blade. 1. Replace blade. Tighten uneven blade bolt. Wheel heights uneven. 2. Set all wheels at same height.
- Page 19 GARANTiA LIMITADA DE DOS AI_IOS PARA LA SEGADORA A MOTOR CRAFTSMAN Por dos (2) aSos, a partir de la fecha de compra, cuando esta Segadora Craftsman se mantenga, lubrique y afine seg_n las instrucciones para la operaci6n y el mantenimiento en el manual del dueSo, Sears reparar&...
- Page 20 I1. OPERAClON SOBRE LAS CUESTAS I. OPERACION Los accidentes ocurren con m_.s frecuencia • Antes de empezar, debe familiadzaree en las cuestas. Estos accidentes ocurren completamente con los controles y el uso debido a resbaladas o cafdas, las cuales correcto de la maquina. Para esto, debe leer y comprender todas las instrucciones que pueden resultar en graves lesiones.
-
Page 21: Mantenimiento
• Pare e inspeccione el equipo si le pega a un • Nunca haga funcionar una mdquina dentro de un &rea cerrada. objeto. Repdrelo, si es necesario, antes de hacerlo arrancar. • Nunca haga ajustes o reparaciones mientras el motor estd en mamha. •... - Page 22 COMO PREPARAR SU SEGADORA Lea estas instrucciones y el manual completamente antes de tratar de montar u PARA DESDOBLAR EL MANGO operar su segadora nueva. IMPORTANTE: Despliegue el mango con IMPORTANTE: Este cortacesped viene SIN mucho cuidado para no pellizcar o da_ar los ACEITE O GASOLINA en el motor.
- Page 23 FAMILIARICESE CON SU SEGADORA LEA ESTE MANUAL DEL DUEI_IO Y I_AS REGLAS DE SEGURIDAD ANTES DE OPERAR SU SEGADORA. Compare las ilustraciones con su segadora para familiarizarse con la ubicaci6n de los diversos controles y ajustes. Guarde este manual para referencia en el futuro. Estos s(mbolos pueden apareser sobre su segadora o en la literatura proporcionada con el producto.
-
Page 24: Para Ajustar La Altura De Corte
AVISO: Si despu_s haber desenganchado de segadora puede hacer que la palanca de control, la segadora no roda hacia atr&s, empuje la segadora un poco hacia salten objetos extrafios dentro La operaci6n de cualquier de sus ojoa, Io que puede adelante para desenganchar las ruedas de la producir dafios graves en dstos. - Page 25 PARA UN CORTEALTO, Orejasde A_, PR.ECAUCI(_N: No haga funcionar su BAJELASRUEDAS segaoora sin la puerta trasera se cerr6, o sin el desviador de recortes o sin el recogedor cdsped aprobados en su lugar. Nunca trate de operar la segadora cuando se halla removido la puerta trasera o cuando se ha removido a puerta trasera o cuando est,.
- Page 26 necesitar cambiar el aceite mds a menudo PARA VAClAR EL RECOGEDOR DE cuando las condiciones son polvorosas o ClaSPED sucias. 1. Levante el recogedor de c_sped usando el AGREGUE GASOLINA mango del bastidor. • Uene el estanque de combustible hasta la Remueva el recogedor de c6sped, con los parte inferior del cuello de relleno de! recortes, de debajo clel mango de la...
-
Page 27: Para Parar
PARA HACER ARRANCAR EL MOTOR • Los poros en los recogedores de c_sped de tela pueden nenarse con mugre y polvo AVISO: Debido alas capas protectoras del con el uso y los recogedores recaudardn motor, una cantJdadpequeSa de humo puede menos cdsped. -
Page 28: Antes De Cada Uso
,,oo,,., ° ,-,.,,,,-,,..o . /s, Revisar si hay sujetadores sueltos c(_sped(si viene equipado) lIPS Umpiadinspeccionar el recogedor de Limpiar la segadora Urn_iar deba o de la cubierta de la trans- rnisi6n (segadoras con poder propufsor Revisar las correas y las poleas irnpul* sadas (segadoras con poder propulsor) Revisar o/afilar/carnbiar la cuchila Tabla de lubdcacibn... -
Page 29: Del Producto
ESPEClFICAClONES DEL PRODUCTO Nt_merode Serie: Fecha de Compra: Capacidad y Tipo de Gasolina: 1.0 Cuartos (Regular sin Plomo) Tipo de Aceite (API-SF-SJ): SAE 10W30 Capacidad de Aceite: 18.50nzas Bujfa (Abertura: .030") NGK BPR6ES Torsi6n del Pemo de la Cuchilla: 35-40 ft. Ibs. El nLimerodel nodelo y el de aerie se eneuentran en la calcomania adjunta a la parte trasere de la caja de la segadora. -
Page 30: Caja De Engranajes
RECOGEDOR DE ClaSPED CALIDADES DE_VISCOSIDAD DE SAE • El recogedor de c_sped puede ser rociado con el ague de la manguera pero tiene que estar 5eco ouando se vaya a usar. • Revise su recogedor de c_sped a menudo pare verificar si est& dafiado o detedoredo. Se va a desgastar con el uso normal. - Page 31 FILTRO DE AIRE BUJIA Su motor puede sufdr averfas y funcionar de Cambie el bujfa al comienzo de cada manera incorrecta con un filtre del aire sucio. temporada de siega o despu_s de cada 100 Sustituir el papel del cartucho una vez al aSo o horas de operaci6n, Io que suceda primero.
- Page 32 PARA REMOVER LA CORREA DE IMPULSI6N PARA MONTAR Y ADJUNTAR EL RECOGEDOR DE CESPED 1. Remueva la cubierta de la impulsi6n. Remueva la correa empujando hacia abajo 1. Ponga el bastidor del recogedor de c6sped en la bolsa del c_sped con la parte r[gida en la polea de la caja de engranajes.
- Page 33 Inmediatamente prepare su segadora para el Barradecontrol q ue _.__:_ j-_._.,,. almacenamiento al final de cada temporada o exigelapresencia del_/_.2) DOBLAR Y/'_,-\ si la unidad no se va a usar por 30 dfas o operador _//HACIA %1_,, } m_.s. Mangosupedor_'_ ////PAPA ,_"...
- Page 34 • Si es posible, guarde su unidad en un ACEITE DEL MOTOR recinto cerrado y ct3brala para protegerla Drene el aceite (con el motor caliente) y contra el polvo y la mugre. c_mbielo con aceite de motor limpio. (Vea • Cubra su unidad con un form protector "MOTOR"...
-
Page 35: Solucion De Problemas
SOLUCION DE PROBLEMAS - Vea la secci6n apropiada en el manual amenos estd dirigido a un centro de servico Sears. CORRECCI6N CAUSA PROBLEMA Mal corte- 1. Cuchilia desgastada, doblada 1. Cambie la cuchilla. Apriete el pemo o suelta. de la cuchilla. disparejo Altura de las ruedas dispareja. - Page 36 SERVICE NOTES...
- Page 37 CRAFTSMAN ROTARY LAWN MOWER - - MODEL NUMBER 917.378521 GEAR CASE ASSEMBLY - - PART NUMBER 174915 KEY PART DESCRIPTION 17060410 Screw, Tapping 1/4-20 x .62 174917 Gear Case, Upper, FWSS 57072 Seal 77881 Beanng 57079 Washer 174918 Drive Shaft, 21" FWGD...
- Page 38 CRAFTSMAN ROTARY LAWN MOWER - - MODEL NUMBER 917.378521 31 91 /_12 85_2_ 83_y86...
- Page 39 CRAFTSMAN ROTARY LAWN MOWER - - MODEL NUMBER 917.378521 PART PART DESCRIPTION DESCRIPTION 182714 Upper Handle, with Grip 165912 Bolt 151721X479 LowerHandle 850733X004 Bracket, Upstop 182713 ControlBar 176185 Washer 182903 Pushnut EngineZone ControlCable 176235 171407 Handle Bolt 750634 Screw 180833...
- Page 40 CRAFTSMAN ROTARY LAWN MOWER - - MODEL NUMBER 917.378521...
- Page 41 CRAFTSMAN ROTARY LAWN MOWER -- MODEL NUMBER 917.378521 KEY PART PART DESCRIP'nON DESCRIPTION 176328 Gear Case Assembly Drive ContrelAssembly 174915 Locknut 1/4-20 175262 Pan Head Tapping Screw #10-24 x 2-3/4 63601 Spring 180607 Spring, Pulley Adjuster 182226 V-Belt 180914 Wheel AdjusterAssembly (Right)
- Page 42 HONDA 4-CYCLE ENGINE MODEL NUMBER GCV-160-AIAE CONTROLJ FAN COVER] ' CAMSHAFT CARBURETOR...
- Page 43 HONDA 4-CYCLE ENGINE MODEL NUMBER GCV-160-AIAE CONTROL FANCOVER PART PART DESCRIPTION DESCRIFnON 558O311 Arm, Governor 3683646 Rubber, Supporter. 107 mm 5580329 Rod, Governor 5028923 Peteock Assembly, Manual 5580345 5580394 Spdng, Governor Bracket, Petcock 5580352 5580451 Spring,Throttle Return Cap Assembly, Fuel Tank 4439428 5580469 Spdng, Lever...
- Page 44 HONDA 4-CYCLE ENGINE MODEL NUMBER GCV-160-AIAE CRANKSHAFT I PISTON CONNECTING ROD J I AIR CLEANER RECOIL STARTER...
- Page 45 HONDA 4-CYCLE ENGINE MODEL NUMBER GCV-160-AIAE CYUNDERBARREL PISTON CONNECTING ROD KEY PART KEY PART NO. NO. DESCRIPTION DESCRIPTION 5579982 Cylinder Assembly 5580014 Piston 2399780 Clip, Valve Guide 1426576 Pin, Piston 5579990 Cover, Head 5580022 RodAssembly, Connecting 5580006 Cover Comp., Breather 1431055 Bolt,Connecting Rod 0636845...
- Page 46 SERVICE NOTES...
- Page 47 SERVICE NOTES...
- Page 48 Your Home For repair - in your home - of all major brand appliances, lawn and garden equipment, or heating and cooling systems, no matter who made it, no matter who sold it! For the replacement parts, accessories owner's manuals that you need to do-it-yourself.
Need help?
Do you have a question about the 917.378521 and is the answer not in the manual?
Questions and answers