Table of Contents
Advertisement
Quick Links
Instruction Manual
2.2 cu.in./36cc
2-Cycle
GASOLINE
CHAIN SAW
Model No.
0944,411362
- 16 in, Bar
•
Safety
• Assembly
•
Operation
•
Maintenance
•
Parts List
•
Fran_;ais
For Occasional
Use Only
C_
WARNING:
Read and follow all Safety
Rules and Operating
Instructions
before
first use of this product.
For answers
to your questions
about this product:
Call 7 am-7
pm, Mon-Sat;
Sun, 10 am-7
pm
1-800-235-5878
Sears Canada,
Inc., Toronto,
Ontario
M5B 2B8
530088473
3/5/04
Advertisement
Table of Contents

Related Manuals for Craftsman C944.411362


Summary of Contents for Craftsman C944.411362
- Page 1 Instruction Manual 2.2 cu.in./36cc 2-Cycle GASOLINE CHAIN SAW Model No. 0944,411362 - 16 in, Bar • Safety • Assembly • Operation • Maintenance • Parts List • Fran_;ais For Occasional Use Only WARNING: Read and follow all Safety Rules and Operating Instructions before first use of this product.
- Page 2 Service and Adjustments LIMITED ONE (1) YEAR WARRANTY FOR CRAFTSMAN _ GAS CHAIN SAW For one (f) year from the date of purchase Sears Canada, Inc,, will repair or replace free of charge at Sears option parts which are defective...
-
Page 3: Plan Ahead
work, check with doctor before oper- _I.WARNING: Always disconnect ating. spark plug w ire when m aking repairs ex- • Do not start cutting until you have a cept for c arburetor adjustments. clear work area, secure footing, and cause achain s aw isahigh-speed especially if you are felling a tree, a woodcutting... - Page 4 standers. Use only C raftsman acces- sories and replacement parts a srec- _. _ Avoid _,_uctions ommended. Never modify your saw. • Maintain chain s aw with care. • Keep u nit s harp a nd clean f orbetter and safer performance. •...
-
Page 5: Maintain Control
• Keep w orking area f ree from obstruc- control, Don't let go, Grip the rear tions s uch as other trees, branches, handle with your right hand whether rocks, fences, stumps, etc. E liminate you are right or left handed, Wrap the oravoid a ny obstruction that y our fingers of your left hand over and... - Page 6 • Low-Kickback Chain: has met k ick- Centre. Take your unit to the place of pur- back p erformance requirements when chase or to your nearest Sears Service Centre. tested on a representative sample of chain saws below 3,8 cubic inch dis- •...
- Page 7 SPARK ARRESTING SCREEN: Your such regulations exist, you are legally saw is equipped with a temperature responsible for maintaining the operat- limiting muffler and spark arresting ing condition of these parts. Failure to do so is a violation of the law. Refer to screen which meets the requirements of California Codes 4442 and 4443.
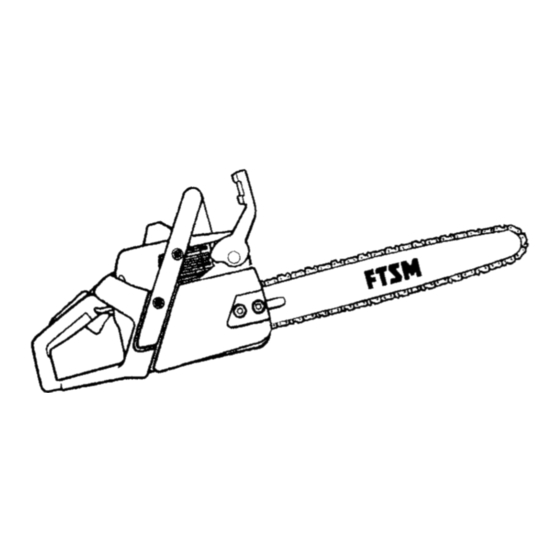
- Page 8 KNOW YOUR SAW READ THIS iNSTRUCTION MANUAL AND SAFETY RULES BEFORE OPERATING YOUR CHAIN SAW. Compare the illustrations with your unit to familiarize yourself with the location of the various controls and adjustments. Save this manual for future ref- erence. Chain Hand Guard---_.
- Page 9 Ensure chain brake is disengaged we recommend you use Craftsman pulling the front hand guard back to- chain saw bar oil, If Craftsman bar oil ward the front handle as far as pos- is not available, you may use a good sible.
-
Page 10: Starting A Cold Engine
For c old weather starting, start the unit 3. Slowly press primer bulb 6 times. atFULL CHOKE; allow the engine to Pull the starter rope quickly with warm upbefore squeezing the throttle your right hand until the engine trigger. starts. NOTE: DO NOT c ut m aterial with the 5. -
Page 11: Operating Tips
Place t hesaw onfirm ground. Grip the • To avoid losing control when cut is rear handle with your right h and a nd the complete, do not put pressure on front h andle with your l eft h and. A pply saw at end of cut. -
Page 12: Important Points
a felling cut is made on the opposite saw aside and pull down the tree side of tree, the tree will tend to fall in with a cable winch, block and tackle, the direction of the notch. or tractor. CUTTING A FALLEN TREE NOTE: If tree has large buttress roots,... - Page 13 use light u pward pressure. Hold s aw firmly a nd maintain control. The saw will t end topush b ack t oward you. Using a_nd _WARNING: N ever turn saw up- L st side down t oundercut. The saw can- not b econtrolled inthis position.
-
Page 14: Customer Responsibilities
PRUNING Second cut _WARNING: Limit pruning to limbs shoulder height or below. Do not cut if branches are higher than your shoul- der. Get a professional to do the job. • Make your first cut 1/3 of the way through the bottom of the limb. This cut will make the limb sag so that it 3rd cut 1 to2 in. - Page 15 the switch to the STOP position. Using bar tool, rcll chain around Make sure engine stops; then restart guide barto ensure all links are in bar groove. engine and continue. 5. Lift up tip of guide bar to check for •...
- Page 16 • Clean the oil holes and bar groove used air filter can never be completely after each 5 hours of operation. cleaned. It is advisable to replace your air filter with a new one after every 50 Remove Sawdust From hours of operation, or annually, which- ever comes first.
- Page 17 Remove muffler diffuser and sperk Replace with Champion CJ-7Y arresting screen assembly. Notice spark plug and tighten securely with a 3/4 inch socket wrench. the orientation of parts for reas- sembling. Spark plug gap should be 0.025 in. Clean the spark arresting screen Reinstall the spark plug boot.
- Page 18 Remove the old chain. • Chain moves at idle. See IDLE 7. Carefully remove new chain from SPEED-T under adjusting procedure. package. Hold chain with the drive • Saw will not idle. See IDLE SPEED-T links as shown. and LOW SPEED MIXTURE-L under adjusting procedure.
-
Page 19: Seasonal Storage
Run engine at least 5 min- cannot reach sparks or open flames utes after adding stabilizer. from water heaters, electric motors or Craftsman 40:1,2-cycle engine oil (air switches, furnaces, etc. cooled) is especially blended with fuel •... -
Page 20: Troubleshooting
TROUBLESHOOTING TABLE WARNING: Always stop unit and disconnect spark plug before perform- ing all of the recommended remedies below except remedies that require operation of the unit. TROUBLE REMEDY CAUSE 1. Move ON/STOP switch to ON. f. ON/STOP switch Engine will not start or will run STOP position. - Page 21 TROUBLESHOOTING TABLE - Continued TROUBLE CAUSE REMEDY Oi_ inadequate 1. Oil tank empty. 1. Fill oil tank. for bar and 2. Oil pump or oil filter 2. Contact Sears Service (see back cover). chain clogged. lubrication. 3. Guide bar oil hole 3.
- Page 22 YOUR WARRANTY RIGHTS AND questions regarding your warranty dghts OBLIGATIONS: The U. S. Environ- and responsibilities, you should contact mental Protection Agency/Environ- your nearest authodzed service center ment Canada and Sears Canada, Inc., or call Sears Canada at 1-800-665-4455. WARRANTY COM- are pleased to explain the emissions control system warranty on your year...
-
Page 23: Warranty
1-800-665-4455. WHERE TO GET sion related parts will be provided with- WARRANTY SERVICE: Warranty ser- out charge to the owner if the part is un- vices or repairs shall be provided at all der warranty. EMISSION CONTROL Sears Canada service centers. Call WARRANTY PARTS LIST: Carburetor, 1-800-665-4455. - Page 24 Dear Customer, _nmanufacturing this product, many steps have been taken to provide you with the highest quality. Unfortunately, errors or omissions cccasionally occur. In the eventthatyou find a mis* sing or defective part, please contact your nearest Sears store. SERVICE AND REPAIR PARTS CALL...
Need help?
Do you have a question about the C944.411362 and is the answer not in the manual?
Questions and answers