Table of Contents
Advertisement
Quick Links
Advertisement
Table of Contents

Related Manuals for Ericsson GH198


Summary of Contents for Ericsson GH198
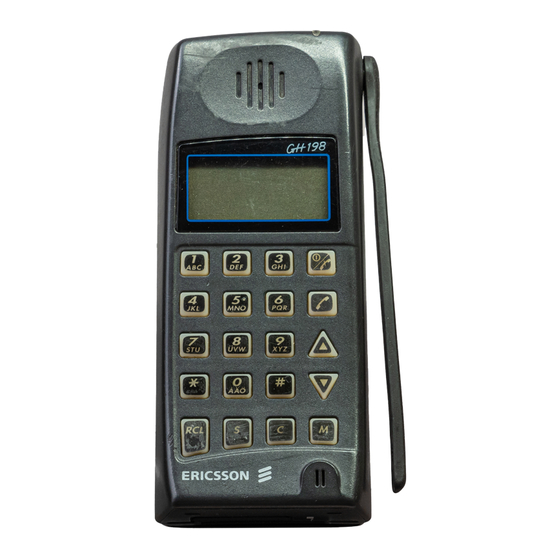
- Page 1 Ericsson GH198 Digital Handheld Telephone for GSM User’s Manual...
- Page 2 Ericsson Mobile Communications AB, at any time and without notice. Such changes will, however, be incorporated into new editions of this manual.
-
Page 3: Safety And Precautions
SAFETY AND PRECAUTIONS Switch off your cellular telephone when in an aircraft. The use of cellular telephones in an aircraft may be dan- gerous to the operation of the aircraft, disrupt the cellular network and is illegal. Failure to observe this instruction may lead to suspension or denial of cellular telephone services to the offender, or legal action, or both. -
Page 4: Table Of Contents
CONTENTS Introduction Basic Operation Making the Phone Ready for Use Attaching the Battery Unfolding the Antenna Turning the Phone On Entering a Phone Number Making a Call Last Number Recall International Calls Emergency calls Receiving a Call Unanswered Calls Call Time Meter Audible Call Timer Volume Control Microphone Mute... - Page 5 Sending a Code Pre-programmed DTMF Signalling Special Functions Accessing a Special Function Using Method 1 Using Method 2 Using a Combination of the Two Methods Leaving a Special Function Changing a Setting Storing a New Setting Ringing Signal Volume Key Clicks, Silent Keypad or DTMF Signals Call Forwarding Call Barring Automatic Re-try...
-
Page 6: Introduction
This digital handheld cellular telephone is designed for use on a GSM (Global System for Mobile communications) network. The GSM standard is the result of many years of collaboration between the telecommunications authorities of different European countries. This unique cooperation will result in GSM networks being installed all over Europe as well as in countries all over the world. -
Page 7: Using Method
accompanying names in memory, recalling phone numbers from memory, DTMF signalling, and using the Special Functions of the phone. You should pay particular attention to the chapter Batteries and Recharg- ing because correct care will prolong the life of a battery and also the length of time between recharging. - Page 8 Overview...
-
Page 9: Key Functions
Key functions... - Page 10 SIM -- Subscriber Identity Module Your SIM must be inserted. If not, you cannot use the phone. The SIM contains your personal data, such as your subscriber number, your ‘‘home’’ network and services you have subscribed to. It also comprises a memory where you can store frequently used phone numbers.
-
Page 11: Basic Operation
Making the Phone Ready for Use Attaching the Battery Unfolding the Antenna Turning the Phone On the display flash for a few seconds. The PWR (Power) indicator then remains lit. SIM not inserted PIN check enabled (Hash) key. Basic Operation The phone is turned ON by pressing and holding down the Power key until a click is heard. - Page 12 The SIM gives you three chances to enter the PIN correctly. If the PIN is entered incorrectly three times, the message ‘‘SIM BLOCKD’’ (SIM is blocked) is displayed. Should this happen, refer to the chapter Problems You Can Solve. After the PIN has been entered correctly, the phone searches for a GSM network and the message‘‘SEARCHING’’...
-
Page 13: Entering A Phone Number
Entering a Phone Number If anything is shown in the numeric field of the display, you must erase it before entering the phone number. To erase the numeric field, hold down the C (CLEAR) key until the digits disappear. A phone number to be called, or stored in memory, is entered on the numeric keys. -
Page 14: Last Number Recall
symbol comes on in the display. When you have made contact with the GSM network, a click is heard and the message ‘‘CALL’’ is displayed. When you have been connected to the desired number, the message ‘‘CALL’’ and the number disappear from the display. -
Page 15: Emergency Calls
A minus sign (--) is displayed on the right in the numeric field of the display. The message ‘‘INTER NO’’ appears briefly. Enter the Country Code, the Area Code and the Phone Number. When you press Send to make the call, the minus sign (--) will be automatically replaced by the international prefix of the country where the phone is presently used. -
Page 16: Audible Call Timer
Audible Call Timer If Special Function No. 13. Minute Minder is enabled, a short beep is heard in the earphone every full minute during the call. Refer to the chapter Special Functions. Volume Control During a conversation, you can adjust the volume of the earpiece with these keys. -
Page 17: Details On The Display And Keys
Display Alphanumeric Field Displays names and memory location numbers (as illustrated above). Displays messages, queries and warnings. Displays the strength of the received signal. Displays the elapsed call time while an outgoing call is in progress. Displays battery meter (if the phone is used as a portable unit). - Page 18 If SERV flashes, it indicates that a GSM network is in range but the phone has not registered on that network. Call Flashes to indicate an incoming call and continues to flash if the call is not answered (Unanswered Call Indicator). In Use The handset symbol is shown during a call and also while an outgoing call is being connected.
-
Page 19: Keypad
Keypad Numeric keys 1 -- 9 and 0 Star ( ) and Hash ( # ) RECALL STORE CLEAR Power/End Send Volume control Forward and back- ward scroll MODE/MUTE... - Page 20 This key has two different functions: Power and End. Power Press and hold down to turn the phone ON or OFF. To terminate a call, press momentarily. Send Used to make a call after a number has been entered, or recalled from memory, and to answer an incoming call.
- Page 21 CLEAR 1. If pressed momentarily, it erases the last digit or letter entered. Can be pressed repeatedly to erase several characters. 2. If held down, it erases all digits, for example a phone number, from the display. 3. Exits from the Special Functions. This key has two different functions: MODE and MUTE.
-
Page 22: Illumination
Used to enter memory location numbers when recalling phone numbers from the memory. When in alphabetic (letter) mode, letters can be entered with the keys 0 -- 9. To enter a letter, press the appropriate key once, twice, or three times according to the position of the desired letter on the key. -
Page 23: Alarm Signal
Alarm Signal A long beep will be heard when the attached battery is becoming exhausted. The warning ‘‘LOW BATT’’ will also flash in the display. Error Signal A short beep tells you if you do something wrong. For example, if you try to store a phone number in a memory location that is already in use. -
Page 24: Storing Numbers
ou can store often-used phone numbers in the memory of your SIM, both when the phone is in standby mode and during a conversation. The actual number of memory locations available depends on the programming of your SIM. A phone number to be stored may contain up to 20 digits. A phone number can be stored in a memory location with, or without, an accompanying name. -
Page 25: Memory Protection
When an underline character ( _ ) appears to the right of the letter entered, you can enter the next. You can enter up to eight letters. If you want to enter a digit (0 -- 9) instead of a letter, press the appropriate numeric key four times. -
Page 26: Erasing A Stored Number (And Name)
Erasing a Stored Number (and Name) A previously stored phone number (and name) will be erased automatically if you store a new number in the same memory location. However, you can erase a number without replacing it with a new number, by proceeding as follows: If there is anything showing in the numeric field of the display, erase it with the C key. -
Page 27: Recalling Numbers
Numeric and Alphabetic Mode If you wish to recall a stored phone number, press the RCL (RECALL) key. Numeric mode applies automatically after you have pressed the RCL key. It means that you can recall the number by entering the number of the memory location. If you wish to recall the number by using the name, or the first part of the name, you have to select alphabetic mode by pressing M (MODE) after RCL. -
Page 28: Speed Calling
Speed Calling The numbers stored in memory locations 1 - 9 can be called by just entering the memory location number and pressing Send. The number appears in the display. If the number was stored with an accompanying name, the name will be displayed briefly. -
Page 29: Appending Digits To A Recalled Number
Appending Digits to a Recalled Number If you have stored a partial number, you can recall it from the memory and then append the remaining digits, using the numeric keys. Replacing the Last Digits of a Recalled Number A number recalled from the memory can be altered by erasing the last digits using the C key, and then entering new digits. -
Page 30: Dialling Memory And Scratch Pad
Dialling Memory The dialling memory has six memory locations (0 and 1 -- 5). The last number called is stored in memory location 0 of the dialling memory. As described in the chapter Basic Operation, you can recall this number by: pressing RCL twice, or pressing RCL, followed by 0, or pressing 0, followed by # (Hash). -
Page 31: Recalling A Number
location 1 of the dialling memory. The number remains, however, in the display. Independent of whether a call is in progress or not, you can enter a phone number and store it by pressing S, followed by # (Hash). ‘‘STORED is displayed. -
Page 32: Dtmf Signalling
Sending DTMF Signals You can use keys 0 -- 9, and # to send DTMF (Dual Tone Multi Frequency) signals to access special services, for example ‘‘banking by phone’’. DTMF signals cannot be sent unless the ‘‘DTMF’’ option in Special Function No 1. Key Clicks, Silent Keypad or DTMF Signals is enabled. -
Page 33: Pre-Programmed Dtmf Signalling
To send the code, press M (MODE), followed by Send. The sequence of characters is converted to DTMF signals and sent automatically, one character at a time. The characters disappear from the display, when the transmission starts. Pre-programmed DTMF Signalling You can store a code in memory in the same way as you store a phone number. -
Page 34: Special Functions
The Special Functions are arranged in the following order: Text in the display RING LEVEL CLICK ON’’ ‘‘SILENT’’ ‘‘DTMF ON FORWARD BARRING ‘‘RETRY OFF’’ ‘‘RETRY ON’’ LIGHT AUTO’’ LIGHT OFF’’ LIGHT ON’’ Name of current Network AVAIL NETW AUT SEARCH’’ MAN SEARCH Special Function Ringing signal volume. -
Page 35: Accessing A Special Function
Text in the display VOLT XX’’ PHONE LOCK Some of the Special Functions are optional and will not be available unless you have ordered them. Some of the special functions will be available only when the SERV (Service) indicator is present in the display, others will not be available when a call is in progress. -
Page 36: Using A Combination Of The Two Methods
If you scroll too far, you can go back by using (Down). To select the last Special Function, press M and then lect another Special Function, by scroll- ing backward with Using a Combination of the Two Methods Enter the number of a Special Function, for example 11, and then scroll forward or backward using Leaving a Special Function A Special Function is left automatically after 10... -
Page 37: Ringing Signal Volume
Ringing Signal Volume You can set the level of the ringing signal in four steps, or turn the ringing signal OFF. Press M, followed by 0. ‘‘RING LEVEL’’ is displayed, together with the current setting, either: #----- (lowest level) ##---- ###- #### (highest level) -------- (turned OFF) - Page 38 Activating, cancelling or reviewing the status of a call forwarding service: Press M, followed by 2. ‘‘FORWARD’’ is displayed. Press S. ‘‘ALL CALLS’’ appears in the display. To select another call forwarding service, scroll forward or backward using also scroll forward using any numeric key.) ‘‘IF BUSY’’...
-
Page 39: Call Barring
When you have made contact with the GSM network, the message ‘‘FORWRD OFF’’ is displayed for ten seconds. If the connection fails: If the connection with the GSM network fails, a beep is heard and the message ‘‘NETWORK PROBLEM’’ -- -- -- ‘‘NETW PROBL’’ appears. Wait a moment and try again. - Page 40 ‘‘CANCEL ALL’’ and ‘‘CHANGE PASSWORD’’ -- -- -- ‘‘CHG PASSW’’ will also appear when you are scrolling. The Cancel All and Change Password services are, however, described later in this section. When the desired service, for example ‘‘ALL INC’’ (all incoming calls), is displayed, press S. ‘‘ACTIVATE’’...
-
Page 41: Automatic Re-Try
Changing your password: Press M, followed by 3. ‘‘BARRING’’ appears. Press S. ‘‘ALL OUTGOING CALLS’’ appears, followed by the abbreviation ‘‘ALL OUT’’. Scroll using until ‘‘CHANGE PASSWORD’’ -- -- -- ‘‘CHG PASSW’’ is displayed. Press S.‘‘OLD?’’ is displayed. Enter the present password and press S.‘‘NEW?’’ is displayed. -
Page 42: Back Light
Back Light The illumination of the display and keypad can be turned ON or OFF all the time, or it can be used in an automatic mode as described in the section Illumination in the chapter Details on the Display and Keys. This special function allows you to turn the illumination ON or OFF, or to select the automatic mode. -
Page 43: Network Selection Mode
‘‘Forbidden’’ means that a network is included in the list of forbidden networks on your SIM. ‘‘Available’’ means a network other than the ‘‘home’’ network, the current network, a ‘‘preferred’’ network or a ‘‘forbidden’’ network. c. If no network is in range, ‘‘NO NETWORK’’ is displayed. -
Page 44: 10. List Of ''Preferred'' Networks
10. List of ‘‘Preferred’’ Networks A list of ‘‘preferred’’ networks on your SIM defines the order of preference in which the phone will select a network during automatic network selection, This Special Function allows you to review the list of networks. -
Page 45: 11. Last Call Time
If you change your mind and do not wish to delete the network, press C. Rearranging the order of networks: Press any numeric key repeated- ly until the network you wish to move within the list is displayed. Move the network to a higher preference number by pressing or to a lower preference number by pressing... -
Page 46: 14. Pin
14. PIN Your SIM is protected by a 4- to 8-digit PIN (Personal Identification Number). This Special Function allows you to decide whether or not the PIN must be entered on the keypad each time the phone has been turned on (PIN Check). The function also allows you to change the PIN. -
Page 47: 15. Any Key
Enter the new PIN and press S. ‘‘AGAIN?’’ is displayed. Enter the new PIN again and press S. If you entered the SIM Unblocking Code and the new PIN correctly, ‘‘UNLOCKED’’ is displayed briefly. You can now use your phone anew. If the message ‘‘SIM BLOCKD’’... -
Page 48: 18. Battery Discharge
Entering and storing the area code: Press M an then enter 17. ‘‘AREA OFF’’ is displayed. Press any numeric key. ‘‘CHG AREA’’ is displayed. Press S. ‘‘ENTER AREA’’ is displayed. Enter the area code you want. To store the area code and turn the Area Code facility ON, press S, Turning the Area Code facility ON or OFF: Press M an then enter 17. -
Page 49: 20. Phone Lock
20. Phone Lock The Phone Lock function allows you to prevent unauthorized use of your phone in the event of a theft. Emergency calls (112) can, however, be made when the phone is locked. There are two levels of locking the phone: Full lock and Autolock. - Page 50 Enabling the electronic lock: Press M and then enter 20. ‘‘PHONE LOCK’’ is displayed. Press any numeric key. ‘‘FULL LOCK?’’ is displayed. To enable the full lock, go to step 4 below. To enable the autolock, press the numeric key again.
-
Page 51: Batteries And Recharging
Batteries Standard battery Slimline battery High-capacity battery At present, there are three types of battery that can be used with the phone: standard, slimline and high-capa- city batteries. Batteries and Recharging Battery Meter The battery meter is shown on the right of the display. The meter reflects the state of charge of the battery attached to the phone. -
Page 52: Care And Maintenance
starts flashing red. If the phone is left on, the low battery alarm will be repeated several times and, eventually, the phone will turn itself off. When the phone has turned itself off, the message‘‘DISCHARGIN’’ flashes in the display and the indicator light on the top of the phone shows a steady red light. -
Page 53: Inserting And Removing A Standard Or Slimline Battery
Inserting and Removing a Standard or Slimline Battery Removal: Insertion:... -
Page 54: Inserting And Removing A High-Capacity Battery
Inserting and Removing a High-Capacity Battery Removal: Insertion:... -
Page 55: Recharging
Slide indicator A battery has a slideable indicator which you can use to tell an empty battery from a charged battery. Slide the indicator to the left if the battery is empty -- to the right if the battery is charged. If you are uncertain of the state of charge of a battery, attach the battery to the phone. -
Page 56: Basic Charger
Press M (MODE) and enter 18. ‘‘DISCHRG OF’’ is displayed. Press any numeric key. ‘‘DISCHRG ON’’ is displayed. Press S (STORE). The message ‘‘DISCHARGIN’’ flashes and the red light comes on. When ‘‘DISCHARGIN’’ and the red light go out, the discharge is complete. Recharge the battery. Basic Charger The charger, delivered with the phone, is to be used indoors together with an AC/DC converter. - Page 57 Recharging a standard battery: Never recharge a battery with the basic charger when the ambient temperature is below 0 ° above 40 Place the battery in the charger. The indicator light on the charger comes on if the battery is placed correctly.
-
Page 58: Accessories
Hands-Free Vehicle Kit A hands-free kit is available for vehicular use of your phone. The kit incorporates a complete system for hands-free usage, powering the phone from the vehicle’s battery, and recharging the standard or slimline battery attached to the phone. -
Page 59: Portable Hands Free
The portable hands-free set is plugged into the receptacle at Portable Hands Free the bottom of the phone. This means that high-capacity batteries cannot be used, only standard and slimline batteries. Any Key facility If you turn ON Special Function No. 15, Any Key, you can Earpiece press any key except the Power key to answer a call. -
Page 60: Vehicle Power Adaptor And Rapid Charger
Vehicle Power Adaptor Vehicle Power Adaptor and Rapid Charger The vehicle power adaptor, or the rapid charger, both powers the phone and recharges the attached standard or slimline battery. The vehicle power adaptor is connected to a 12 V, negative earth, cigarette lighter receptacle in a vehicle. Rapid Charger The rapid charger is to be used indoors, and it is powered from the mains. - Page 61 Recharging a battery and powering the phone: Turn OFF the phone. Plug the vehicle power adaptor/rapid charger into the receptacle at the bottom of the phone. Plug the vehicle power adaptor into the cigarette lighter receptacle in the vehicle, or the rapid charger into a mains socket.
-
Page 62: Multi Charger
Multi Charger The multi charger can be used to recharge standard, slimline and high-capacity batteries. It is to be used indoors with an AC/DC converter. It takes less then 1 hour to recharge a slimline battery, less than two hours to recharge a standard battery, and less than 3 hours to recharge a high-capacity battery. - Page 63 Recharging a battery using the horizontal compartment: Attach the battery in the same way as you would attach it to the phone. See the right-hand figure above. If a red arrow on the charger lights up, it indicates that the battery is being recharged. If the red arrow flashes, it indicates that the battery is being discharged.
- Page 64 A red arrow lights up to indicate that recharging is in progress. When a green arrow replaces the red arrow, recharging is completed and you can remove the battery or phone. However, no harm will come to the battery if left in the charger. When a battery is fully recharged, the charger changes to trickle-charging the battery.
-
Page 65: Problems You Can Solve
Phone Does Not Come On Recharge or replace the battery. Refer to the chapter Batteries and Recharging. If the phone is powered from a cigarette lighter receptacle, using the Vehicle Power Adaptor, check that this is properly connected both to the cigarette lighter receptacle and to the receptacle at the bottom of the phone. -
Page 66: Steady Red Indicator Light
Steady Red Indicator Light ‘‘DISCHARGIN’’ flashes in the display. The phone has turned itself off, after the ‘‘LOW BATT’’ alarm has been issued several times. Refer to the chapter Batteries and Recharging. Changing Your Password To prevent unauthorized use of the Call Barring service, a Password must be entered. - Page 67 ‘‘PASSWORD ERROR’’ -- -- -- ‘‘PASSW ERR’’ You have entered a wrong password when activating or cancelling a call barring service, or you have made an error when entering the sequence for changing your password. ‘‘PASSWORD CHANGED’’ -- -- -- ‘‘PASSW CHGD’’ Password changing was successful.
-
Page 68: Inserting The Sim
Inserting the SIM...
Need help?
Do you have a question about the GH198 and is the answer not in the manual?
Questions and answers