Advertisement
Quick Links
operator's
manual
MODEL
NO.
358.798141-28,0ce
AWARNING:
ReadtheOperator'sManual
and Follow All Warnings
and Safety
Instructions.
FailureTo Do So CanResuIt
in SeriousInjm-y.
i
•Always Wear Eye Protection During Operation
,_E/A/,qS [I:RRFT$MRN® _
GAS WEEDWACKER
®
2 Cycle Engine
* Assembly
• Operation
Fuel Mix 16:1
* Maintenance
• Repair Parts
um
i
ilnf11 if
iiii
Sold
by Sears,
Roebuck
and
Co.,
Chk:ago,
Ill. 60684
U.S.A.
iii iiii
,i, i_11
, ,i,,,i,,i
66909-2-16987-1-17387
@Sears, Roebuck and Co., 1987
Advertisement

Related Manuals for Craftsman Weedwacker 358.798141-28.0cc


Summary of Contents for Craftsman Weedwacker 358.798141-28.0cc
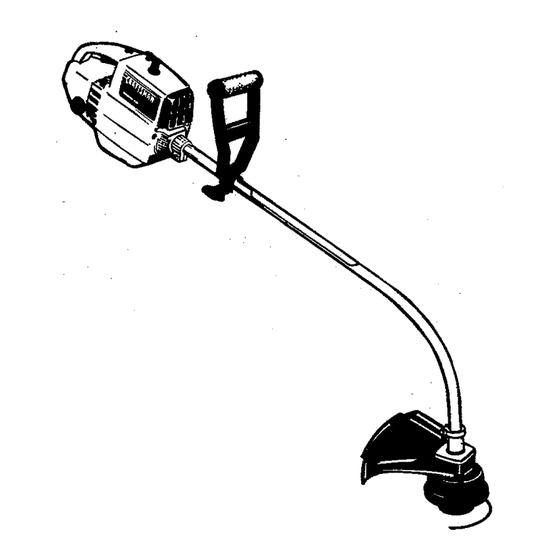
- Page 1 operator's manual MODEL 358.798141-28,0ce •Always Wear Eye Protection During Operation ,_E/A/,qS [I:RRFT$MRN® _ GAS WEEDWACKER ® Fuel Mix 16:1 2 Cycle Engine AWARNING: * Maintenance * Assembly ReadtheOperator'sManual and Follow All Warnings • Repair Parts • Operation and Safety Instructions. FailureTo Do So CanResuIt in SeriousInjm-y.
- Page 2 TWO YEAR LIMITI_ WARRANTY ON CRAFISMAN WEEDWACKgR® For Two years fromdateofpurchase, when_Weedwacker_is mainlained,luhricated,andtunedup_.eordingtotheoperating ann mamtenaw.e mstmclaons m tlae operators manual, Sears will repair free of charge any defect in material or worlmmnship. This warranty excludes nylon line,spark plug,and air cleaner ;which are expendable parts and [_come wornduringnor- IfthisWeedwacker _ isused forco_ial or rental purposes, thiswarranty applies for only 30 days from the date ofpurchase.
- Page 3 VARNINGS AND SAFETY INSTRUCTIONS _WARNING -- _ PO_8 I00£ CANBEOANGESOU$! This tool can cause serious injury or blindness to the operator and others. The warnings and safety instructions in this manual must be followed to provide reasonable safety and efficiency in using this tool. The operator is responsible for foIlowing the warnings and instructions in this manual and on the tool.
- Page 5 WARNINGSAND SAFETY INSTRUCTIONS ar/T G " 1. Always wear a safety face shield or goggles. See Inspect the area to be cut before each use. Remove "_,ccessories." objects (rocks, broken _lass, nails, wire, string, etc.) which can be thrown or become entangled in the trim- 2.
- Page 6 IIII II IIIII II Ill I] I IIII IIIIIIIII TRIMMER YOUR iiiiiitltt t tit it t tl It A. INTRODUCTION Your Trimmer is a versatile product developed for large lawnsand to make short work ofa-cariety of lawn care tasks CARTON CONTENTS: QTY.
- Page 7 IHII[II[IIIVJIJII IIIIII IIII ,m,l,Wll,_llUll A.QQi_.]Iu[IIll .V _t°°l is received assembled, repeat all steps in this'section to be sure assembly is correct •,.v-...-...,,--.., and is adjusted for the Ol_mtor.) iiii IIIIIIIIII iiiiiiiiiiii iiiii i IIII i iiiiiiii iiiiiiiii A. PREPARATION 2. Tools you Will need: a.
- Page 8 '+ 3. DRIVl_ SHAFT HOUSING _ Figure4 4.ASSIST HANDLE --Figure a. Removethe packing cover from theend ofthe Drive a. Hold the Assist Handle so it is leaning back toward Shaft Housing. , NOLO: Make sure the Flexible Drive Shafl does not theEngineand aligned betweenthe Engineandthe...
- Page 9 ill i il l ii iiill ii •Him iiiiii IIIH I I II Illllllllllll IIIIII Illllllll iii iiiiii illl ENGINE INFORMATION 3. USE THE FOLLOWING ONLY: (16 parts gasoline to 1 part oil) a. Use only recommended fuel mixtures. b. Mix and pour fuel outdoors and where there are •...
- Page 10 IIIIIIllll II • i iiiiiiiiiiiiiii iii Illt ,HlUIlUUlII,U PRE_PERATION CHECKS Use only the specified trimmer head. See "Specifica- _WARNING tions?' Make sure the trimmer head is properly Review all Warnings and Safety Instructions in this installed and securely fastened, Refer to "Assembly" manual.
- Page 11 ,,,m I IIIIIIH 1 II IIII I IIIIIIIIIIWII IIIIIIIIIIIII 11 IIII[ D. OPERATING INSTRUCTIONS ." t. Bring the engine to cutting speed before entering 3. Make sure the Trimmer Head stops turning when the material to be cut. the Throttle Trigger is released and the engine runs at idle speed.
- Page 12 A. _'rRIMMEIg 1. OF A OR ..- - a. Always wear asafety face shield or goggles. See f. Make carburetor adjustments with the drive '_.ccessories,' shaft housing supported to prevent the trimmer line from contacting any object. Hold the tool b.
- Page 13 IlllIIIII i iiiiiiii C. CUTTING METHODS • The tip of the line does the cutting. Allow the line to Always wear eye protection. Never lean over the trim- trim at its own pace. You will achieve better results by met head. Rocksor debriscan ricochet orbethrmm into ..
- Page 14 I IIllIl II Ill GENERAL MAINTENANCE Illll iiiiiiiiiiiiiiiiiiiiiiiiii iii II IIIIIIIIII A. M_.JNTENANCE SAFETY Be sure thetrimmer head stops turning when engine Maintain the tool accordingto recommended pro- idles. See "Carburetor Adjustments:' cedures. Keep the trimmerline at the proper length. Use only Sears flexible, non-metallic monofilament Disconnect the spark plug before...
- Page 15 e. Make sure the line saver is in place and installed cor- rectly. Insert the end ofthe line in the line saver as shown TURN LOCK RING in Figure 20. Place spool in homing. Press spool down. CLOC_ TOINSTALL "lhm and lock spool under lugs on drive gear. f.
- Page 16 IIII IIIIIIIIII I IIII IIII IIIIII iUlllJmJll iillii IIIIl JIlllI 1. PREPARA'I_ON €. CARBURETOR ADJUSTMENTS a. Use a fresh fuel mix. See "Fueling Your Engine" AWARNING b. Make sure the line extends to the length allowed by Make carburetor adjustments with the drive shaft hous- the line limiter to provide correct load on engine.
- Page 17 DEmEan &TION CHECK HIGH SPEED MIXTURE a. Allow engine to idle, then squeeze Throttle Trigger fully. ICAUTZON: 1 Do not operate engine at full throttle for prolonged periods while making high speed b. Allow engine to run at full speed for about I second. adjustments as damage to the engine can occur.
- Page 18 E. STARTER ROPE • This is a complicated andpotenfially hazardous task. Move away from the fuel tank with the rope to be It is recommended that only your Sears Service installed. Use a match and melt both endsofthe rope Center perform this repair. to prevent fraying.
- Page 19 20. Pull thel2 inch slack in the rope into the inside ofthe fan housing and catch rope in pulley notch. Fig- ure29. 21. Hold the rope taut andmake 2 complete on'as ofthe pulley counterclockwise _ to placetension on the spring. Continue to hold the pulley to retain tension.
- Page 20 G. TROUBLE SHOOTING CHAKT TROUBLE CAUSE REMEDY .+._..i i ,H i i 1. Fill tank with correct fuel mixture, Engine wil! not start 1. Fuel tank empty. or will run only for 2. Engine flooded. 2. See "Startinglnstructions" a few seconds after 3.
- Page 21 WEEDWACKER ® REPAIR PARTS LIST -- Model 358.798141-28.0cc ]r l SE_ImrCl_fS_N. ¢u_ _umwJu=Kim* ..q...=..q.._,, PART • QTY. DESCRIPTION ..PART QTY. DESCRIPTION RE(}, REQ, •t 706515 _;mm.er Head Assembly 8t0ck 92216 Washer-3!8" DustCup #7! .B5764 (inclo2-9) 92359 DuSt Cup 93896 Hub wiUne Saver 92218...
- Page 22 SEAR s WACKER ® REPAIR PARTS ,--.Model 358.798141-28.0€€ 19 30 PART _¥. " " PART QTY. • ._ " v._ ;I. DESCRIPTION • REQ. DESCRIPTION 24436 BumperFuelTank Housing ' 25 26048 Starter Pulley 26566 Handle& FuelTank Housing 15123 Washer#10Staxter PulleyScrew 27373 HandleCover 15479...
- Page 23 VEEDWACKER ® REPAIR PARTS LIST -. Model 358.798141-28.0cc SEARS .% - 60.. 11- [_! !_-_i t6 5 PART QTY. DES_iP'RON " PART QTY. REQ. OLEO. DESCRIPTION 42059. Spring-Starter Dog 19105 Seat-Carburetor Case 69238 Line Kit Nut-Rywheei-(5/t6"x26) 541131 26236 ChokelWire 26029 Cover-Carburetor Case Washer-Rywheel •...
- Page 24 SEARSWEEDWACKER ® REPAIR PARTS LIST -- Model 358.798141.28.0cc: eu ,E'rOR 3S 83 Figure 4r r J Gasket PART QTY. PART QTY. DESCRIPTION DESCRIPTION REQ. REO. 35017 Screw-Pump Cover 35O36 Spring-Hi Sp_ Needle 35191 35142 PumpCoverAss'y.(Inc!.#4) Needle-Hi Speed 35164 35028 * + Gasket-Pump , +Pin.Metering Lever 35156 35016...
- Page 25 ....... I !L LIIJ IJ IIII "1IIIII IIIII IIII iiiiiii iiiiiiiiiiiiiiiiiii iiiiiiiiilil,liilltJit] liji iitilliliiiiilli ¿¿¿¿¿¿¿¿¿ IIII JlII L [JlILLLJ2111iL_ L _[LIWI]HII I II IIII mill Him The following accessories are available through Sears Retail Stores, Catalog, Outlets or Service Centers. ITEM STOCK Safety Face Shield ..............
- Page 26 NcrrFs...
- Page 27 IIII IIIIIIII IIIII /11 IIIII I IIIIIII III IIII QUICK REFERENCE PAGE Read and Follow All Warnit_, Safety Instructions and Operating Instructions. Failure to do so can result in serious injury. PREPARATION . • • ......... 3 &...
- Page 28 The ModelNumber will be foundunder the handle with the Serial Number. Always mentionthe Model Number when requesting service or repair parts for your unit. AIIpartslisted hereinmay be orderedfrom any SearsService Centerand most Sears Stores. WHEN ORDERING REPAIR PARTS GIVE THE FOLLOWING INFORMA- TION:AS,SHOWN!INTHIS_EIST ""...
Need help?
Do you have a question about the Weedwacker 358.798141-28.0cc and is the answer not in the manual?
Questions and answers