Table of Contents
Advertisement
Available languages
Available languages
Operator's
Manual
CRRFTSMRH °
LAWN
19.5 HR*
TRACTO
42" Mower
Electric Start
6-Speed Transaxle
Model No.
917.28807
• EspaSol,
p. 32
This product has a low emission
engine
which operates
differently
from
previously
built
engines.
Before
you start the
engine,
read and understand
this Owner's
Manual.
IMPORTANT:
Read and follow all Safety
Rules and Instructions
before
operating
this equipment.
For answers to your questions
about this product, Call:
1-800-659-5917
Sears Craftsman Help Line
5 am - 5 pm, Mon - Sat
SEARS,
ROEBUCKAND
CO., HOFFMAN
ESTATES,
IL 60179
U.S.A.
Visit our Craftsman
website:www.sears.com/craftsman
*As rated by the engine manufacturer
Advertisement
Table of Contents

Related Manuals for Craftsman 917.28807


Summary of Contents for Craftsman 917.28807
- Page 1 IMPORTANT: For answers to your questions about this product, Call: Read and follow all Safety 1-800-659-5917 Rules and Instructions before Sears Craftsman Help Line operating this equipment. 5 am - 5 pm, Mon - Sat SEARS, ROEBUCKAND CO., HOFFMAN ESTATES, IL 60179 U.S.A.
-
Page 2: Limited Warranty
..........Assembly/Pre-Operation ......Troubleshooting ........Sears Service ......Back Cover Operation ..........Maintenance Schedule ......CRAFTSMAN LIMITED WARRANTY TWO YEARS ON TRACTOR When operated and maintained according to all supplied instructions, if this tractor fails due to a defect in material... -
Page 3: General Operation
DANGER: This cutting machine is capable of amputating hands and feet and throwing objects. Failure to observe the following safety instructions could result in serious injury or death. o Never direct discharged material toward _,WARNING: In orderto prevent accidental anyone. Avoid discharging material starting when setting up, transporting, against a wall or obstruction. -
Page 4: Slope Operation
Ii. SLOPE OPERATION • Never carry children, even with the blades shut off. They may fall off and Slopes are a major factor related to loss of be seriously injured or interfere with control and tip-over accidents, which safe machine operation. -
Page 5: General Service
• Keep machine free of grass, leaves, • Remove gas-powered equipment from other debris build-up. Clean oil or fuel the truck or trailer and refuel it on the spillage and remove any fuel-soaked ground. If this is not possible, then debris. -
Page 6: Product Specifications
(Gap: .030") AGREEMENTS Ground Speed Forward: Congratulations on making a smart pur- (MPH): chase. Your new Craftsman® product designed and manufactured for years of dependable operation. But like all products, it may require repair from time to time. That's when having a Repair Protection Agreement can save you money and aggravation. - Page 7 Steering Wheel Steering (1) Large Flat Washer Wheel Insert (1) 5/16 Lock Washer (1) Hex Bolt 5/16-18 x 4 Steering Extension []_M Steering Wheel Steering Adapter Shaft Boot Seat (1) Washer _(1) Knob (1) Seat (1) Oil Drain Tube For Future Use Slope Sheet Keys...
- Page 8 Your new tractor has been assembled at the factory with the exception of those parts left unassembled for shipping purposes. To ensure safe and proper operation of your tractor all parts and hardware you assemble must be tightened securely. Use the correct tools as necessary to insure...
-
Page 9: Check Battery
Lower seat into operating position NOTE: You may now roll your tractor sit in seat. the skid. Follow the appropriate instruction below to remove the tractor from the skid. Slide seat until a comfortable position is reached which allows you to press WARNING: Before starting,... - Page 10 CHECK TIRE PRESSURE Vf CHECKLIST The tires on your tractor were overin- flated at the factory for shipping purposes. Before operate your tractor, Correct tire pressure is important for best wish to assure that receive best cutting performance. performance satisfaction from this •...
- Page 11 These symbols may appear on your tractor or in literature supplied with the product. Learn and understand their meaning. REVERSE NEUTRAL HIGH CHOKE FAST SLOW IGNITION SWITCH ENGINE OFF REVERSE ENGINE ON ENGINE START PARKING BRAKE MOWER HEIGHT MOWER LiFT OPERATION SYSTEM (ROS)
-
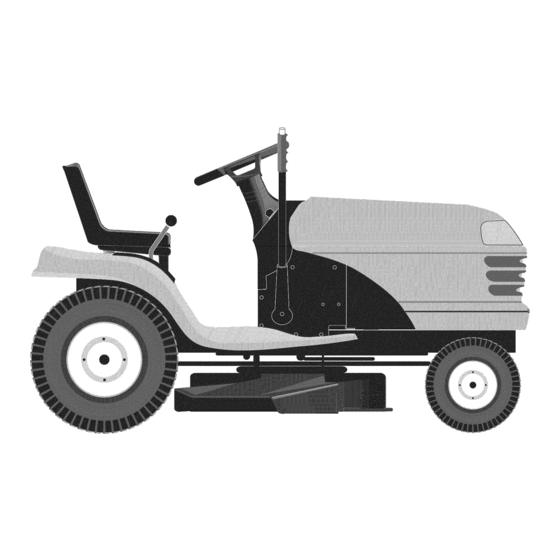
Page 12: Know Your Tractor
KNOW YOUR TRACTOR READ THIS OWNER'S MANUAL SAFETY RULES BEFORE OPERATING YOUR TRACTOR Compare the illustrations with your tractor to familiarize yourself with the locations various controls and adjustments. Save this manual for future reference. Attachment ROS "ON" Position Clutch Lever Ignition Switch Throttle/Choke Control... - Page 13 The operation of any tractor result in foreign objects thrown into the eyes, which can result in severe eye damage. Always wear safety SAFETYGLASSES glasses or eye shields while operating your tractor or performing adjustments or repairs. We recommend a wide vision safety mask over...
- Page 14 USING REVERSE OPERATION • The average lawn should be cut to ap- SYSTEM proximately 2-1/2 inches during the cool season and to over 3 inches during hot Depress clutch/brake pedal all the way months. For healthier and better looking down and hold.
-
Page 15: Towing Carts And Other Attach= Ments
TOWING CARTS AND OTHER ATTACH= CAUTION: Alcohol blended fuels (called MENTS gasohol or using ethanol or methanol) attract moisture which leads to separa- Tow only the attachments that are recom- tion and formation of acids during storage. mended by and comply with specifications Acidic gas can damage... -
Page 16: Mowing Tips
COLD WEATHER STARTING ( 50 ° F and below) When engine starts, leave throttle control in choke position until engine warms up and begins to run roughly. Once rough running begins, imme- diately move the throttle control to the fast position. Engine warm-up take from several... - Page 17 MAINTENANCE BEFORE EVERY EVERY EVERY EVERY EVERY BEFORE SCH E D U L E EACH SEASON STORAGE HOURS HOURS HOURS HOURS Check Brake Operation Check Tire Pressure Check Operator Presence & ROS System. _ Check for Loose Fasteners Check/Replace Mower Blades Lubrication Chart...
-
Page 18: Blade Removal
ROS "ON" Position TRACTOR Engine "ON" Position (Normal Operating) Always observe safety rules when per- forming any maintenance. BRAKE OPERATION If tractor requires more than five (5) feet to stop at highest speed in highest gear on a level, dry concrete or paved surface, then... - Page 19 BATTERY Change the oil after every 50 hours of opera- tion or at least once a year if the tractor Your tractor has a battery charging system not used for 50 hours in one year. which is sufficient for normal use.
-
Page 20: Air Filter
AIR FILTER Clean out chaff and debris Air Screen Your engine will not run properly using a dirty air filter. Replace pre-cleaner after every 25 hours of operation or every season. Service paper cartridge every 100 hours of operation or every season, whichever occurs... - Page 21 SERVICE OR ADJUSTMENTS: WARNING" TO AVOID SERIOUS INJURY, BEFORE PERFORMING Depress clutch/brake pedal fully and set parking brake. Place gearshift lever in neutral (N) position. Place attachment clutch in "DISENGAGED" position. Turn ignition key to "STOP" and remove key. Make sure the blades and all moving parts have completely...
-
Page 22: Side-To-Side
TO LEVEL MOWER HOUSING Check adjustment on right side of trac- Measure distance "D" directly in front Adjust the mower while tractor is parked level ground or driveway. Make suretires and behind the mandrel at bottom edge of propedy inflated (See the sides of tires for mower... - Page 23 TO REPLACE MOWER BLADE DRIVE TO REPLACE MOTION DRIVE BELT BELT Park the tractor on level surface. Engage The mower blade drive belt may be parking brake. For assistance, there is a belt installation guide decal on bottom side replaced without tools.
- Page 24 TRANSAXLE GEAR SHIFT LEVER NEU= Replace washers and snap retaining TRAL ADJUSTMENT ring securely in axle groove. Replace axle cover. The transaxle should be in neutral when the NOTE: To seal tire punctures and prevent gear shift lever is in neutral (N) (lock gate) flat tires due to slow leaks, purchase...
- Page 25 REPLACING BATTERY INTERLOCKS RELAYS Loose or damaged wiring may cause _,WARNING: Do not short batteryterminals your tractor to run poorly, stop running, by allowing a wrench or any other object to prevent it from starting. contact both terminals at the same time.
- Page 26 Immediately prepare your tractor for stor- blended fuels (called gasohol or using age at the end of the season or if the trac- ethanol or methanol) can attract moisture tor will not be used for 30 days or more. which leads to separation and formation acids...
-
Page 27: Troubleshooting
TROUBLESHOOTING CHART: See appropriate section in manual unless directed to Sears service center PROBLEM CAUSE CORRECTION Will not start Out of fuel. Fill fuel tank. See "TO START ENGINE" Engine not "CHOKED" properly. Operation section. Wait several minutes before Enginefiooded. attempting to start. - Page 28 TROUBLESHOOTING CHART: See appropriate section in manual unless directed to Sears service center PROBLEM CAUSE CORRECTION Engine clicks but Weak or dead battery. Recharge or replace battery. will not start Corroded battery terminals. Clean battery terminals. Loose or damaged wiring. Check all wiring.
- Page 29 TROUBLESHOOTING CHART: See appropriate section in manual unless directed to Sears service center PROBLEM CAUSE CORRECTION Poor cut = uneven Worn, bent or loose blade. Replace blade. Tighten blade bolt cutting Mower deck not level. Level mower deck. Clean underside of mower Buildup of grass, leaves, and trash under mower.
- Page 30 TROUBLESHOOTING CHART: See appropriate section in manual unless directed to Sears service center PROBLEM CAUSE CORRECTION Battery will not Bad battery cell(s). Replace battery. charge Poor cable connections. Check/clean all connections. Faulty regulator (if so equipped). Replace regulator. Faulty alternator. Replace alternator.
- Page 31 SUGGESTED GUIDE FOR SIGHTING SLOPES FOR SAFE OPERATION ONLY RIDE UP AND DOWN HILL, NOT ACROSS HILL 15 DEGREES MAX. down the face of slopes, never across the face. Do not mow WARNING: To avoid serious injury, operate your tractor up and slopes greater than 15 degrees.
- Page 32 Contratapa Mantenimiento ..........GARANTiA LIMITADA DE CRAFTSMAN DOS ANOS PARA TRACTORES Si opera y mantiene este tractor segOn todas las instrucciones provistas, y este deja de funcionar debido a defectos de! material o de la mano de obra dentro de los dos a_os posteriores...
- Page 33 PELIGRO: Esta Maquina cortadora es capaz de amputar las manosy los pies y de lanzar objetos, si no se observan las instrucciones de seguridad siguientes se pueden producir lesiones graves o la muerte. _I,ADVERTENCIA: Siempre desconecte • No hacer funcionar la m&quina sin el alambre de la bujia y p6ngalo donde no pueda captador de hierba entera, la protecci6n de entrar en contacto con la bujia, para evitar el...
- Page 34 • Escoger una velocidad de marcha baja de • Nunca permitir que niflos u otras personas modo que no sea necesario pararse o cam- esten dentro del equipo por remolcar. biar estando en una pendiente. • En pendientes, el peso del equipo remolcado •...
- Page 35 • Las cuchillas de! cortacesped son afiladas. • Mantener la maquina libre de hierba, hojas Envolver la cuchilla, ponerse guantes y poner u otros residuos acumulados. Limpiar las la maxima atenci6n cuando se hacen opera- salpicaduras de aceite o carburante y quitar clones en elias.
- Page 36 Velocidad de Marcha Hacia Adelante: Congratulaciones per su buena compra. 1 s7 Recarrido(MPH): Su nuevo producto Craftsman® est& diseSado 2 nd y fabricado para funcionar de mode fiable per 3 rd muchos aSos. Pero come todos los productos, puede necesitar alguna reparaci6n de tanto en tanto.
- Page 37 Voiante de direccion Inserto (1) Arandela volante direcci6n (1) Arandela (1) Perno hexagonal seguridad 5/16 5/16-18 Eje de Extenci6n Accesorio Adaptador transci6n de la direcci6n Asiento (1) Arandela de calibre (1) Manilla (1) Asiento Hoja de pendiente Liaves (2) Llaves...
- Page 38 Su tractor nuevo ha sido montado en la f&brica con la excepci6n de aquellas partes que no se han montado por razones de envio. Para asegurarse que su tractor funcione en forma adecuada y segura todas las partes y los articulos de ferreteria que se monten tienen que set apretados en forma segura.
- Page 39 Deslice el asiento hasta que Ilegue a una AVlSO: Ahora puede rodar su tractor fuera de posici6n c6moda, que le permita presionar la corredera. Siga las siguientes instrucciones el pedal del embrague/freno completamente para remover el tractor de la corredera. hasta abajo.
- Page 40 REVISION DE LA PRESION DE LAS _LiSTA DE REVISION LLANTAS Las Ilantas en su tractor fueron infladas de- Antes de operar y de disfrutar de su tractor nuevo, masiado en la f&brica por razones de envio. La le deseamos que reciba el mejor rendimiento y la mayor satisfaccion de este producto de calidad.
- Page 41 Estos simbolos pueden aparecer sobre su tractor o en la literatura proporcionada con el producto. Aprenda y comprenda sus significados. MARCHA ATRAS NEUTRO ALTO BAJO ESTRAN. GU- R,_PIDO LENTO LACION " (@) -@ MOTOR MOTOR MOTOR LEVANTAMIENTO FRENO ALTURA DE LA ESTACIONAMIENTO SEGADORA DE LA SEGADORA...
- Page 42 FAMILIARICESE CON SU TRACTOR LEA ESTE MANUAL DEL DUEllO Y LAS REGLAS DE SEGURIDAD ANTES DE OPERAR SU TRACTOR Compare las ilustraciones con su tractor para familiarizarse con las ubicaciones de los diversos controles y ajustes. Guarde este manual para referencia en el futuro. Patanca det embrague Posici6n ROS "ON"...
- Page 43 La operaci6n de cualquier tractor puede hacer que salten objetos extraflos dentro de sus ojos, Io que puede producir daflos graves en estos. Siempre use anteojos SEGURIDAD de seguridad o protecciones para los ojos mientras opere su tractor o cuando haga ajustes o reparaciones.
- Page 44 PARAOPERAR LA SEGADORA PARA OPERAR EN CERROS Su tractorviene equipadacon un interruptor _,ADVERTENOIA: No maneje hacia arriba o sensorqueexigela presencia del operador. S i hacia abajo en cerros con pendientes superiores a el motorest&funcionando y e!embrague delac- 15 ° y no maneje atravesando ninguna pendiente.
- Page 45 AGREGUE GASOLINA • Los accesorios y el embrague ahora pueden • Llene el estanquede combustible.Llene ser utilizados. Si el motor no acepta esta carga, hastalaparteinferior delcuellode relleno del vuelva a arrancar el motor para permitirle que estanque degasolina. N oIoIlenedemasiado. se caliente por un minuto utilizando el estran- Usegasolina regular, s in plomo,nuevay lim- gulador como describido arriba.
- Page 46 PROGRAMA ANTES CADA CADA CADA CADA CADA ALMACENAMIENT( MANTENIMIENTO CADA use TEMPORADA HORAS HORAS HORAS HORAS Revisar la operacion del freno Revisar la presion de las Ilantas verifiez la commande de presence d'operateur et le sistema d ROS Revisar si hay sujetadores sueltes Afilar/cambiar las cuchillas...
- Page 47 TRACTOR • Cuando el motor est& en marcha con el interruptor de Ilave del sistema de funcio- Siempre observe las reglas de seguridad cu- ando de mantenimiento. namiento atr&s (ROS) en la posici6n "ON" y el embrague del accesorio conectado, cual- OPERAClON DEL FRENO...
- Page 48 Revise el nivel del aceite del carter antes de ar- BATERiA rancar el motor y despues de cada ocho (8) horas Su tractor cuenta con un sistema de carga de la de uso continuado. Apriete la tapa del relleno/va- bateria que es suficiente para el uso normal. Sin rilla indicadora de nivel del aceite en forma segura embargo, si se carga la bateria peri6dicamente, cada vez que revise el nivel del aceite.
-
Page 49: Filtro De Aire
FILTRO DEACEITEDELMOTOR SISTEMA DE ENFRIAMIENTO DE AIRE Cambie el filtrodeaceitedelmotorcadatem- Los escombros pueden atascar el sistema de poradaovez pormedioquecambie el aceite, s i enfriamiento de aire de motor. Remueva la cubi- eltractorse usam&sde 100horasen unaflo. erta del soplador y limpie el &rea mostrada para FILTRO DEAIRE evitar el recalentamiento y daflos al motor. - Page 50 & ADVERTENCIA:PARA EVITAR LESK_NES SERIAS, ANTES DE DAR CUALQUIER SERVICIO O DE HACER AJUSTES: Presione el pedal del embrague/freno completamente y aplique el freno de estacionamiento. Ponga la palanca de cambios en la posici6n de neutro (N). Ponga el embrague del accesorio en la posici6n desenganchado (DISENGAGED).
- Page 51 AJUSTE DE LADO A LADO Cuando la distancia "D" sea de 1/8" a 1/2" mas baja en la parte delantera queen la trasera, Levante la segadora a su posici6n mas alta. apriete la tuerca "F" en contra del mufl6n en , A media distancia de ambos lados de la sega- dora, mida la altura desde la parte inferior del ambos varillajes delanteros.
- Page 52 PARA CAMBIAR LA CORREA CONTROLAR Y AJUSTAR EL FRENO IMPULSION DE MOVIMIENTO Si el tractor exige m&s de cinco (5) pies para Estacione el tractor en una superficie nivelada. pararse a una velocidad m&s alta en el cambio Enganche el freno de estacionamiento.
- Page 53 PARA CAMBIAR EL FUSIBLE REEMPLAZAR LA BATERIA C&mbielo por un fusible tipo enchufable de 20 _I_,ADVERTENCIA: No haga cortocircuito amps, tipo automotriz. El sujetador del fusible los terminales de la bateria al permitir que una est& ubicado detr&s del tablero. Ilave de tuerca o cualquier otro objeto entre en contacto con ambos terminales a la misma...
- Page 54 MOTOR Inmediatamente prepare su tractor para el alma- cenamiento al final de la temporada o si el tractor SISTEMA DE COMBUSTIBLE no se va a usar pot 30 dias o m&s. IMPORTANTE: Es important evitar que se for- _ADVERTENClA: Nunca almacene el tractor man depositos de goma en partes fundamen- tales del sistema de combus-tible...
- Page 55 IDENTiFICACiON DE PROBLEMAS: Yea la secci6n apropiada en el manual a menos que este dirigido a un centro de servicio Sears, PROBLEMA CAUSA CORRECCION 1. Sin combustible. 1. Llene e! estanque de combustible. NO arral3ca 2. Motor sin la 2. Vea "PARA ARRANCAR MOTOR"...
- Page 56 IDENTIFICACION DE PROBLEMAS: Yea la secci6n apropiada en el manual a menos que este dirigido a un centro de servicio Sears, PROBLEMA CAUSA CORRECCION Perdida de fuerza Acumulaci6n de cesped, hojas y 3. Limpie la parte inferior de la caja (continuado) basura debajo de la segadora.
- Page 57 IDENTIFICACION DE PROBLEMAS: Yea la secci6n apropiada en el manual a menos que este dirigido a un centro de servicio Sears, CAUSA PROBLEMA CORRECCION Las cuchillas 1. Obstrucci6n en el mecanismo 1. Remueva la obstrucci6n. segadoras no rotan del embrague. 2.
- Page 59 GUiA SUGERIDA PARA IViEDIR LAS PENDIENTES CON LA VISTA PARA UNA OPERACION SEGURA SOLAMENTE ANDE CUESTA ARRIBA O CUESTA ABAJO Y NO ATRAVIESE EL CERRO 15 GRADOS MAX. ADVERTENCIA: Para evitar dafios graves, haga funcionar su tractor arriba y abajo de las pendientes, nunca transversalmente con respecto a ias pendientes.
- Page 60 NEED MORE o Findthis and a[[ your other product manualsonline. oGet answers from our t eam ofhome experts. oGet apersooaUzed maioteoance ptao f or y our home. oFind i nformatio_ and tools t ohelp with home project_. manage[_ home b_o_ght tos'o_ b ySoa_ Your Home For repair - in your...
Need help?
Do you have a question about the 917.28807 and is the answer not in the manual?
Questions and answers