Table of Contents
Advertisement
Owner's Manual
rRRFTSMAN®
ALL-IN-ONE
CUTTING TOOL
Model No.
183,172520
Important
Safety Notice
[&
WARNING
I
Always have one hand firmly
placed on the tool body while
operating, Never operate the
tool by holding only the tool
handle.
®
CAUTION:
Before using this Cutting
Tool, read this manual and
follow all its Safety Rules
and Operating
Instructions.
• Safety Instructions
• Accessories
• Assembly
• Operation
• _aintenance
• Parts List
• Espanol
Seam, Roebuck and Co., Hoffman Estates, IL 60179 USA
Part. No. 183172520001
Rev. 1
04/29102
Advertisement
Table of Contents

Related Manuals for Craftsman 183.172520


Summary of Contents for Craftsman 183.172520
- Page 1 Owner's Manual rRRFTSMAN® ALL-IN-ONE CUTTING TOOL Model No. 183,172520 ® Important Safety Notice [& WARNING Always have one hand firmly placed on the tool body while operating, Never operate the tool by holding only the tool handle. • Safety Instructions CAUTION: •...
- Page 2 SECTION PAGE SECTION PAGE Warranty ..Carton Contents 6, 7 Product Spec_lcations Know Your Cutting Tool ..Power Tool Safety . Assembly & Operation 9 - 18 CuttmgTool Safety ..Mamtenance ..ElectricalRequirements& Safety Repatr Parts 19 - 25 Accessooes Parts &Servtce Avaiiabtl_ ..
- Page 3 IA WARNING I Before using your cutting tool, it is critical that you read and understand these safety rules. Failure to follow these rules could result in serious injury to you or damage to the cutting tool. REMOVE ADJUSTING KEYS AND WRENCHES Good safety practices are a combination of common sense, staying alert and understanding how to use your Form the habit of checking to see that keys and...
- Page 4 11. NEVER HOLD THE WORKPIECE IN ONE HAND For your safety, do not plug in your cutting tool or try to use any accessory until It Is completely assembled whale operating the tool wnth the other hand and installed according to these instructions, 12 NEVER PLACE HANDS iN THE PATH OF THE until you have read and understood this Owner's...
- Page 5 BZo)gl :! N :il_ k.'l_gl iF_,1II[o] _ I[Clli I"] :1 III _, I :kl ;[o] :l _;,q 1:1_i,.-![el _I[o[e] _,|-,_ This cutting tool is double insulated to protect you from Make sure your extension cord is in good condition. electrical shock When using an extenslon cord, be sure to use one heavy enough to can_ the current the tool will draw An undersized cord will cause a drop m llne voltage resulbng...
- Page 6 :le[o,]:l,,"[,,,_o] ;,11:1_ AVAILABLE ACCESSORIES UNPACKING AND CHECKING CARTON CONTENTS I,A, WARNING I WARNING Use only accessories recommended for this cutting If any part is missing or damaged, do not plug the tool. Follow instructions that accompany accessories. cutting tool into the power source until the missing or Use of improper accessories may cause injury to the damaged part is replaced and assembly is complete.
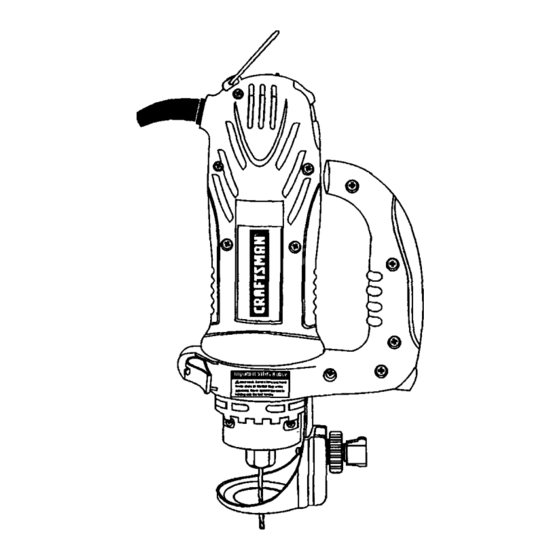
- Page 8 Motor HOUSIng Motor Housing Qu_k Mounta_ Bracket Lever Mounting C1r_ Bracket Cuthn( Adlushng Qu_k Knob Locking Level D_sc Mounhng Insed Locking Knob Motor Hous,ng--_-" Pma_on Handle Depth Motor Housqng Depth Scale" .. He,hi Knobs Qumk Lockm plunge Knob Lockm Ac_on Lever Turret Bevel...
- Page 9 IA WARNING I INSTALLING CUTTING BITS - Cont'd Remove the plug from the power source before assembly, changing accessories or cutters and making adjustments. This safety action will help Insert new cutting bit (4) into the collet prevent accidental starting of the tool which could IA WARNING I result in serious injury.
- Page 10 CHANGING COLLET INSERT INSTALLING FREEHAND SOLE PLATE - cont'd The cutting bits for this tool are locked into ptace with a Shde freehand sole plate mounting bracket (1) onto collet nut (1) and collet (see Fig 3) The tool is assembled the bottom of motor housing (2) until the slot in the at the factory with NO collet insta!led Both the l/s"...
- Page 11 PRACTICE CUTS USING FREEHAND SOLE PLATE IA wAR.I.G I Set the speed control switch to the appropriate speed Have you read =POWER TOOL SAFETY", Turn the swntch ON "cuTrlNG TOOL SAFETY" and "ELECTRICAL SAFETY" on pages 3, 4 and 5 of this Manual? When the motornsup to fullspeed, slowiyttp the tool not, please do it now before you operate this to an upnghtposttnon, lettnng the bit cut nntothe...
- Page 12 CUTTING OUTLET OPENINGS IN DRYWALL CUTTING OUTLET OPENINGS IN DRYWALL - cont'd Move the bit slowly to the nght until you feel and he; DANGER the bit contacting the mstde of the box Do not attempt to use this tool to make cut-outs around any fixture or opening which has live electrical Pull the btt out far enough to shp tt over the edge of...
- Page 13 ADJUSTING FREEHAND SOLE PLATE - Cont'd INSTALLING PRECISION HANDLE The prectslon handle is desogned for use when prec0sion control over the tool movement 0sdesired The comfortable handle can be used with either the right or left hand Fig. l l Shde precls0on handle mounting bracket (1) onto the bottom of motor housmg (2) until the slot under the ::::(ql=...
- Page 14 s] I_-{qil _[_eil illi1"_: CIRCLE CUTTER OPERATION - cont'd CIRCLE CUTTER OPERATION Turn the switch ON IA WARNINGI Unplug the tool from the power source I_fore When the motor is up to full speed, slowly hp the t_ changing accessories, changing bits and making and clrole cutter assembly to an upright posdlon, letting the bit cut into the workpiece (see Fig 14) I...
- Page 15 SETTING ROUTER DEPTH FOR SINGLE DEPTH ONLY _tLIJ_[¢]=l I='TO]IInlI;:I,41:Y,JI.'] The router accessory converts your cuttnngtool Into a Depth of cutting os controlled by sliding the router base up small hobby plunge router that uscapable of handling and down on the gutde rods and locking dun place small '/,"...
- Page 16 SETTING PLUNGE DEPTH - cont'd SETTING ROUTER BASE BEVEL Bevel cutting with the cutting bit can be done with the Loosen both height adjust=ng knobs (6) by tummg them counter clockw=se router base tilted to the desired angle NOTE Only loosen height adjushng knobs enough to release the tens=on on the gutde rods (7) Loosen both bevel adjustmg locks (1) by pulhng them outward from the router base (2) (see Fig 18)
- Page 17 | lUJ _, [ l'] :11=|o]ll 1:1:| I:T'_ FREEHAND CUTTING AND ROUTING CU'I-rlNG STRAIGHT LINE WITH STRAIGHT EDGE When the router base accessory is installed on the cutting To cut a straightline, you can use a straightedge tool, it will function as a small router to be used for templateto guide the routerbase freehand cutting of irregular shaped patterns You can cut patterns out of the workpnese with the cutting bit or route...
- Page 18 For your own safety, turn the switch OFF and remove undunder nom_l conditions.Therefore, no further the plug from the power source before maintaining lubrication is required your cutting tool. When servicing, use only Identical Craftsman parts. Use of any other part may create a hazard or cause product damage.
- Page 19 Main Unit...
- Page 20 WARNING When servicing use only CRAFTSMAN replacement parts. Use of any other parts may create a HAZARD or cause damage to your Cutting Tool. Any attempt to repair or replace electrical parts on this Cutting Tool may create a hazard unless repair is...
- Page 21 Freehand Soleplate Assembly Part Name Key # Part # 02AF-000041-10 F[xlngshaft 02AF-000076-00 Release lock pin 02AS-000287-00 Screw 2213-MA0010-00 Freecutmetal round guide Lock 2213-PA0010-00 Fixbase 2213-PA0011-00 2213-PA0012-00 Piast=c guide base 2213-PA0013-00 AdjustmentGear 15T Sleeve 2213-PA0014-00 Sclew lock F 2213-PA0015-00...
- Page 22 Handle Assembly Key # Part # Part Name 02AF-000041-10 Fixingshaft 02AF-000076-00 Release lock pin 02AH-000106-00 Compressivespnng Screw 02AS-000148-00 02AS-000287-00 Screw 02AS-000288-00 Screw Washer 02AW-000067-00 2213-MA0013-00 S-roundguide holder Lock 2213-PA0010-00 2213-PA0012-00 Plasbcguide base 2213-PA0013-00 AdjustmentGear 15T 2213-PA0014-00 Sleeve Screw lock F 2213-PA0015-00 2213-PA0016-00 Anx righthandle...
- Page 23 Circle Cutter Assembly Key # Part # Part Name 02AN-000017-00 I Square nut 02AN-000018-00 Hexagon thin nut 02AS-000258-00 Machine screw 02AS-000272-00 Screw 02AW-000022-00 Spdng washer 2206-MA0001-00 Cimular arm (metric) 2206-MA0005-00 Cimular arm (inch) 2206-MA0002-00 Washer 2206-MA0003-00 Handle bush 2206-PA0001-00 Dgstance lock w=thcenter pin 2206-PA0003-00 Locking base 2206-PA0004-00...
- Page 24 Router Assembly...
- Page 25 Router Assembly Part Name Key # Part # 02AF-000041-10 Fixingshaft 02AF-000077-00 Base release lock pin 02AF-000078-00 ; Height rod Guide bush 02AG-000145-.00 02AJ-000016-00 Routertile base 02AH-000107-00 Spring 02AH-000108-00 Spring 02AH-000109-00 Spring Screw nut 02AN-000001-A0 02AN-000013-00 Square nut 02AN-000019-00 M4 fixing nut Steel ball 02AQ-000001-A0 Screw...
- Page 26 For repair of major brand appliances in your own home... no matter who made it, no matter who sold it! 1-800.4-MY-HOME ® Anybrne, day or night (1-800-469-4663) (U S.A. and Canada) _,-_ www.sears.com www.sears.ca For repair of carry-in products like vacuums, lawn equipment, and electronics, call for the location of your nearest ?:"...
Need help?
Do you have a question about the 183.172520 and is the answer not in the manual?
Questions and answers
Edge cutting guide.accsery, attaches to base plate.
The edge cutting guide accessory for the Craftsman part number 183.172520 is the Rip Guide.
This answer is automatically generated