Panasonic Lumix DMC-TS20 Owner's Manual
Hide thumbs
Also See for Lumix DMC-TS20:
- Owner's manual (79 pages) ,
- Basic owner's manual (31 pages) ,
- Instrucciones básicas de funcionamiento (25 pages)

Related Manuals for Panasonic Lumix DMC-TS20


Summary of Contents for Panasonic Lumix DMC-TS20
- Page 1 Pa.aso.ic Owner's Manual for advanced features Digital Camera _o_e, _o DMC-TS20 Before connecting, operating or adjusting this product, please read the instructions completely. VQT4B00 F1211HY0...
- Page 2 Contents Playing Back Motion Pictures ....39 Deleting Pictures ........• To delete a single picture ....40 • To delete multiple pictures Before Use (up to 50) or all the pictures ....41 Setting the Menu ........Care of the camera ........•...
- Page 3 Taking a Picture with Face Recognition Function ..........Connecting to other equipment • Face Settings ........Entering Text ........... Playing Back Pictures on a Using the [Rec] Menu ......TV Screen ..........• [Picture Size] ........Saving the Recorded Still Pictures and [Sensitivity] ........
- Page 4 Before Use Please be sure to read "(Important) About the WaterprooflDustproof and Anti-shock Performance of the Camera" (P6) before using this unit underwater to prevent the unit from being mishandled, which may cause water to seep • Handling of the camera (to prevent water leakage...
- Page 5 2 hours with the side door open when the temperature of the camera gets close to the ambient temperature. • Contact Panasonic's Service Center if the fogging does not disappear. Conditions in which inner side of the lens may be fogged...
- Page 6 1 This means that the camera can be used underwater for specified time in specified pressure in accordance with the handling method established by Panasonic. "MIL-STD 810F Method 516.5-Shock" is the test method standard of the U.S. Defense Department, which specifies...
- Page 7 If an impact to the camera occurs, it should be inspected (subject to a fee) by a Panasonic's Service Center to verify that the waterproofing is still effective. • When the camera is splashed with detergent, soap, hot spring,...
- Page 8 1 year, with use and age. To avoid permanently damaging the camera the seals should be replaced once each year. Please contact Panasonic's Service Center for related costs and other information. Close the side door securely. (_) [LOCK]...
- Page 9 Before Use • Use the camera underwater to 5 m (16 feet) with the water temperature between 0 °C and 40 °C (32 '_F and 104 °F). • Do not use for scuba diving (Aqualung). • Do not use the camera at a depth of over 5 m (16 feet).
- Page 10 Before Use Drain water by holding the camera upside-down @ and the right up _ shaking it lightly a few times. • After using the camera at the beach or in water, or after washing it, water may remain around the speaker and microphone for a while and may cause a drop in volume...
- Page 11 • if any accessories are lost, customers in the USA and Puerto Rico should contact Panasonic's parts department at 1-800-833-9626 and customers in Canada should contact 1-800-99-LUMIX (1-800-995-8649) for further information...
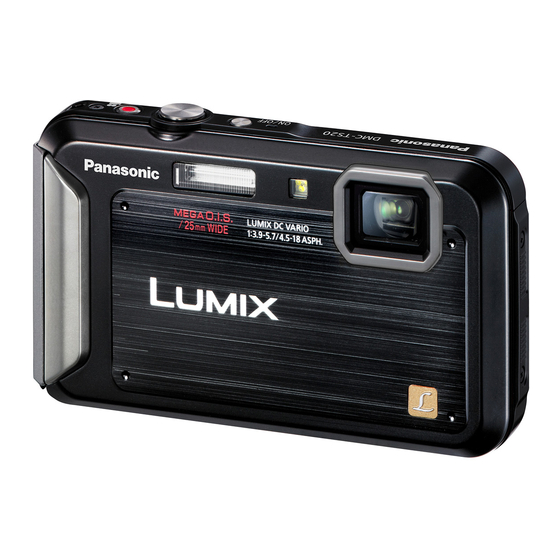
- Page 12 Before Use Flash (P57) 2 3 456 Motion picture button (P35) Shutter button (P29, 32) Camera [ON!OFF] button (P24) Microphone Self-timer indicator (P62)! AF Assist Lamp (P9I) Lens (PS, 134, 143) LCD monitor (P53, I28, I33) 10 11 [MODE] button (P27, 95) 10 Zoom button (P54) 11 Strap eyelet (P14) •...
- Page 13 Before Use @: A/Exposure compensation (P631 Cursor buttons ,_. ,f,=(___ Auto Bracket (P64) ._.L_ (_: •/Macro Mode (P61) AF Tracking (P87) (_): _l/Self-timer (P62) @: I_/Flash setting (P57) In this Owner's Manual, the cursor buttons are described as shown in the figure below or described with A/T!,_/I_.
- Page 14 Preparation _Run strap through strap eyelet on the camera. • If the strap cord is loose, it may snag when the side door is opened or closed. Since damage or leaks may result, be sure to attach the cord firmly, checking that it is not snagged in the side door.
-
Page 15: Charging
To ensure that safe products are used, we recommend that a genuine Panasonic battery pack is used. Use the dedicated charger and battery. • The battery is not charged when the camera is shipped. - Page 16 Preparation • About the [CHARGE] indicator Charging. Off: Charging has completed. (Disconnect the charger from the electrical socket and detach the battery after charging is completed.) • When the [CHARGE] indicator flashes -The battery temperature is too high or too low. It is recommended to charge the battery again in an ambient temperature...
- Page 17 & Imaging Products Association]. • Temperature: 23 _C (73.4 °F)/Humidity: 50%RH when LCD monitor is on. • Using a Panasonic SD Memory Card (32 MB). • Using the supplied battery. • Starting recording 30 seconds after the camera is turned on. (When...
- Page 18 Preparation • Playback Approx. 240 min • The operating times and number of recordable pictures will differ according to the environment and the operating conditions. For example, in the following cases, the operating times will shorten and the number recordable pictures is reduced: low temperature...
- Page 19 Preparation •Check that this unit is turned off. that there is no foreign object. (P8) •Confirm • We recommend using a Panasonic card. ®, [LOCK] O:Slide switch and release the lock. _:Slide the release lever _ and open the side door.
- Page 20 Preparation • Remove the battery after use. (The battery will be exhausted if left for a long period of time after being charged.) • Turn the camera off and wait for the "LUMIX" display on the LCD monitor to clear before removing the card or battery.
- Page 21 Preparation The following operations can be performed using this unit: Pictures can be recorded on the built-in When a card has not been inserted memory and played back. Pictures can be recorded on the card and When a card has been inserted played back.
- Page 22 Preparation The following cards, which conform to the SD video standard, can be used with this unit. (These cards are indicated as card in the text.) • Use a card with SD Speed Class I with "Class 4" or higher when recording motion pictures.
- Page 23 Preparation • About the display of the number of recordable pictures and available recording time • You can confirm the number of recordable pictures and available recording time by pressing [DISPLAY] several times. (P53/ Number of recordable pictures Available recording time •...
- Page 24 Preparation • The clock is not set when the camera is shipped. button. Press camera [ON/OFF] • If the language select screen is not displayed, proceed to [Requirements for Underwater use] below. Press [MENU/SET]. Press All' to select the language, and press [MENU/SET]. [Requirements for Underwater use]...
- Page 25 Preparation Press <1/1_ to select the items (year, month, day, hour, minute, display sequence or time display format), press to set. @: Time at the home area (D: Time at the travel destination • You can cancel without setting the clock by pressing [1_/_].
- Page 26 Preparation Hold the camera gently with both hands, keep your arms still at your side and stand with your feet slightly apart. • To prevent dropping, be sure to attach the supplied strap and fit it to your wrist. {P14/ •...
- Page 27 Basic Press [MODE]. MODE AI,I,II_ Press to select the Recording Mode. Press [MENU/SET]. - 27-...
- Page 28 Basic • List of Recording Modes The subjects are recorded using settings automatically selected by the camera. The subjects are recorded using your own settings. Use this mode to take pictures of sporting events, etc. This allows you to take pictures that show the snow as white as possible at a ski resort or a snow-covered mountain.
- Page 29 Basic The camera will set the most appropriate settings to match the subject and the recording conditions so we recommend this mode for beginners or those who want to leave settings to the camera and take pictures easily. • The following functions are activated automatically.
- Page 30 Basic When the camera identifies the optimum scene, the icon of the scene concerned is displayed in blue for 2 seconds, after which its color changes to the usual red. When taking pictures [i-Portrait] [i-Scenery] [i-Macro] [i-Night Portrait] [i-Night Scenery] [i-Sunset] [i-Baby] _2 41 Only when [i_A] is selected.
- Page 31 Basic Following menus be set. [Rec] [Picture Size] I /[Burst]" /[Color Mode]l/[Face Recog.] [Motion Picture] [Rec Quality] [Setup] [Clock Set]/[World Time]/[Beep]"/[Language]/[Stabilizer Demo.] For the setting method of the menu, refer to P42. Settings may be different from other Recording Modes. •...
- Page 32 Basic The camera automatically sets the shutter speed and the aperture value according to the brightness of the subject. You can take pictures with greater freedom by changing various settings in the [Rec] menu. Press [MODE]. MODE to select [Normal Picture], Press &l,l<lll_ and then press [MENU/SET].
- Page 33 Basic Aim the AF area at the subject, and then press the shutter button halfway. Focus indication Blinks AF area (_ White--Green White--Red Sound Beeps 2 times Beeps 4 times • The AF area may be displayed larger for certain zoom magnifications and in dark places.
- Page 34 Basic • When the subject is not in focus (such as when it is not in the center of the composition of the picture you want to take) Aim the AF area at the subject, and press the shutter button halfway to fix the focus and exposure.
- Page 35 Bas_ the motion Start recording by pressing picture button. (_) Available recording time (_ Elapsed recording time • You can record motion pictures fitting each Recording Mode. • Release the motion picture button right after you press it. • The recording state indicator (red) (_ will flash while recording motion pictures.
- Page 36 Basic • When recording to the built-in memory, [Rec Quality] is fixed to [VGA]. • The available recording time displayed on the screen may not decrease regularly. • Depending on the type of the card, the card access indication may appear for a while after recording...
- Page 37 Basic Press [(_)]. • Normal Playback is displayed automatically when the power is turned on by pressing and holding the [(_] button. • This camera complies with the DCF standard "Design rule for Camera File system" established by JEITA "Japan Electronics and Information Technology...
- Page 38 Basic Press [W] on the zoom button. 1 screen-->12 screens-->30 screens-->Calendar screen display Number of the selected picture and the total number recorded pictures • Press [T] on the zoom button to return to the previous screen, • Pictures displayed using [[F]] cannot be played...
- Page 39 Basic This unit was designed to play motion pictures using the MP4 and QuickTime Motion JPEG formats. Press <1/1_ to select a picture with a Motion Picture icon (such as [_]), and then press • to play back, Motion picture icon (_) Motion picture recording...
- Page 40 Basic Once deleted, pictures cannot be recovered. • Pictures on the built-in memory or the card that are being played back will be deleted. • Pictures that are not in the DCF standard or those that are protected cannot be deleted, Press [(_].
- Page 41 Basic Press ["_/:_]. to select © Press [Delete Multi] or [Delete All] and then press [MENU/SET]. • [Delete All] -_ Confirmation screen is displayed. Pictures are deleted by selecting [Yes]. • It is possible to delete all pictures except the ones set as favorite when JAil Delete Except...
- Page 42 Basic The camera comes with menus that allow you to choose the settings for taking pictures and playing them back just as you like and menus that enable you to have more fun with the camera and use it more easily. In particular, the [Setup] menu contains some important settings relating to the camera's clock and power.
- Page 43 Basic &IT Press to select the menu item and then press [MENU/SET]. (_ Menu screen page • It will switch to the next page when you reach the bottom. (It will also switch by pressing the zoom button) &IT Press to select the setting and then press [MENU/SET].
- Page 44 Basic By using the Quick Menu, some of the menu settings be easily found. • The features that can be adjusted using Quick Menu are determined by the mode or a display style the camera is in. when Press [Q.MENU] recording.
- Page 45 Basic [Clock Set], [Auto Power Off] and [Auto Review] are important items. Check their settings before using them. For details on how to select the [Setup] menu settings, refer to P42. To maintain waterproof performance, display the things need check before use •...
- Page 46 Basic Departure date and return date of the travel as well as the name of the travel destination can be set. You can display the number of days that have passed when playing back the pictures and stamp it on the recorded pictures with [Text Stamp] (P1031.
- Page 47 Basic This allows you to set the beep and shutter sound. =7))[Beep Level]: [Shutter Vol.]: [K])] ([Low]) [_._L _ ] ([Low]) [[(],))] ([High]) [_)))] ([High]) [_::] ([OFF]) [_X] ([OFF]) ,))0 [Beep Tone]: _O [Shutter Tone]: [,_)e]/[,_)e]/[,_)e] [._e]/[_e]/[,_e] I_))_i_t I Adjust the volume of the speaker to any of the 7 levels. iii i i i i !i!i i!iiii ii i ii i iiii i ii i iii i i ii !! ! !!! ! !! ! !!! ! !! ! !!! ! !!! ! !! ! !!! ! !! ! !!! ! !! ! !!! ! !!! ! •...
- Page 48 Basic These menu settings make it easier to see the LCD monitor when you are in bright places or when you are holding the camera high above your head. [A_] ([Auto Power LCD]) The brightness is adjusted automatically depending on how bright it is around the camera.
- Page 49 Basic This allows you to set either to display or not display histogram. [ON]/[OFF] A Histogram is a graph that displays brightness number of pixels at each brightness level on the along the horizontal axis (black to white) and the j_:_ vertical axis.
- Page 50 Basic The camera is automatically turned off if the camera has not been used for the time selected on the setting. [2MIN.]/[SMIN.]/[10MIN.]/[OFF] • [Auto Power Off] is set to [5MIN.] in the Intelligent Auto Mode. • [Auto Power Off] does not work in the following cases.
- Page 51 Basic The [Rec] or [Setup] menu settings are reset to the initial settings. • When the [Rec] menu settings are reset during recording, the operation that resets the lens is also performed at the same time. You will hear the sound of the lens operating but this is normal and not indicative...
- Page 52 Basic It is possible to oh eck which version of firmwa re is on t h e ca me ra. I built-in memory or card is formatted. Formatting irretrievably deletes all the data so check data carefully before formatting. • Use a battery with sufficient battery power when formatting.
- Page 53 Recording Press [DISPLAY] to change. LCD monitor DISPLAY • When the menu screen appears, the [DISPLAY] button is not activated. During Playback Zoom, while playing back motion pictures and during a slide show, you can only select (_ or @. ®...
- Page 54 Recording You can zoom in to make people and objects appear closer or zoom out to record landscapes in wide angle. Setting the number of pixels to IOM or less will operate the Extended Optical Zoom to take zoomed pictures without affecting quality. To make subjects appear further away use (Wide) Press [W] on the zoom button.
- Page 55 Recording • Types of zooms Maximum 9x + 1 4× magnification Picture No deterioration No deterioration quality [Picture Size] with [] (P81)is Conditions None selected. 1 This includes the optical zoom magnification. The magnification level differs depending [Picture Size] setting. The zoom functions below...
- Page 56 Recording • The indicated zoom magnification is an approximation. • "EZ" is an abbreviation of "Extended Optical Zoom". It is possible to take more magnified pictures with the optical zoom. • When using the Digital Zoom, we recommend using a tripod and the Self-timer (P62) for taking pictures.
- Page 57 Recording Photo flash Do not cover it with your fingers or other objects. Set the flash to match the recording. Press • [_]. to select the item and then press Press All' [MENU/SET]. - 57-...
- Page 58 Recording [_-A] ([Auto]) The flash is automatically activated when the recording conditions make it necessary. [[_'A ] ([iAuto]) The flash is automatically activated when the recording conditions make it necessary. It is activated once before the actual recording to reduce the red-eye phenomenon (eyes of the subject...
- Page 59 Recording • Available Flash Settings in Recording Mode The available flash settings depend on the Recording Mode. C_: Available, Not available, Scene Mode initial setting) <Y <Y F_I_ _1_[_ ..• [] [] r+.+'_ • [i_-A] is displayed. • The flash setting may change if the Recording Mode is changed.
- Page 60 Recording • The available flash range In [D(S0] 30 cm (0.98 feet) to 4.4 m (14 feet) 1 m (3.3 feet) to 3 m (9.8 feet) [Sensitivity] • Shutter speed for each flash setting &S@ 1 or 1/8 to 1/1300 &A@ 1/60 to 1/1300 1 or 1/4 to 1/1300...
-
Page 61: Focusing
Recording This mode allows you to take close-up pictures of a subject, e.g. when taking pictures of flowers. Press • [_]. Press All' to select the item and then press [MENU/SET]. You can take pictures of a subject as close as 5 cm [AF,_] (0.16 feet) from the lens by pressing the zoom button ([AF Macro]) - Page 62 Recording Press • [_]. Press All' to select the item and then press [MENU/SET]. [_),0] ([10 sec.]) Picture is taken 10 seconds after shutter is pressed. Picture is taken 2 seconds after shutter is pressed. [_-)2] ([2 sec.]) • When using a tripod, etc., this setting is a convenient...
- Page 63 Recording Use this function when you cannot achieve appropriate exposure due to the difference in brightness between the subject and the background. Underexposed Properly exposed Overexposed Compensate the exposure Compensate the exposure towards positive. towards negative. Press • [F-_]until [Exposure] appears. compensate exposure Press _1/1_ to...
- Page 64 Recording In this mode, 3 pictures are automatically recorded in the selected exposure compensation range each time the shutter button is pressed. With Auto Bracket +1 EV 1st picture 2nd picture 3rd picture ÷0 EV 1 EV + 1 EV Press •...
- Page 65 Recording By setting the Recording Mode to [,_], [:l.], [_] or [4,] pictures can be taken more effectively matching the conditions such as sports, snow, beach & surf. • Tone of the color of the image may change when picture is taken with unmatched usage.
- Page 66 Recording This mode is optimal for taking pictures to 3 m (10 feet) underwater and at the beach. • To prevent water leakage, make sure that there are no foreign objects, such as sand, hair, dust, etc., clamped and close the side door all the way until it clicks. Also, read "(Important) About the Waterproof/Dustproof and Anti-shock...
- Page 67 Recording By creating areas that are blurred and areas that are not, the picture will look like that of a miniature model. Motion pictures can also be recorded with diorama effects that appear to be played back in fast forward. Press [MODE].
- Page 68 Recording When you select a Scene Mode to match the subject and recording situation, the camera sets the optimal exposure and hue to obtain the desired picture. Press [MODE]. [Scene Mode], press [MENU/SET]. Press A/I'/_I/I_ to select and then ress &/1'/_l/l_ to select the Scene Mode and then press [MENU/SET].
-
Page 69: Portrait]
Recording When taking pictures of people outdoors during the daytime, this mode allows you to improve the appearance and make their skin tones look healthier. • Technique for Portrait Mode To make this mode more effective: Press and hold down the zoom button as far as possible to Tele. O Move close to the subject to make this mode more effective. - Page 70 Recording Pictures are recorded continuously while moving the camera horizontally or vertically, are combined to make a single panorama picture. Press to select the recording direction and then press [MENU/SET]. After confirming the recording direction, press [MENU/SET]. • A horizontal/vertical guide is displayed. Press the shutter button halfway...
-
Page 71: Panorama Shot]
Recording • The zoom position is fixed to Wide. • The focus, white balance, and exposure are fixed at the optimum values for the first picture. a result, if the focus or brightness changes substantially during recording, the entire panorama picture may not be recorded at the suitable... - Page 72 Recording This allows you to take pictures of a person and the background with near real-life brightness. • Technique for Night Portrait Mode • Use the flash. (You can set to [ _ • Ask the subject not to move while taking a picture.
-
Page 73: Entering Text
Recording This takes pictures of a baby with a healthy complexion. When you use the flash, the light from it is weaker than usual. It is possible to set different birthdays and names for [Baby1] and [Baby2]. You can select to have these appear at the time of playback, or have them stamped on the recorded image using [Text Stamp] (P103). - Page 74 Recording Select this when you want to take pictures of a pet such as a dog or a cat. You can set your pet's birthday and name. For information about [Age] or [Name], refer to [Babyl]/[Baby2] on P73. Select this when you want to take pictures of a sunset view. This allows you to take vivid pictures of the red color of the sun.