
Related Manuals for Sony Handycam CCD-FX310


Summary of Contents for Sony Handycam CCD-FX310
- Page 1 Video Camera Recorder 1_ CCD FX310 Operation Manual Before operating the unit, please read this manual thoroughly and retain it for future reference. Handgcam Video 8 (c_1992 by Sony Corporation...
- Page 2 The model and serial numbers are located on Model No. CCD-FX310 the bottom. Record the serial number in the Serial No. space provided on the right hand. Refer to these numbers whenever you call upon your Sony dealer regarding this product.
-
Page 3: Table Of Contents
Before You Begin About this manual ........................ Checking supplied accessories ................... Before you start ........................Getting Started :_i;;d_i_ !_! _! Charging and installing the battery pack ................ilil Inserting a tape ........................Preventing accidental erasure ..................Adjusting the viewfinder lens ....................Using the viewfinder as a sports finder ................ - Page 4 Welcome to Video Congratulations on your purchase of this Sony Handycam ® camcorder. With your Handycam you can capture life's precious moments with superior picture and sound quality. Your Handycam is loaded with advanced features, but at the same time it is very easy to use. You will soon be producing home video that you can enjoy for years to come.
- Page 5 Check that the following accessories are supplied with your camcorder • Wireless Remote • Size AA (R6) battery for • Battery pack NP-55 (1) Commander Remote Commander • AC power adaptor • Lithium battery • RFU adaptor RFU-90UC CR2025 (1) AC-V35/V35A Change to plus side illus •...
- Page 6 Before you can use this camcorder, you need t ocharge and nstall thebattery pack 1 Plug the AC power adaptor into a wall outlet. 2 Align the flat side of the battery pack with the line on the AC power adaptor. 3 Push down and slide the battery pack in the direction of the arrow 4 Set the CHARGE/VTR switch to CHARGE.
- Page 7 1 Align the flat side of the battery pack with the white line on the camcorder. 2 Make sure that the arrow on the battery pack is close to the top of the camcorder. 3 Push down and slide the battery pack in the direction of the arrow.
- Page 8 Make sure that the battery pack or another power source is attached. Press the small blue button on the EJECT switch and simultaneously slide EJECT EJECT in the direction of the arrow. The cassette compartment automatically liftsup and opens toward you. Insert a tape with the window facing outside.
- Page 9 Before using your camcorder for the first time or after another person used it, adjust the viewfinder lens to best fit your eyesight. Make sure that a battery pack or another power source is attached to the camcorder. It1 111] Press the small green button on POWER and set the POWER switch tO CAMERA.
- Page 10 When the lithium battery becomes weak, the ,$, indicator will blink in the viewfinder screen for about 5 seconds when you set the POWER switch to CAMERA. In this case, replace the battery with a Sony 0R2025 or Duracell DL-2025. Use of any other battery may present a risk of fire or explosion.
- Page 11 You need to set your camcorder's date and time to be able to superimpose the date and time onto your video. Make sure that the power source and lithium battery are attached. 1 Press,.e sma,, green ha,ton on,.e Ill'Ill] POWER switch and slide the POWER switch to CAMERA.
- Page 12 When you preset your child's birth date in your camcorder, you can put your child's age in years and months on your tape. You can also preset the date of an event. Once you enter the birth date of your child, the clock inside your carncorder will automatically update age of your child.
- Page 13 Enter the birth date. First adjust the blinking digits by pressing DATE (+), and then press 0%÷ ÷ _BIRT_D_ TIME (NEXT). The age (year and month) appears when all the items are adjusted. e%_> _> --AVG--I., % 1987) _ei_IpoA if you missed the correct number with DATE (+) Keep pressing DATE (+).
- Page 14 Before you record one-time events, make a trial recording to make sure that your camcorder is working properly. Keep the lens clean, or the focus cannot be adjusted properly. It is very easy to start recording scenes. 1 "_'--_ 45,6 Hold the camcorder by putting your hand through the grip belt so that your thumb can easily press the red...
- Page 15 Automatic recording With the PROGHAM AE switch set Io the green position, all the camera functions are on automatic (i.e. auto iris, auto white balance, auto focus) and the shutter speed is set at normal (1/60 second). To stop recording momentarily Press START/STOP again.
- Page 16 You can create a professional-looking home video using these sepcial effects; zoom, close-up, fade-in and fade-out. Zooming is a recording technique that lets you change the size of the subject in the scene. Use "Zoom-in (telephoto)" for dramatic close-ups, and "zoom-out (wide-angle)" for panoramic long shots.
- Page 17 You can use th_s camcorder as a VCR by connecting it directly to your TV for playback. After you connect this camcorder to your TV, use the Remote Commander for convement control of the camcorder. Use the supphed RFU adaptor to connect your camcorder to your TV. Before connechng, make sure that the TV ts turned off to prevent speaker damage.
- Page 18 Press the small green button on the POWER switch and set the POWER I_._._o P F L Ay__I switch to PLAYER. POWER Insert a tape. (See page 8.) Turn on the TV and select the channel to which you adjusted the RFU adaptor (3 CH or 4 CH). If you are connecting with audio/video inputs, set your TV's TV/VlDEO selector to VIDEO PLAY...
- Page 19 • Keep the remote sensor away from strong lightsources such as direct sunhght or illummat_on Remote control with the Commander may not function properly ander such circumstances. • The command mode of the Commander _sVTR2 Avoid using the Sony VCRs with the same command mode at the same time Getting familiar with some buttons ' R._-,,- _...
- Page 20 Have sufftcient battery pack power to do 2 or 3 times as much recording than have planned. "Battery life" indicated in this manual is measured by the continuous recording t=me of the camcorder, placed at room temperature using a fully-charged battery Battery life is shorter in cold climates.
- Page 21 If the terminals (metal parts on the back) are not clean, the battery duration will be shortened. When the terminals are not clean or when the battery pack has not been used for a long time, install and remove the battery pack from time to time.
- Page 22 You can choose any ofthe following power sources foryour c amcorder: battery pack ( see page 6),house c urrent, and 12/24 V car battery. The appropriate power source foryou tochoose depends ontheplace w here y ou want to use your c amcorder. Place Power source Accessory to be used...
- Page 23 _he DCP-77 DC pack (not supphed) is required. Align the flat side of the DC pack with the white line on the camcorder, and push down and slide it in the direction of the arrow, Connect the cord of the DC pack to the cigarette lighter socket of a car (12 V or 24 V), To remove the DO pack Removeit thesame wayas youdo with the batterypack.
- Page 24 In the prewous chapter 'Basic Camera Operation", you learned the basic recording operations. This section shows you how to record the date or time, record an age, re-record a picture and more. Date or time can be superimposed on your recording DATE_÷) 5 30 0o PM)
-
Page 25: Storing A Birth Date In Your Camcorder
Note You cannot add the age later during playing back or editing. To stop recording the age Press AGE/EVENT until the indicator goes out. To change the display while recording Press AGE/EVENT until the indicator you want to record is displayed. Recording of the indicator you select starts when [_, _-_,or [] goes out. - Page 26 You can check the last port_on of a scene you recorded without changing the setting of JUSt the POWER switch using EDITSEARCH. Put the camcorder in the standby mode by pressing the START/STOP button. 8TART I STOP Press the - _ side of EDITSEARCH momentarily.
-
Page 27: Camera Recording
You can reshoot a scene over the last recorded port,on using EDITSEARCH. prevtously recorded portion will be erased. Set the STANDBY switch up. START / STOP Look in the viewfinder and find the point from where you want to begin recording by: Keep pressing the + side of EDITSEARCH continuously to advance the picture at a normal 4, EDITSEARCH... - Page 28 You can _nserta scene m the m_ddleof a recorded tape by settLngthe starting point and ending point. A previously recorded portion will be erased. []t 111 ] Press the small green button and slide the POWER switch to CAMERA. ML_.._ o I_ F A'_..._Y._ POWER...
- Page 29 You can connect an external microphone (not supplied) to the MIC jack. This jack also accepts a "plug-in-power" microphone. Attach the microphone to the accessory shoe of the camcorder. If the microphone has two plugs, connect the DC IN plug to the RFU DC OUT jack on the camcorder.
-
Page 30: Manual Adjustments
The camcorder's automatic functions offer you worry-tree operation under most shooting conditions. But in some circumstances, manual adjustment is better for effective recording. You can manually maintain focus and compensate for backlighting with this camcorder. Some shooting situations may call for using some items manually, while others may call for using them automatically. -
Page 31: Playing Back
When you use the PROGRAM AE (Auto Exposure) function, you can give a portrait' effect (the object ts m focus and the background is out of focus) or capture htgh-speed action with "sports" mode or "high speed shutter" mode. Select from three types of mode referring to the following table. - Page 32 You can fade-m or fade-out to gwe your tecordtng a professtonal appearance When fading-tn, the picture will gradually appear from black. The sound wtll also gradually increase. When fading-out, the picture will gradually fade to black. The sound will also decrease. FADE FADE When fading-in...
- Page 33 In the earher section (page 17) we explatned the bastc connection to your TV w_th the RFU adaptor. In this section we discuss several other ways of connecting to your TV. There are several ways to connect your camcorder to your TV. If your TV has aud_o/vtdeo inputs, use an A/V cable.
- Page 34 If your TV has no AUDIO/VIDEO input jacks Disconnect the antenna connection between the TV and the VCR, and connect the RFU adaptor to the VHF/UHF input of the TV and VHF/UHF output of the VCR. VHF/UHF vcRI AC-V35N35A RFU-90UC .) If your TV has AUDIO/VIDEO input jacks Connect Audio and Video from the camcorder to the VCR instead of to the TV, Set the...
- Page 35 The supphed wtreless Remote Commander _suseful to control the camcorder from a dtstance When usmg tt, be sure to set the BI REMOTE COMMANDER ON/OFF swttch to To make the same indications in the viewfinder on the TV (only on the Commander) Press DATA SCREEN.
- Page 36 Dunng recora_ng or playback, the d_g_ts on the counter indicate the actual recording playback t_me. To count the whole tape Press COUNTER RESET at the begfnnng of the tape so that the counter shows "0:00 00". Write down the counter reading at a partqcular point so that you can easily find that point later by refernng to the tape counter.
- Page 37 Pause How to connect Make connectionsusingthe appropriate A/V cable (suchas Sony VMC-710M/720M for monaural VCR or VMC-910MS/920MS for stereo VCR) and set the CHARGE/VTR selector on the AC power adaptor to VTR. Set the input selector of the VCR to LINE, if avaitable.
-
Page 38: Editing
How to edit Insert a tape to be recorded into recording VCR. Slide EDIT on the camcorder to the direction of the arrow. EDIT ,-=. Set the POWER switch of the camcorder to PLAYER, then insert the recorded tape. Play back a tape on the camcorder until you locate the point where you want to start editing, then press II PAUSE to set the camcorder to the playback pause mode. - Page 39 ......II the camcorder _sbrought d_rectly from a cold place to a warm place, moLsture may condense inside the camcorder, on the surface of the tape or on the lens. In this cond_bon, the tape may stick to the head drum and be damaged or the unit may not operate correctly.
- Page 40 When playback picturesbecome nozsyor hardlyvisible, the videoheads may be contaminated. In such cases, 1 Clean the video heads with the Sony V8-25CLH cleaning cassette (not supplied), referring to its instructions. 2 After cleaning, check if the picture is clear by recording or playing back with an ordinary tape.
- Page 41 Less than6 _ r_'m_ _'-_ flat surface of suitable height. (9/32 inches) Caution When attachang a tripod not manufactured by Sony, the length of the camera mounting screw must be less than 6.5 mm Otherwqse the screw...
- Page 42 To get the best colors, you must maintain a sufficient light level. Photography lamps or halogen lamps are recommended. For best results, use of Sony video lights, since their weight and low heat output levels allow safe and direct connection to the camcorder.
- Page 43 On operation Operate the camcorder on 6.0 V (battery pack) or 7.5 V (AC power adaptor). For DC or AC operation, use the accessories recommended in this manual. Should any solid object or liquid fall into the casing, unplug the camcorder and have it checked by qualified personnel before operating it any further.
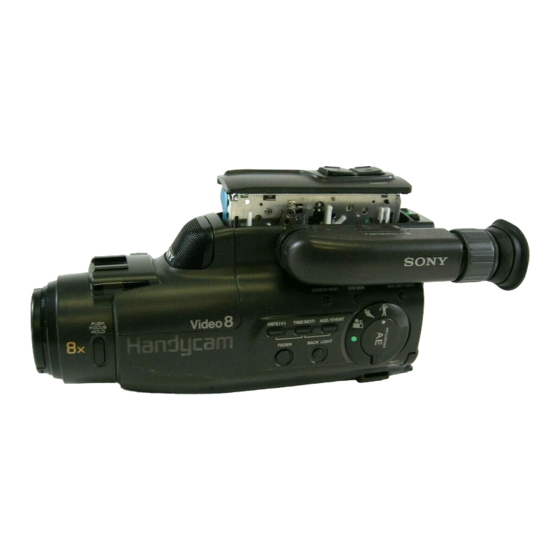
- Page 44 For details on the use of each part, refer to the pages ind_cated _nthe circle. POWER switch CAMERA: for camera recording PLAYER: for playing back or editing tapes OFF: power off REMOTE control connector (stereo mini-minijack) _) @ (earphone) jack (minijack) START/STOP button STANDBY switch...
- Page 45 Tape transport buttons _) PLAY (playback) FF (fast-forward) REW (rewind) STOP (stop) II PAUSE (pause) Lens cap VIDEO output jack (phono jack) (_ RFU DC OUT (RFU adaptor DC output) jack (special minlJack) AUDIO output jack (phono jack) MIC jack (PLUG IN POWER) (mono mini-jack) Remote control sensor _) EDIT switch _) Hook for shoulder strap...
- Page 46 Accessory shoe Remote control sensor (_) Focus HOLD switch _) PUSH FOCUS HOLD button _) Tripod receptacle (bottom) FADER button BACK LIGHT button 1_) DATE (+) button • (_) _) TIME (NEXT) button • _) _) AGE/EVENT button (_) (_) PROGRAM AE selector (_ _) BATT (battery eject) knob O Hook for shoulder strap...
- Page 47 Viewfinder Camera recording/battery lamp _) COUNTER RESET button _) • ZERO MEM button _) 1_) TAPE/BATT CHECK button O (_) Viewfinder adjustment ring Eyecup BEEP ON/OFF switch [] REMOTE COMMANDER ON/OFF switch _) Battery mounting surface Additional Informatton...
- Page 48 _ PLAY (play back) button _) <1<1 REW (rewind) button (_ [] STOP button II PAUSE button _) DATA SCREEN button: HOLD switch* (_) START/STOP button FF _ (fast forward) button _) Power zoom button liD- SLOW (slow playback) button _ Note The * mdqcates the functtons which are...
- Page 49 If you run into any problems during operation, use the following table to troubleshoot the problem. Should the difficulty persist, unplug the unit and contact your Sony dealer or local authorized Sony service facility. Corrective actions Symptom Cause ..The power does not turn The battery is not attached.
- Page 50 Remove the tape and leave the camcorder for has occurred. at least an hour. The gap of the head is Clean the head using the clogged. Sony V8-25CLH video Cautionlamp' head cleaning tape. Camera operation Consult your nearest Other troubles may VCR operation Sony dealer.
-
Page 51: Specifications
RFU DC OUT Special minijack, 5 V DC System Earphone jack Minijack, 8-ohm impedance Remote _ jack Stereo mini-minijack Video recording system MIC jack Minijack, dBs, low impedance Rotary two heads, Helical with 2.5 to 3 V DC output, scanning FM system impedance 6.8 kilohms... - Page 52 Lithium Battery ............or write to: If you have any question about this product, you may call: Sony Customer Information Center Sony Customer Information Center Sony Drive, Mail Drop #T1-11, East Coast 201-930-7669 (SONY) NJ Park Ridge, NJ 07656 Central...
Need help?
Do you have a question about the Handycam CCD-FX310 and is the answer not in the manual?
Questions and answers