Sony DSC-S60 User's Manual / Troubleshooting
Digital still camera
Hide thumbs
Also See for DSC-S60:
- User's manual / troubleshooting (103 pages) ,
- Service manual (27 pages) ,
- Read this first (2 pages)
Table of Contents
Advertisement
Quick Links
SONY
2-500-_4_-,_(_)
#igi,al
$,ill
Camera
User's
Guide/
Troubleshooting
Operating
Instructions
Before operating the unit, please read this mallt/a] and
"Read This First" (separate volume) thoroughly, and retain
it lot future reference.
Owner's Record
The model and serial numbers are located on the bottom.
Record the serial number in the space provided below.
Refer to these numbers whenever you call upon your Sony
dealer regarding this product.
Model No. DSC-S60/SS0/STS0/S90
Serial No.
Using the menu
Using the Setup screen
Using your computer
Printing still images
Addilional
information
on 1his product
and answers
to frequenlly
asked questions
can be lk)und at our
Customer
Support
Website.
http://www.sony.net!
Printed
on 100%
recycled
paper using
VOC (Volatile
Organic
Compound)-free
vegetable
oil based
ink.
Printed in China
2590641110
DSC-S60/
_
$90
C_bep-sho{
"Read
This
First" (separate
volume)
Explains lhe set-up and basic operations
for shooting/playback
with your camera.
© 2005 Sony Corporation
Connecting
your
_::!:!'
camera
to yourTV
Troubleshooting
Others
l
Index
Advertisement
Table of Contents

Related Manuals for Sony DSC-S60


Summary of Contents for Sony DSC-S60
- Page 1 The model and serial numbers are located on the bottom. Using your computer Record the serial number in the space provided below. Refer to these numbers whenever you call upon your Sony dealer regarding this product. Model No. DSC-S60/SS0/STS0/S90 Printing still images Serial No.
- Page 2 If you have any questions about this product, you may call: Sony Customer Information Services Center To prevent fire or shock hazard, do 1-800-222-SONY (7669) not expose the unit to rain or moisture. The number below is for the FCC related matters only.
- Page 3 If you should lose the equipment off and on, the user is encouraged luse cover, please contact your nearest Sony try to correct the intertbreuce by one or more service station.
-
Page 4: Noteson Usingyourcamera
Noteson usingyourcamera CarlZeisslens Types of "MemoryStick"thatcanhe used(notsupplied) This camera is equipped with a Carl Zeiss lens which is capable of reproducing sharp images IC recording medium used by this with excellent contrast. camera is a "Memory Stick". There are two The lens lot this camera has been produced... - Page 5 •Do not shake or strike the c amera. In addition Thepicturesusedinthis manual malfuuctinns and an inability to record images, this m ay render the r ecording medium unusable, The photographs used as examples nf pictures or cause image data breakdown, damage or loss.
- Page 6 For full useof the digital still camera Get more friendly with your camera • Shoot with your favorite settings (tS"ogram auto shooting/ Manual shooting) ---+ page 26 • Enjoy various shooting/playback using the menu ---+ page 29 • Change the default settings ---+ page 45 Connect your camera to a PC or a printer...
-
Page 7: Table Of Contents
Table of contents Notes on using your camera ..............Basic techniques for better images ............Focus Focusing on a subject successfully Exposure Adjusting the light intensity ............Color On the effects of lighting ..............Quality On "image quality" and "image size", ..........Identifying parts .................. - Page 8 Viewing menu ..................[_1 (Folder) (Protect) DPOF 1:_ (Print) (Slide) (Resize) B_= (Rotate) '_ (Divide) (Selup) Trimmitag Using Setup items ................Camera 1 ................... AF Mode Zoom Digital DatefI'ime Red Eye Reduction AF Illuminator Aulo Review Camera 2 ................... Enlarged Icon Internal Memory Tool ................
- Page 9 Enjoying your Windows computer ............Copying images to your computer ............Viewing image files stored on a computer with your camera (using a "Memory Stick") ..................Using the supplied software ..............Using your Macintosh computer .............. How to print still images ................Printing images directly using a PictBridge compliant...
-
Page 10: Basictechniquesfor Better Images
E?_joyfi_g #m camera Basictechniquesfor better images This section describes the basics so you call enjoy your camera. It tells you how to use various camera fuuctions such as the mode dial (page 26), the menus (page 29), and so Press lully down Press... - Page 11 ,.,.,=,, Shutter speed = Length of time the camera receives Exposure; light Aperture = Size of the opening allowing light to pass through ISO = Recording sensitivity Overexposure The exposure is automatically set to the = too much light proper value ill the auto adjustment mode.
-
Page 12: Color On The Effects Of Lighting
Adjusting t he ISOsensitivity ISO is unit of measurement (sensitivity), estimating how much light an image pickup device (equivalent to photo fihns) receives. Even when the exposure is the same, images differ depending on the ISO sensitivity. []SO] adjusts the sensitivity ---* page 34 High ISO sensitivity Records... -
Page 13: Quality On "Image Quality" And "Image Size
o. "Jm.ge q..,tr'.._ "Jm.ge .Jze" is made up of a collection of small dots called pixels, If ii o]]i_ins a large number of pixels, the picture becomes large, it takes up more memory, and the image is displayed in fine detail. "Image size"... - Page 14 Selectingthe imagesizefor use(--* step 4 in "ReadThisFirst'_ Pixel Many (Fine image Example: Printing in up to A4 quality and large file size size) Few (Rough image Example: An attached image quality but small file to be sent by e=mail size) The default settings are marked...
-
Page 15: Identifyingparts
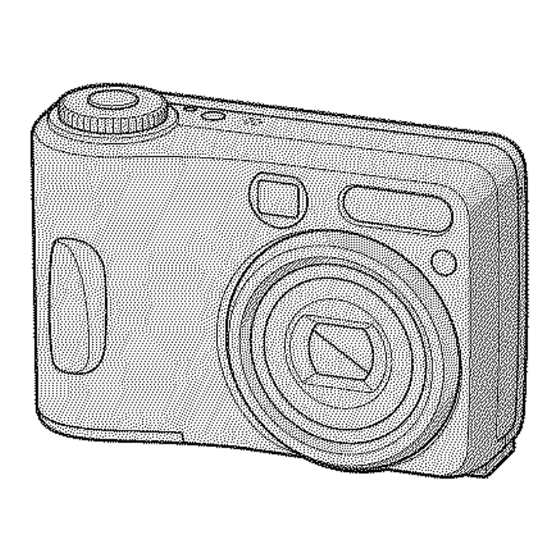
Identifyingparts See the pages ill parentheses for details Multi conuector (59, 75) operation. Tripod receptacle • Use a Iripod with a screw length ol less than 5.5 mm/7/32 inch). You will be unable to firmly secure lhe camera lo lripods having longer screws, and may damage lhe camera. - Page 16 For shooting: Zoom (W/T) button DSC-S90 (-* step 5 it_ "Read This Fil:_'t ") For viewing: (_/_ (Playback zooru) button/[_i_ (Index) button (-* step 6 it_ "Read This First") I[]1 (Display/LCD on/off) button (21) MENU button (29) Control button Menu on: IlVl4II,IQ step 2 m "Read This First")
-
Page 17: Indicatorsonthe Screen
Indicatorsonthe screen See the pages ill parentheses for details operation. Whenshooting still images Battery remaining (-4 st U) 1 in "Read This Fim't") • I_l[17GA FINE,_ • AE/AF lock (--*. st(' 1) 5 i_* J,¢.-.) _ ®,_._ l,a0" 400 r_l ( "Read This Fit:_t") /m _ _<%_/'_ c:a2:00 _/-iN... - Page 18 iiifN_i!@i!iii!ll!;iiiiiiiiiiiiiiiiiiiiiiiiiii N_fmmi_+_+_iii_iii+_!;iiiiiiiiiiiiiiiiiiiiiiiiiiiiiiiiiiiiiiiiiiiiiiiiiiiiiiiiiiiiiii! L--_ Z E'_3m Image size (--* stu_ 4 in Vibration warning (10) • Indicates vibration will L_aA "Read This Flint") prevent ynu from shooting clear images. Even if the FINE STD Image quality (34) vibration warning appears, you can still shoot images. Recording folder (51) However, we recommend...
- Page 19 Whenplaying backstillimages !!!_!{_iiL!:L!:L!: !!!!!!_!!_!_!_!:!!!!!!!!!!!!1!!!!!!!!!!!!!!!!! Battery remaining (--* step [C:32:00 1 in "Read Thi; Firs't") +2,0EVISO4_ L'_ Z L-_k Image size (-4 ,step 4 in L"v'GA "Read Th& First") Recording mode (26, 35) Playback (-* step 6 in _ _BACK/NEXT _VOLUME "Read This Fit:st") VOL.IIIID_ Volume (--* stu_ 6 in...
- Page 20 N i iii i iii i!; i i!; i i!; i i!; L ..i ill iiiiiiiiiiiii iiiiiii iiiiiii iiiiiii iiiiiii iiiiiii i 8/8 12/12 hnage number/Number images recorded in selected folder (38) C:32:00 Self-diagnosis display (88) 00:00:12 Counter (--_ st_7) 6 in "Read This Fir_'t") Do not disconnecl 1he cable...
-
Page 21: Changing The Screen Display
Changing the screen display Each time you press the ]l-q] (Display/LCD • A large difference in the hislogram displayed when shooting and during playback occur on/oft) button, the display changes when: follows. The flash strobes. The shutter speed is slow or high. -
Page 22: Numberof Still Imagesand Recordingtime Of Movies
• Movies with the size set to [640(Fine)] can be only recorded on a "Memory Stick PRO". • For image size and image quality, see page 13. • When images recorded using earlier Sony models are played back on this camera, the display may differ from the actual image size. -
Page 23: Whenyou Do Not Havea "Memory Stick" (Recordingwith The Internal Memory)
Whenyou do not havea "Memory Stick" (Recordingwith the internal memory) The camera has 32 MB of internal memory, This memory is not removable, Even when there is no "Meruory Stick" inserted in the caruera, you can record iruages using this internal memory, •... -
Page 24: Battery Life And Numberof Imagesthat Can Be Recorded/Viewed
Battery life and numberof imagesthat can be recorded/viewed .1 Supplied with DSC-S90/DSC-S80 The tables show the approximate number *2 Supplied with DSC-S60 images that can be recorded/viewed and the battery life when you shoot images .3 Supplied wifl_ DSC-ST80 [Normal] mode with batteries at full... - Page 25 Whenshooting movies DSC-S90 NH-AA-DA 210 rain. 300 rain. ,.,.,v,, (Ni-MH) .1 Alkaline .2 60 rain. 120 rain. Battery pack 240 rain. 360 rain. NP-NH25 .3 DSC-S80/ST80/S60 NH-AA-DA 220 rain. 300 rain. (Ni-MH) .1 Alkaline .2 90 rain. 120 rain. Battery pack 260 rain.
-
Page 26: Usingthe Modedial
Usingthe modedial Set the mode dial to the desired function. Shooting movies Control button -4 step 5 in "Read This First" i_}: Playback/Edit step 6 in "Read This First" Still image shooting modes Autoadjustment mode step 5 in Allows easy shooting with the settings at{justed... - Page 27 SceneSelection For details stU) 5 in "R_.ad This First" For shooting all image appropriately according to the scene condition, a combination functions is determined by the camera. (_/: you call select the desired setting) ik") Auto Center AF 0.5mt1.0m 3.0mt7.0m Toadjust t heexposure manually 1_) Press •...
- Page 28 • Shutter speeds of one second or longer are indicated by ["], for example, 1". • When you set the shutter speed slower, using a tripod is recommended to prevent the effects of vibration. • If you select shutter speeds of 1/6 second or slower, the NR slow shutter Rmction activates automatically to reduce the picture noise and "NR"...
-
Page 29: Using Menu Items
Ud_g #_e mem_ Mode dial MENU button Control button 5" Turn on the power and set the mode dial. llems availaMe vary depending on the mode dial position. Press MENU to display the menu. Select the desired menu item with ,/1_ on the control button. -
Page 30: Menu Items
Menu items For details on the operation -. page 29 Modedial position: Scene Menufor shooting (page31) [] (EV) (Focus) (Metering Mode) WB (White Bal) (P.Quality) Mode (REC Mode) (Interval) I,_± (Flash Level) PFX (P.Effect) (Saturation) (]p (Contrast) IE_ (Sharpness) (Setup) Menu forviewing(page38) P"I (Folder) (Protect) -
Page 31: Shootingmenu
Shootingmenu Fo, details o, the operatio, -_ page 29 The default settings are marked with _. Manually attjusts the exposure. Toward Toward +2.0EV Toward +: Brightens an image. The exposure is determined automatically by the camera. , -2.0EV Toward : Darkens an image. - Page 32 Fordetailson the operation -_ page 2g You can change the focus method. Use the menu when it is difficult to get the proper focus in auto focus mode. co (unlimited distance) Focuses on the subject using a previously set distance to the subject.
- Page 33 For detailson the operation -, page 2g "_° If the subject is out of focus When silouting witil the subject at the edge nlthe flame (or the screen), or when using [Center AF], tize camera may not focus nn a subject at the edge of the frame. In a case like this, do as follows. Recompose the shot so Ihat the subject is centered in the AF range finder, and press the shutter...
- Page 34 Fordetailson the operation -_ page 2g At[justs the color tones according to the lighting condition ill a situation, for example, when the colors of a image look strange. _,6,_ (Incandescent) Adjusts for places where the lighting conditions change quickly such as a party hall, or under bright lighting such as photography studios.
- Page 35 For detailson the operation -, page 2g Selects whether the camera performs contiuuous shooting or )lot when you press the shutter button. Multi Burst ([_ll) Records 16 frames in succession as a still image file when you press the shutter button.
- Page 36 Fordetailson the operation -_ page 29 The maximum number of continuous shots (Units: images) VGA(E-Mail) Selects the flame interval ill the [Multi Burst] mode (page 35). •This setting cannot be made when [Mode] (REC Mode) in the 1/7.5 (1/7.5") menu is set to other than [Multi Burst] (page 35). 1/15 (1/15") 1/30 (1/30") Adjusts...
- Page 37 For detailson the operation -, page 2g Adjusts the saturation of the image. + ((_) Toward +: Brightens the color. Normal - (_) Toward : Darkens the color. Adjusts the contrast of the image. + ((1_) Toward +: Enhances the contrast. Normal - ((1_) Toward...
-
Page 38: Viewingmenu
Viewingmenu Fordetai/so, the operation -_ page29 The default settings are marked with _. Selects the folder contaiuiug the image you want to play back (when using a "Memory Stick" only). Cancel See the l'ollowing Cancels the selection. procedure. (_) Select the desired folder with _1/1_- o n the control button. - Page 39 For detailson the operation -, page 29 Fh'otects images against accidental erasure. Protect Exit (O--,) See the lk)llowing procedure. Exits the Protection l'unction. Toprotect i mages in single-image mode Display the image you want to protect. Press MENU to display the menu. 5"...
- Page 40 Fordetailson the operation -, page 29 Tocancel t heprotection In single-image mode tS"ess • in step @ or (_) of "To protect images in single-image mode." In index mode @ Select the image R)r which you want to remove protection in step (_) of "to protect images index...
- Page 41 For detailson the operation -, page 2g Image Folder Plays back all images in the selected folder. Plays back all images stored on the "Memory Stick". Repeat Plays back images in a continuous loop. After all the images have been played back, the slide show ends.
- Page 42 Fordetailson the operation -, page 2g Rotates a still image. 4" '% Rotates an image. See the following procedure. Determines the wtation. See the following procedure. Cancel Cancels wtation. @ Display the image to be rotated. @ Press MENU to display the menu. @ Select [D_] (Rotate) with _1/1_ on the control button, then press O.
- Page 43 For detailson the operation -, page 29 Example: Cuttinga movie numbered 101_0002 This section describes all exarnple of dividing a rnovie numbered 10l_0002 and deleting it ill the following file configuration. 0001 0003 0002 Cutting scene A. 0002 Divide 101 0002 is divided into 101 0004 and 101 0005. Cutting scene B.
- Page 44 Fordetailson the operation -, page 29 (_) Press • at the desired cutting point. • When you want to adjust the cutting point, select [41111111_](frame rewind/fnrward) and adjust the cutting point nsing 4/1_. • If you want to change the cutting point, select [Cancel]. The playback of the movie starts again. (_) Select IOK1 with AfV' and press •.
-
Page 45: Usingsetupitems
Ush_gthe Setup scree_ UsingSetupitems You call change the default settings using the Setup screen, Mode dial ..... /ii!iiii_i -MENU button Control button Turn on the power. Press MENU to display the menu. Press • on the control button to select (Setup). -
Page 46: Camera 1
CameraI For details on the operation -. page 45 The default settings are marked with _'. Selects the auto focus operation mode. Single (S AF) Automatically adjusts the focus when the shutter button is pressed and held halfway down. This mode is useful for shooting stationary subjects. -
Page 47: Red Eye Reduction
For detailsonthe operation-, page 45 • When you press the zoom bullon, the zoom scaling indicalor appears as lollows. The W side ol'lhis line is lhe optical zoom area, wm::amZaT and the T side is the digital zoom area x2.5 Zoom scaling indicator •... - Page 48 Fordetailson the operation-, page 45 The AF illuminator supplies fill light to focus more easily on a subject in dark surroundings. The AF illuminator emits red light allowing the camera to focus easily when the shutter button is pressed halfway, until the focus is locked.
-
Page 49: Camera 2
a Camera 2 For details on the operation -. page 45 The default settings are marked with _. Enlarges the setting indicator temporarily when you press } (Flash mode), 6,) (Self-timer), o1" (Macro). __0n Enlarges the indicators. Does not enlarge the indicators. -
Page 50: Internal Memorytool
Internal MemoryTool Fordetai/so/7the operation-, page45 This item does not appear when a "Memory Stick" is inserted ill the camera. The default settings are marked with _. Formats the internal memory. • Note that formatting irrevocably erases all data in the internal memory, including even protected images. .__J OK See the l'ollowing procedure. -
Page 51: Memorystick Tool
MemoryStick Tool For detai/so, the operatio, -_ page45 This item appears only when a "Meruory Stick" is inserted ill the camera. The default settings are ruarked with _. Formats the "Memory Stick". A commercially available "Memory Stick" ix already formatted, and can he used immediately. - Page 52 Fordetailson the operation-, page 45 Changes the folder currently used for recording images. Cancel See the l'ollowing procedure. Cancels changing the recording t'older. (_) Select [OK] with • on the control button, then press 0. The folder selection screen appears. Select REC, Folder _/2l_...
-
Page 53: Setup 1
u'_" S etupI Fo, _ota_ls o,tho o po,at_o, _ p_go 45 The default settings are marked with _. Selects the brightness of the LCD backlight when using the camera with batteries. Bright Brightens. Normal Dark Darkens. • Selecting [Bright] uses up the battery charge l_.tster. Selects the sound produced when... -
Page 54: Setup2
Setup2 ---'_ Fordetai/so, the operation -_ page45 The default settings are marked with _'. Selects the method used to assign file numbers to images. Series Assigns numbers to files in sequence even if the rccording folder or the "Memory Stick" is changed. (When the replaced "Memory Stick"... - Page 55 For detai/sonthe operation-, page 45 Sets the date and time. Select [OK] with • on the control button, and press 0. Then, i)erl'orm the procedure explained in "Set the clock" (-+ step 2 in "Read This Fi_:_t"). Cancel Cancels setting the clock.
-
Page 56: Enjoying Your Windows Computer
Us#_g your computer Enjoying your W indows computer For details on using a Macintosh computer, Viewing images on your Installing the USB driver. computer • Installation of the USB driver is not needed when using Windows Enjoying images using "PicturePackage" Viewing images saved on your Installing "PicturePackage"... - Page 57 • A separate software application fk)r operating the recording device is required in order to write to CD-Rs. The f ollowing environment Noteson connecting y ourcamera to a recommended foracomputer connected computer the camera. • Operations are not guaranteed lot all the Recommended environment for reconlnlended computer...
-
Page 58: Copyingimagesto Yourcomputer
Copyingimagesto yourcomputer The "InstallShield Wizard" screen This section describes the process using Windows computer as an example. appears. You can copy images fi'om the camera • If the install menu screen does not appear, your computer as follows. double-click (My Computer) -4 {_ (P1CTUREPACKAGE). - Page 59 Insert a "Memory Stick" with recorded images into the camera. • When copying images in the internal To the nmlti memory, this step is unnecessary. COIllleCtOF Insert the batteries with enough capacity remained in the camera, Cable for multi-use or connect the camera to a wall terminal...
- Page 60 Click the check box of unwanted images to remove the checkmark so they are not copied, then click • For Windows 98/98SE/2000/Me, IMlow the [Next]. procedure explained in "Stage 4-B: Copying images to a Cnmputer" on page 61. This section describes an example copying...
- Page 61 Click the radio button next to 1 Double-click [My Computer] -. [Nothing. I'm finished working [Removable Disk] -4 [DCIM]. with these pictures] to select it, then click [Next]. tJ ..• It" the "Removable Disk" icon is not The "Completing the Scanner displayed, page...
- Page 62 Double-click the [My Documents] Click [Start] -, [My Documents]. folder. Then, right-click on the "My Documents" window to display the menu and click L":_ ..[Paste]. contents of the "My Documents" folder displayed. • If you are not using Windows double-click Documents] on the...
- Page 63 "Memory Stick", or is only the "101MSDCF" foldea turn off the camera. When you copy There is only the "101 SONY" folder in images from a "Memory Stick" afler case of the internal memory. copying images in the internal memory the computer, inserl the "Memory...
-
Page 64: Viewing Imagefiles Storedon A Computerwith Yourcamera(Usinga "Memory Stick")
"Memory Stick". [Copy]. @Double-click [Removable Disk] or • Step 1 is not necessary if the file name set with [Sony MemoryStick] in [My your camera not been changed. Computer]. • You may be unable to play back some... -
Page 65: Usingthe Suppliedsoftware
Usingthe suppliedsoftware This section describes the process using a Windows computer as an example. Turn on your computer, and insert the CD-ROM (supplied) into the CD-ROM drive. The installation menu screeu appears. • If itd_es _t _ppe/r,_otbe=c ck_(My The supplied CD-ROM contaius two Computer)-4 @ (P1CTUREPACKAGE). - Page 66 ;_ Remove the CD-ROM as the shortcut icons of "PicturePackage Menu" and "PicturePackage destination Folder" are displayed after the installation. Tostartupthesoftware • Double-click the "PicturePackage Menu" icon on the desktop. Forinformation on theuseof the software Click [?] at the upper-right corner of each screen to show the on-line help.
-
Page 67: Usingyour Macintoshcomputer
Usingyour Macintoshcomputer You call copy images to your computer may not recover al camera alld your cnmpuler the same time. create a video CD using "hnageMixer VCD2" (supplied). OS (pre-installed): Mac OS 9. l, 9.2, or Mac OS X (v10.0-v10.3) Prepare the camera USB connector:... - Page 68 Todisconnect thecablefor multi-use (_) After lhe user information screen appears, terminal/remove t he"Memory Stick"/ enter the desired name and password. The installation of the soflwarc starts. turnoffthecamera Tostartup "lmagelVlixer V CD2" Drag and drop the drive icon o1"the icon of the "Memory Stick"...
-
Page 69: Howto Print Still Images
Pr&_&g s_ill _mages Howto print still images You call print images by connecting the camera directly to a i_JPictBridge compliant printer. You call print images with a "Memory Stick" compliant printer. For details, see the operating iustructions supplied with the printer. You can copy images to a computer... -
Page 70: Printing Images Directly Using A Pictbridge Compliant Printer
Printing i mages directly u sing a PictBridge compliant printer Even if you do not have a computer, can print images shot using your camera conuectiug the camera directly to a Prepare the camera to connect it to the PictBridge compliant printer. - Page 71 Regardless of what the mode dial is set to, the print menu appears when you complete • For DSC-ST80, refer to Ihe operating instruclions "Cyber-shot Slalion". Stage 2. Connect the multi connector on Select the desired printing method with on the control your camera and the USB jack on the printer with the cable for button,...
- Page 72 Toprint otherimages [Size] Select the size of the printing sheet. After step 3, select [Select] and the desired image with A/V, then perform from step [Date] Toprint images on the indexscreen Select [Day&Time] or [Date] to insert the date and time on images. Perform "Stage 1 : tS"eparing...
-
Page 73: Printingat A Shop
Printingat a shop You can take a "Memory Stick" containing iruages shot with your caruera to a photo printing service shop. As long as the shop supports photo printing services conforruing to the DPOF, you call make a (Print order) mark on images advance so that you do not need to reselect... - Page 74 To cancel, select [Cancel] ill step 4 o1" select [Exit] ill step 8, then press O. Toremove themarkin indexmode Display the index screen. (-, step Select the images from which you want to 6 in "Read This First'_ remove the mark ill step 5, then press O. Toremove all themarksin thefolder Press MENU to display the menu.
-
Page 75: Viewing Images On A Tvscreen
your gamem fo y#_lr TV gom_eedW Viewing images on a TVscreen You call view images on a TV screen by connecting the cmnera to a TV. Set the mode dial to _, and turn on the camera. Turn off both your camera and the TV Mode dial... - Page 76 OnTVcolor systems If you want to view iruages on a TV screen, you need a TV with a video input jack and the cable for multi-use terminal (supplied with DSC-$90/$80/$60) or the A/V connecting cable (supplied with DSC- ST80). The color system of the TV must match...
-
Page 77: Troubleshooting
If a code such as "C/E:I-'IV'I:f-IV'I" appears on the screen, see page 88. Remove thebatteries, a ndinsertthebatteries againafteraboutone minute,andturnonthe power. O Initialize thesettings (pages 53) Consult y ourSonydealeror localauthorized Sony service facility. Please understand that you give your consent that the contents... - Page 78 For DSC-ST80, also refer to the operating instructions "Cyber-shot Station". The battery remaining indicator is incorrect, or sufficient battery remaining indicator is displayed but the power runs out too quickly. • This phenomenon occurs vd_en you use the camera in an extremely hot or cold location (page 93).
- Page 79 Your camera cannot record images. • Check the free capacity of the internal memory or "Memory Stick" (page 18). If they are full, do one of the following: Delete unnecessary images (-+ st{7) 6 in "Read Tkis Fir_'t") Change the "Memory Stick". •...
- Page 80 The flash does not work. • The flash is set to @ (No flash) (-+ _t_'l>5 in "R<'ad Th& Fir_7"). • You cannot use the flash when: [Mode] (REC Mode) is set to [Burst] or [Multi Burst] (page 35). ,.J (Tx_ilight mode) or _ (Candle mode) of the Scene mode, or _ (movie) is selected.
- Page 81 The eyes of the subject come red. • Sel [Red Eye Reduclion] in the _ (Setup) menu to IOn] (page 47). • Shoot the subject at a distance closer than the recommended shooting distance using the flash (--+ st U) 5 in "Read This Firs't'). •...
- Page 82 The image does not appear on the screen. • If the cabh: for multi-use termimtl is connected, disconnect it (page 75). Your camera cannot delete an image. • Cancel the protection (page 40). • Set the write-protect switch on the "Memory Stick"...
- Page 83 • For Windows 98/98SE/Me, click the [Device Manager] tab. The "Device Manager" appears. 3 Right-click [_' Sony DSC], then click [Uninstall] -+ [OK1. The device is deleted. 4 Install the USB driver (page 58). You cannot copy images. • Connect...
- Page 84 The image and sound are interrupted by noise when you view a movie on a computer. • You arc playing back tile movie directly from tile internal nlemory or tile "Memory Stick". Copy the movie to the hard disk of your computer, then play back the movie from the hard disk (page 58).
- Page 85 The free capacity of the internal memory does not increase even when copy the data stored in the internal memory to a "Memory Stick". • Tile data is not deleted al_er copying. Execute the [Format] command (page 50) to format the internal memory afler copying...
- Page 86 Printing is canceled. • You disconnected the cable for multi-use terminal (DSC-$90/$80/$60) or Cyber-shot Station (DSC-ST80) before the @ (Do not disconnect the cable for nmlti-use terminal/the cable) mark disappears. Cannot insert the date or print images in the index mode.
- Page 87 lens gets fogged. • Moislure condensation has occurred. Turn oil the camera and leave it l'or about an hour belk)re using it (page 95). The camera becomes warm when use it for a long time. • This is not :t malfunction. lens does not move when...
-
Page 88: Warning Indicators And Messages
Sony dealer local authorized Sony service facility. • The battery level is low. Charge the batteries (--4 st(,!) ] i_ "Read This C:32:lili Fi_:_t"). - Page 89 File error Memory Stick locked • An error occurred while playing back • Set the write-protect switch on the "Memory Stick" to the recording the image. position (page 91 ). File protect No memory space in internal • Release the protection (page 40). memory No memory space in Memory Stick Image...
- Page 90 Enable printer to connect • [USB Connect] is set to [PictBridge], • The data transmission to the printer may however the camera is connected to a not be completed yet. Do not disconnect the cable for multi-use terminal (DSC- non-PictBridge compliant device.
-
Page 91: Onthe "Memory Stick
Others Onthe "Memory Stick" Notesonusinga "MemoryStick"(not A "Memory Stick" is a compact, portable supplied) IC recording medium. The types "Meruory Stick" that call be used with this • You cannot record, edit or delete images il you camera are listed in the table below. - Page 92 Notes on using a "MemoryStickDuo" (notsupplied) • To a "Memory Stick Duo" canlel'a, _rrl_[l tile be sure to insert the "Memory Slick Dun" into a Memory Stick Dun Adaptor. If ynu inserl a "Memory Stick Dun" inlo a "Memory Slick" complianl device wilhnut a Memory Slick Dun Adaptor, you mighl not be able In remove it fi'nm the device.
-
Page 93: Onthe Battery Chargerand The Batteries
Onthe battery chargerand the batteries Onthebattery charger ( supplied with Batteries y oucannot u sewithyour DSC-S90/S80) camera • Do not charge any other b:_tteries except Sony Manganese tmtteries Nickel-Metal Hydride batteries in the battery Lithium batteries charger supplied with your camera. - Page 94 Effective useof Nickel-Metal H ydride • The hattery remaining indicator may not display batteries the correct inlormation when using alkaline batteries/Oxy Nickel Primary Battery. • Batteries are discharged even wheu they are nnt • Due to characteristics of alkaline batteries/Oxy used.
-
Page 95: Precautions
Precautions @Donot leavethecamerainthe @Onmoisture condensation following places It" the camera is brought directly from a cold to at warm location, moisture condense inside • In an extremely hot place outside the camera. This moisture condensation In places such as in a cal" parked in tire sun, tire cause a malflmctinn... -
Page 96: Specifications
Specifications Camera [Power, general] Power HR 15/51 :HR6 (Size AA) [System] Nickel-Metal Hydride batteries hnage device 6.85 mm (1/2.7 type) color (2) (supplied with DSC-Sg0/ CCD, Primary color filter $80), 2.4 V R6 (size AA) Alkaline batteries Total pixel number of camera (2) (supplied with DSC-S60), Approx. - Page 97 BC-CS2A/CS2B Ni-IH batterycharger (supplied with DSC-S90/S80) Power requh'emenls AC 100 lo 240 V, 50/60 Oulput voltage AA: DC 1.4V 400 mA x 2 AAA: DC 1.4 V 160 mA x 2 Operating temperature 0°C to +40°C (+32°F to + 104 oF) Storage temperature 20°C to +60°C (-4°F to + 140 oF)
- Page 98 Index Date/Time ......Daylight ........ cable ......Cable li)r multi-use terminal Delete ........ 59, 75 Accessories supplied step 6 it* "Read This ---* it* "Read This Fir,_t" Camera 1 ......AE/AF indicator Camera 2 ......Digital Zoom ......---* st_7_ 5 it* "Read This Candle mode...
- Page 99 Formm ......50, 51 LCD Backligbt ..... Number of images/Recording lime ........ LCD screen ..see -Screen" Hislogmm ..... ..21,31 Optical zoom ..46 ....M AF ........Holding the camera OS ....... .57, ---+ _('p 5 itt "R_'ml Thi,_ Macinlosh comi'mler .....
- Page 100 Still image ---* stt7) 5 it* "Read This Mode ......Fir,_l " step 4 it* "Read This Red Eye Reduction ....Shooting menu ..... Fir,_l" Resize ........Shooting movies ....Video CD ......65, 68 Rewind/Fast li)rward Shutter speed ....11,27 Video Out ......
- Page 101 M£MORY 5TIEK DUD , "Memory Stick PRO Duo", MEMDR¥ STIER PR0 DUO, "MagicGate", and MZ_GIICIGAkTE are trademarks of Sony Corporation. • Picture Package is a trademark of Sony Corporation. • Microsol:, Windows, Windows Media, and DirectX are either registered trademarks trademarks of Microsol: Corporation in the United States and/or other countries.
Need help?
Do you have a question about the DSC-S60 and is the answer not in the manual?
Questions and answers