Table of Contents
Advertisement
Quick Links
Advertisement
Table of Contents

Related Manuals for Sylvania SRC22134


Summary of Contents for Sylvania SRC22134
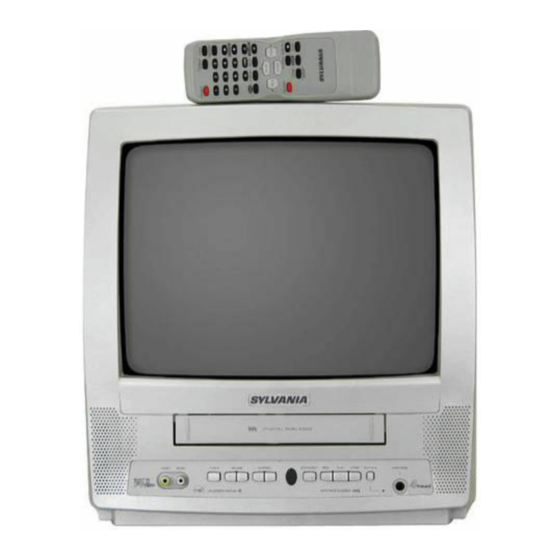
- Page 1 SYLVANIA COLOR TV/VCR SRC22134 (13 inch) SRC22194 (19 inch) _c_ I f_/_ This Owner's Manual is made of recycled paper. I INSTRUCCIONES EN ESPAI_IOL INCLUIDAS. determined that this product meets the ENERGYSTAR® guidelinesfor energy efficiency. ENERGYSTAR® is a U.S. registered mark...
-
Page 2: Important Safeguards
TO RAIN OR MOISTURE. WARNING: TO REDUCE THE RISK OF FIRE OR ELECTRIC SHOCK, DO NOT EXPOSE THIS APPLIANCE THIS SYMBOL INDICATES THAT DAN- GEROUS VOLTAGE CONSTITUTING A RISK OF ELECTRIC SHOCK IS PRESENT WITHIN THIS UNIT. CAUTION: TO REDUCE THE RISK OF ELECTRIC THIS SYMBOL INDICATES THAT THERE ARE IMPORTANT OPERATING AND SHOCK, DO NOT REMOVE COVER (OR BACK). - Page 3 F;QURE EXAMPLE OF ANTENNA GROUNDING AS PER NATIONAL ELECTRICAL CODE GROUND CLAMP ELECTR¢C SERVtCE • GROUNDING CONDUCTORS {NECSECTION$_0.21) NEC. NATIONALELECTRICALCODE ELECTROOESYSTEM $2898A (NEC ART 250, PART H) 13.Outdoor Antenna grounding-If an outside antenna or 19.Damage Requiring Service.Unplug this TWVCR from cable system is connected to the TV/VCR, be sure the the wall outlet and refer servicing to qualified service per-...
-
Page 4: Precautions
PRECAUTIONS IMPORTANT COPYRIGHT INFORMATION Unauthorized recording or use of broadcast televi- For safe operation and satisfactory performance of sion programming, video tape, film or other copy- your TV/VCR, keep the following in mind when righted material may violate applicable copyright selecting a place for its installation: laws. -
Page 5: Table Of Contents
TABLE OF CONTENTS • RECORDING ......• IMPORTANT SAFEGUARDS ..... NORMAL RECORDING ....• PRECAUTIONS ......OTR (One Touch Recording) ....• FEATURES ......TIMER RECORDING ....• SUPPLIED ACCESSO_ES ....TIMER PROGRAM EXTENSION ..HINTS FOR AUTOMATIC TIMER • OPERATING CONTROLS AND FUNCTIONS RECORDING ...... -
Page 6: Features
FEATURES • Rotary 4-head Record/Playback System-Fnnr • Auto Head Cleaner-Automatically cleans video heads ensure excellent picture quality and special heads as you insert or remove a cassette. effects playback. • Zero Return-The tape returns to counter of • Index Search-Fast-forwards to start of next recording. 0:00:00 by rewinding or fast forwarding. -
Page 7: Operating Controls And Functions
OPERATING CONTROLS AND FUNCTIONS his manual covers 13" and 19". The operation of the two models are exactly the same except the_ ppearance. 19" model is illustrated in this manual. -TV/VCR FRONT PANEL - 1 2 3 4 5 6 78910111213 - REMOTE CONTROL - 1 VIDEO input jack- Connect to the video output jack of your video camera or another VCR. - Page 8 - REAR VIEW -* © 8 REW button- Press to rewind the tape, or to view 16 MENU button- Press to display the main menu on the TV screen. the picture rapidly in reverse during playback mode. (Rewind Search) 17 DISPLAy button- Display the counter or the cur- button- rent channel number and current time on the TV screen.
-
Page 9: Preparation For Use
PREPARATION FOR USE From Cable System or Satellite Dish \ _VHF/UHF Antenna Rod Antenna Satellite Box or Cable Box. 13" model only)_l_ (Not supplied) (Supplied with (Not supplied) (Not supplied) " VHF Antenna UHF Antenna From (Not supplied) Cable System Flat twin-lead cable VHF/UHF COMBINED... -
Page 10: External Input Mode
TO RECORD A SCRAMBLED/UNSCRAMBLED CHANNEL 1) Set the TV/VCR channel selector to the output channel of the Cable Converter Box or Satellite 1)Open the battery compartment cover by pressing the cover on the remote unit in the direction of the Box. -
Page 11: Clock Set Up (Auto / Manual)
Select "SETTING CLOCK" TO SELECT A DESIRED CHANNEL Press the MENU button on the TIMER PRO_RAMMI_ p_TURE CONTP_ S_Tr_G C_OCK remote control. CIelNI_L SET L,e You can select the desired channel by using the USERS S,_T Up V-CHIP Press the PLAY/A or STOP/_ but- LA_U_ NGtlSh 3 CHANNEL •... -
Page 12: Channel Set Up Again
NOTE: When unplugging the AC cord or if there is a power Select "SETTING CLOCK" I _"°_'_'_u- failure for more than 3 seconds, you may have to P_TLIRE /,- _.,_cL_ Press the MENU button on the reset the clock. C_".qNEt. _ remote control. -
Page 13: Selecting The Language
Select "CHANNEL SET UP" 2 Select "ENGLISH" or "ESPANOI_" Press the MENU button on the Select "ENGLISH" or "ESPANOL"= Spanish using T_MERpROGR_AM,'NG remote control. the EFWD,,_ or REW/'ql button. _eTUnE CON71=a_ 8_VflNG CLOCK _NN£C _ET UP Press the PLAY/• or STOPiV but- LISEF'S SET UP V_HtP SEt UP L_N_U#,GE... -
Page 14: Tv Operation
TV OPERATION The TV/VCR's picture controls - BRIGHT, CON- TRAST, COLOR, TINT and SHARPNESS - are 1 Turn on theTV/VCR preset to factory specifications. Although they are Press the POWER button to turn on the TV/VCR. usually the best, you may need to make some further adjustments for a natural looking image. -
Page 15: Closed Caption System
TO CANCEL THE CLOSED CAPTION SYSTEM Repeat steps [1] and [2], select [OFF] using the You can view specially labeled (cc) TV programs, EFWD/I_ or REW/II button. Press the MENU but- movies, news, pre-recorded tapes with either a dia- ton on the remote control to return to TV mode. logue caption or text display. - Page 16 4 Select your desired item 5 Exit the V-Chip setting mode Press the PLAY/A or STOP/_' but- /,. _ Press the MENU button on the remote control return to original mode. Then, press the EFWD/I_ button to _,',I ton to point to your desired item. [ _-_'_ MPAA RATING...
-
Page 17: Fm Mode (Src22134 Only)
CHANGE ACCESS CODE To chan_e access code, follow the steps. Press the MENU button to exit the TV/VCR SETUP. Note: Press the MENU button so that the TV/VCR SETUP • If you unplug the power code or power failure display, appears on the TV screen. occurs, the changed access code will be lost and will return to default (0000). -
Page 18: Normal Playback
PICTURE SEARCH Make sure ... • TV/VCR power must be turned on. This feature is very useful in finding or skipping over a particular scene on a tape. In this mode, the sound 1 Insert a prerecorded tape will be muted. If the erase-protection tab has been removed, the 1)You may view a video tape at a high speed in TV/VCR will start playback automatically,. -
Page 19: Slow Motion
NOTES: • Time Search can be set up to a maximum of 9 hours 50 minutes (9:50) by 10 minutes at a time. Press the SLOW button to reduce the playback speed. • This function will not operate in recording mode. The TV/VCR mutes the sound during slow motion. -
Page 20: Vertical Hold Control
In the Pause/Sti!! mode only, when the picture begins • Tracking adjustment will be set automatically to vibrate vertically, stabilize the picture by pressing (Digital Tracking function) when you start play- the CHANNEL • or • button. back. NOTE: • However when playing pre-recorded tapes or tapes If there are video noise lines on the screen, see Tracking recorded on units other than your own, noise lines Adjustment section. -
Page 21: Otr (One Touch Recording)
Avoid overlap of programs ... There is a chance that a program will not be record- ed. When programs overlap: This function enables you to set the recording length • The program with the earliest start time wil_record simply by pressing the REC/OTR button on the first. -
Page 22: Timer Program Extension
For every day recording : To record a TV program at the same Finish setting the program time on the same channel every ..\.zJ. L l._- _ r_n PnC_n_CJih_5 Press the F.FWDtI_ or REW/_I button. The program day. (Example: Monday through is now completed. -
Page 23: Recording
TO CANCEL AN A UTOMATIC TIMER RECORDING Press the PLAY/A or STOP/V but- • After setting a program; ton to point to "AUTO RETURN". ,%_L_,_ 1)Press the POWER button. Press the EFWD/I_ or REW/<I 2)Repeat steps [1] N [2] under TIMER RECORD- button until [ON] appears. -
Page 24: Sleep Timer
2 Select "TV" or "TAPE" The Sleep Timer function turns off the TV/VCR Press the PLAY/A or STOP/• but- | without using the POWER button after a desired ton until it points to "TV/TAPE". period of time. Press the F.FWD/_ or REW/_I Iw .. -
Page 25: On Screen Display
ON SCREEN DISPLAY To check the Counter, Clock and Channel number on the TV screen, press the DISPLAY button on the remote control. Each time you press the DISPLAY button on the remote control, the TV screen will change as follows: WHEN CLOSED CAPTION... -
Page 26: Troubleshooting Guide
TROUBLESHOOTING GUIDE If you have followed the instructions contained in this manual and have difficulty in operating your TV/VCR, locate the PROBLEM in the left column below. Check the corresponding CORRECTIVE ACTION column to remedy the problem. PROBLEM CORRECTIVE ACTION No power. -
Page 27: Specifications
SPECIFICATIONS GENERAL SPECIFICATIONS ELECTRICAL SPECIFICATIONS CRT : 13 or 19 inch in-line gun, 90* Video input level : 0.5-2.0Vp-p deflection tube Audio input level : -15dBs Television system : NTSC-M Video S/N ratio : More than 46dB Closed caption system :§15.119/FCC Audio S/N ratio : More than 43dB Video Heads :... - Page 28 INDICE CONTROLES DE OPERACION INSTALACION DE LAS PILAS ..... SUS FUNCIONES ......PREPARACION DE CANALES POR CONEXIONES DE ANTENA/CABLE ..PRIMERA VEZ ......MODO DE ENTRADA EXTERNA ... AJUSTE DEL RELOJ ..... Este manual sirve para los modelos de 13" y 19". A excepci6n de la apariencia, la operaci6n de los dos modelos...
- Page 29 - PANEL TRASERO © Bot6n I_- Funcl6n de segulmlento- Pulse los botones para minimiz_ el ruido de video (Ifneas o puntos en la pan- • Cuando establezca un programa (por ejemplo: para talla) durante la reproducci6n. ajustar el reloj o para estableeer un programa de tem- 6 Ventanilla sensora del mando a distancia- porizador), pdlselo para determinar su elecci6n y vaya Recibe las sefiales infrarrojas procedentes del mando a...
- Page 30 22 Bot6n de pausa/Imagen flJa (PAUSE/STILL)- riot), y al pulsarlo por segunda vez, el canal eambiar,5 Ptllselo para detener temporalmente la cinta durante la del 10al 3. grabaci6n o para ver una imagen fija durante la repro- 25 Botdn del temporlzador despertador/para ducci6n.
- Page 31 Cuando utilice u na Cerci6Tese... serial de entrada extema (otra videograbadora o una videoc_nara), conecte los cables de • La alimentaci6n del televisor/videograbadora deber_i estar conectada. salida de audio/video del equipo de reproduccidn alas tomas AUDIO IN/VIDEO IN de su En el ejemplo de abajo, el reloj va a ajustarse ast: televiser/videograbadora.
- Page 32 Get ft fixed: at yuur home or ours! For repair of major brand appliances in your own home... no matter who made it, no matter who sold it! 1-800-4-MY-HOME sM Anytime,day or night (1-800-469-4663) www.sears.com To bring in products such as vacuums, lawn equipment and electronics for repair, call for the location of your nearest...
Need help?
Do you have a question about the SRC22134 and is the answer not in the manual?
Questions and answers