Table of Contents
Advertisement
Advertisement
Table of Contents

Subscribe to Our Youtube Channel
Related Manuals for Gefen EXT-HD-DSMP


Summary of Contents for Gefen EXT-HD-DSMP
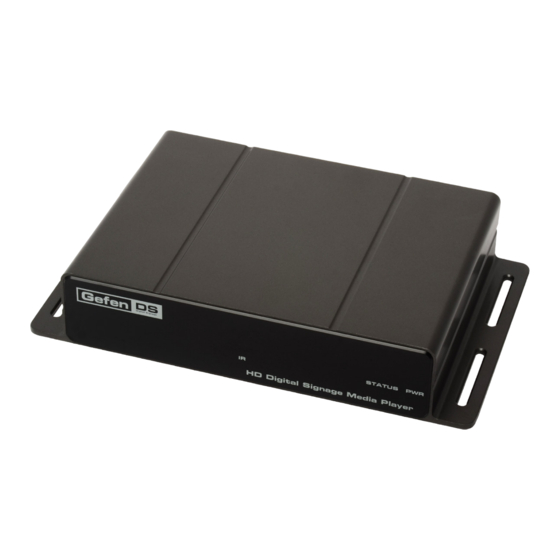
- Page 1 ® Hi-Def Digital Signage Media Player EXT-HD-DSMP User Manual www.gefen.com...
- Page 3 Notice Gefen, LLC reserves the right to make changes in the hardware, packaging and any accompanying documentation without prior written notice. Hi-Def Digital Signage Media Player is a trademark of Gefen, LLC HDMI, the HDMI logo, and High-Definition Multimedia Interface are trademarks or registered trademarks of HDMI Licensing in the United States and other countries.
-
Page 4: Table Of Contents
CONTENTS Introduction Operation Notes Features Panel Layout Front Panel Back Panel Panel Descriptions IR Remote Control IR Remote Control Layout IR Remote Descriptions Installing the Batteries Connecting the Hi-Def Digital Signage Media Player Wiring Diagram Operating the Hi-Def Digital Signage Media Player Powering the Hi-Def Digital Signage Media Player Accessing the Main Menu Safely Removing the USB Storage Device... -
Page 5: Introduction
Gefen provides a CMS (Content Management Software) solution which can be run in a virtual environment. The Gefen CMS will allow you to easily manage all of your units in the field from any compatible browser with access to logs, schedules, content, and playlists. -
Page 6: Operation Notes
The main settings, schedules, playlists, and subdirectories will be located on the attached USB device. The default directories and settings file (settings. xml) can be downloaded and placed into the root directory of the USB device. These files can be downloaded from the Gefen Web site at: www.gefen.com/downloads »... -
Page 7: Features
FEATURES Features • Supports resolutions up to 1080p Full HD • HDMI, Component, and Composite A/V outputs active simultaneously • Text-based scheduling and playlist using a text editor • CMS for multiple units* • Supports MPEG 1/2/4, DivX 3/4/5/6, XVid, and H.264/AVC video codecs •... -
Page 8: Panel Layout
PANEL LAYOUT Front Panel... -
Page 9: Back Panel
PANEL LAYOUT Back Panel... -
Page 10: Panel Descriptions
PANEL DESCRIPTIONS This IR window receives signals from the IR Remote Control Unit. STATUS This LED indicator will flash bright blue to indicate network traffic when the Media Player is connected to a network. Power LED indicator. When power is applied to the unit, this LED will glow bright blue. -
Page 11: Ir Remote Control
IR REMOTE CONTROL EXT-HD-DSMP-IR Remote Control Layout... - Page 12 IR REMOTE CONTROL IR Remote Control Descriptions Power This button will toggle between the ON and STANDBY power states. A RED LED will be active when the unit is in Standby power state. The Power LED will glow bright blue when the Media Player is powered ON. Numeric Keypad (0 - 9) Used to enter values when using the Menu System.
-
Page 13: Installing The Batteries
IR REMOTE CONTROL Installing the Batteries Remove the battery cover on the back of the IR Remote Control Unit. Insert the included AA batteries into the open battery slot. Replace the battery cover. IR emitter Transmits the IR commands to the Media Player Battery Slot (shown with batteries) -
Page 14: Connecting The Hi-Def Digital Signage Media Player
CONNECTING THE HI-DEF DIGITAL SIGNAGE MEDIA PLAYER How to Connect the Hi-Def Digital Signage Media Player Connect Hi-Def Digital Signage Media Player to the display using the included HDMI cable. NOTE: If using the Hi-Def Digital Signage Media Player with an analog display, then connect the Hi-Def Digital Signage Media Player to the display using user-supplied composite or component video cables. -
Page 15: Operating The Hi-Def Digital Signage Media Player
OPERATING THE HI-DEF DIGITAL SIGNAGE MEDIA PLAYER Powering the Hi-Def Digital Signage Media Player Once power has been connected to the Hi-Def Digital Signage Media Player, the following screen will be displayed while the unit completes the booting process. After the boot process has been completed, any schedules, playlists, and content will be automatically begin playing: If no content has been scheduled, then the PIN code screen will be displayed. -
Page 16: Accessing The Main Menu
OPERATING THE HI-DEF DIGITAL SIGNAGE MEDIA PLAYER Accessing the Main Menu If no media is scheduled to play after the Media Player has finished booting, then the PIN code screen will be displayed. The PIN code screen provides a secure gateway to the Main Menu. - Page 17 OPERATING THE HI-DEF DIGITAL SIGNAGE MEDIA PLAYER As the PIN code is entered, each of the numbers will be masked for security purposes. Although not required, a PIN code is recommended to prevent unauthorized access to the Main Menu. The PIN code can be disabled (see page 47).
-
Page 18: Safely Removing The Usb Storage Device
OPERATING THE HI-DEF DIGITAL SIGNAGE MEDIA PLAYER After entering the correct PIN code, the Main Menu will be displayed. S/W Version: Ver.0.9.7.3 Safely Removing the USB Storage Device In Stand-Alone Mode, it will be necessary to remove the USB storage device from the Media Player in order to update schedule files, playlist files, and content. - Page 19 OPERATING THE HI-DEF DIGITAL SIGNAGE MEDIA PLAYER The Media Player will prompt you to select which device to stop. In the example below, only one USB device is connected to the Media Player. Additional storage would be identified as D, E, F, etc. Highlight the USB device you wish to stop and eject, using the ▲...
-
Page 20: How The Hi-Def Digital Signage Media Player Works
The illustration below provides a summary of each of the three files, the location of the file on the USB drive, and how they relate to one another. settings.xml <settings> Location: Root directory <devConfig> <name value=”Gefen Player” /> This file contains the name of the </devConfig> <ipConfig> active Schedule file to be executed. <ipMode value=”manual” />... -
Page 21: Renaming Files And Directories
HOW THE HI-DEF DIGITAL SIGNAGE MEDIA PLAYER WORKS Renaming Files and Directories As mentioned earlier, three (3) directories must reside in the root directory of the USB drive at all times: /media, /playlists, and /schedules. The settings.xml file must always reside in the root directory. The names given to each of the files and directories are provided as a guide and are by no means static. -
Page 22: Operating Modes
HOW THE HI-DEF DIGITAL SIGNAGE MEDIA PLAYER WORKS Operating Modes The Hi-Def Digital Signage Media Player can operate in one of two modes: Stand-alone Mode and Network Mode. Stand-Alone Mode Use this mode if you want content played locally from the USB flash drive on the Media Player. -
Page 23: Stand-Alone Mode
STAND-ALONE MODE Using Stand-Alone Mode Connect the Hi-Def Digital Signage Media Player according to the instructions on page 10. STOP: Make sure the USB storage device is connected to the Media Player before power is connected. The Media Player comes pre-loaded with a demo playlist, schedule, and content. - Page 24 STAND-ALONE MODE S/W Version: Ver.0.9.7.3 Eject USB Device Indicates that the green button on the IR Remote Control is used for safe removal of the USB device. Refer to page 14 for details on ejecting the USB drive from the Media Player. Remove the USB device from the back of the Media Player and connect it to your computer.
-
Page 25: Viewing The Schedule File
STAND-ALONE MODE Viewing the Schedule File Open the schedule.gsh file, located in the /schedules directory. Any plain text editor can be used (such as Windows® Notepad, etc). IMPORTANT: Do not use a word processing program to edit the Schedule file, as this may introduce unwanted invisible control characters into the file. - Page 26 STAND-ALONE MODE Next, the playlist file will be specified. Make sure to use the leading forward- slash in the path when specifying the full path to the schedule file. <FileName>/playlists/playlist.gpl</FileName> <FileName>/playlists/playlist.gpl</FileName> <FileName>playlists/playlist.gpl</FileName> As mentioned earlier, the playlist.gpl file can be renamed to something more meaningful, if you like.
-
Page 27: Editing The Playlist File
STAND-ALONE MODE Editing the Playlist File Open the playlist.gpl file, located in the /playlists directory. Locate the <media> tag at the top of the file. The <media> and </media> tags must surround each instance of video content. <media> <FileName>..</FileName> </media> Type the full path (make sure to include a forward slash at the beginning of the path) to the video content, between the <FileName>... -
Page 28: Viewing The Settings.xml File
STAND-ALONE MODE Viewing the Settings.xml File Finally, we’re going to take a quick look at the file. The settings.xml file contains all the information on how the Hi-Def Digital settings.xml Signage Media Player operates. Within the file, the active settings.xml schedule must be specified: Open the settings.xml file, located in the root directory of the USB drive. - Page 29 STAND-ALONE MODE The root directory of the USB drive should look something like this: Filename Filesize Filetype media File folder playlists File folder schedules File folder settings.xml 2,472 XML Doc... After you have verified everything, eject the USB drive from your computer before removing it. If the USB drive is removed without ejecting it, data loss and/or data corruption may occur.
-
Page 30: Adding More Video Content To The Playlist
STAND-ALONE MODE Adding More Video Content to the Playlist Running only one selection of video content may not always be what you want to do. The Hi-Def Digital Signage Media Player is capable of playing several pieces of video content. Here’s how to add more than one file to the playlist: Safely eject and remove the USB drive from the Media Player, then plus the USB drive into an available USB port on your computer. -
Page 31: Scheduling Content
STAND-ALONE MODE Scheduling Content We’ve already seen how we can play one or more media files and loop them. However, we can also specify a when the playback will begin and end. Open the schedule.gsh file, located in the /schedules directory. Insert the following two lines between the <DefaultEvent>... -
Page 32: The Default Event
THE DEFAULT EVENT Understanding the Default Event As mentioned earlier, the schedule.gsh file must always contain a default event. The important thing to remember when using Digital Signage is that something (some type of media) should be displayed at all times. A Digital Sig- nage application with nothing displayed defeats the whole purpose of the application. -
Page 33: Push Mode / Pull Mode
PUSH MODE / PULL MODE Using Push and Pull Modes Use Push or Pull Modes when the Digital Signage requirements are: • Playback and looping of media files • Scheduling and playlist capability • Remote content management using the built-in FTP client / server NOTE: You should already be familiar with the schedule.gsh, schedule.gpl, and settings.xml files and how they work. -
Page 34: Method 1: Configuration Using The Osd
PUSH MODE / PULL MODE Method 1: Configuration using the OSD Open the OSD and select the Network option. S/W Version: Ver.0.9.7.3 Select either DHCP IP (AUTO) which automatically assigns the IP address from the pool. The FIX IP (MANUAL) option will require you to provide the correct IP address, Subnet mask, Default Gateway, and DNS server ad- dress. - Page 35 PUSH MODE / PULL MODE Select the Set FTP username / password for client option. S/W Version: Ver.0.9.7.3 Enter the desired user name and password in the respective fields: Press the OK button on the IR Remote to accept the changes. Select the Back button to return to the main menu of the OSD.
- Page 36 PUSH MODE / PULL MODE Select the Enable / Disable FTP server / client option. S/W Version: Ver.0.9.7.3 Select the Enable / Disable FTP Server option. Press the OK button on the IR Remote Control until it is set to Enable, then press the Back button on the IR Remote Control.
-
Page 37: Method 2: Configuration Using The Settings.xml File
ADVANCED: Before editing the settings.xml file, it is recommended that you are familiar with XML (eXtended Markup Language). If you are unfamiliar with XML, you should review pages 45 and 46 before continuing. Open the settings.xml file and locate the <ipConfig> section: <name value=”Gefen Player” /> <ipConfig> <ipMode value=”manual” /> <automatic /> <manual>... -
Page 38: Configuring The Ftp Client
PUSH MODE / PULL MODE Set the pushMode attribute to enable. Then, set the userName and userPass attributes to the desired values. For most scenarios, the port value should be set to 21. Save the file to the USB drive. STOP: Before inserting the USB drive back in the Hi-Def Digital Signage Media Player, make sure you disconnect the power to the unit. - Page 39 PUSH MODE / PULL MODE Enter the user name and password that were created on page 31. User name Password Connect to the Hi-Def Digital Signage Media Player using your FTP client. Once connected, you should see a directory listing similar to the following: Filename Filesize Filetype...
- Page 40 PUSH MODE / PULL MODE To make changes to the current schedule or playlist, make changes locally on your computer, then upload the new files to their respective directories. Media files can also be added. Any changes will automatically take place once the Hi-Def Digital Signage Media Player finishes executing the current schedule and/or playlist.
-
Page 41: Pull Mode
PUSH MODE / PULL MODE Pull Mode In this next section, we will discuss Pull Mode. When we refer to Pull Mode, we are describing a process whereby content is (automatically) “pulled from” an FTP server to the Hi-Def Digital Signage Media Player. In this configuration, the Hi-Def Digital Signage Media Player becomes the FTP client. - Page 42 PUSH MODE / PULL MODE Press the OK button to accept the changes. Select the Set FTP username / password for server option. S/W Version: Ver.0.9.7.3 Enter the desired user name and password in the respective fields. If no user name of password currently exists, the Current Username and Current Password fields may be left blank.
- Page 43 PUSH MODE / PULL MODE Select the Enable / Disable FTP server / client option. S/W Version: Ver.0.9.7.3 Select the Enable / Disable FTP Server option. Press the OK button on the IR Remote Control until it is set to Enable, then press the Back button on the IR Remote Control.
-
Page 44: Method 2: Configuration Using The Settings.xml File
ADVANCED: Before editing the settings.xml file, it is recommended that you are familiar with XML (eXtended Markup Language). If you are unfamiliar with XML, you should review pages 45 and 46 before continuing. Open the settings.xml file and locate the <ipConfig> section: <name value=”Gefen Player” /> <ipConfig> <ipMode value=”manual” /> <automatic /> <manual>... - Page 45 PUSH MODE / PULL MODE Set the pullMode attribute to enable. <pullConfig> <pullMode value=”enable” /> <disable /> <enable> ..Next, set the IP address of the server used to hold the content for the following attributes: <pullConfig> <pullMode value=”enable” /> <disable /> <enable> <pullURL value=”192.168.2.70” /> <settingPull value=”192.168.2.70” /> <schedulePull value=”192.168.2.70/schedules” />...
- Page 46 PUSH MODE / PULL MODE Under the pullSchedule tag, the pullRepeat attribute value can be set to hourly or daily, or none. See page 51 for more information. If the pullRepeat attribute is set to daily, set the time value under the <daily>...
-
Page 47: Configuring The Ftp Server
PUSH MODE / PULL MODE Configuring the FTP Server The following covers the configuration process for the FTP server. This process applies whether you are running FTP server software on a PC on a network or have a dedicated FTP server. The first step is to create the path and permissions to the directory which the Hi-Def Digital Signage Media Player will be accessing. -
Page 48: The Settings.xml File
Filesize Filetype Logs File folder media File folder playlists File folder schedules File folder settings.xml 2,472 XML Doc... A portion of the settings.xml file is shown below: <settings> <devConfig> <name value=”Gefen Player” /> </devConfig> <ipConfig> <ipMode value=”manual” /> <automatic /> <manual> <ip value=”192.168.2.238” /> <subnet value=”255.255.255.0” /> <gateway value=”0.0.0.0” /> <dns1 value=”4.2.2.2” /> <dns2 value=”8.8.8.8” /> </manual> </ipConfig> <osdConfig> <osdLock value=”enable” /> <disable />... - Page 49 THE SETTINGS.XML FILE The settings.xml is constructed as a typical XML file: The beginning of the settings.xml file begins with an XML declaration: <?xml version=”1.0” encoding=”UTF-8” ?> The XML declaration is followed by a <settings> start-tag. The end of the file contains a </settings> end-tag. All other tags and attributes are contained within these two tags, creating the following structure: <?xml version=”1.0” encoding=”UTF-8” ?>...
-
Page 50: Settings.xml Summary
Tag Name: <devConfig> Description: Allows you to change the name of the device. Attributes: name Example: <devConfig> <name value=”Gefen Player” /> </devConfig> IP Configuration Tag Name: <ipConfig> Description: Allows you to specify automatic (DHCP) or manual (FIXED IP) configuration of the Hi-Def Digital Signage Media Player. - Page 51 SETTINGS.XML SUMMARY OSD PIN Code Tag Name: <osdConfig> Description: Allows you to change or disable the PIN code for the OSD. Attributes: osdLock <osdConfig> Example: <osdLock value=”enable” /> <disable /> <enable> <pinConfig> <pin value=”0000” /> </pinConfig> </enable> </osdConfig> Notes: Once the PIN code has been changed in the settings.xml file, the Hi-Def Digital Signage Media Player must be power-cycled after inserting the USB drive.
- Page 52 SETTINGS.XML SUMMARY Notes: Once the time zone or time mode has been changed using the settings.xml file, the Hi-Def Digital Signage Media Player must be power-cycled after inserting the USB drive. WARNING: When using schedules, it is highly recommended that an NTP server be used to maintain all time settings.
- Page 53 SETTINGS.XML SUMMARY Pull Mode Configuration Tag Name: <pullConfig> Description: Allows you to modify Pull Mode settings in network mode. Attributes: pullMode pullURL schedulePull playlistPull contentPull pullLogUpload userName userPass port syncMedia syncPlaylist syncSchedule Example: <pullConfig> <pullMode value=”enable” /> <disable /> <enable> <pullURL value=”192.168.2.70” /> <settingPull value=”192.168.2.70” /> <schedulePull value=”192.168.2.70/schedules” /> <playlistPull value=”192.168.2.70/playlists” /> <contentPull value=”192.168.2.70/media” />...
- Page 54 SETTINGS.XML SUMMARY Notes: The syncMedia attribute enables / disables the syncing of media from the server to the Media Player. The two examples below illustrate the difference between disabling and enabling the syncMedia attribute. Note that when the syncMedia attribute is enabled, the Media player will receive the new content and erase the current content from the Media Player.
- Page 55 SETTINGS.XML SUMMARY Pull Schedule Configuration Tag Name: <pullSchedule> Description: Located within the <pullSchedule> opening and closing tags. This section allows you to specify when content is pulled on a daily or hourly basis. Attributes: pullRepeat time (daily) time (hourly) <pullConfig> Example: ..<pullSchedule>...
- Page 56 SETTINGS.XML SUMMARY Setting the Active Schedule Tag Name: <schedule> Description: Sets the active schedule. Attributes: activeSchedule <schedule> Example: <activeSchedule value=”/schedules/ schedule.gsh” /> </schedule> Display Configuration Tag Name: <display> Description: Sets the output resolution and enables / disables underscan. Attributes: output videoReduceSize <display> Example: <output value=”NTSC1080I” />...
- Page 57 SETTINGS.XML SUMMARY Reboot Configuration Tag Name: <rebootConfig> Description: This option can be used in rare cases when the Media Player has exhibited abnormal behavior and performing a reboot return the Media Player to normal operation. The reboot time should be set when content is not scheduled to play. After the reboot procedure is executed, the Media Player will continue with the current schedule.
-
Page 58: Formatting The Usb Drive Using Ext3
FORMATTING USING EXT3 Formatting the USB drive using ext3 The Digital Signage Media Player allows USB drives to be formatted using the ext3 file system from within the built-in menu system. The ext3 (third extended file system) is a journaled file system used by the Linux kernel. Press the Home button on the IR Remote Control. -
Page 59: Firmware Update
FIRMWARE UPDATE Updating the Firmware Copy the install.img file to the root directory of the USB drive. Insert the USB drive into the USB port on the Hi-Def Digital Signage Media Player. Enter the OSD and select Manual firmware update via USB. S/W Version: Ver.0.9.7.3 Press the OK button on the IR Remote. - Page 60 FIRMWARE UPDATE WARNING: Do not disconnect power or remove the USB drive during the firmware update process. Doing so may cause the unit to function improperly or lock up in an unrecoverable state. The following set of screens will be displayed as the update process is taking place: After the update process has completed successfully, the following screen will be displayed.
-
Page 61: Specifications
SPECIFICATIONS Maximum Pixel Clock................225 MHz Digital Video Output Connectors......(1) HDMI Type A 19-pin, female Analog Video Output Connectors..(1) Component, RCA-type, (1) Composite, RCA-type, Digital Audio Output Connector............(1) TOSLINK™ Analog Audio Output Connector..........(1) L/R, RCA-type Ethernet Connector................ RJ-45, Shielded USB Output Connectors............ -
Page 62: Warranty
If equipment fails because of such defects and Gefen is notified within two (2) years from the date of shipment, Gefen will, at its option, repair or replace the equipment, provided that the equipment has not been subjected to mechanical, electrical, or other abuse or modifications. - Page 64 Rev A7 v0.9.7.3 20600 Nordhoff St., Chatsworth CA 91311 1-800-545-6900 818-772-9100 fax: 818-772-9120 www.gefen.com/DS ds@gefen.com This product uses UL listed power supplies.
Need help?
Do you have a question about the EXT-HD-DSMP and is the answer not in the manual?
Questions and answers