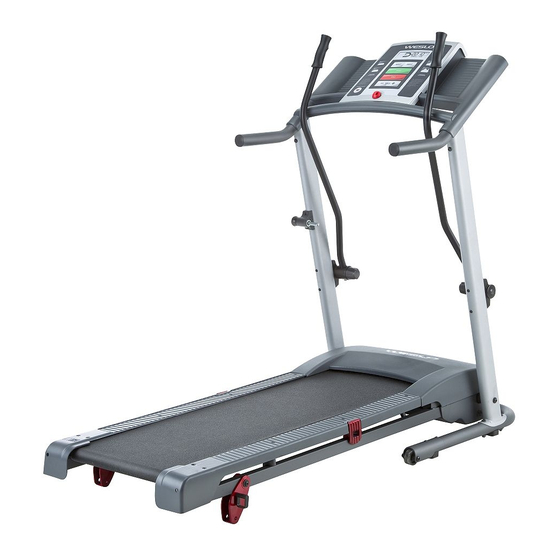
Weslo Crosswalk 5.0t User Manual
Treadmill exerciser
Hide thumbs
Also See for Crosswalk 5.0t:
- User manual (29 pages) ,
- Manual (28 pages) ,
- Manual del usuario (28 pages)
Table of Contents

Related Manuals for Weslo Crosswalk 5.0t


Summary of Contents for Weslo Crosswalk 5.0t
- Page 1 ® Model No. 831.24822.0 TR A Serial No. User's Write the serial number in the space above for future reference. Serial Number Decal • Assembly • Operation • Maintenance • Part List and Drawing Sears, Roebuck and Co. Hoffman Estates, IL 60179...
-
Page 2: Table Of Contents
TABLE OF CONTENTS WARNING DECAL PLACEMENT .............. IMPORTANT PRECAUTIONS ..............BEFORE YOU BEGIN ............... ASSEMBLY ................OPERATION AND ADJUSTMENT ............HOW TO FOLD AND MOVE THE TREADMILL ..........TROUBLESHOOTING ..............EXERCISE GUIDELINES ..............PART LIST ................EXPLODED DRAWING ..............ORDERING REPLACEMENT PARTS .......... -
Page 3: Important Precautions
iMPORTANT PRECAUTIONS WARNING: -to reduce the .skofse.ous njory, read a , mportant precautions and in- structions in this manual and all warnings on your treadmill before using your treadmill. Sears as- sumes no responsibility for personal injury or property damage sustained by or through the use of this product. - Page 4 20. Never leave the treadmill unattended while it Never drop or insert any object into any is running. Always remove the key, unplug opening on the treadmill. the power cord, and press the power switch DANGER: A ways uop ug the p ower into the off position when the treadmill is not...
-
Page 5: Before You Begin
BEFORE YOU BEGIN Thank you for selecting the new WESLO ® ing this manual, please see the back cover of this CROSSWALK 5.0t treadmill. The CROSSWALK 5.0t manual. To help us assist you, note the product model treadmill offers a selection of features designed to number and serial number before contacting us. -
Page 6: Assembly
ASSEMBLY Assembly requires two persons. Set the treadmill in a cleared area and remove all packing materials. Do not dispose of the packing materials until assembly is completed. Note: The underside of the treadmill walking belt is coated with high-performance lubricant. - Page 7 Make sure the power cord is unplugged. With the help of a second person, carefully tip the treadmill onto its side. Unfold the Frame (51) away from the Uprights (53, 54). Orient the Base (52) as shown. Attach the Base to the Left Upright (53) and the Right Upright (54) with four M10 x 58mm Bolts (2) and four M10 Nuts (73).
- Page 8 Set the Right Handrail (33) on the console as- sembly. Make sure that the console wire is Console not pinched. Remove the tie from the bracket on the Right Handrail. If necessary, press the Cage Nut (110) back into place. Start an M5 x 16mm Screw (85) with an M5 Star Washer (7) into the Right Handrail (33), and then start two M4.2 x 19mm Screws (10) into...
- Page 9 StartanM8x 15mm Bolt(8)withanM8Star Washer ( 5) intoeachUpright ( 53,54).Then, firmly tightenall six IVI8 x 15ram Bolts (8). Attach the Latch Housing (48) to the Left Upright (53) with two M4.2 x 18mm Screws (58); start both Screws, and then tighten both of them.
- Page 10 Attach the Left Upper Body Arm (105) to the Left Upright (53) with two 1/4" x 3 1/2" Bolts (103), two 1/4" Flat Washers (101), and two M10 Star Washers (9). Make sure that the Left Upper Console Body Arm is on the side of the console as- sembly shown.
-
Page 11: Operation And Adjustment
OPERATION AND ADJUSTMENT THE PRE-LUBRICATED WALKING BELT that is properly installed and grounded in accor- dance with all local codes and ordinances. Your treadmill features a walking belt coated with high- IMPORTANT: The treadmill is not compatible with performance lubricant. IMPORTANT: Never apply sil- GFCl-equipped outlets. -
Page 12: Console Diagram/Features
CONSOLE DIAGRAM IB52 rtME SELECT DISPLAY WORKOUT PRiORiTY START -JOGGING WALKING WORKOUTS WORKOUTS STOP WARNING: _. ADVERTENCIA: To rdu¢ risk s_rlous _J_;Ir Irl+s)o entiend_ mar,u_l o_,, ,,o_ _,3_,:t;,,? °' TARGET PULSE o,ip FEATURES OF THE CONSOLE To turn on the power, see page 13. To use the man- ual mode, see page 13. -
Page 13: To Turn On The Power
HOW TO TURN ON THE POWER the manual mode by pressing the Workout Select button repeatedly until only zeros appear in the dis- iMPORTANT: if the treadmill has been exposed to plays. cold temperatures, allow it to warm to room tem- perature before turning on the power, if you do not... - Page 14 The lower left ment is selected, hold down the Stop button, insert display--As you exer- the key into the console, and then release the Stop cise, the lower left dis- button. An E for English miles or an M for metric play can show the kilometers will appear in the priority display.
- Page 15 HOW TO USE A PRESET WORKOUT for the next segment, the speed setting will flash in the display to alert you and the treadmill will auto- Insert the key into the console. matically adjust to the new speed setting. The workout will continue in this way until the last seg- See HOW TO TURN ON THE POWER on page ment ends.
-
Page 16: To Change The Incline
HOW TO CHANGE THE iNCLiNE OF THE TREADMILL HOW TO USE THE UPPER BODY ARMS To vary the intensity of your exercise, you can change As you walk on the treadmill, you can hold the the incline of the treadmill. There are two incline levels. handrails or use the upper body arms. -
Page 17: How To Fold And Move The Treadmill
HOW TO FOLD AND MOVE THE TREADMILL HOW TO FOLD THE TREADMILL HOW TO MOVE THE TREADMILL Remove the key and unplug the power cord. Before moving the treadmill, fold it as described at the CAUTION: You must be able to safely lift 45 Ibs. (20 left. -
Page 18: Troubleshooting
TROUBLESHOOTING Most treadmill problems can be solved by following the steps below. Find the symptom that applies, and follow the steps listed. If further assistance is needed, please see the back cover of this manual. PROBLEM: The power does not turn on SOLUTION: a. - Page 19 PROBLEM: The walking belt slows when walked on SOLUTION: a. Use only a single-outlet surge suppressor that meets all of the specifications described on page 11. If the walking belt is overtightened, treadmill perfor- mance may decrease and the walking belt may be- come damaged.
- Page 20 PROBLEM: The upper body arms squeak during use SOLUTION: a. (Note: Correcting this problem requires a small amount of white marine grease, available at hard- ware stores.) Turn the Resistance Knob (A) coun- terclockwise and remove it. Next, remove the Resistance Cone (B) and the Left Upper Body Arm (105), along with the Resistance Plate (C), Washers (D), Spring Washer (E), Thrust Washers...
-
Page 21: Exercise Guidelines
EXERCISE GUiDELiNES Burning Fat--To burn fat effectively, you must exer- cise at a low intensity level for a sustained period of time, During the first few minutes of exercise, your body uses carbohydrate calories for energy. Only after the first few minutes of exercise does your body begin to use stored fat calories for energy, If your goal is to burn fat, adjust the intensity of your exercise until your heart rate is near the lowest number in your training... -
Page 22: Part List
PART LISTmModel No. 831.24822.0 RO91OA To locate the parts listed below, see the EXPLODED DRAWING near the end of this manual. Key No. Qty. Description Key No. Qty. Description M10 x 110mm Bolt Frame M10 x 58mm Bolt Base M4.2 x 13mm Tek Screw Left Upright M4.2 x 16mm Screw Right Upright... - Page 23 Key No. Qty. Description Key No. Qty. Description 1/4" Flat Washer Handgrip Hex Key Resistance Assembly 1/4" x 3 1/2" Bolt Upper Body Arm Insert #10 x 3/4" Screw Cage Nut Left Upper Body Arm User's Manual Right Upper Body Arm Note: Specifications are subject to change without notice.
-
Page 24: Exploded Drawing
EXPLODED DRAWING AmModel No. 831.24822.0 Ro91oA... - Page 25 EXPLODED DRAWING B mlVlodel No. 831.24822.0 RoeloA _--47...
- Page 26 EXPLODED DRAWING CmlVlodel No. 831.24822.0 Ro91oA 103_...
- Page 27 EXPLODED DRAWING DmlVlodel No. 831.24822.0 Ro91oA I__>...,_,J _109...
-
Page 28: 90-Day Full Warranty
Your Home ® Registered Trademark / TMTrademark / SMService Mark of Sears Brands, LLC ® Marca Registrada / Marca de Fabrica / Marca de Servicio de Sears Brands, LLC 90-DAY FULL WARRANTY If this Sears Treadmill Exerciser fails due to a defect in material or workmanship within 90 days of the date of purchase, call 1-800-4-MY-HOME ®(1-800-469-4663) to arrange for free repair (or replacement if repair proves impossible).
Need help?
Do you have a question about the Crosswalk 5.0t and is the answer not in the manual?
Questions and answers
FF display