Advertisement
Quick Links
Download this manual
See also:
User Manual
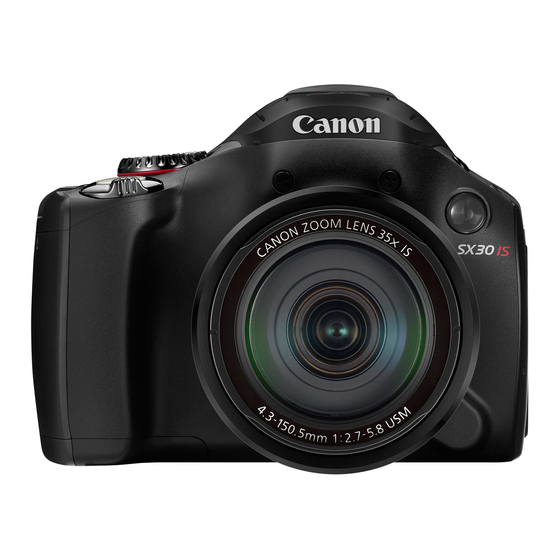
SX30
LS
Camera User Guide
Make sure
guide, including
the "Safety
Precautions"
section
before using the camera.
use it in the future.
Advertisement

Related Manuals for Canon POWERSHOT SX30IS


Summary of Contents for Canon POWERSHOT SX30IS
- Page 1 SX30 Camera User Guide Make sure guide, including the "Safety Precautions" section before using the camera. use it in the future.
- Page 2 AVC-DC400ST NS-DCll Shoe Cap Getting Started DIGITAL CAMERA Warranty "Canon Customer So{ufloe Disk Card Support" Leaflet Using the PDF Manuals Also refer to the PDF manuals on the CD=ROM. After installation, shortcut icons appear on the desktop. If the software installation fails, you can find the manuals in the Readme folder on the CD-ROM.
- Page 3 Test Shots and Disclaimer Take some initial test shots and play them back to make sure the images were recorded correctly. Please note that Canon Inc, its subsidiaries affiliates, and its distributors are not liable for any consequential damages arising...
- Page 4 (p. 64) ii}!i_il iiS ¸¸¸¸ i_i_ iii!_ii!_i,!i_!!ii_zi_i Landscape Sports Low Light Foliage Fi..(p. 62) (p. 62) (p. 63) (p. 64) (p. 64) Shoot with special effects ..................Miniature Effect (p. 65) (p. 65) (p. 69) (p. 70) Focus on faces ............25, 64, 84, 88 Shoot in places where I cannot use the flash (turn effthe flash) ..
- Page 5 What Do You Want to Do? Look at my pictures ............28 Automatically play back pictures (siideshow) .... '23 Look at my pictures on a TV ............Look at my pictures on a computer ..........Quickly search pictures ............120,121 Erase pictures ..............
- Page 6 Chapters 1 - 3 explain the basic operations and frequently used functions this camera. Chapters 4 onward explain the advanced functions, letting you learn more as you read each chapter. Checking the Package Contents ..2 MENU - Basic Operations ....
- Page 7 TabJe of Contents Shooting Close-ups (Macro) ... 73 Setting the Aperture Value ....96 Changing the Recording Pixel Setting the Shutter Speed and Setting (Image Size) ....... Aperture Value ........ Changing the Compression Ratio Correcting the Brightness (Image Quality) ....... Shooting (i-Contrast) .......
- Page 8 Table of Contents Displaying Various Images (Smart Shuffle) ....... ! 25 Changing Image Transitions ..!26 Changing Camera Settings ... 152 Viewing Images on a TV ....!27 Changing Shooting Function Viewing Images on a Settings ......... High-Definition TV ......Registering Commonly Used...
- Page 9 If the battery charger becomes wet, unplug it from the outlet consult your camera distributor or the closest Canon Customer Support Help Desk. CD-ROMs, Playing the CD-ROM(s) in an audio player (music player) could damage speakers.
- Page 10 Safety Precautions Use only the recommended battery. Do not pJace the battery near or in direct flame. Unplug the power cord periodically wipe away any dust and dirt that collected on the plug, the exterior of the power outlet, and the surrounding area.
- Page 11 Safety Precautions When using the camera on a beach or at a windy _oeation, be carefut not to attow dust or sand to enter the camera. This may cause the camera to malfunction. This is due to the high intensity of the flash burning dust and foreign materials stuck to the front of the unit.
- Page 12 icons are used in the text to represent the camera buttons and control dial. Language that displays on the screen appears inside [ ] (square brackets). The directional buttons, control dial, and FUNC./SET button represented by the following icons. Up button FUNC./SET button Left button...
- Page 13 Getting Started This chapter explains preparations before shooting, how' to shoot mode, and then howto view and erase the images you take. The latter part of this chapter explains how to shoot and view movies transfer images to a computer. Attaching Included items/Holding...
- Page 14 Use the included charger to charge the battery. Be sure to charge the battery as it is not charged at the time of purchase. Removethe cover. _nsert t he battery. Align the _ marks on the battery charger, then insert the battery by sliding it in (_) and down (@).
- Page 15 However, if the battery bulges to the point where it will no longer fit into the camera, please contact a Canon Customer Support Help Desk. If the battery is quickly depleted even after charging, it has reached the end of its life span.
- Page 16 SD memory cards (2 GB and _ess)* SDHC memory cards (more than 2 GB, up to and including 32 GB)* SDXC memory cards ,S',_ (more than 32 GB)* MultiMediaCards MMCplus memory cards HC MMCplus memory cards Eye=Fi Cards * This memory card complies with the SD standards. Some cards may not operate properly depending on the brand of card used.
- Page 17 _nserting the Battery Memory Card Ope.thecover. Slide the cover ((_)) and open it ((2)). Inse_ the battery. Insert the battery as shown until it locks into place with a click. Be sure to insert the battery in the correct direction or it will not properly lock into place.
- Page 18 inserting the Battery and Memory Card Removing Battenj Meme_j Card Remove battery. ¸ Open the cover and press the battery lock in the direction of the arrow. The battery will pop up. Remove the memory card. Push the memory card in until you hear a click, then slowly release The memory card wil! pop up.
- Page 19 Open the screen. Open the screen <_ ), end rotate it forward Close the screen (_). ® You can freely adiust the angle and orientation the screen as you like for the shooting conditions. Always keep the screen closed with it facing the camera body when the camera is not in use,...
- Page 20 The Date/Time settings screen will appear the first time the camera is turned on. Since the dates and times recorded into your images are based on these settings, be sure to set them. Turn onthecamera. Press the power button. The Date/Time screen will appear.
- Page 21 Setting the Date and Time Changing You can change the current date and time settings. Display the menus. _,J il _::!!i!!i!!ii: Press the M E N U button= Choose [Date/Time] in the _t1'tab. Press the _ _ buttons to choose the 71' tab.
- Page 22 You can change the language that displays on the screen. Press and hold the _ button, then Display the settings screen. MENU immediately press the button..................set thed splaylanguage. Press the _'_'_ _ buttons or turn the _ii: dial to choose a language, then press button.
- Page 23 Before you use a new memory card or one that has been formatted in other devices, you shouBd format the card with this camera. Formatting (initializing) a memory card erases all data on the memory card. As you cannot retrieve the erased data, exercise adequate caution...
- Page 24 Pressing the Shutter Button To take images that are in focus, be sure to first press the shutter button lightly (halfway) to focus, then press fully to shooL Press haJfway (Press JightJy to focus). Press fightJy until the camera beeps twice and AF frames appear where...
- Page 25 Since the camera can determine the subject and shooting conditions, you can let it automatically select the best settings for the scene and just shoot. camera can also detect and focus on faces, setting the color and brightness to optimal levels.
- Page 26 Taking Pictures tSmart Auto) When the camera focuses, it will beep twice and AF frames will appear where camera focused. Several AF frames will appear when the camera focuses on more than one poinL If [Raise the flash] appears on the screen, you should use the flash to shoot.
- Page 27 Taking Pictures (Smart Auto) What if the color and brightness of the images do not turn out as expected? The scene icon (G 180) that appears on the screen may not match the actual scene, If this happens, try shooting in p mode (p, 71 ) What if the screen is off even the camera is turned...
- Page 28 You can view the images you have taken on the screen. Enter Playback mode. Press the [] button. The last image you took will appear. chooso m go. Pressing 4 or turning the _i_ dial counter- clockwise wil! cycle through the images the reverse order they were taken, from the newest...
- Page 29 You can choose and erase images one at a time. Please note that erased images cannot be recovered. Exercise adequate caution before erasing image_ Enter Playback mode. Press the [] button. The last image you took will appear. Choose an image to erase. Press the 4 _ buttons or turn the _:_i dia! to display...
- Page 30 The camera can automatically select all settings so that you can shoot movies just by pressing the movie button. The audio will record in stereo. Set the mode dial to _). Choose_ mode. Remaining Time compose t he shot. in on your subject, making it appear larger.
- Page 31 Shooting Movies Do not touch the microphone while shooting. Do not press any buttons other than the movie button wMle shooting. The sound the Microphone buttons make will be recorded in the movie..Stop shooting. Press the movie button again.
- Page 32 You can view the movies you have shot on the screen. Enter Playback mode. Press the [] button. The _ast image you took will appear. appears on movies. Choose a movie. Press the 4 _ buttons or turn the _:_ dial to choose a movie, then press the @ button.
- Page 33 You can use the included software to transfer images you have shot with the camera to a computer for viewing. Bfyou are already using software included with another Canon=brand compact digital camera, install the software from the included CD=ROM, overwriting your current installation.
- Page 34 Transferring images to a Computer for Viewing Macintosh PowerPC G4/G5 or Intel Processor (still images), Core Duo 1.66 GHz or higher (movies) Mac OS X vi0.4 - v10.5:512 MB or more (still images), 1 GB or (movies) Mac OS X v10.6:1 GB or more eBrowser: 250 MB or more CameraWindow: 150 MB or more MB or more...
- Page 35 Transferring images to a Computer for Viewing ........When the instalation finishes, click ........[Restart] or [Finish]o Remove the CO-ROM. == Remove the CD-ROM when your desktop screen appears, Macintosh Place the CB in the computer's drive, Place the supplied CD-ROM (DiGiTAL CAMERA...
- Page 36 Tum on the camera. :: Press the [_ button to turn on the camera. Open CameraWindow. Windows Click [Downloads Images From Canon Camera using Canon CameraWindow]. iij_ __,_,_ _,_ _ _ _ __,,_,,_ CameraWindow will appear. BfCameraWindow does not appear,...
- Page 37 Transferring images to a Computer for Viewing Transfer View l_ages Click [import Bmages from Camera], then dick [Bmport Untransferred Bmages]. AI! images not previously transferred will transfer to the computer. Transferred images wi!l be sorted by date and saved in separate folders in the Pictures...
- Page 38 Supplied w ith Camera Neck Strap Battery Pack NB-7L Battery Charger NS-DC11 DIGFAL CAMERA with Terminal Cover* CB-2LZ/CB-2LZE" SoLution Disk AVC-DC400ST Case for Ho_ Shoe Cap _nterface Cable [_ncluees no_ snoe cab _FC-40OPCU* Memory Card USB card reader Windows/Macintosh HDM_ Cable HTC-I00 High-Definition...
- Page 39 The following camera accessories are sold separately. Some accessories not sold in some regions, or may no longer be availaMe. Power Supplies ..................Battery Charger CB=2LZ/CB-2LZE An adapter for charging Battery Pack NB=7L Battery Pack NBWL Rechargeable lithium=ion battery. AC Adapter Kit ACK-DCS0 This kit lets you power the camera using...
- Page 40 SeparateJy Sold Accessories Flash ................................SpeedJite 270EX/430E× ll/580E× A shoe-mounted flash that allows for a wide range of flash photography. SpeedJite Bracket SB-E2 Prevents unnatural shadows from appearing on the sides of objects when shooting from a vertical position, and is useful for shooting portraits.
- Page 41 Printers Canon-Brand PietBridge Compliant Printers By connecting your camera to a Canon- brand PictBridge compliant printer, SELPHY series can print your images without having use a computer. For more information,...
- Page 43 Learning More This chapter explains the parts of the camera and what appears on the screen, as well as the basic operating instructions=...
- Page 44 (_') Microphone (p. 3I) d} Zoom Lever _) _ (Flash) Button (p. 72) Shooting: E€3 (Telephoto) (Wide @ Speaker Angle) (pp. 25, 30, 58) Playback: C[ (Magnify) (Index) @ Lamp (pp. 61, 67, 68, 80, 81,158, 159) (pp. 120, 125) #-_)Focal Length (approx.) (@ Shutter Button...
- Page 45 Components Guide (_ Screen (LCD Monitor) (pp. 19, 46, 179, @ A/V OUT (Audio/Video Output) / 181) DIGITAL Terminal (pp. 35, 127, 144) @ _,% (Short Cut)(p. 162) / (AF Frame Selector) (pp. 85, 88) / [D] (Direct Print) (p. 144) Button (Single Image Erase) Button (p.
- Page 46 S_v_tch[ng D_spi_y You can change the screen display using the DISP, button. Refer to p, 179 for details on information that appears on the screen. Opening the screen with the power on will turn the screen on, and turn the viewfinder off, Closing the screen so that it faces...
- Page 47 indicator Screen DispJay Dark Shooting Conditions The display automatically brightens when shooting in dark conditions, allowing you to check the composition (Night Display function). However, brightness of the image on the screen, and the brightness of the actual image recorded may be different.
- Page 48 FUNC You can set commonly used functions using the menu, The menu items and options differ depending on the Shooting mode (pp, 182 = 183). Choose a Shooting mode. Set the mode dial to the desired shooting mode. FUNC..Dispmay the menu.
- Page 49 Various functions can be set from the menus. The menu items are organized under tabs, such as for shooting and playback (F_). The options differ depending on the Shooting mode and the Playback mode (pp. 184 = 187). Display the menu. Press the M EN U button, choosea tab.
- Page 50 You can silence or adjust the volume of camera sounds. MUting Sounds ..Displaythe menu. MENU Press the button= Choose [Mute]. Press the _' buttons to choose the 71' tab. Press the ,_'_ buttons or turn the dial to choose [Mute], then press the _ buttons...
- Page 51 The screen brightness can be changed in two ways. You can set the brightness of the screen and the viewfinder separately. (Press the D_SPo button to switch to the desired display before making settings), Display the menu. MENU Press the button, Choose [LCD Brightness].
- Page 52 You can adjust the viewfinder so that the display is clearly visible (Dioptric adjustment). set the viewfinder display. DISR Press the button several times until the viewfinder turns on (p. 46). Adjust the diopter. Adjust the dial while looking through viewfinder.
- Page 53 When you have mistakenly changed a setting, you can reset the camera the default settings. Displaythe menu. MENU Press the button. Choose [Reset AIR]. Press the 4 _ buttons to choose the _1' tab. Press the ,_'_ buttons or turn the _(!_ dia! to choose [Reset All], then press the @ button.
- Page 54 Perform low leve! formatting when [Memory card error] appears, the camera does not operate properly, or you think that the recording/reading speed of a memory card has dropped. As you cannot retrieve the erased data, exercise adequate caution before formatting the memory card.
- Page 55 CJock Functions Complete the Row meveiformat. Press the @ button. You can check the current time. Press and hold the @ button. The current time appears. Bfyou hold the camera vertically while using the clock function, it will switch vertical display.
- Page 57 Shooting with Co only Used Functions This chapter explains how to shoot in different conditions, as well as how to use common functions, such as the self-timer. This chapter assumes the camera is set to _ mode for "Zooming More Ctosely on Subjects (Digital Zoom)"...
- Page 58 You can use the digita! zoom to zoom up to approximately 140x and capture subjects that are too far away for the optical zoom to enlarge. The images may appear coarse, however, depending on the recording pixel setting (p. 74) and the zoom factor used.
- Page 59 Zooming in More C_ose_y on Subjects (Digita_ Zoom) Digital TeleoConvettet The focal length of the lens can be increased by approx. 1.7x or approx. 2. lx. This enables a faster shutter speed and less chance of camera shake than the zoom (including digital zoom) used by itself at the same zoom factor.
- Page 60 You can insert the shooting date and time in the lower right corner of an image. Once inserted, however, they cannot be deleted. Be sure to check beforehand that the date and time are correctly set (p. 20)_ Choose [Bate Stamp]..
- Page 61 The selfotimer can be used to shoot a group photo that includes photographer. The camera will shoot approximately 10 seconds after the shutter button is pressed. Press the T button. choose Press the ,_v buttons or turn the _:!i:i dial to choose (:i_, then press the _ button.
- Page 62 The camera will select the necessary settings for the conditions in which you wish to shoot when you choose the matching mode. choosea shootingmode. Set the mode dial to the desired Shooting mode. shoot. _,'I_ T ake portraits (Portrait) Produces a soft effect when photographing...
- Page 63 The camera will seJect the necessary settings for the conditions in which you wish to shoot when you choose the matching mode. Set the mode dial to S(:N..O ..Enter SCN moae. choosethe Shooting mode. After pressing the @ button, press the _.'_...
- Page 64 Shooting in Speciat Scenes _ Take shots of people at the beach (Beach) Lets you take shots of bdghtly lit people on sandy beaches where the reflected sunlight is strong, Take shots of foliage (Foliage) Lets you shoot trees and leaves, such as new growth, autumn...
- Page 65 Shooting in Specia_ Scenes Adding Effects Shooting Shoot images with vivid colors (Super Vivid) Lets you take shots with vivid, intense colors. _, Take posterized shots (Poster Effect) Lets you take shots that look like an old poster or illustration=...
- Page 66 The camera will shoot, even without pressing the shutter button, when detects a smile. choose _. Follow Steps 1 = 2 on p. 63 to choose DISR then press the button. Press the 4 _ buttons or turn the _:::i:': d ial to DISR choose -LC:,then press the...
- Page 67 Point the camera at a person and press the shutter button fully. The camera will shoot approximately two seconds after it detects a wink. Choose _:_. Follow Steps 1 = 2 on p. 63 to choose DISR then press the button.
- Page 68 Using the Face Se_f=Timer The shutter will release approximately two seconds after the camera detects a new face (p. 84). You can use this when the photographer wants to be in the image, such as a group photo. Choose _:_..
- Page 69 Shoot with the Effects of a Fish-Eye Lens (Fish=eye Effect) After choosing in Step 1, press the ._" buttons. Lets you shoot with the distorting effect of a fish-eye lens. choosea. Follow Steps 1 - 2 on p. 63 to choose _J_.
- Page 70 Blurs chosen portions in the top and bottom of an image to produce the effect of a miniature model. choose 8. Follow Steps 1 - 2 on p. 63 to choose A white frame (the area that will not be blurred) appears on the screen.
Need help?
Do you have a question about the POWERSHOT SX30IS and is the answer not in the manual?
Questions and answers