Transcend JetFlash MP3 User Manual
Usb flash drive
Hide thumbs
Also See for JetFlash MP3:
- User manual (30 pages) ,
- User manual (26 pages) ,
- User manual (18 pages)
Table of Contents
Advertisement
Quick Links
Advertisement
Table of Contents

Related Manuals for Transcend JetFlash MP3


Summary of Contents for Transcend JetFlash MP3
- Page 1 JetFlash™ MP3 User’s Manual P/N TS128/256/512M/1GJF-MP3...
-
Page 2: Table Of Contents
Table of Contents Introduction Package Contents......................1 Features..........................1 System Requirements ....................... 2 Reminders .......................... 2 Caution: Risk of Deafness ....................2 Product Overview ....................3 LCD Display ......................... 3 Basic Operation Power On ..........................4 Power Off..........................4 Play a Track ........................4 Pause a Track........................ - Page 3 AB Repeat Function ....................9 FM Function (Radio) ..................... 10 Scan for a Channel ......................10 Preset a Channel......................10 Select a Preset Channel ....................11 Record a FM Channel ...................... 11 Voice Recording Function Record Voice ........................11 Play the Recorded Files ....................12 Settings Repeat Mode ........................
-
Page 4: Package Contents
Introduction Thank you for purchasing Transcend’s JetFlash™ MP3. This small device is more than a USB Flash Drive. It combines a USB Flash Drive with an MP3 player, AB repeater, voice recorder and an FM radio. Your JetFlash™ MP3 supports USB2.0 to expedite exchanging huge amounts of data between any desktop or laptop computer. -
Page 5: System Requirements
System Requirements Desktop or notebook computer with USB port One of following operating systems: • Windows 98SE • Windows Me • Windows 2000 • Windows XP • Mac OS 9.0 or later • Linux kernel 2.4 or later Reminders 1. Keep your JetFlash away from heat, direct sunlight, and moisture. Do not bend, flex, or drop your JetFlash. -
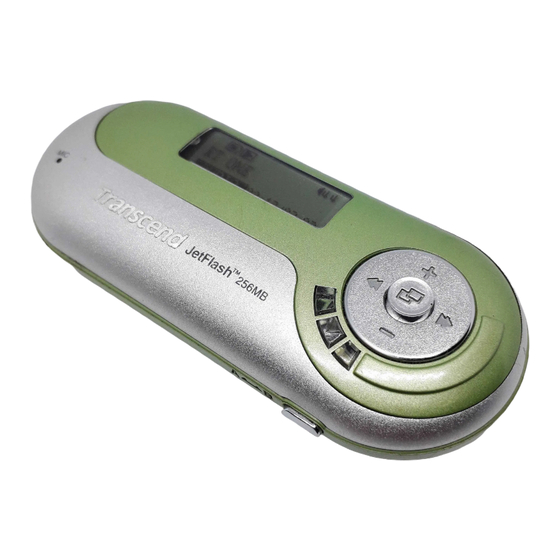
Page 6: Product Overview
Product Overview Joystick Menu (In) Next / Fast-forward (Right) Previous / Rewind (Left) Volume Up (Up) Volume Down (Down) PLAY Button Microphone A-B Button HOLD Switch Earphone Jack USB Connector LCD Display Icons Indications Hold Indicates when the Hold function is enabled. Battery Status Indicates the Battery Status. -
Page 7: Basic Operation
Basic Operation Power On Press and hold the PLAY button to turn the power on. An animated logo will be shown on the LCD Display first, and then you can start to use the JetFlash. Power Off Press and hold the PLAY button to turn the power off. In about three seconds the Power Off Status Bar will appear on the LCD display to show you the Power Off status. -
Page 8: Decrease Volume
Decrease Volume Push once or push and hold the Joystick downwards (Volume Down) until you have reached the desired volume. Repeat a Track Please see “Repeat Mode” in “Settings” for detailed instructions. Repeat All Tracks Please see “Repeat Mode” in “Settings” for detailed instructions. Repeat a Portion of a Track (AB Repeat) Press the A-B button to mark the beginning of the portion you wish to repeat and then press the button again to mark the end of the portion you wish to repeat. -
Page 9: Driver Installation For Windows Me, 2000, And Xp
3. The InstallShield Wizard will guide you through the installation process. 4. After the drivers have been installed, plug your JetFlash into an available USB port. The New Hardware Found dialogue boxes will appear. 5. Your computer will automatically detect this new device. A new Removable Disk drive with a newly assigned drive letter will appear in the My Computer window. -
Page 10: Driver Installation For Linux Kernel 2.4 Or Later
Driver Installation for Linux Kernel 2.4 or Later No drivers are required. Just plug your JetFlash into the USB port and mount it. Example: Create directory of /mnt/JetFlash first: mkdir /mnt/JetFlash mount JetFlash: mount –a –t msdos /dev/sda1 /mnt/JetFlash Warning 1. -
Page 11: Mp3 Function
MP3 Function Download or Upload MP3/WMA Files 1. Plug your JetFlash into an available USB port. A new Removable Disk drive with a newly assigned drive letter will appear in the My Computer window. The LCD Display will show the image below for ready status. -
Page 12: Navigation Function
4. Press the PLAY button again to play the MP3/WMA file. If the track format is VBR(Variable Bit Rate), the time may not be accurate. Navigation function By following the below procedures, you can easily search tracks using the Navigation function. In Audio mode, press and hold the Joystick inwards (Menu) to enter the Navigation function. -
Page 13: Fm Function (Radio)
To resume normal playback, press the A-B button again. FM Function (Radio) 1. Press the Joystick inwards (Menu) to enter the menu. Select the RADIO icon, and then press the Joystick inwards again to enter the FM function. 2. On the LCD Display, the FM radio frequency will show on the screen. Upon using the FM Function the first time, all channels will be auto scanned once and the first 10 channels with a strong signal will be preset. -
Page 14: Select A Preset Channel
4. Press the Joystick inwards again to save the selected channel to the selected favorite channel number. Select a Preset Channel 1. To select a preset channel, press the PLAY button repeatedly to choose from CH01~CH10. 2. The desired stored favorite channel will appear on the Display. Record a FM Channel 1. -
Page 15: Play The Recorded Files
2. On the LCD Display, a recording file is generated and placed under the folder of [ \VOICE\ ]. The recording file name sequence starts from [ V0001.WAV ], and then [V0002.WAV ], and so forth. 3. Press the Joystick inwards again to stop recording and the display will return to the menu. -
Page 16: Settings
Settings the Joystick inwards (Menu) Press to enter the menu. Select the SETTING icon, and then the Joystick inwards press again to enter the SETTINGS menu. Repeat Mode Select a desired playback repeat mode from NORMAL, REPEAT ONE, REPEAT ALL, and RANDOM. -
Page 17: Backlight
Backlight Set a time for the backlight to turn off automatically. 1. Push the Joystick to the right (Next) or to the left (Previous) to select the BACKLIGHT icon in SETTING, and then press the Joystick inwards to enter. 2. Push the Joystick to the right (Next) or to the left (Previous) to change the BACKLIGHT setting. -
Page 18: Language
Language Set the language option to support the filename or ID3 tag/title display of MP3/WMA files only, it doesn’t change the user interface. If there is ID3 tag/title of MP3/WMA file, it will be displayed first or it will display filename. Push the Joystick to the right (Next) or to the left (Previous) to select the... - Page 19 3. All of the files will be displayed in sequence. Push the Joystick to the right (Next) or to the left (Previous) to select DEL and then press the Joystick inwards to delete the file shown on the LCD. The “File Deleted” message will show on the LCD. Select NEXT to skip to the next file, or select EXIT to leave the current screen.
-
Page 20: Safely Remove Your Jetflash
Safely Remove Your JetFlash Before removing your JetFlash, please make sure the LCD Display is not in READ/WRITE status or unpredictable damage to the files or your JetFlash may occur. Remove JetFlash in Windows 98SE Unplug your JetFlash from your system directly when data is not transferring. Remove JetFlash in Windows Me, 2000, and XP 1. -
Page 21: Recover Your Jetflash
1. Remove the battery from your JetFlash and plug your JetFlash into an available USB port. Select the button on the task bar and select Programs > Transcend JetFlash MP3 > JetFlash MP3 Firmware Update to run the JetFlash MP3 Firmware Update program. -
Page 22: Recover Jetflash In Windows Me, 2000, And Xp
3. If the Format Data Area checkbox is checked. The Option message box will appear. Select Yes to continue. Running this step will erase all the data on the JetFlash. Please backup all of the data on the JetFlash first. 4. - Page 23 2. The Transcend JetFlash MP3 Setup window will appear. Select Next to continue. 3. The InstallShield Wizard will guide you through the installation process. 4. Remove the battery from your JetFlash and plug your JetFlash into an available USB port.
- Page 24 6. Select the button on the task bar and select Programs > Transcend JetFlash MP3 > JetFlash MP3 Firmware Update to run the JetFlash MP3 Firmware Update program. 7. The JetFlash MP3 Firmware Update dialog box will appear. 8. If the Format Data Area checkbox is checked.
- Page 25 Running this step will erase all the data currently on the JetFlash. Please backup all of the data on the JetFlash first. 9. Select Start to initiate the Firmware Update. 10. The Complete message box will appear. Select Close to complete the Recovery procedures. Your JetFlash has been returned to its initial status.
-
Page 26: Troubleshooting
If an error occurs, first check the information listed below before taking your JetFlash for repair. If you are unable to remedy a problem from the following hints, please consult your dealer, service center, or local Transcend branch office. Driver CD cannot auto-run in Windows Enter Device Manager in Control Panel and enable the Auto-Insert function of the CD-ROM drive. - Page 27 Buttons don’t work Check to see if the HOLD switch is set to “HOLD ”. If yes, set it to “OFF”. Cannot hear track playback Check the following: 1. Are there any MP3 or WMA files in the root directory of your JetFlash? If not, you must download music files from your computer or Internet first.
- Page 28 File that was just deleted still appears Re-delete the file and refer to the “Safely Remove Your JetFlash” section to remove JetFlash after the delete process is completed. JetFlash automatically removed from the operating system This problem occurs when you press the PLAY button while your JetFlash is still connected to a USB port.
-
Page 29: Specifications
MP3 Format: MP3 and WMA • Record Format: ADPCM (WAV) • Compress Rate: 32Kbps–320Kbps • Max Speed: Read 3.2 MB/sec, Write 2.8 MB/sec • Certificates: CE, FCC, BSMI Ordering Information Memory Size Transcend P/N 128MB TS128MJF-MP3 256MB TS256MJF-MP3 512MB TS512MJF-MP3 TS1GJF-MP3... -
Page 30: Jetflash Limited Warranty
This warranty is subject to the conditions and limitations set forth herein. Duration of Warranty: Transcend JetFlash are covered by this warranty for a period of two (2) years from the date of purchase. Transcend will inspect the product and make the determination as to whether the product is eligible for repair or replacement.
Need help?
Do you have a question about the JetFlash MP3 and is the answer not in the manual?
Questions and answers