Table of Contents
Advertisement
Advertisement
Table of Contents

Related Manuals for Epson 6100


Summary of Contents for Epson 6100
- Page 1 ® PowerLite Home Cinema 6100/6500 UB Home Theater Projector User’ s Guide...
-
Page 2: Copyright Notice
Epson product. Epson is not responsible for any use of this information as applied to other products. Neither Seiko Epson Corporation nor its affiliates shall be liable to the purchaser of this product or third parties for damages, losses, costs, or expenses incurred by purchaser or third parties as a result of: accident, misuse, or abuse of this product or unauthorized modifications, repairs, or alterations to this product, or (excluding the U.S.) failure to... -
Page 3: Table Of Contents
Contents Introduction Projector Parts Front Back Bottom Projector Control Panel Remote Control Button Map Optional Accessories Registration and Warranty Using This Manual Setting Up the Projector Choosing a Location Installing the Projector Connecting the Cables Connecting Video and Computer Equipment Making Other Connections Installing Batteries in the Remote Control Turning the Projector On and Off... - Page 4 Advanced Color Adjustments Adjusting the Gamma Setting Adjusting RGBCMY Locking the Projector Making Detailed Adjustments Using the Menu System Changing How the Menus Display Adjusting the Picture Quality Input Brightness Settings Sharpness and Picture Quality Settings Color Settings Adjustments for Computer Images Selecting Memory Settings and Resetting the Projector Selecting Memory Settings Creating Memory Settings...
- Page 5 Solving Remote Control Problems Where To Get Help Specifications General Lamp Remote Control Dimensions Electrical Environmental Safety Compatible Video Formats ESC/VP21 Command Codes Notices Important Safety Information FCC Compliance Statement Declaration of Conformity Epson America, Inc. Limited Warranty Index Contents...
- Page 6 Contents...
-
Page 7: Introduction
Native 1080p (1920 × 1080) resolution, dynamic contrast ratio up to 75000:1 (18000:1 for the Home Cinema 6100), and up to 1600 lumens (Home Cinema 6500 UB) or 1800 lumens (Home Cinema 6100) of brightness (white light output and color light output) for incredibly rich, sharp images in any room lighting ■... -
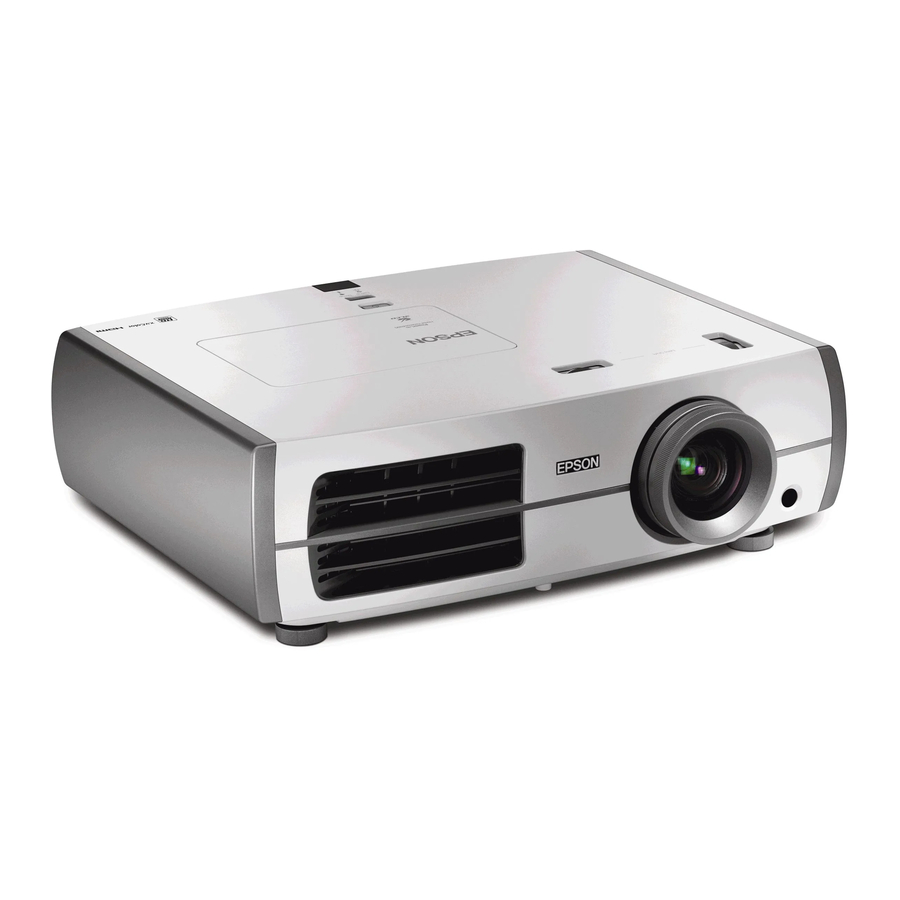
Page 8: Projector Parts
Projector Parts Front Lamp cover Ventilation slots Horizontal lens shift dial Back Component video port HDMI ports Air intake (filter) Introduction Control panel (top) Focus ring Lens cover Infrared receiver S-Video port Video port Cable holder Vertical lens shift dial Control panel (side) Zoom ring... -
Page 9: Bottom
Bottom Mounting bracket attachment points Optional cable cover attachment points (brass colored) Projector Control Panel Top control panel Power button Source button Switches the video input source Warning lights Side control panel Menu button Enter button Displays the Selects menu items or menus opens the line menu Menu navigation... -
Page 10: Remote Control Button Map
Remote Control Button Map Power button Turns projector on or off Default button Restores default settings when menu is displayed Menu navigation buttons Memory button Recalls custom picture settings RGBCMY button Adjusts the hue, saturation, and brightness for each color Gamma button Adjusts the gamma values of the screen display... -
Page 11: Optional Accessories
Your projector comes with a basic two-year carry-in warranty. For details, see page 75. In addition, Epson offers free Extra Care equipment failure, you won’t have to wait for your unit to be repaired. Instead, Epson will ship you a replacement unit anywhere in the United States or Canada, usually via overnight delivery. -
Page 12: Using This Manual
Note: Contains important information about your projector. Tip: Contains helpful projection tips. Need additional help? Take advantage of Epson’s automated support services 24 hours a day at www.epson.com/support. Use this site to view FAQs (Frequently Asked Questions) or product information and e-mail your questions to Epson support. -
Page 13: Setting Up The Projector
Setting Up the Projector Follow the instructions in this section to choose a location for the projector, connect the cables, and display an image. Choosing a Location You can install the projector for the viewing setups shown below, as well as rear projection. Center Side Ceiling... - Page 14 Ideally, keep the projector level and place it at a height so its lens is centered between the top and bottom of the screen, as shown below. If this is not possible, you can use the lens shift dials to reposition the image. As a rule of thumb, you can use lens shift to move the image up or down by nearly its full height, and left or right by about one-half its width (for details, see page 26).
- Page 15 19.7 to 41.8 feet 200 in. (173 × 98 in.) 6.01 to 12.76 m 508 cm (440 × 249 cm) * Offset B is about 10 percent less for the Home Cinema 6100. 4:3 aspect ratio Diagonal image size Projection distance (width ×...
- Page 16 24.2 to 51.3 feet 7.36 to 15.62 m * Offset B is about 10 percent less for the Home Cinema 6100. To determine the exact image size when you know the projection distance (or the exact projection distance when you know the desired image size), you can use the Projection Distance Calculator.
-
Page 17: Installing The Projector
Front/Ceiling 4. Press the button when done. Menu Note that you can rotate the Epson logo plate 180 degrees when suspending the projector from a ceiling. If you are planning to use an AV controller with the projector, refer to the table of ESC/VP21 command codes on page 70. - Page 18 The following illustrations show the dimensions of the projector: 5.4 in. 136 mm 0.5 in. 12 mm M4×9mm Setting Up the Projector 0.2 in. 4.5 mm 131 mm 17.7 in. 450 mm 11.8 in. 300 mm 5.9 in. 150 mm 2.2 in.
-
Page 19: Connecting The Cables
Connecting the Cables Connecting Video and Computer Equipment You can connect the projector to many types of video equipment, such as a VCR, DVD player, digital tuner, cable or satellite box, video game console, camcorder, or digital camera. You can also connect it to a desktop or laptop PC or Apple on compatible video formats, see page 68. - Page 20 For best results, connect your video equipment to the equipment doesn’t support HDMI, connect it to one of the following ports (highest quality listed first): Component When you connect a large or heavy cable to the projector, such as an HDMI cable, it is recommended that you fasten it to one of the two holders using a commercially available cable tie.
-
Page 21: Making Other Connections
Making Other Connections Connect the power cable and other cables described below, depending on how you plan to use the projector. ■ Plug the power cable into the projector and a grounded electrical outlet. ■ port outputs a 12-volt DC signal Trigger out when the projector is turned on. -
Page 22: Installing Batteries In The Remote Control
Installing Batteries in the Remote Control The remote control uses two AA batteries. Warning: Keep batteries away from children. If a battery is swallowed, contact your doctor immediately. 1. Release the tab and lift open the cover. 2. Insert two new AA batteries as shown. 3. -
Page 23: Turning Off The Projector
4. Press the Ppower button on the remote control or projector. Remote control Note: To prevent children from turning on the projector, you can use the Child Lock feature. See page 32 for details. If you’ll be using the projector at an altitude above 4900 feet (1500 meters), turn on High Altitude Mode so the fan can properly cool the projector at the high altitude air pressure. -
Page 24: Selecting The Image Source
Selecting the Image Source The source buttons on the projector and remote control let you switch between images from different pieces of equipment connected to the projector (such as a DVD player, cable or satellite box, or video game console). Press the button on the remote control that corresponds to the port to which your Source... -
Page 25: Positioning The Image
Positioning the Image If the image is not centered on the screen, use the horizontal and vertical lens shift dials to adjust its position. Caution: Do not try to move the lens by hand, or you may damage the projector. Always use the lens shift dials to change the lens position. - Page 26 (W) and height (H), as shown below: Maximum lens shift boundary Setting Up the Projector 1/2H 1/2W Move downwards Move to Move to the right the left Move upwards (85% for the Home Cinema 6100)
-
Page 27: Making Basic Adjustments
Making Basic Adjustments Follow the instructions in this chapter to make basic adjustments to the image shape, size, color, and quality. For further refinements, see “Making Detailed Adjustments” on page 33. Focusing and Zooming Use the focus ring to sharpen the image. Use the zoom ring to reduce or enlarge the image. -
Page 28: Choosing The Aspect Ratio
Choosing the Aspect Ratio In many cases, video signals are automatically resized to fit on your screen when You may need to change the size of the image (or aspect ratio) for certain image types by pressing the on the remote control. Select one of these settings: ■... -
Page 29: Choosing The Color Mode
■ x.v.Color for the most natural color reproduction when viewing movies through HDMI. The built-in Epson Cinema Filter automatically improves color reproduction in a darkened room; it is not used when you select Color Mode Dynamic... -
Page 30: Advanced Color Adjustments
Advanced Color Adjustments To further customize the color and image quality, you can adjust the gamma and individual RGBCMY color tones. (Not available when is selected as the Color Mode.) x.v.Color RGBCMY Gamma Note: You can fine-tune these and other color and image quality settings using the projector’s menu system (see page 33). -
Page 31: Adjusting Rgbcmy
2. Do one of the following: ■ Select one of the numeric correction values using the u or d button on the remote control and press the right. The horizontal axis represents the input signal level, and the vertical axis represents the output signal level. -
Page 32: Locking The Projector
Locking the Projector The projector includes two lock settings to prevent the image from being accidentally changed once it’s adjusted, and to keep children from turning on the projector without adult supervision. To access the lock settings, follow these steps: 1. -
Page 33: Making Detailed Adjustments
Making Detailed Adjustments You can use the projector’s on-screen menus to make detailed adjustments to the image quality—such as the brightness, contrast, sharpness, and color. You can also change the menu display, sleep mode settings, and other projector features. Using the Menu System You can access the menu system either from the remote control or the buttons on the projector’s control panel. - Page 34 4. Press the u, d, l, or r button to change settings as necessary. You may have to press the button to confirm your choice. Enter 5. When you’re finished, press the button to exit the menu system. Menu To display one of the line menus, press the bottom of the image: Press the u or d button to select the setting you want to adjust: ■...
-
Page 35: Changing How The Menus Display
Changing How the Menus Display Use these options to control how the menus display. ■ Language Settings > Language Select from 21 languages to use in the menu system. ■ Menu Position Settings > Display > Menu Position Use the arrow buttons to choose a position on the screen for displaying the menu. ■... -
Page 36: Auto Iris
■ EPSON Super White Signal > Advanced > EPSON Super White Note: This setting can be used only when a composite video, S-Video, or component video signal is being input and the Color Mode is set to Natural, Theatre, Theatre Black 1, or Theatre Black 2 (see page 29). -
Page 37: Sharpness And Picture Quality Settings
■ HDMI Video Range Signal > Advanced > HDMI Video Range Note: This setting can be used only when HDMI1 or HDMI2 is selected as the image source (see page 24). This setting cannot be used when the Color Mode is set to x.v. Color (see page 29). -
Page 38: Noise Reduction
6500 UB) for viewing movies on a player that produces interlaced output. Select for watching videos captured with a video camera. With the Home Cinema 6100, set to when viewing images with a large amount of movement. With the Home Cinema... - Page 39 This setting reduces block noise that can appear when projecting MPEG images that have been compressed at a low bit rate. ■ 2-2 Pull-down (Home Cinema 6100 only) Signal > Advanced > 2-2 Pull-down Note: This setting can be used only when viewing a 1080p/24Hz signal input through the Component, HDMI1, or HDMI2 ports (see page 68).
-
Page 40: Color Settings
Color Settings If the image colors don’t look correct, you can adjust them using these settings. Use the first three settings described below to make the most visible changes. If you only need to make slight adjustments, you can fine-tune the picture with the remaining settings. Most color settings are stored separately for each image source and color mode. - Page 41 ■ RGB Image > Advanced > RGB Note: This setting cannot be used when the Color Mode is set to x.v. Color (see page 29). Use the RGB settings to fine-tune the color of the image. You can adjust the offset and gain for each signal color (red, green, and blue).
-
Page 42: Adjustments For Computer Images
■ Contrast Enhancement (Home Cinema 6500 UB only) Image > Advanced > Contrast Enhancement Note: This setting cannot be used when the Color Mode is set to x.v. Color (see page 29). This setting automatically enhances contrast by calculating based on the current contrast. You can select from 3 levels of contrast enhancement. -
Page 43: Selecting Memory Settings And Resetting The Projector
Selecting Memory Settings and Resetting the Projector Your projector comes with 10 memory locations for installers to save customized settings, designed to provide the best color quality for each of your video inputs. Selecting Memory Settings You can easily recall the memory settings by using the memory button on the remote control. -
Page 44: Renaming Memory Settings
Renaming Memory Settings With the Home Cinema 6500 UB, you can rename memory settings so that they are easier for you to recognize. 1. Press the Memory 2. Select Rename Memory 3. Select the memory name you want to change, then press the selection screen is displayed. -
Page 45: Resetting The Projector
Resetting the Projector If the image quality isn’t what you expect, one or more settings may be adjusted improperly. If necessary, you can restore the projector to its factory-default (original) settings. To restore the settings in a specific menu (such as the Image or Settings menu), open that menu, select , and confirm as needed. -
Page 46: Customizing Projector Features
Customizing Projector Features Use the settings in this section to adjust the image size and position, suppress on-screen text, and select basic setup options. Image Sizing Before adjusting any of these settings, make sure you have already selected an appropriate aspect ratio for the type of picture you’re viewing (see page 28). -
Page 47: Screen Options
Screen Options ■ Messages Settings > Display > Messages Turn this setting off if you want to prevent on-screen messages from appearing (such as the no-signal message, or the identifying text that appears when you switch between image sources or color modes). ■... - Page 48 ■ Component Settings > Input Signal > Component Change this setting to match the type of equipment connected to the Component port. For component video, select or select YCbCr ■ Trigger Out Settings > Trigger Out Turn on this setting if you want the the projector is operating.
-
Page 49: Maintenance
Maintenance Your projector needs little maintenance. All you need to do on a regular basis is keep the lens clean. You also may need to clean the air filter to prevent overheating. Warning: Before you clean any part of the projector, turn it off and unplug the power cord. Never open any cover on the projector, except the lamp and filter covers. -
Page 50: Cleaning The Projector Case
Cleaning the Projector Case Before you clean the case, turn off the projector and unplug the power cord. ■ To remove dirt or dust, wipe the case with a soft, dry, lint-free cloth. ■ To remove stubborn dirt or stains, moisten a soft cloth with water and a neutral detergent. - Page 51 If the dirt is difficult to remove or the filter is broken, replace it. You can purchase air filter part number V13H134A21 (ELPAF21) from an authorized Epson reseller. To find the nearest reseller, please call 800-GO-EPSON (800-463-7766). To purchase online, visit www.epsonstore.com (U.S. sales) or www.epson.ca (Canadian sales).
-
Page 52: Replacing The Lamp
Turn off this product when not in use to prolong the life of the projector. You can purchase lamp part number V13H010L49 (ELPLP49) from an authorized Epson reseller. To find the nearest reseller, please call 800-GO-EPSON (800-463-7766). To purchase online, visit www.epsonstore.com (U.S. - Page 53 5. Insert the screwdriver that came with the lamp (or a similar tool) into the slot on the back of the projector to release the lamp cover. Then lift up the cover to remove it. 6. Loosen the two screws securing the lamp (they don’t come all the way out). 7.
- Page 54 8. Gently insert the new lamp and tighten its screws. Caution: Don’t touch the glass portion of the lamp assembly. Touching the glass could result in premature lamp failure. 9. Replace the lamp cover. (The projector won’t work if the lamp cover is open or loose.) 10.
-
Page 55: Resetting The Lamp Usage Timer
Resetting the Lamp Usage Timer After replacing the lamp, plug the projector back in, turn on the power switch on the back, and press the P button. Then follow these steps to reset the lamp usage timer: Power 1. Press the button on the projector or remote control. -
Page 56: Storing The Projector
Pack the projector in its original packaging or equivalent. Transporting the Projector Note: Epson shall not be liable for any damages incurred during transportation. The projector contains many glass and precision parts. When shipping the projector for repairs, use the original packaging material if possible. If you do not have the original packaging, use equivalent materials. -
Page 57: Problem Solving
Problem Solving This section explains how to interpret the projector’s status lights, solve problems with the picture and remote control, and contact technical support. What To Do When the Lights Come On or Flash The lights on top of the projector indicate the projector’s status and let you know when a problem occurs. - Page 58 There is a problem with the auto iris or cinema filter. Turn off the power switch on the back of the projector, and unplug it from the electrical outlet. Then contact Epson for assistance (see page 63). There is a fan or sensor problem. Turn off the power switch on the back of the projector, and unplug it from the electrical outlet.
-
Page 59: Solving Picture Problems
Solving Picture Problems You cannot turn on the projector. ■ Make sure the power cord is connected and the power switch in back of the projector is turned on. Then wait a moment for the Ppower icon to light up before pressing the Ppower button. - Page 60 You’re using a computer and no picture appears on the screen. If you’re using a Windows ■ Press the function key that lets you display on an external monitor. It’s often labeled with an icon such as key while pressing it. Check your laptop’s manual or online help. On most systems, the projector, or display on both at the same time.
- Page 61 The picture is upside-down or reversed. Change the setting in the Settings menu (see page 47). Projection The picture isn’t rectangular. ■ If the image looks like screen and angled toward it. Face the projector straight ahead (instead of at the center of the screen), then use the horizontal lens shift dial to center the image (see page 25).
-
Page 62: Solving Remote Control Problems
The colors on the screen don’t look right. ■ Make sure the Input Signal page 47). ■ Press the Color Mode page 29). ■ Check the brightness and contrast settings (see page 35). ■ Fine-tune the colors with the settings listed on page 40. ■... -
Page 63: Where To Get Help
Speak to a Support Representative To use the Epson PrivateLine Support service, call (800) 637-7661 and enter the PIN on the Epson PrivateLine Support card that came with your projector. This is the fastest way of speaking to a live representative, and it’s free. This service is available 6 Time, Monday through Friday, for the duration of your warranty period. - Page 64 Problem Solving...
-
Page 65: Specifications
Color light output 1600 lumens Low mode: White light output 474 lumens (ISO 21118 standard) Color light output 474 lumens Dynamic contrast ratio 18000:1 (Home Cinema 6100) 75000:1 (Home Cinema 6500 UB) Image size 30 to 300 inches Projection distance 2.8 to 62.8 feet (0.87 to 19.15 m) -
Page 66: Lamp
5.4 inches (136 mm); not including adjustable feet 17.7 inches (450 mm) 14.2 inches (360 mm); not including lens protrusion 16.1 lb (7.3 kg) (Home Cinema 6100) 16.5 lb (7.5 kg) (Home Cinema 6500 UB) 50/60 Hz AC 100 to 120 VAC: 3.2 A (Home Cinema 6100) -
Page 67: Environmental
Environmental Temperature Operating: 41 to 95 °F (5 to 35 °C) Storage: 14 to 140 °F (–10 to 60 °C) Humidity Operating: 20 to 80% RH, non-condensing Storage: 10 to 90% RH, non-condensing Operating altitude Up to 7500 feet (2286 meters) Safety United States FCC Part 15B Class B (DoC) -
Page 68: Compatible Video Formats
Compatible Video Formats The projector supports analog video in NTSC, PAL, and SECAM formats, and it automatically adjusts to the incoming signal. It can receive these formats as composite video, S-video, or component video— which it accepts through the Video, S-Video, and Component ports, respectively. The projector also supports digital video (SDTV, HDTV) and various monitor display formats. - Page 69 Analog RGB (computer display) Signal Frequency (4:3) Resolution (Hz) 640 × 480 VESA 640 × 480 72/75/85 56/60/72/ SVGA 800 × 600 75/85 1024 × 768 60/70/75/85 1152 × 864 70/75 1280 × 960 60/75 SXGA 1280 × 1024 60/75 1280 ×...
-
Page 70: Esc/Vp21 Command Codes
You can use an AV controller with a 9-pin null modem serial cable to control the projector. You can download the complete ESC/VP 21 Communication Manual for home theater projectors from the Epson website at www.epson.com/support. Following are some of the available codes: Item... -
Page 71: Notices
Notices Important Safety Information Follow these safety instructions when setting up and using the projector: ■ Never look into the projector lens when the lamp is turned on; the bright light can damage your eyes. Never let children look into the lens when it is on. ■... - Page 72 ■ The lamp(s) in this product contain mercury. Please consult your state and local regulations regarding disposal or recycling. Do not put in the trash. ■ Allow the lamp to cool for one hour before replacing it. ■ Unplug the projector during lightning storms or when not in use for extended periods. ■...
-
Page 73: Fcc Compliance Statement
FCC Compliance Statement This equipment has been tested and found to comply with the limits for a Class B digital device, pursuant to Part 15 of the FCC Rules. These limits are designed to provide reasonable protection against harmful interference in a residential installation. This equipment generates, uses, and can radiate radio frequency energy and, if not installed and used in accordance with the instructions, may cause harmful interference to radio or television reception. -
Page 74: Declaration Of Conformity
(1) this device may not cause harmful interference, and (2) this device must accept any interference received, including interference that may cause undesired operation. Trade Name: Type of Product: Model: Marketing Name: Notices Epson Projector H291A/H292A PowerLite Home Cinema 6100/6500 UB... -
Page 75: Epson America, Inc. Limited Warranty
What Epson Will Do To Correct Problems: If your product requires service during the limited warranty period, please call Epson at the number on the bottom of this statement and be prepared to provide the model, serial number, and date of original purchase. Epson will, at its option, repair or replace the defective unit, without charge for parts or labor. - Page 76 This warranty gives you specific legal rights, and you may also have other rights, which vary from jurisdiction to jurisdiction. To find the Epson Authorized Reseller nearest you, please visit our website at: www.epson.com. To find the Epson Customer Care Center nearest you, please visit www.epson.com/support.
-
Page 77: Index
Index Numerics 2-2 Pull-down, 39 4-4 Pull-down, 39 Abs. Color Temp. setting, 40 Accessories, 11, 63 Air filter cleaning and replacing, 50 to 51 ordering, 11 Anti-theft device, 8, 11 Aspect button, 10, 28, 59 Aspect ratio, selecting, 28, 46 Auto Iris setting, 36 Auto Setup, 42 Batteries, remote control, 22... - Page 78 11, 63 Home Service, 11 PrivateLine Support, 12, 63 technical support, 12, 63 warranty, 11, 75 to 76 EPSON Super White setting, 36 ESC/VP21 command codes, 70 FCC Compliance Statement, 73 Filter, see Air filter Flickering, 38, 61 Focus ring, 27...
- Page 79 Message setting, 47 Mosquito NR, 38 Motion Detection, 38 Mounting projector, 17 Moving projector, 56 No image, 59 to 60 Noise Reduction, 38 Offset, color, 41 Output scaling, 46 Pattern button, 10, 25 Picture problems, 59 to 62 Pixelworks, 67 Positioning image, 25 to 26, 46 Positioning projector, 13 to 16 PrivateLine Support, 12, 63...
- Page 80 Skin Tone setting, 40 Sleep mode, 48 Source buttons, 9, 10 Source, selecting image, 24 Specifications compatible video formats, 68 to 69 dimensions, 66 electrical, 66 environmental, 67 general, 65 lamp, 66 remote control, 66 Startup screen, selecting, 47 Static, 61 Storing projector, 56 Support, 12, 63 S-Video connection, 19...
Need help?
Do you have a question about the 6100 and is the answer not in the manual?
Questions and answers