Advertisement
Available languages
Available languages
Quick Links
OPERATOR'S
MANUAL
(RRFT$1VlRN°
iPROFESSiONAL
i
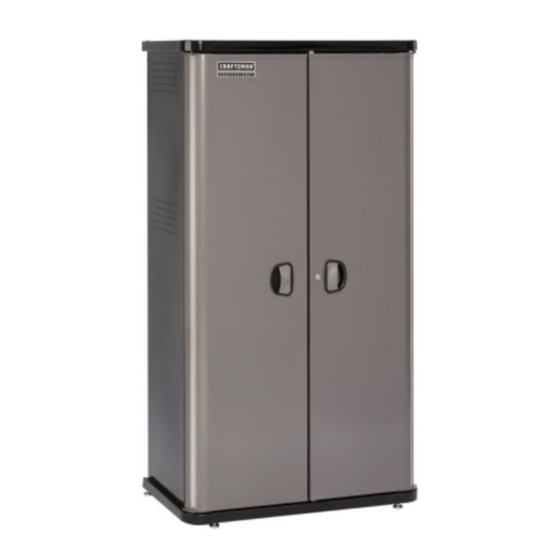
GARAGE STORAGE SOLUTIONS
FLOOR CABINET-
ALL SHELVES
°::i!i!i!::
il
CAUTION:
Read and follow all Safety Rules and Operating
Instructions
before first use of this product.
Sears, Roebuck and Co., Hoffman Estates, IL 60179, USA
F1379A3
Advertisement

Related Manuals for Craftsman 706.153410


Summary of Contents for Craftsman 706.153410
- Page 1 OPERATOR'S MANUAL (RRFT$1VlRN° iPROFESSiONAL GARAGE STORAGE SOLUTIONS FLOOR CABINET- ALL SHELVES °::i!i!i!:: CAUTION: Read and follow all Safety Rules and Operating Instructions before first use of this product. Sears, Roebuck and Co., Hoffman Estates, IL 60179, USA F1379A3...
-
Page 2: Safety Warnings
SAFETY WARNINGS AND CAUTIONS: Use appropriate safety equipment when using power and hand tools. Failure to do so may cause personal injury or product damage. Use adequate manpower when assembling and moving this unit. Failure to do so may cause personal injury or product damage. DO NOT stand on this product. - Page 3 A(2)
- Page 4 STEP 2: AA(6) STEP 1 : AA(4) BB(6) CC(4) cc(6) • Install AA(6) with BB(6) and CC(6). • Install A(2) as shown, using AA(4) and CC(4). • Finger tighten. • Finger tighten. Note: Ensure A is oriented correctly on each side. CC(4) /A(2) AA(4)
- Page 5 STEP 4: STEP 3: DD(4) EE(8) • Attach EE to front and back of slots in the door. • Attach DD to flange on left side door at the top and bottom. • Attach DD to unit behind left side door at the top and bottom. Apply to unit Apply to flange\,...
- Page 6 STEP 6: STEP 5: AA(1) I_i[i! i lT i-[i ¸¸ i¸¸ Tii ¸¸ i_ GG(4) BB(1) CC(1 ) • Install B to unit using AA, BB, and CC. Note: The part has multiple slots to enable it to be flush with the wall when aligned with a stud.
-
Page 7: Shelf Adjustment
STEP 7: RETAINING CORD ATTACHMENT: • Attach C to door where desired Cabinet MUST be attached to a stud in a wood frame walt. Failure to do so may cause personal injury or )roduct damage. Hardware provided for wood frame wall use only. Concrete or other surfaces will require other hardware (not provided). - Page 8 fDETENT ADJUSTMENT: Adjust detent when needed. NOTE: Turn clockwise to tighten, counterclockwise to loosen. HINT: The more weight in the door the tighter the detent will need to be to work properly. Adjust "\\\\ ',,, /-Ji ..Leveling Foot Adjustment I/ / •...
- Page 9 MANUAL DE USUARIO I CRFIFTSM FIN°I SOLUCIONES PARA ALMACENAMIENTO EN EL GARAJE ARMARIO DE PIE- TODAS LAS BALDAS °°::i!i!i!:: ATENClON: Lea y siga todas las Normas de Seguridad y las Instrucciones de Funcionamiento antes de utilizar por primera vez este producto. Sears, Roebuck and Co., Hoffman Estates, IL 60179, Estados Unidos F1379A3...
- Page 10 ADVERTENCIAS Y PRECAUCIONES DE SEGURIDAD: • Utilice un equipo de seguridad apropiado cuando use herramientas electricas y manuales. De Io contrario podria ocasionarse lesiones personales daSar el producto • Utilice el personal adecuado para el montaje y el traslado de esta unidad. De Io contrario podria ocasionarse lesiones personales o daSar el producto...
- Page 11 A(2)
- Page 12 PASO 2: AA(6) PASO 1 : AA(4) BB(6) CC(4) cc(6) • Instale A(6) utitizando AA(6) BB(6)y CC(6). • Instale A(2) como se ilustra, utilizando AA(4) y CC(4). • Apriete a mano. • Apriete a mano. Nota: AsegQrese de que A esta correctamente orientado en cada lado.
- Page 13 PASO 4: PASO 3: DD(4) EE(8) • Fije DD a la pesta_a en el lado izquierdo de la puerta en la • Coloque EE en la parte frontal y posterior de las ranuras de parte superior e inferior. la puerta. •...
- Page 14 PASO 6: PASO 5: AA(1) I_i[i! i lT i-[i ¸¸ i¸¸ Tii ¸¸ i_ GG(4) BB(1) CC(1 ) • Coloque Ben la unidad utilizando AA, BB, and CC. NOTA: La pieza tiene mQItiples ranuraspara permitir que pueda ser nivelada con la pared cuando se alinea con un •...
- Page 15 PASO 7: COLOCACION DE LA CUERDA DE SUJECCION: • Coioque C en la puerta en el lugar deseado. El Armario DEBE ser colocado sobre un saliente tachonado de una pared de marco de madera. De Io contrario podria ocasionarse lesiones personales dafiar el producto.
- Page 16 t_AAJuSTE DEL SEGURO: • Ajuste el seguro cuando sea necesario. NOTA: Gire en el sentido de tas agujas del reloj para apretar yen el sentido contrario para aflojar. CONSEJO: Cuanto mas peso soporte la puerta, mas apretado debera estar el seguro para funcionar correctamente. inflamables.
Need help?
Do you have a question about the 706.153410 and is the answer not in the manual?
Questions and answers